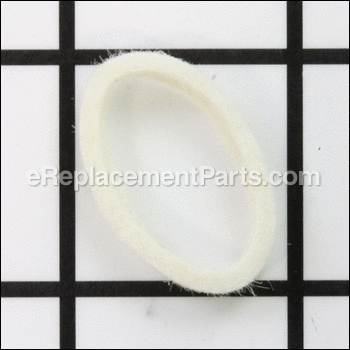
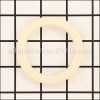
Felt Washer SP0001575
Part Number: SP0001575
Leaves our warehouse within
7 - 12 business days
7 - 12 business days
*This part replaces obsolete part #: SP0001803, BES870XL/06.29 and BES870XL06.29.
Product Information
Description:
| This is a genuine Breville replacement felt washer which is supplied directly from original equipment manufacturer. It is specially designed for a espresso machine. Washer helps to distribute the pressure evenly over the surface of connected parts. It is made out of felt material and it is sold individually. |
Frequently Purchased With


Compatibility
Products Compatibility
This item works with the following types of products:
- • Espresso
Questions & Answers for Felt Washer
No questions have been asked yet
Repair Instructions: Submitted by Customers Like You
9 of 10 people found this instruction helpful
Tool Type:
Espresso
Parts Used:
Repair Difficulty:
Medium
Time Spent Repairing:
15-30 minutes
Tools Used:
Socket set
The original part was worn out and that affected the grinding precission
Empty and clean the grinder. Replace the felt washer, and reassemble.
Did you find this story helpful?
Thanks for voting and helping fellow customers!
7 of 7 people found this instruction helpful
Tool Type:
Espresso
Parts Used:
Repair Difficulty:
Easy
Time Spent Repairing:
Less than 15 minutes
Tools Used:
Adjustable Wrench
Felt washer broke when cleaning out a Breville BCG820BSSXL coffee grinder jam
This grinder will jam if the coffee discharge chute is blocked - it was because someone put the grind jar in backwards... The felt washer under the impeller is very fragile and broke when cleaning out the discharge chute. This felt washer is not available on the Breville web site. eReplacementParts.com showed a similar washer SP0001575 but for a different Breville coffee grinder/brewer. I took a chance that it would fit assuming that Breville does not make many of these grinders. it fit just fine! BTW - I bought 2 just in case it happens again.
Did you find this story helpful?
Thanks for voting and helping fellow customers!
3 of 3 people found this instruction helpful
Tool Type:
Espresso
Repair Difficulty:
Easy
Time Spent Repairing:
Less than 15 minutes
Tools Used:
Wrench Set, Vaccumn
While cleaning the grinder for the first time I did not realize that there were small parts below the hollowed grind fan part of the system & accidentally sucked them up with my vac.
Simple Job
1. Again removed the grinder hopper
2. Vac.'d out & fully cleaned burr
3. Unscrewed all parts as previously done.
4.Finished cleaning again.
5. Replaced missing parts as indicated in your drawings
6. Reassembled unit.
7. First test of repair proved REPAIR & PARTS WORKED PERFECTLY.
I could not have done, or even found the right parts, without your great drawings. You have my undying thanks for that.
I was very happy with your service and should the need arise I will do so again.
Did you find this story helpful?
Thanks for voting and helping fellow customers!
2 of 3 people found this instruction helpful
Tool Type:
Espresso
Parts Used:
Repair Difficulty:
Easy
Time Spent Repairing:
30-60 minutes
Tools Used:
Socket set, Pocket knife
Took grinder apart
Washer was broken, so ordered another.
Replaced washer, cleaned grinder.
Removed small pebble that was about the size of one-half coffee bean.
Put machine back together and enjoyed a latte.
Washer was broken, so ordered another.
Replaced washer, cleaned grinder.
Removed small pebble that was about the size of one-half coffee bean.
Put machine back together and enjoyed a latte.
Did you find this story helpful?
Thanks for voting and helping fellow customers!
2 of 3 people found this instruction helpful
Tool Type:
Espresso
Parts Used:
Repair Difficulty:
Easy
Time Spent Repairing:
Less than 15 minutes
Tools Used:
Pliers, Adjustable Wrench
Felt washer in coffee grinder broke
1. Dismantled coffee grinder according to manufacturer's instructions
2. Removed old felt washer
3. Put in new felt washer
4. Re-assembled coffee grinder according to manual
2. Removed old felt washer
3. Put in new felt washer
4. Re-assembled coffee grinder according to manual
Did you find this story helpful?
Thanks for voting and helping fellow customers!
Tool Type:
Espresso
Parts Used:
Repair Difficulty:
Easy
Time Spent Repairing:
15-30 minutes
Tools Used:
Socket set, Adjustable Wrench
Setting for amount of coffee ground needed to be close to maximum
1. Removed hopper
2. Vacuumed out grinder assembly
3. Unlocked and removed outer grinder
4. Removed cap nut that's holding inner grinder, then removed inner grinder
5. Removed washers
6. Removed grind fan assembly
7. Replaced felt washer
8. Inserted grind fan assembly
9. Put replacement washers back in place
10. Put cap nut back in place and tightened nut
11. Put replacement outer grinder back in place and locked it in place
12. Checked distance between outer and inner grinder, factory setting of 5 was adequate (minimal to none metal grinding noticable
13. Put bean hopper back in place
14. Adjusted grind of beans
15. Adjusted setting for amount of coffee ground
-> now the setting is a little below 1/4 - >-> like new!
Did you find this story helpful?
Thanks for voting and helping fellow customers!
Tool Type:
Espresso
Parts Used:
Repair Difficulty:
Easy
Time Spent Repairing:
Less than 15 minutes
Tools Used:
Socket set
Burr needed cleaning.
1.Removed the top nut.
2. Removed the washers and outer burr.
3. Removed the inner burr and felt washer.
4 After cleaning all, put in new felt washer and all the parts in place.
5. Test the grinding of coffee and drink a well deserved expresso.
2. Removed the washers and outer burr.
3. Removed the inner burr and felt washer.
4 After cleaning all, put in new felt washer and all the parts in place.
5. Test the grinding of coffee and drink a well deserved expresso.
Did you find this story helpful?
Thanks for voting and helping fellow customers!
Tool Type:
Espresso
Parts Used:
Repair Difficulty:
Easy
Time Spent Repairing:
Less than 15 minutes
Tools Used:
Screwdriver, Pliers, Socket set
When cleaning, I found the ruined felt washer under the grind fan.
1. I removed the nut, the washers and the inner burr.
2. After, the grind fan was removed.
3. The felt washer was taken out and replaced with the new washer.
4. The grind fan was replaced, then the inner burr, the spring and flat washers, and last, the nut.
5. An expresso was prepared to test the coffee grinder. It passed the test.
2. After, the grind fan was removed.
3. The felt washer was taken out and replaced with the new washer.
4. The grind fan was replaced, then the inner burr, the spring and flat washers, and last, the nut.
5. An expresso was prepared to test the coffee grinder. It passed the test.
Did you find this story helpful?
Thanks for voting and helping fellow customers!
Reviews
13 Reviews
Average Rating (out of 5):
Click to filter by ratings:
5 stars
9
4 stars
0
3 stars
1
2 stars
1
1 stars
2
< PREV
- 1
- 2
easy to use and find part on this website.
Fast effective and efficient! Delivery cost outrageous and long. Other than that the part is as was shown on site, so because of the delivery very high charges this will be a last restore source i will use for my needs. God bless and my his peace and grace follow you always. BCH Sisk
Guest -
November 15, 2022
Verified Purchase
Needed part just right.
The only place I can find this part is with you. The original has the fit.
Nancy -
September 30, 2022
Verified Purchase
Perfect fit
I had my coffee machine ready for the installation, took me 5 minutes to make my first espresso coffee. Thanks
Guest -
August 21, 2022
Verified Purchase
Easy repair
I needed this washer because I clean the grind assembly and the washer has to be changed. The felt is always ruined.
Guest -
January 29, 2022
Verified Purchase
The right part for my machine
Factory replacement part worked great. My only complaint would be the slow response that erplacementparts provided. I have ordered from them in the past and still like their selection of parts but sometimes the service is slow.
Benjamin -
December 6, 2021
Verified Purchase
I finally got it
It took awhile but I finally got the part I needed. Ersplacements sent me emails to let me know the progress of my order. I appreciate that.
Guest -
August 11, 2021
Verified Purchase
Hard part to find but these guys had it!
Easy and on time. A Pleasure.
Guest -
February 14, 2020
Verified Purchase
Washer for espresso machine
Arrived quickly thanks again.
Rafael -
December 26, 2019
Verified Purchase
Fits Breville Smart Grinder Pro
Perfect fit, goes in the shaft under the impeller.
JOHN -
August 29, 2019
Verified Purchase
Replacement washer
Ordered 6 felt washers. One came torn inside the plastic bag. The other 5 are fine. Used one in my Breville Barista coffee grinder. Works great again.
Guest -
October 18, 2019
Verified Purchase
Verified Purchase
eReplacementParts Team
< PREV
- 1
- 2
Product Information