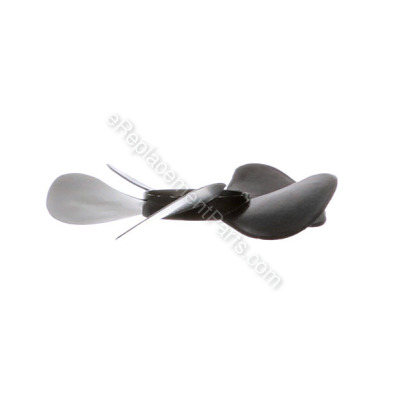
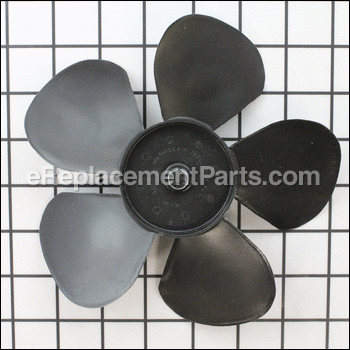
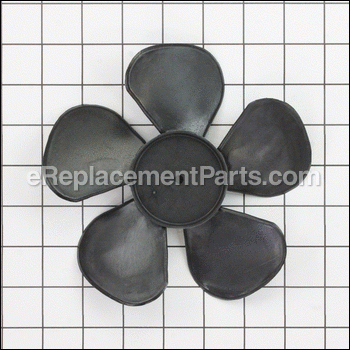
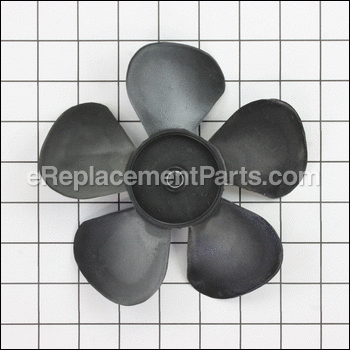
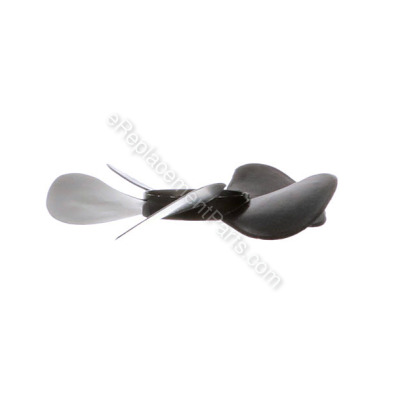
This fan blade is an authentic replacement part supplied by the manufacturer. It is commonly used in NuTone exhaust fans. Replacing this part is a straightforward process that should take approximately 15 minutes. A screwdriver and a hammer are needed to replace this part.
1. Align the new blade
2. Gently tap the center of the fan with a hammer to start the blade on the shaft
3. Push the blade down in the center until it is seated at the bottom of the motor shaft
4. Install the unit and tighten the two mounting screws.
5. Ensure the power switch is in the OFF position and plug in the power plug to the socket inside the fan housing
6. Replace the cover and center thumb screw
Fan Blade S68293000
OEM part for: Nutone, Broan
Part Number: S68293000
Jump To:
Product Description ?
- Classification: Part
- Weight: 0.20 lbs.
- Shipping: Ships Worldwide
Frequently Purchased Together ?
Compatibility
This part will fit the following 32 machines
Nutone
Broan
This item works with the following types of products:
- Range Parts
This part replaces obsolete part #: 68293000
Customer Part Reviews ?
- 1
Questions & Answers ?
Our customer Service team is at the ready daily to answer your part and product questions.

Ask our Team
We have a dedicated staff with decades of collective experience in helping customers just like you purchase parts to repair their products.
Does this fit my product?Questions & Answers for Fan Blade
Customer Repair Instructions ?
All our customer repair instructions are solicited directly from other customers just like you who have purchased and replaced this exact part.
Motor rarely kicked over. When it did it made a high screeching noise.
Tool Type
Ventilation
Difficulty
Easy
Time
Less than 15 minutes
Tools Used
Screwdriver
Parts Used
2) Use Phillips to loosen screws holding baseplate/motor in fan housing. Unplug motor and drop out baseplate/motor.
3) Loosen nuts holding motor onto baseplate, remove motor.
4) Put new motor on, replace nuts, press new fan blade onto spindle.
5) Install motor/base plate back into housing, replace grill.
6) Turn on new working fan and smile!
the old fan blades broke
Tool Type
Ventilation
Difficulty
Easy
Time
Less than 15 minutes
Tools Used
Screwdriver, Nutdriver
Parts Used
Motor winding open (fan would not run)power okay.
Tool Type
Ventilation
Difficulty
Easy
Time
1-2 hours
Tools Used
Screwdriver, Nutdriver
2. Checked power on fan housing receptacle with beeper (okay).
3. Removed fan motor module (loosen two screws & twist).
4. Recheck (plugged in to power outlet still not working).
5. Used multi-meter (continuity function): Open transformer windings.
6. Ordered parts (motor, fan blade, filter, fan blade cover, and plastic knob.
7. Assembled motor on housing and fan blade on motor.
8. Reinstalled new parts in ventilation housing (careful to route power wiring).
9. Install filter, ventilation cover, and knob.
10. Test with fan/light switch.
11. Back to normal ops.
Fan motor stopped working
Tool Type
Ventilation
Difficulty
Easy
Time
Less than 15 minutes
Tools Used
Screwdriver
Unplug motor and unscrew from main bracket
Remove motor from support bracket
Put new motor on support bracket and put back on main bracket.
Plug in and turn on to see if the fan rubs on the side,if so adjust and tighten down and put filter and cover back on.
Original fan blade kit was broken during shipping
Tool Type
Ventilation
Difficulty
Easy
Time
Less than 15 minutes
Tools Used
Parts Used
Old vent fan assembly not working
Tool Type
Ventilation
Difficulty
Easy
Time
15-30 minutes
Tools Used
Screwdriver, Adjustable Wrench, Cleaning agent and towels
1) Remove outer vent grille, typically with thumb screw
2) Fan assembly is held in by 2 Philips screws, but unplug fan first.
3) Remove fan assembly, I only needed the 2 small nuts from where the fan motor attaches to the bracket to re-use for new one.
4) Install new fan motor to new bracket, re-use old nuts.
5) Install new fan blade on new motor, make sure to line up notch.
6) Clean up dust/dirt, or in my case many years of cooking oil!
7) Reinstall new assembly, check to make sure fan blade rotates freely!
8) If all good, plug in fan motor and test.
9) Reinstall grille (clean if needed).
The old fan blade broke out in the center.
Tool Type
Ventilation
Difficulty
Easy
Time
Less than 15 minutes
Tools Used
Screwdriver, Hammer
Parts Used
2. Align new blade making sure that the flat spot in the hole matches that the flat on the motor shaft.
3. Gently tap the center of the fan with a hammer to start the blade on the shaft.
4. Push the blade down in the center until it is seated at the bottom of the motor shaft.
5. Install the unit and tighten the two mounting screws.
6. Make sure the power switch is in the OFF position and plug in the power plug to the socket inside the fan housing.
7. Replace the cover and center thumb screw.
8. Turn the power switch on. Should be good to go.
OEM stands for Original Equipment Manufacturer and means the part you’re buying is sourced directly from the manufacturer who made your product. At eReplacementParts, we sell only genuine OEM parts, guaranteeing the part you’re purchasing is of better design and of higher quality than aftermarket parts.
Our product descriptions are a combination of data sourced directly from the manufacturers who made your product as well as content researched and curated by our content & customer service teams. This content is edited and reviewed internally before being made public to customers.
Our customer service team are at the ready daily to answer your part and product questions. We have a dedicated staff with decades of collective experience in helping customers just like you purchase parts to repair their products.
All our part reviews are solicited directly from other customers who have purchased this exact part. While we moderate these reviews for profanity, offensive language or personally identifiable information, these reviews are posted exactly as submitted and no alterations are made by our team.
All our customer repair instructions are solicited directly from other customers just like you who have purchased and replaced this exact part. While we moderate these reviews for profanity, offensive language or personally identifiable information, these reviews are posted exactly as submitted and no alterations are made by our team.
Based on data from past customer purchasing behaviors, these parts are most commonly purchased together along with the part you are viewing. These parts may be necessary or helpful to replace to complete your current repair.
All our installation videos are created and produced in collaboration with our in-house repair technician, Mark Sodja, who has helped millions of eReplacementParts customers over the last 13 years repair their products. Mark has years of experience in selling and repairing both commercial and residential products with a specialty in gas-powered equipment.
This data is collected from customers who submitted a repair instruction after replacing this exact part. Customers can rate how easy the repair was to complete and how long it took. We aggregate this data to provide a repair rating that allows customers to quickly determine the difficulty and time needed to perform their own repair.

