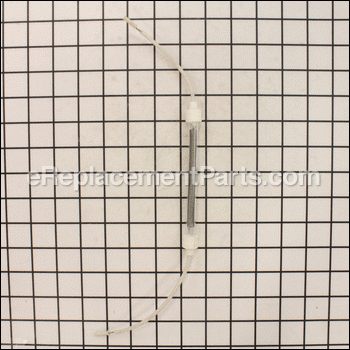
Element, Heating, Short 3860001
Part Number: 3860001
Order within the next 10 hours
and your part ships today!
and your part ships today!
*This part replaces obsolete part #: 370.W001.
Product Information
Compatibility
Products Compatibility
This item works with the following types of products:
- • Heater
Questions & Answers for Element, Heating, Short
No questions have been asked yet
Repair Instructions: Submitted by Customers Like You
1 of 1 people found this instruction helpful
Tool Type:
Heater
Parts Used:
Repair Difficulty:
Easy
Time Spent Repairing:
30-60 minutes
Tools Used:
Screwdriver
Replaced burned out SunHeat infrared bulb
This heater is the 750 watt model. It has 3 bulbs: two within the body of the heater and one just prior to the air exit. The exit bulb was the one that was burned out. It's the one that requires the most work to replace because you need to do more disassembly to get to it.
The first step is to unplug it and remove the heater assembly from the cabinet. It's held in place by about 9 screws around the periphery of the bottom. Then start taking the sheet metal sides and front off. All of the sheet metal screws are the same size so there's no need to keep them separated.
The second step is to determine which bulb is gone. The bulbs are in series so you need to do continuity checks at each junction of the bulbs. This is the second bulb I've replaced in this type of heater (I have 4 of them). Another way to check is to GENTLY tug at the leads on the bulbs. The most common failure mode is that the leads become very cleanly detached from the bulb. I think the solder or whatever they use to attach them gets degraded by the heat. They're attached in the circuit with wire nuts so removal is very easy.
Once you've determined which bulb is gone just remove it and replace it. DO NOT touch the glass portion of the new bulb. Oils from your fingers will lead to localized heating and fail the bulb very quickly. If you do touch it, clean it with rubbing alcohol on a paper towel.
One other caution is to bend the leads into position very carefully so as not to stress their attachment to the bulb. Also, the replacement leads are about an inch shorter than the originals so plan your wire routing ahead of installation to minimize having to manhandle them into place.
After it's installed, plug it in and check to see that the heater starts up. You'll know that it does by the familiar 60 cycle hum you get as the bulbs heat up. Unplug it and reassemble.
It's a pretty easy process and the most important thing is to not try to strong arm anything. The bulbs are kind of delicate.
Did you find this story helpful?
Thanks for voting and helping fellow customers!
Product Information