

*This part replaces obsolete part #: 680058002, 680301008 and 680301006.
Product Information
Specifications
|
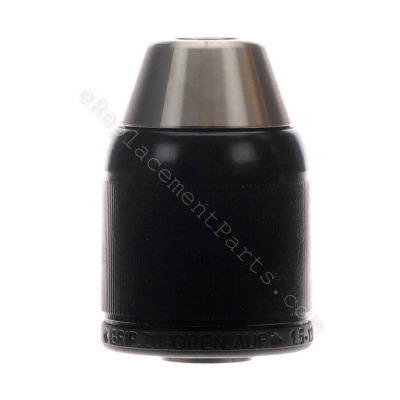
Description:
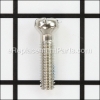
| This is a genuine OEM sourced part which is specially designed for use with Ridgid drills. This chuck is used to secure a drill bit. If your drill's bit retention is suffering, the rotation feels stiff, or the chuck has seized up entirely, a new chuck should fix the problem. This high-quality 1/2 inch chuck is made of durable materials and is sold as an individual item. Please note, the screw to secure the chuck is sold separately. |
Frequently Purchased With
Compatibility
the 29 compatible machines
This part is compatible with the following machines:
Ridgid
R7110 1/2" Drill
R830153 Cordless Drill-Driver
R830153 Cordless Drill-Driver
R8411503 18V Cordless Hammer Drill
R8411503 18V Cordless Hammer Drill
R8411503 18V Cordless Hammer Drill
R851150 Cordless Hammer Drill
R851150 Cordless Hammer Drill
R851150 Cordless Hammer Drill
R82015 (After G0343) 12V 2 Max HC Speed Cordless Drill / Driver
R82015 (After G0343) 12V 2 Max HC Speed Cordless Drill / Driver
R83015 (after G0343) 14.4V Max HC 2 Speed Cordless Drill / Driver
R83015 (after G0343) 14.4V Max HC 2 Speed Cordless Drill / Driver
R83015 (before G0343) 14.4V Max HC 2 Speed Cordless Drill / Driver
R83015 (before G0343) 14.4V Max HC 2 Speed Cordless Drill / Driver
R830153 Cordless Drill-Driver
R830153 Cordless Drill-Driver
R8411503 18V Cordless Hammer Drill
R8411503 18V Cordless Hammer Drill
R8411503 18V Cordless Hammer Drill
R851150 Cordless Hammer Drill
R851150 Cordless Hammer Drill
R851150 Cordless Hammer Drill
R82015 (After G0343) 12V 2 Max HC Speed Cordless Drill / Driver
R82015 (After G0343) 12V 2 Max HC Speed Cordless Drill / Driver
R83015 (after G0343) 14.4V Max HC 2 Speed Cordless Drill / Driver
R83015 (after G0343) 14.4V Max HC 2 Speed Cordless Drill / Driver
R83015 (before G0343) 14.4V Max HC 2 Speed Cordless Drill / Driver
R83015 (before G0343) 14.4V Max HC 2 Speed Cordless Drill / Driver
R84015 (after G0304) 18V Max HC 2 Speed Cordless Drill / Driver
R84015 (after G0304) 18V Max HC 2 Speed Cordless Drill / Driver
R84015 (before G0304) 18V Max HC 2 Speed Cordless Drill / Driver
R84015 (before G0304) 18V Max HC 2 Speed Cordless Drill / Driver
R8411501 Cordless Drill
R8411501 Cordless Drill
R8411511 Cordless Drill
R8411511 Cordless Drill
R82015 (before G0343) 12V 2 Max HC Cordless Drill / Driver
R82015 (before G0343) 12V 2 Max HC Cordless Drill / Driver
R84015 (After G0343) 18.0 Volt Max Hc 2 Speed Drill / Driver
R84015 (Prior To G0343) 18.0 Volt Max Hc 2 Speed Drill / Driver
R82015 (Prior G0343) 12 Volt 2 Max Hc Speed Drill / Driver
R82015 R82015 12 Volt 2 Max Hc Speed Drill / Driver Prior To G0343
Products Compatibility
This item works with the following types of products:
- • Cordless Drill
- • Drill
- • Hammer Drill
Repair Guides
![]()

![]()


Articles:
|
This article explains steps for how to remove threaded-on chucks and taper-fit drill chucks, as well as steps for removi...
September 18, 2009
|

|
Broken gearboxes and sticky chuck screws can make removing a drill chuck difficult. This article explains the tricks you...
August 12, 2010
|

Questions & Answers for Drill Chuck
No questions have been asked yet
Repair Instructions: Submitted by Customers Like You
2 of 2 people found this instruction helpful
Tool Type:
Cordless Drill
Parts Used:
Repair Difficulty:
Easy
Time Spent Repairing:
Less than 15 minutes
Tools Used:
Screwdriver, Allen wrench, hammer
Chuck was worn
1. Removed chuck screw w/screwdriver. (note: reverse thread screw)
2. Removed old chuck w/allen wrench inserted.
3. Tapped allen wrench, which loosened old chuck, removed old chuck.
4. Install new chuck by performing steps 3.,2.,1.
2. Removed old chuck w/allen wrench inserted.
3. Tapped allen wrench, which loosened old chuck, removed old chuck.
4. Install new chuck by performing steps 3.,2.,1.
Did you find this story helpful?
Thanks for voting and helping fellow customers!
1 of 1 people found this instruction helpful
Tool Type:
Drill
Parts Used:
Repair Difficulty:
Medium
Time Spent Repairing:
15-30 minutes
Tools Used:
Screwdriver, Hammer, Allen wrench
Chuck wouldn't hold bit
I found your video on how to remove the a drill chuck. Here is the link to it, if you need it.
https://www.youtube.com/watch?v=usC8unA5RiA
https://www.youtube.com/watch?v=usC8unA5RiA
Did you find this story helpful?
Thanks for voting and helping fellow customers!
Tool Type:
Cordless Drill
Parts Used:
Repair Difficulty:
Easy
Time Spent Repairing:
15-30 minutes
Tools Used:
Screwdriver, Vice and allen wrench
Drill chuck would not stay tight on bits
Got on You Tube found replacement instructions quit easy undo screw in bottom of chuck backwards thread . Take a large allen wrench tighten down in chuck. Place drill in vice to hold hit allen wrench with dead blow hammer and get to untighten screw off then screw back on new one put back in screw in bottom of chuck go to work.
Did you find this story helpful?
Thanks for voting and helping fellow customers!
Tool Type:
Cordless Drill
Repair Difficulty:
Easy
Time Spent Repairing:
Less than 15 minutes
Tools Used:
Screwdriver, Allen wrench,hammer
Chuck got old
Remove the screw from the middle of chuck
Install allen wrench in chuck
Hit with hammer to loosen chuck
Install new chuck
Install screw
Install allen wrench in chuck
Hit with hammer to loosen chuck
Install new chuck
Install screw
Did you find this story helpful?
Thanks for voting and helping fellow customers!
Tool Type:
Cordless Drill
Parts Used:
Repair Difficulty:
Hard
Time Spent Repairing:
Less than 15 minutes
Tools Used:
Screwdriver
This was a replacement chuck for a Ridgid hammer drill.
I watch the video on the Repair Center on your site on How to Remove a Drill Chuck. And I had the drill up and running in no time. Thank you.
Did you find this story helpful?
Thanks for voting and helping fellow customers!
Product Information
Repair Guides
![]()
![]()
Articles:
|
This article explains steps for how to remove threaded-on chucks and taper-fit drill chucks, as well as steps for removi...
September 18, 2009
|
|
Broken gearboxes and sticky chuck screws can make removing a drill chuck difficult. This article explains the tricks you...
August 12, 2010
|