Door Spring SP0010504
Part Number: SP0010504
Leaves our warehouse within
7 - 12 business days
7 - 12 business days
*This part replaces obsolete part #: BOV800XL/133.1 and BOV800XL133.1.
Product Information
Description:
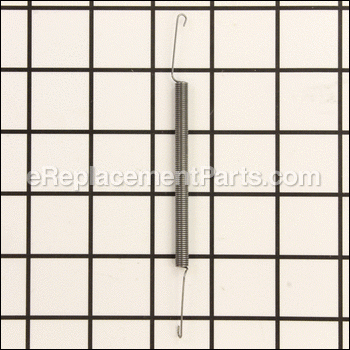
| This is a Genuine Manufacturer Approved replacement part used on Breville Smart Oven. Spring provides spring action for the Door to keep it shut. This item is made out of Metal and it is Sold Individually. |
Compatibility
Products Compatibility
This item works with the following types of products:
- • Oven
Questions & Answers for Door Spring
Door slams shut.It opens normally. A Brevel toaster oven.
John
asked on 2023-01-13
Hi John,
Thank you for your question. If the door slams shut on your toaster oven, the issue could be with the spring, the hinge or the lever that the hinge slides on when you open and close the door. You will need to inspect these parts to see which one is causing the issue. If you have any questions, please let us know. We are open 7 days a week. We look forward to hearing from you!
eReplacementParts Team January 13, 2023
Repair Instructions: Submitted by Customers Like You
121 of 121 people found this instruction helpful
Tool Type:
Convection Oven
Parts Used:
Repair Difficulty:
Medium
Time Spent Repairing:
30-60 minutes
Tools Used:
Screwdriver, Pliers, (needlenose pliers)
The door spring failed on my Breville Convection Toaster Oven.
Getting at the spring is somewhat challenging. There is a rather narrow space with which to access it. I basically removed the feet and back panel from the toaster oven. There are two screws on each feet and several small screws to remove the back, which slides down and off once the feet and screws are removed. I could then slightly bend the side of the top panel to get access to the spring (removing the top panel would be too complex). I used needle nose pliers to remove the two pieces of the old broken spring. The spring connects to the door arm and then a small hole at the back of the oven. I had to slightly bend open the loop at the end of the new spring to get it to slide onto the door arm. I then bent it back with the pliers once it was in the hole. I then gripped the other end of the new spring with the needle nose pliers and pulled it onto the hole at the back of the oven. Put everything back together and works fine now!
Did you find this story helpful?
Thanks for voting and helping fellow customers!
72 of 76 people found this instruction helpful
Tool Type:
Convection Oven
Parts Used:
Repair Difficulty:
Medium
Time Spent Repairing:
30-60 minutes
Tools Used:
Screwdriver, Pliers
Door Spring Broken, Door Wouldn't Stay Closed
Spring is on the left side, so only remove left side feet and left side panel screws.
Pull left side sheet metal away from oven an inch or two to expose spring. Use needle nose pliers to remove old spring pieces.
I installed the new spring in the door bracket first, then used the pliers to stretch the spring to the back of the oven, where it fits into a hole near a screw. It takes a lot of stretching to get the spring back to the hole. Good gripping needle nose pliers are a big help.
Also, because there is so much tension on the spring, I needed someone else to help hold the oven still while I pulled the spring. Watch out for SHARP sheet metal !
Did you find this story helpful?
Thanks for voting and helping fellow customers!
35 of 35 people found this instruction helpful
Tool Type:
Toaster
Parts Used:
Repair Difficulty:
Medium
Time Spent Repairing:
30-60 minutes
Tools Used:
Screwdriver, Pliers
Door spring was broken
1.Took the small back panel screws out with phillips head screwdriver
2.Took the feet off- 8 long and 4 short screws
3.Took the back panel off
4.Pried the left side away slightly and shimmed it open to access and remove broken spring with needle nosed pliers
5.Turned the toaster/oven upside down to thread new spring into small round hole in inside tip of door bracket
6.Turned the toaster/oven right side up to pull other end of spring toward back hole with pliers
7.The repair was obvious and easy to figure out but physically tricky because the metal is sharp and the space is narrow and hard to see into. The spring is very taut. Watch your hands!
8.I finally got it strung and the spring works perfectly
9.Very happy with eReplacementParts.com they saved me money not having to get a whole new toaster/oven!
Did you find this story helpful?
Thanks for voting and helping fellow customers!
22 of 22 people found this instruction helpful
Tool Type:
Toaster
Parts Used:
Repair Difficulty:
Hard
Time Spent Repairing:
1-2 hours
Tools Used:
Screwdriver, Needle Nose Pliers, small magnet, flash light, vice grips
Door spring broke
1. I printed out & read the instructions from the other customers several times before starting, & while doing the repair, which was very helpful. After reading the instructions from the others, I knew what to expect, & the job was about as difficult as they described it to be.
2. Turned the unit upside down & removed the 4 feet (2 pairs) by taking out 6 screws for each pair.
3. Removed the back by taking off about 20 screws.
4. Pried the left side open, & carefully straightened the ends of the broken springs with a needle nose pliers to remove them from the holes with a magnet.
5. Bent the ends of the new spring slightly straight to get them to go into the holes, Did the one on door first, & bent it back into a curve before doing the one on the back.
6. Used a vice grips on the far end of the coiled part of the spring to really stretch it to get the end to go into the hole.
7. Quickly bent the end of the spring into a curve so it would not come out of the hole while holding the vice grips with the other hand.
8. Reassembled the unit.
9. It now works great again.
10. I don't think I could have done the job alone even though I'm a mechanical engineer & plumber, as my wife helped holding the oven, flash light, left side of the sharp metal oven, & gave valuable advise & support while doing the repair.
11. The spring was shipped & arrived quickly.
Did you find this story helpful?
Thanks for voting and helping fellow customers!
19 of 20 people found this instruction helpful
Tool Type:
Convection Oven
Parts Used:
Repair Difficulty:
Easy
Time Spent Repairing:
30-60 minutes
Tools Used:
Screwdriver, Pliers
Broken Door Spring
1. Remove all rear screws (20+) (I used magnetic screwdriver and magnetic bowl to hold the tiny screws. You don't want to lose a screw in the inter electronics!
2. Remove feet entirely (2 screws per foot)
3. Slide off rear panel
4. Gently pry side with door hinge, open just enough to thread the new spring. I attached the spring to the rear frame hole mount first and used needle nose pliers to pull and attach the spring to the door hinge
5. Reverse steps (remember that top edge goes under the top edge/lip)
Did you find this story helpful?
Thanks for voting and helping fellow customers!
12 of 12 people found this instruction helpful
Tool Type:
Convection Oven
Parts Used:
Repair Difficulty:
Medium
Time Spent Repairing:
15-30 minutes
Tools Used:
Screwdriver, Pliers
Tension Spring on door finally broke after 6 years of daily use.
1. Removed all screws from back or unit.
2. Remove feet from bottom of unit.
3. Gently bent back the side panel where spring is mounted. Please note - the top rear portion of panel has a "fitted lip" placed across the top that mates to the interior framework. Gently work this apart in order to be able to further open up side panel.
4. Removed pieces of old spring. (Turn upside down, or use a telescoping magnet)
5. Attached new spring first to the door hinge, then back to the mounting hole on rear corner strut of oven. Both holes are obvious when looking at how, and where, a spring should mount. New spring tension is pretty strong. Needed to use bigger pliers to grasp rear spring on straight section prior to where it forms a hook to slip over the mounting hole. Just be careful as the edges of the side pane of the over can be sharp.
6. When reattaching side and rear panel of oven, make sure that the "fitted lip" at the top of the rear panel fits over the section of frame to lock it into place, before putting screws back in.
Did you find this story helpful?
Thanks for voting and helping fellow customers!
9 of 9 people found this instruction helpful
Tool Type:
Convection Oven
Parts Used:
Repair Difficulty:
Medium
Time Spent Repairing:
15-30 minutes
Tools Used:
Screwdriver, Pliers, Vise grips, needle nose pliers
Oven door would fall down during use at at times
First looked at all the reviews and instructions already listed here - several are very detailed and precise - THANKS to them I was able to do this very quickly and with out much hassle.
Point of clarification would be the SPRING is located on the LEFT SIDE, as when you look at the oven (the side without the controls). I removed only the left side screws on bottom, and back side as well as the feet. was able to pry open and remove old spring.
Many posters also had problems with getting the NEW SPRING on. I would agree, had to use the help of another person to hold the oven base while I used a pair of VISE GRIP NEEDLE NOSE to pull the spring to the back - I first put on the end of spring on door - then to back side. One poster had advise to 'straighten' the end of the new spring to make it easier to install in the tiny hole, I did this and that finally did it, took some patience to 'bend' the end back again but it can be done.
Overall I am glad I did this repair and was well worth it - I love this oven and use it daily.
I would also point out as did many others - the 'EDGES are sharp!" I did use a rag to help wedge the side of the panel open to make it easier - and safer - to work on
Did you find this story helpful?
Thanks for voting and helping fellow customers!
10 of 12 people found this instruction helpful
Tool Type:
Convection Oven
Parts Used:
Repair Difficulty:
Medium
Time Spent Repairing:
15-30 minutes
Tools Used:
Screwdriver, Pliers
Broken door spring
Don't use toaster/oven while broken spring is still in that side panel there are other energized parts that can be compromised. Unplug unit and do not use until repair is complete. Feet must be removed. Rear panel can be removed and the panel which makes up both sides and top and be removed yet I found that the side with the broken spring can be lifted out enough to make repair.
Did you find this story helpful?
Thanks for voting and helping fellow customers!
6 of 6 people found this instruction helpful
Tool Type:
Convection Oven
Parts Used:
Repair Difficulty:
Medium
Time Spent Repairing:
15-30 minutes
Tools Used:
Screwdriver, Pliers, Power Driver #2 Phillips Bit, Needle nose pliers.
Breville Convection Oven Door Spring Replacement
1. Followed instructions from other repair threads posted. Used my power screw driver with #2 Phillips head bit and needle nose pliers.
2. Removed bottom feet on both sides to remove back panel.
3. Removed back panel screws (all of them).
4. Pried off (push out away from oven) rear sides to slide rear panel down and off.
5. FROM REAR--door spring is on the right, so pried away the right side to remove broken spring.
6. Noted rear oven body hole for spring connection (marked it), which is slightly bigger than a screw hole. This is located about midway down the back oven body on the right side.
7. Hooked one end of new spring to door bracket (small) hole and pulled other end with needle nose pliers to hook onto the rear oven body hole. Need strong grip--lots of tension on spring!
8. Re-inserted rear panel (slides up under rear of top panel) and pushed side panels back onto oven body.
9. Reinstalled all screws (2-middle screws on oven feet bracket would not catch due to bending of side panel--realignment not perfect). Make sure the 4-screws to the feet are secured--all that is necessary.
Did you find this story helpful?
Thanks for voting and helping fellow customers!
8 of 12 people found this instruction helpful
Tool Type:
Convection Oven
Parts Used:
Repair Difficulty:
Medium
Time Spent Repairing:
15-30 minutes
Tools Used:
Screwdriver, Pliers, Power Drill
Spring to door broke
About two dozen screws to removed and side plate had to be flexed to get at problem.
Did you find this story helpful?
Thanks for voting and helping fellow customers!
show more
Reviews
17 Reviews
Average Rating (out of 5):
Click to filter by ratings:
5 stars
16
4 stars
1
3 stars
0
2 stars
0
1 stars
0
< PREV
- 1
- 2
Glad to have it
The part took 5 months from order to delivery, apparently due to residual shipping delays from Asia. However, eReplacementParts gave instructions on how to modify the old spring so that it could continue to be used. It was not easy to do, but the toaster door is still working well with the old spring. And when it finally breaks, glad to already have a new one.
Guest -
February 13, 2023
Verified Purchase
Impressive On-going Updates on Status of the Backorder
I ordered a door spring for a toaster oven around the beginning of the original Covid Outbreak. I was informed the item was on backorder. Over the course of the next two years, I regularly, every two months or so, received an email update reporting the status of the backorder. Although it took over two years for the part to arrive, I appreciated the ongoing updates. It was reassuring to know that I would eventually receive the item when the supply issue was resolved. And yes, I eventually was shipped the needed spring.
Guest -
July 27, 2022
Verified Purchase
Just what I needed.
Haven't use it yet as it was back-ordered. It was shipped as soon as possible and is just the right part.
Guest -
February 4, 2022
Verified Purchase
Easy Fix
Was nervous about ordering from a website I had not used before. The spring came in just a few days and was exactly what we hoped we had ordered. Now my toaster oven door stays closed! I will go to this website with confidence in the future when the need arises.
Guest -
May 1, 2020
Verified Purchase
Worked perfectly to fix my Breville toaster oven
The part was perfect to fix the door to the toaster oven from dropping suddenly. The repair only required a pair of needle nose pliers and a screwdriver. Hardest part was finding the second hole for the spring (all the way on the back “wall” of the toaster about 4 inches from the bottom!)
Guest -
April 27, 2020
Verified Purchase
Great and accurate part delivery!
The order was processed very quickly and accurately. The installation comments were also very helpful to have.
Guest -
January 4, 2020
Verified Purchase
Quick shipping; OEM
The spring was shipped out the same day I ordered. It replaced my old broken spring. After having removed a total of 32 screws (18 for the back panel; 2 for the left panel and 12 for the legs), I was able to get the broken one out and replaced with the new one without distorting the left side panel. Yes, I did get help for someone to pull back the left side panel and to shine light into the narrow space for this repair job. Long nose pliers and phillips screwdriver are a must. Having a pair of small hands also help, so is the past experience of replacing iPhone battery. Beware of being cut by the sharp edges of panels while repairing.
Thank eReplacementParts for making this spring available for those who like to tinker with things, not to mention that in my case I have a Breville Toaster-Oven door closed properly as it should.
Theodore -
December 28, 2019
Verified Purchase
Breville Toaster Oven Door Spring
The two door springs arrived fairly quickly, as promised. They were as ordered, and worked perfectly. Thank you.
Chris Mapp
iGlobal -
December 23, 2019
Verified Purchase
Spring was in stock.
Very fast delivery. Website was easy to use. The $4.99 spring saved me $350 for a new oven. Thanks.
Guest -
December 12, 2019
Verified Purchase
Breville Oven Door Spring
Part worked perfectly, fast delivery, Thanks!
Guest -
December 11, 2019
Verified Purchase
Verified Purchase
eReplacementParts Team
< PREV
- 1
- 2
Product Information