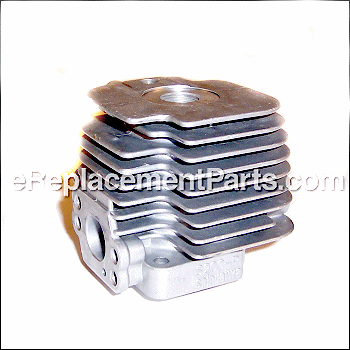
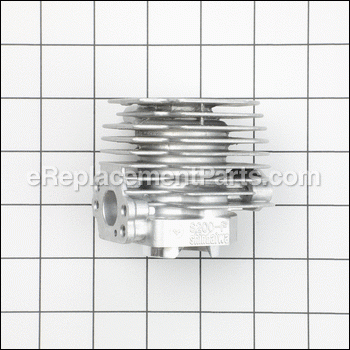
This is an authentic Shindaiwa replacement part, sourced from the original manufacturer for use with trimmers and brushcutters. The special cylinder is used to house the piston and is the combustion chamber for the engine. This cylinder is available as an individual replacement part, please see model diagram for associative parts.
Cylinder A130001150
OEM part for: Shindaiwa
Part Number: A130001150
Jump To:
Frequently Purchased Together ?
Compatibility
This part will fit the following 10 machines
Shindaiwa
This item works with the following types of products:
- Trimmer Parts
- Hedge Trimmer Parts
This part replaces obsolete part #: 20142-12110
Repair Videos ?
|
Filthy Filters? This article will show you how to install a filter kit on an Echo SRM-225 trimmer....
May 27, 2015
|
Customer Part Reviews ?
- 1
Questions & Answers ?
Our customer Service team is at the ready daily to answer your part and product questions.

Ask our Team
We have a dedicated staff with decades of collective experience in helping customers just like you purchase parts to repair their products.
Does this fit my product?Questions & Answers for Cylinder
Customer Repair Instructions ?
All our customer repair instructions are solicited directly from other customers just like you who have purchased and replaced this exact part.
Shindaiwa T22 Trimmer, will not start.
Tool Type
Trimmer
Difficulty
Medium
Time
30-60 minutes
Tools Used
Screwdriver, Pliers, Socket set, Compression tester, WD40, penetrating oil, apexes.
1. Upon trouble-shooting diagnosis, suspicion was confirmed that there was a lack of compression to the unit.(55psi) note: you need at least a minimum of 70-75psi or better, for proper compression to start the unit. In some cases, it is still possible that 70psi "may", not be sufficient. If you, do not own or have a compression tester, you, may still be able to tell if you have a compression problem simply by just on pulling the starter rope, if it pulls too freely, and with little to no resistance, chances are that is the cause, but it is always best to use a compression tester.
2. Ordered all parts through ereplacement.com!
Replacement of any internal parts on small engines is not an easy task for those who are not familiar or mechanically inclined. But it can be done. Tip: before disassembling, it is not a bad idea to take several pictures, or video, during this process. Thank me later.
3. Remove spark plug, and housing.
4. Remove carburetor and associated components.
5. Remove muffler, and ignition coil.(before removal, and since the unit was an older model, I, optioned to spray penetrating oil, onto to all bolts, nuts, etc. before putting torque into them, nothing worse than adding stripped screws n bolts during the process, but sh__ happens.
6. Removed cylinder, evidence of heat discoloration, and scarring on exhaust port side, plus piston ring had forged with piston confirmed diagnose.
7. Inspected crank and piston rod, clean out all possible debris that may have fallen inside the cavity. Blast of compressed air works very well. Advise: my opinion, should you have to replace these parts as well, it is probably better off, to just buy a new unit.
8. Removed and replaced piston(and associated components) note: rubbed piston with 2cy oil to help with cylinder installation.
9. Carefully, slide new cylinder, onto the piston, with special attention not to damage piston ring.(the top of the piston has an arrow, make sure this is pointing to the exhaust side of the cylinder). Secure cylinder to casing.
10. Attach muffler(this would be a good time to inspect and clean the spark arrestor screen, over time, they clog from improper oil mixtures and will bog the unit preventing full power), attach ignition coil(with proper gap setting, use your manual, or a business card works great).
11. Reattach carburetor and components. Note: since the unit was not used for an extended period of time, it was my option to include a carb rebuild kit into the repair.
12. Rechecked unit with compression tester, 95psi! Reassembled housing, installed spark plug. Note: prior to connecting spark plug wire, and I'm not sure whether it matters or not, but I, decided to pull the starter rope slowly(about 10 cranks), just to feel the compression and for the piston and cylinder to lube and bond.
13. Fresh gas added, and she ran like new.
Good day! I, hope this helped, and best of luck in your repairs.
No Compression; will not start
Tool Type
Trimmer
Difficulty
Medium
Time
30-60 minutes
Tools Used
Screwdriver, Pliers
Parts Used
2. Took cylinder off
3. Removed old piston
4. Replaced new piston ring and new piston on existing piston arm
5. Replaced cylinder gasket
6. Oiled piston and inside of new cylinder
7. Seated new cylinder over new gasket and new piston
8. Replaced other gaskets and re-assembled engine
9. Still will not start.
No compression.
Tool Type
Trimmer
Difficulty
Medium
Time
30-60 minutes
Tools Used
Screwdriver, Nutdriver, Allen wrenches
Parts Used
2. Removed the plastic motor cover housing.
3. Removed the carb. and the muffler.
4. Remove the cylinder. Note which side is exhaust and which side is intake.
5. Remove the piston (little keeper that holds the wrist pen in may be a little difficult removing) (NOTE: The arrow on top of piston points toward exhaust side of cylinder).
6. Use light motor oil and lubricate the piston, the ring and the cylinder. (The piston kit comes with everything needed. Make sure the gap part of ring meets at the stop in ring grove of piston).
7. Reverse the steps when re-assembling.
OEM stands for Original Equipment Manufacturer and means the part you’re buying is sourced directly from the manufacturer who made your product. At eReplacementParts, we sell only genuine OEM parts, guaranteeing the part you’re purchasing is of better design and of higher quality than aftermarket parts.
Our product descriptions are a combination of data sourced directly from the manufacturers who made your product as well as content researched and curated by our content & customer service teams. This content is edited and reviewed internally before being made public to customers.
Our customer service team are at the ready daily to answer your part and product questions. We have a dedicated staff with decades of collective experience in helping customers just like you purchase parts to repair their products.
All our part reviews are solicited directly from other customers who have purchased this exact part. While we moderate these reviews for profanity, offensive language or personally identifiable information, these reviews are posted exactly as submitted and no alterations are made by our team.
All our customer repair instructions are solicited directly from other customers just like you who have purchased and replaced this exact part. While we moderate these reviews for profanity, offensive language or personally identifiable information, these reviews are posted exactly as submitted and no alterations are made by our team.
Based on data from past customer purchasing behaviors, these parts are most commonly purchased together along with the part you are viewing. These parts may be necessary or helpful to replace to complete your current repair.
All our installation videos are created and produced in collaboration with our in-house repair technician, Mark Sodja, who has helped millions of eReplacementParts customers over the last 13 years repair their products. Mark has years of experience in selling and repairing both commercial and residential products with a specialty in gas-powered equipment.
This data is collected from customers who submitted a repair instruction after replacing this exact part. Customers can rate how easy the repair was to complete and how long it took. We aggregate this data to provide a repair rating that allows customers to quickly determine the difficulty and time needed to perform their own repair.


