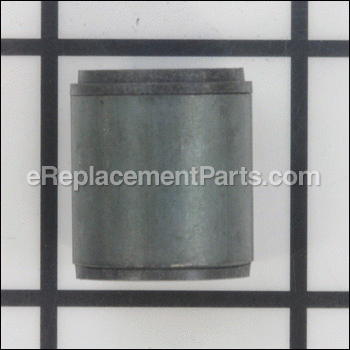
This is a genuine item that is supplied directly from the original equipment manufacturer. It is specially designed for Genie garage openers. This coupler is utilized as an adapter between the motor and the screw shaft. It is a high-quality replacement for a missing or a damaged hardware that was installed on a new unit. Note, one durable metal coupler is included. Replacing it will require a screwdriver and a wrench set to take apart the housing and disconnect the screw shaft.
Coupler 30257T.S
OEM part for: Genie
Part Number: 30257T.S
Compatibility
This part will fit the following 14 machines
Genie
This item works with the following types of products:
- Screwdriver Parts
Customer Part Reviews ?
- 1
Questions & Answers ?
Our customer Service team is at the ready daily to answer your part and product questions.

Ask our Team
We have a dedicated staff with decades of collective experience in helping customers just like you purchase parts to repair their products.
Does this fit my product?Questions & Answers for Coupler
Customer Repair Instructions ?
All our customer repair instructions are solicited directly from other customers just like you who have purchased and replaced this exact part.
The limit switch (the switch that stops the garage door motor once the garage door is fully opened) broke, causing the garage door opener to continue turning after the door was fully opened.
Tool Type
Screwdriver
Difficulty
Medium
Time
30-60 minutes
Tools Used
Screwdriver, Socket set, Adjustable Wrench
Parts Used
When I separated the opener from the track, I could easily see the broken coupler.
Pulled it out with, and replaced with the new one.
Rehanging the garage door opener was a bit tricky, since I was doing it by myself standing in a stool, instead of a ladder (safety first!).
I secured the open back in the position it was in bases on the wear marks from the nuts and bolts.
Lined up the track and opener by sight.
Greased up the drive screw.
Plugged back.
Pushed garage door button
!Viola!
Both items had broken
Tool Type
Screwdriver
Difficulty
Easy
Time
Less than 15 minutes
Tools Used
Screwdriver, Socket set
The garage door opener would not open the door,
Tool Type
Screwdriver
Difficulty
Medium
Time
30-60 minutes
Tools Used
Socket set, Wrench Set
Parts Used
Removed the 2 bolts from the motor housing to the track.
Once separated, the Coupler is visible and can be replaced. Be sure to clean out any broken fragments of the old coupler.
Line up the motor at 12:00 position and turn the drive on the shaft to also be at 12:00. This will make the re-engagement easier.
Put the new coupler into the motor and reassemble the shaft on to the motor bracket. Secure with the two nuts and bolts.
Raise the finished assembly and connect the wires.
Thats it !
Furnace board replacement
Tool Type
Screwdriver
Difficulty
Easy
Time
15-30 minutes
Tools Used
Screwdriver, Nutdriver
Parts Used
Genie garage door opener coupler worn, on cold days it squealed.
Tool Type
Screwdriver
Difficulty
Medium
Time
30-60 minutes
Tools Used
Power Drill, Socket set, Wrench Set
Parts Used
2. Removed the old coupler. and installed the new.
3. The hardest part was aligning the two bolts to reinstall the screw drive.
3. Loosened the garage door opener motor, and wiggled it until the bolt holes were aligned up.
4. Finalized by replacing all hardware.
I appreciate your fast service to send my coupler part.
Garage door coupler stripped out
Tool Type
Screwdriver
Difficulty
Easy
Time
15-30 minutes
Tools Used
Socket set, Wrench Set
Parts Used
Garage door screw drive not turning
Tool Type
Screwdriver
Difficulty
Easy
Time
30-60 minutes
Tools Used
Screwdriver, Pliers, Socket set
Parts Used
OEM stands for Original Equipment Manufacturer and means the part you’re buying is sourced directly from the manufacturer who made your product. At eReplacementParts, we sell only genuine OEM parts, guaranteeing the part you’re purchasing is of better design and of higher quality than aftermarket parts.
Our product descriptions are a combination of data sourced directly from the manufacturers who made your product as well as content researched and curated by our content & customer service teams. This content is edited and reviewed internally before being made public to customers.
Our customer service team are at the ready daily to answer your part and product questions. We have a dedicated staff with decades of collective experience in helping customers just like you purchase parts to repair their products.
All our part reviews are solicited directly from other customers who have purchased this exact part. While we moderate these reviews for profanity, offensive language or personally identifiable information, these reviews are posted exactly as submitted and no alterations are made by our team.
All our customer repair instructions are solicited directly from other customers just like you who have purchased and replaced this exact part. While we moderate these reviews for profanity, offensive language or personally identifiable information, these reviews are posted exactly as submitted and no alterations are made by our team.
Based on data from past customer purchasing behaviors, these parts are most commonly purchased together along with the part you are viewing. These parts may be necessary or helpful to replace to complete your current repair.
All our installation videos are created and produced in collaboration with our in-house repair technician, Mark Sodja, who has helped millions of eReplacementParts customers over the last 13 years repair their products. Mark has years of experience in selling and repairing both commercial and residential products with a specialty in gas-powered equipment.
This data is collected from customers who submitted a repair instruction after replacing this exact part. Customers can rate how easy the repair was to complete and how long it took. We aggregate this data to provide a repair rating that allows customers to quickly determine the difficulty and time needed to perform their own repair.


