
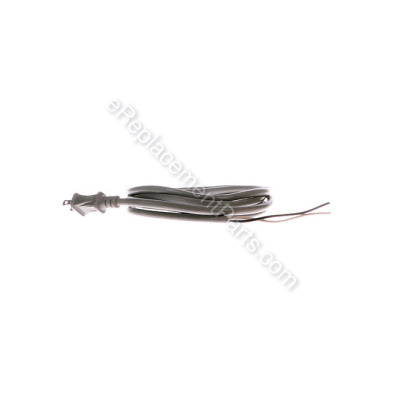

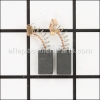
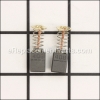
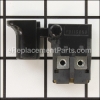
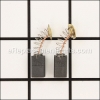
Cord Set 664213-3
Part Number: 664213-3
Order within the next 13 hours
and your part ships today!
and your part ships today!
*This part replaces obsolete part #: 664034-3, 664015-7, 664002-6 and 664013-1.
Product Information
Specifications
| Length: 8' Gauge: 18 Wires: 2 Type: Bare Wire |
Description:
| This cord is a genuine Makita replacement part and is sold individually. This cord is made for the double insulated tools shown below It is a two wire cord with two prongs and does not need a ground wire. |
Frequently Purchased With


Compatibility
the 109 compatible machines
This part is compatible with the following machines:
Makita
BO5021K Sander
NHP1310 Drill
6407 Drill
6408 Drill
N1900B Planer
3700B Trimmer
4200H Circular Saw
4200H Circular Saw
6310 Drill
6410 Drill
6510LVR Drill
6800DBV Screwdriver
6801DBV Screwdriver
6805BV Screwdriver
HP1310 Drill
8401 Drill
9030 Belt Sander
9031 Belt Sander
9045N Finishing Sander
9207SPB Sander
9501B Grinder
9523NB Grinder
9524NB Grinder
9901 Belt Sander
BO4510 (Canada) Finishing Sander
DA3000R Drill
JN1600 Nibbler
JS1600 Metal Shear
LS1440 Miter Saw
LS1440 Miter Saw
3702B Laminate Trimmer
BO5021 Random Orbit Sander
GV5000 Disc Sander
9045B Finishing Sander
6000LR Drill
BO5020 Random Orbit Sander
9523NBH Angle Grinder
BO4530 Finishing Sander
BO3700 Finishing Sander
GE0600 Die Grinder
5820 Circular Saw
5820 Circular Saw
BO5012 5 inch Random Orbit Sander
1902 Planer
4200NH Circular Saw
4200NH Circular Saw
9032 Belt Sander
N9501BZ Disc Grinder
3608B Router
1100 3-1/4" Power Planer
1911B 4-3/8" Planer
N1923B 3-1/4" Power Planer
3620 Router
DP4700 1/2" Electric Drill
DP4700 1/2" Electric Drill
GV5010 5" Disc Sander
BO5030 5" Random Orbit Sander
JR1000FTK Reciprocating Saw
JR1000FTK Reciprocating Saw
BO4510 (USA) Finishing Sander
6408K 3/8" Drill
M432 Jig Saw
M432 Jig Saw
M901 Finishing Sander
M361 Router
1923B Planer
2400B Saw
4300BA Saw
6407 (Type 1) Drill
6407 (Type 2) Drill
6408K (Type 1) Drill
6408K (Type 2) Drill
6408K (Type 3) Drill
6408 (Type 1) Drill
6408 (Type 2) Drill
6408 (Type 3) Drill
6801DB Screwdriver
6801DB (Type 2) Screwdriver
6801DBV (Type 2) Screwdriver
9501BKIT Grinder
9525NBX Grinder
9527PBK (Type 1) Grinder
9527PBK (Type 2) Grinder
9527PBK (Type 3) Grinder
9527PB (Type 1) Grinder
9527PB (Type 2) Grinder
9527PB (Type 3) Grinder
9528PB (Type 1) Grinder
9528PB (Type 2) Grinder
9528PB (Type 3) Grinder
BO5012K Sander
BO6010 Sander
DA3000R (Type 2) Drill
DA3000 (Type 2) Drill
GA5000 Grinder
GA5000 (Type 2) Grinder
GV6000 Sander
HP1501K Drill
HP2030 (Type 1) Drill
HP2030 (Type 3) Drill
HP2031 (Type 1) Drill
HP2031 (Type 2) Drill
HP2031 (Type 3) Drill
HP2033 Drill
HR2430 Misc
HR3850B Misc
JV2000 Saw
M102 Planer
N9501B Grinder
Products Compatibility
List
This item works with the following types of products:
- • Circular Saw
- • Drill
- • Electric Drill
- • Grinder
- • Jig saw
- • Laminate Trimmer
- • Miter Saw
- • Nibbler
- • Planer
- • Reciprocating Saw
- • Router
- • Sander
- • Saw
- • Screwdriver
- • Shear
- • Trimmer
Repair Guides
![]()

Watch the Repair Video for
Cord Set

Articles:
|
Step-by-step instructions for removing and installing the power cord on your Makita planer....
August 06, 2018
|

Questions & Answers for Cord Set
No questions have been asked yet
Repair Instructions: Submitted by Customers Like You
Tool Type:
Electric Drill
Repair Difficulty:
Easy
Time Spent Repairing:
15-30 minutes
Tools Used:
Screwdriver, Soldering gun
Electric cord was deteriorating and switch cover rubber had deteriorated.
Removed Phillips screws from the back housing. Removed cord, rubber boot over cord and switch. Removed rubber switch cover from switch, discarded. Removed old cord by compressing quick lock spring and pulling out wires. Removed boot from old cord. Stripped and soldered ends of new cord and slipped boot over cord. Inserted new cord wires into quick release spring, keeping polarity the same. Fit new rubber boot over switch. Reinstalled switch, cord and cord boot into drill and reassembled rear housing. Reinserted and tightened Phillips screws. Done.
Did you find this story helpful?
Thanks for voting and helping fellow customers!
Tool Type:
Planer
Parts Used:
Repair Difficulty:
Easy
Time Spent Repairing:
Less than 15 minutes
Tools Used:
Screwdriver, Crimper
Nicks in cord jacket and damaged plug
1. Removed the screws on handle half
2. Removed the handld half (cover)
3. Removed screws from cord strain relief
4. Noted location of wires and removed from finger switch
5. Removed ring terminals from old cord and removed cord from guide
6. Inserted new cord through cord guide and installed strain relief
7. Crimped new compression ring terminals to new cord.
8. Attached wires to switch
9. Routed wires in handle section to prevent pinching.
10.Reattached handle half with screws.
Did you find this story helpful?
Thanks for voting and helping fellow customers!
Tool Type:
Circular Saw
Repair Difficulty:
Easy
Time Spent Repairing:
Less than 15 minutes
Tools Used:
Screwdriver, None
Bad cord
Remove old one and replaced with new one
Did you find this story helpful?
Thanks for voting and helping fellow customers!
Tool Type:
Grinder
Repair Difficulty:
Easy
Time Spent Repairing:
15-30 minutes
Tools Used:
Screwdriver
Old angle grinder cord finally gave up the ghost.
Dismantled the tool, swapped out the cord and guard, reassembled. No rocket science here.
Did you find this story helpful?
Thanks for voting and helping fellow customers!
Tool Type:
Electric Drill
Repair Difficulty:
Easy
Time Spent Repairing:
15-30 minutes
Tools Used:
Screwdriver, SOLDERING IRON
CORD GUARD AND CORD SET DAMAGED
TOOK DRYWALL GUN APART REPLACED CORD AND CORD GUARD
Did you find this story helpful?
Thanks for voting and helping fellow customers!
Tool Type:
Electric Drill
Repair Difficulty:
Medium
Time Spent Repairing:
Less than 15 minutes
Tools Used:
Screwdriver
Broken variable speed trigger and dust cover and frayed cable
1. Removed plastic handle and took pictures of how trigger was wired
2. Unscrewed wire harness and removed old trigger, dust cover, and cable
3. Replaced wire slip cover over new power cable
4. Connected wires into the trigger
5. Reassembled dust cover, wire harness, and plastic handle
2. Unscrewed wire harness and removed old trigger, dust cover, and cable
3. Replaced wire slip cover over new power cable
4. Connected wires into the trigger
5. Reassembled dust cover, wire harness, and plastic handle
Did you find this story helpful?
Thanks for voting and helping fellow customers!
Tool Type:
Sander
Repair Difficulty:
Easy
Time Spent Repairing:
15-30 minutes
Tools Used:
Screwdriver, Soldering iron - I don’t like crimp- on terminals
Switch was intermittent and power cord was old and tired
I opened the handle by removing 3 screws. The replacement trigger fit right into the handle; it needed 2 ring lug terminals soldered onto the new power cord and connected where the old power cord was. The new cord was already stripped properly, the conductors each needed to be shortened 1-1/2” or so and then clamped under the handles’ built-in strain-relief. The rubber cord guard fit into its built-in nest. The handle parts provide well designed nests and wire guides so carefully replacing the handle half will provide clamping action for the cord guard. The switch fits right in and is well secured. Replacing the handle half and tightening the 3 screws completes the job. There were no printed instructions provided and the 2 replacement electrical wire terminals were not supplied, but any normal human would have no difficulties as the assembly is quite clear and the terminals are available almost everywhere ... I enjoyed this easy little repair project and now my little belt sander works great again, and the replacement power cord is more robust than the original. Ereplacement Parts was easy to use and the employee I spoke with was very knowledgeable and nice to deal with.
Did you find this story helpful?
Thanks for voting and helping fellow customers!
Tool Type:
Sander
Repair Difficulty:
Easy
Time Spent Repairing:
Less than 15 minutes
Tools Used:
Screwdriver
Electrical cord was deterinated
1. Remove 4 screws from top case of sander.
2. Pry up the top case and remove.
3. Remove 2 screws from cord clamp.
4. Disconnect the two wires.
5. Remove old cord & cord guard.
6. Install new cord & cord guard.
7. Connect the two wires and position wires same as original.
8. Reinstall the cord clamp.
9. Replace top case of sander.
10. Secure top case with 4 screws.
Did you find this story helpful?
Thanks for voting and helping fellow customers!
Tool Type:
Electric Drill
Parts Used:
Repair Difficulty:
Easy
Time Spent Repairing:
15-30 minutes
Tools Used:
Screwdriver
Worn out cord
Remove the screws from the housings and separate them.
Remove the cord clamp, remove the cord wires from the switch
Connect the new cord wires into the switch
Replace the cord clamp
Screw the housings back together
Remove the cord clamp, remove the cord wires from the switch
Connect the new cord wires into the switch
Replace the cord clamp
Screw the housings back together
Did you find this story helpful?
Thanks for voting and helping fellow customers!
Tool Type:
Router
Repair Difficulty:
Hard
Time Spent Repairing:
1-2 hours
Tools Used:
Screwdriver, Pliers, rubber hammer- stripper- crimper- neddle nose pliers
Bad power cord and broken switsh
1. Remove all visible screws
2. Remove brushes
3. Tap and pry top of tool apart with caution and leave bottom together.
4. Remove bolts from stator and unhook brush connectors (2) and leave rotor in bottom half.
5. Switch and cord connections are not exposed. Unscrew switch and remove wires. Note handing for re connections.
6. Put tool back together and lightly tap with a rubber hammer to put housings back together.
7. Caution- not a snap to fix. Take to took to a shop unless your real good with your hands.
Did you find this story helpful?
Thanks for voting and helping fellow customers!
show more
Reviews
5 Reviews
Average Rating (out of 5):
Click to filter by ratings:
5 stars
4
4 stars
1
3 stars
0
2 stars
0
1 stars
0
< PREV
- 1
Another great experience with eReplacementParts!
Another great experience with eReplacementParts! The part is exactly what I needed, at a fair price and immediate shipping.
Guest -
November 12, 2021
Verified Purchase
power cord with reinforcement for Makita grinder
This replacement powercord and reinforcement are the equal of the original Makita installed items, so glad to have found exact replacement parts!
Guest -
December 2, 2020
Verified Purchase
Power cord pigtail
the order process was easy and the parts arrived quickly and fit perfectly.
Guest -
April 13, 2020
Verified Purchase
Great cord no problems.
I received my new cord replaced it and used it this weekend. Works good. Easy replacement.
Guest -
November 4, 2019
Verified Purchase
Simple repair with great results
Arrived as advertised, complete,
Guest -
June 26, 2019
Verified Purchase
Verified Purchase
eReplacementParts Team
< PREV
- 1
Product Information
Repair Guides
![]()
Watch the Repair Video for
Cord Set
Articles:
|
Step-by-step instructions for removing and installing the power cord on your Makita planer....
August 06, 2018
|