Milwaukee Parts
Repair Parts Home
  
Power Tool Parts
  
Milwaukee Parts
  22-64-0665 Cord Set (6-foot)

Cord Set (6-foot) 22-64-0665

OEM part for: Milwaukee

Part Number: 22-64-0665


Install
Videos!
Cord Set (6-foot) - 22-64-0665:Milwaukee 360 View
Cord Set (6-foot) - 22-64-0665:MilwaukeeCord Set (6-foot) - 22-64-0665:MilwaukeeCord Set (6-foot) - 22-64-0665:Milwaukee 360 View
In Stock
Ships within 1 business day
Medium 15-30 minutes (16 rated repairs)?
OEM: Original Equipment Manufacturer ?
Milwaukee

Product Description ?

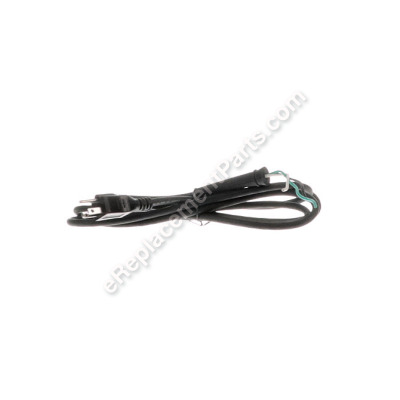
This is an genuine OEM approved replacement part designed for use with Milwaukee Power Tools. This item is Sold Individually. Due to the use or other factors a cord can crack or get damaged otherwise. It is important to replace a damaged cord before continuing to use your equipment. It is made out of Rubber and Metal. This cord comes together with Protector/Grommet.

  • Gauge: 18
  • Wires: 3
  • Type: Bare Wire
  • 18-3 6ft
  • Classification: Part
  • Weight: 0.53 lbs.
  • Shipping: Ships Worldwide

Compatibility

This is the official OEM part for the following brands:

  • Milwaukee

This item works with the following types of products:

  • Drain Cleaner
  • Drill
  • Electric Drill
  • Hammer Drill
  • Screwdriver
  • Shear

This part replaces obsolete part #: 22-M-0450, 22-64-0450, 22-64-0660

Customer Part Reviews ?

4.4
Average Rating (out of 5):
7 Reviews
Click to filter by ratings:
5 stars
6
4 stars
0
3 stars
0
2 stars
0
1 stars
1
  • Highest Rating
  • Most Recent
< PREV
  • 1
NEXT >
  • Great part, exact fit!!
    Easy to order & the shipping was quick. It’s a good feeling to know that parts are available somewhere for the tools that I own! Shipping was fast and convenient
    George D - September 21, 2023 Verified Purchase
    replacement electric cord.
    The Milwaukee screw gun replacement electrical cord I received was a genuine Milwaukee part.It fit perfectly.Good price,fast shipping,great customer service.I will certainly buy again.
    Guest - May 10, 2022 Verified Purchase
    Replacement power cord 35 year old Milwaukee drill
    Exact duplicate of the original, fit like a glove.
    Guest - March 9, 2021 Verified Purchase
    Great to work with Ereplacement
    Great to order from ereplacement products and service was great
    Gerald - April 16, 2020 Verified Purchase
    Easy install
    arrived on time and in good condition. Just what I needed
    Guest - September 25, 2019 Verified Purchase
    Repcaement cord for drill
    works great got it in 2 days
    Guest - June 15, 2019 Verified Purchase
    Not the right cord
    The end did not have the reinforcement as pictured. I sent a request that someone look into it with no response
    Guest - July 2, 2020 Verified Purchase

    Questions & Answers ?

    Our customer Service team is at the ready daily to answer your part and product questions.

    photo of team member
    Ask our Team

    We have a dedicated staff with decades of collective experience in helping customers just like you purchase parts to repair their products.

    Does this fit my product?

    Questions & Answers for Cord Set (6-foot)


    No questions have been asked yet

    Customer Repair Instructions ?

    All our customer repair instructions are solicited directly from other customers just like you who have purchased and replaced this exact part.

    Medium 15-30 minutes (16 rated repairs)?

    Replaced power cord for drill

    Kent - April 29, 2017
    👍 3 of 3 people found this instruction helpful
    Tool Type

    Electric Drill

    Difficulty

    Hard

    Time

    More than 2 hours

    Tools Used

    Screwdriver, Pliers, Adjustable Wrench, Soldering tool

    1. Opened up drill handle to expose wiring connections to switch / trigger
    2. Disconnected wires - damaged switch / trigger releasing old fashioned stab connections (no illustrations - just verbal instructions found).
    3. Soldered the two spades from old cord onto two leads of new power cord.
    4. Due to damage from disassembly poor connection with one spade
    5. Searched for replacement switch - unavailable (drill too old)
    6. Removed spade from one lead - soldered lead to switch
    7. Connected other leads with spade and nut (grounding lead)
    8. Closed up drill handle.
    Did you find this story helpful?
    Thanks for voting and helping fellow customers!

    Bad switch and cord

    ronald - April 26, 2016
    👍 2 of 2 people found this instruction helpful
    Tool Type

    Shear

    Difficulty

    Medium

    Time

    15-30 minutes

    Tools Used

    , solder gun

    Remove one half of the handle. Then make a wiring diagram. To remove the wires from the switch I used a paper clip and pressed it the holes where the wires were connected and then pulled the wires out. To make it easier to insert the wires into the new switch, strip about a half inch at the end of the new cord and put solder on the wires to harden them. Then press them into the switch. You will also want to use a wire terminal to crimp on the ground wire. Then put the handle back on.
    Did you find this story helpful?
    Thanks for voting and helping fellow customers!

    Nothing

    Peter - July 29, 2021
    👍 1 of 1 people found this instruction helpful
    Tool Type

    Electric Drill

    Difficulty

    Easy

    Time

    15-30 minutes

    Tools Used

    Screwdriver, Wire strippers, soldering iron and solder

    Prepared the leads, inserted them in switch and ground, reassembled handle, plugged in and enjoyed the whir of the drill, much safer with a new cord.
    Did you find this story helpful?
    Thanks for voting and helping fellow customers!

    cord on Milwaukee 45 year old drill worn out

    WILLIAM - February 19, 2019
    👍 1 of 1 people found this instruction helpful
    Tool Type

    Electric Drill

    Difficulty

    Easy

    Time

    15-30 minutes

    Tools Used

    Screwdriver, soldering iron

    disassembled handle, measured electrical leads, cut, stripped and tinned the 3 wires. reassembled handle
    Did you find this story helpful?
    Thanks for voting and helping fellow customers!

    Electric Cord had a short

    Richard - February 17, 2019
    👍 1 of 1 people found this instruction helpful
    Tool Type

    Electric Drill

    Difficulty

    Easy

    Time

    30-60 minutes

    Tools Used

    Screwdriver, Pliers, Electrical Tools

    Took casing off drill
    Freed up wires from drill motor
    Installed new wires from new cord to drill motor wires
    Reinstall casing
    Test drill to see if it works ----- Bingo
    Put in rest of screws to drill motor casings .
    Did you find this story helpful?
    Thanks for voting and helping fellow customers!

    Old & frayed power cord

    Vernon - March 5, 2018
    Tool Type

    Shear

    Difficulty

    Medium

    Time

    15-30 minutes

    Tools Used

    Screwdriver, Pliers, Soldering iron & solder

    1. Make sure tool is unplugged
    2. Remove screws & take tool apart to remove old & worn power cord
    3. Check to make sure new power cord fits properly before trimming to fit
    4. Tin the power cord ends & install into switch
    5. Be careful & test tool before reassembling
    Did you find this story helpful?
    Thanks for voting and helping fellow customers!

    AC cord very dried out and cracked in several places, easily cracked when bent, safety hazard.

    Paul - October 27, 2017
    Tool Type

    Electric Drill

    Difficulty

    Easy

    Time

    15-30 minutes

    Tools Used

    Screwdriver

    Simply replaced the old cord set with the new one, spliced the leads onto existing leads in the trigger and ground wire. Reassembled the handle and tested as working correctly. I did blow out the motor housing while the handle was removed.
    Did you find this story helpful?
    Thanks for voting and helping fellow customers!

    The gasket around the power cord where it enters the handle part of the drill cracked and deteriorated over time

    Patrick - April 26, 2017
    Tool Type

    Electric Drill

    Difficulty

    Easy

    Time

    15-30 minutes

    Tools Used

    Screwdriver, Pliers

    1. Drew the screws that hold the two halves of the handle together.
    2. Disconnected the leads of the old power cord.
    3. Connected the new cord.
    4. Cleaned out dust and residue from the mechanism with a soft paintbrush.
    5. Reassembled the handle.
    Did you find this story helpful?
    Thanks for voting and helping fellow customers!

    Cord was cracking

    Joseph - April 7, 2017
    Tool Type

    Electric Drill

    Difficulty

    Easy

    Time

    15-30 minutes

    Tools Used

    Screwdriver

    Removed the screws from the handles
    Disconnected the cord wires from the switch and the ground wire
    Connected the new cord wires to the switch and attached the ground wire
    Screwed the handles together
    Did you find this story helpful?
    Thanks for voting and helping fellow customers!

    Cord was cracking

    Ricky - March 3, 2017
    Tool Type

    Electric Drill

    Difficulty

    Easy

    Time

    Less than 15 minutes

    Tools Used

    Screwdriver, Na

    Remove one handle half from the drill. Remove the wires from the switch and ground wire. Connect all the wires to the switch along with the ground wire. Route the wires so they won't get pinched. Attach the handle half.
    Did you find this story helpful?
    Thanks for voting and helping fellow customers!

    OEM stands for Original Equipment Manufacturer and means the part you’re buying is sourced directly from the manufacturer who made your product. At eReplacementParts, we sell only genuine OEM parts, guaranteeing the part you’re purchasing is of better design and of higher quality than aftermarket parts.

    Learn More

    Our product descriptions are a combination of data sourced directly from the manufacturers who made your product as well as content researched and curated by our content & customer service teams. This content is edited and reviewed internally before being made public to customers.

    Our customer service team are at the ready daily to answer your part and product questions. We have a dedicated staff with decades of collective experience in helping customers just like you purchase parts to repair their products.

    All our part reviews are solicited directly from other customers who have purchased this exact part. While we moderate these reviews for profanity, offensive language or personally identifiable information, these reviews are posted exactly as submitted and no alterations are made by our team.

    All our customer repair instructions are solicited directly from other customers just like you who have purchased and replaced this exact part. While we moderate these reviews for profanity, offensive language or personally identifiable information, these reviews are posted exactly as submitted and no alterations are made by our team.

    Based on data from past customer purchasing behaviors, these parts are most commonly purchased together along with the part you are viewing. These parts may be necessary or helpful to replace to complete your current repair.

    All our installation videos are created and produced in collaboration with our in-house repair technician, Mark Sodja, who has helped millions of eReplacementParts customers over the last 13 years repair their products. Mark has years of experience in selling and repairing both commercial and residential products with a specialty in gas-powered equipment.

    This data is collected from customers who submitted a repair instruction after replacing this exact part. Customers can rate how easy the repair was to complete and how long it took. We aggregate this data to provide a repair rating that allows customers to quickly determine the difficulty and time needed to perform their own repair.

    eReplacementParts.com
    7174 South 400 West
    Suite 5
    Midvale, UT 84047
    visa mastercard discover american express PayPal
    Recent searches:
    Suggested searches:
    Models:
    Manufacturers:
    Need help finding your model number?