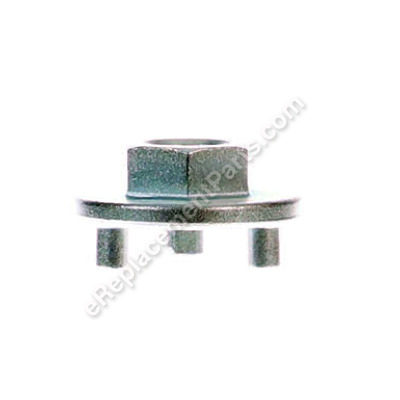
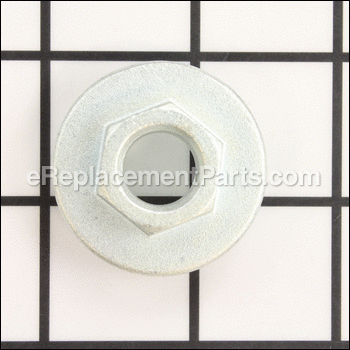
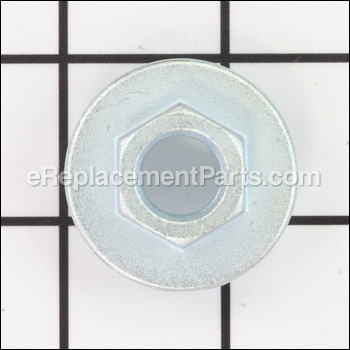
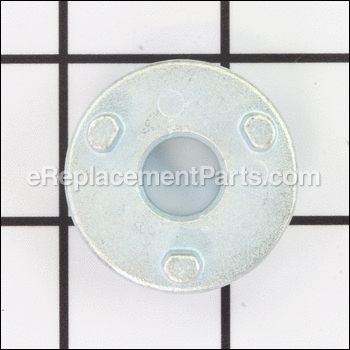
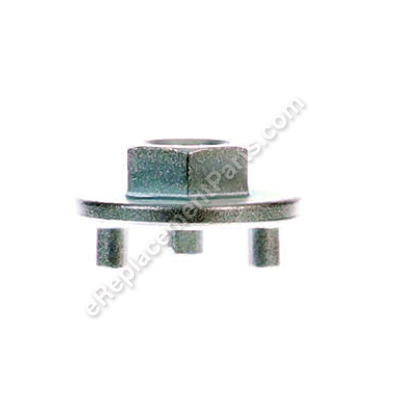
This item has been sourced from the original manufacturer to ensure a high level of quality. The metal tool is used to remove the clutch from the crankshaft. This item fits over the clutch and a wrench or ratchet is used to put leverage on the clutch to remove or install it. This item is sold as an individual item.
Clutch Removal Tool 89750516133
OEM part for: Echo
Part Number: 89750516133
Jump To:
Frequently Purchased Together ?
Compatibility
This item works with the following types of products:
- Chain Saw Parts
- Saw Parts
This part replaces obsolete part #: 89750516130, 89750502830
Customer Part Reviews ?
- 1
Questions & Answers ?
Our customer Service team is at the ready daily to answer your part and product questions.

Ask our Team
We have a dedicated staff with decades of collective experience in helping customers just like you purchase parts to repair their products.
Does this fit my product?Questions & Answers for Clutch Removal Tool
Customer Repair Instructions ?
All our customer repair instructions are solicited directly from other customers just like you who have purchased and replaced this exact part.
Roller sprocket broke and needed to be replaced.
Tool Type
Chain Saw
Difficulty
Medium
Time
30-60 minutes
Tools Used
Adjustable Wrench
2. Removed chain and bar.
3. Removed spark plug and air filter cover
4. Removed spark plug wire and spark plug.
5. Rotated motor until piston at bottom.
6. Put piece of rope in spark plug hole to allow clutch to be removed.
7. Put clutch removal tool on clutch and used adjustable wrench to turn clockwise to loosen.
8. Removed clutch and sprocket bearing (sprocket was gone already)
9. Lubed sprocket bearing and put new roller sprocket on inside of clutch.
10. Replaced clutch assembly with new roller sprocket.
11. Used sprocket tool to tighten counter clockwise.
12. Removed rope from cylinder.
13. Replaced spark plug and put plug wire back on.
14. Replaced spark plug cover.
15. Put bar and chain and sprocket cover back on.
16. Adjusted chain and started saw. (did not need carb kit, filed for future use).
Clutch drum/sprocket, bearing and brake shoes excessively worn.
Tool Type
Chain Saw
Difficulty
Medium
Time
More than 2 hours
Tools Used
Socket set, Echo clutch removal tool for CS 370/CS 400
Parts Used
2. Removed spark plug connector from spark plug. Cleaned dirt and debris away from spark plug base using electronics spray cleaner (expensive but really does a good job without damage to any of the plastic parts on the chainsaw). Removed spark plug.
3. Removed clutch cover/brake band assembly from chainsaw using 13 mm socket and removed guide bar and chain. Cleaned all exposed parts with spray cleaner.
4. Using clutch sprocket removal tool, 19 mm socket and 1/2" drive ratchet, rotated engine crank to put the piston in the bottom position of the cylinder. Stuffed 1/4" nylon rope into cylinder to prevent piston from moving too far (the rope serves as a stop for loosening the clutch assembly without damaging the engine internals.
5. The clutch assembly is screwed onto the chainsaw shaft with left hand threads. Using the tools listed in 4. above, loosen and unscrew clutch assembly from chainsaw. An extra hand is helpful if available to help hold things while loosening. Be careful to not lose the washers and bearing assembly during removal. Cleaned everything for inspection.
6. Lubricated the new bearing assembly with grease and installed new clutch parts and followed the above steps in reverse order to complete the job. (Based on inspection, you may have found other parts to replace while you have some of the chainsaw parts removed but this is not discussed in this procedure.) Use care to be sure that the anti-kickback finger on the clutch/brake cover is positioned properly on the anti-kickback lever.Most of the time spent was used for cleaning and inspection.
Chain was locking up and was raised up on the bar a bit close to the engine end.
Tool Type
Chain Saw
Difficulty
Easy
Time
Less than 15 minutes
Tools Used
, Clutch Removal Tool
oiler stopped working
Tool Type
Chain Saw
Difficulty
Hard
Time
More than 2 hours
Tools Used
Screwdriver, Wrench Set, Nutdriver, puller and torx
chain had shredded the clutch drum & related
Tool Type
Chain Saw
Difficulty
Easy
Time
30-60 minutes
Tools Used
Screwdriver, air drill
2. removed chain and the bar. Cleaned up saw.
3.used special tool to remove left handed screw.
4.puted on new parts, tightened.
5.Put chain & bar back on
6. Put cover back on.
7. reset chain to proper tension.
Rim sprocket was worn and needed replacement.
Tool Type
Chain Saw
Difficulty
Easy
Time
15-30 minutes
Tools Used
Screwdriver, Impact wrench and socket, clutch removal tool
clutch
Tool Type
Chain Saw
Difficulty
Easy
Time
15-30 minutes
Tools Used
Socket set
part of the process for dismanteling the saw for oiling problems
Tool Type
Chain Saw
Difficulty
Easy
Time
15-30 minutes
Tools Used
Screwdriver, Pliers, Socket set, Wrench Set
Parts Used
Bearing Needle was bad. Clutch Drum was worn.
Tool Type
Chain Saw
Difficulty
Easy
Time
15-30 minutes
Tools Used
Screwdriver, Socket set, Battery powered Impact Wrench
2. Used impact wrench and removal tool to loosen Clutch.
3 Removed Clutch and clutch drum
4. Replaced needle and clutch drum [greased bearing needle]
5 Re-installed Clutch and tightened with removal tool and impact wrench.
6. Re-installed bar and chain
7 re-installed cover and tightened chain with adjusting screw.
Easy fix with an impact wrench.
chain adjustment was worn, and clutch needed replacment
Tool Type
Chain Saw
Difficulty
Hard
Time
1-2 hours
Tools Used
Screwdriver, Socket set, Wrench Set, Adjustable Wrench
THanks
OEM stands for Original Equipment Manufacturer and means the part you’re buying is sourced directly from the manufacturer who made your product. At eReplacementParts, we sell only genuine OEM parts, guaranteeing the part you’re purchasing is of better design and of higher quality than aftermarket parts.
Our product descriptions are a combination of data sourced directly from the manufacturers who made your product as well as content researched and curated by our content & customer service teams. This content is edited and reviewed internally before being made public to customers.
Our customer service team are at the ready daily to answer your part and product questions. We have a dedicated staff with decades of collective experience in helping customers just like you purchase parts to repair their products.
All our part reviews are solicited directly from other customers who have purchased this exact part. While we moderate these reviews for profanity, offensive language or personally identifiable information, these reviews are posted exactly as submitted and no alterations are made by our team.
All our customer repair instructions are solicited directly from other customers just like you who have purchased and replaced this exact part. While we moderate these reviews for profanity, offensive language or personally identifiable information, these reviews are posted exactly as submitted and no alterations are made by our team.
Based on data from past customer purchasing behaviors, these parts are most commonly purchased together along with the part you are viewing. These parts may be necessary or helpful to replace to complete your current repair.
All our installation videos are created and produced in collaboration with our in-house repair technician, Mark Sodja, who has helped millions of eReplacementParts customers over the last 13 years repair their products. Mark has years of experience in selling and repairing both commercial and residential products with a specialty in gas-powered equipment.
This data is collected from customers who submitted a repair instruction after replacing this exact part. Customers can rate how easy the repair was to complete and how long it took. We aggregate this data to provide a repair rating that allows customers to quickly determine the difficulty and time needed to perform their own repair.

