eReplacementParts.com
877-346-4814
Makita Parts
Repair Parts Home
  
Power Tool Parts
  
Makita Parts
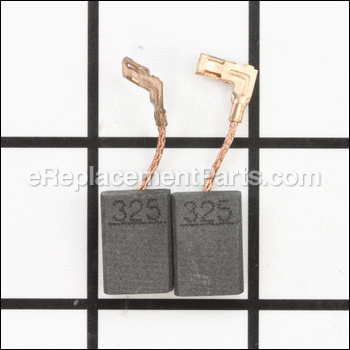
  CB325 Carbon Brush Set

Carbon Brush Set CB325

OEM part for: Makita

Part Number: CB325


Install
Videos!
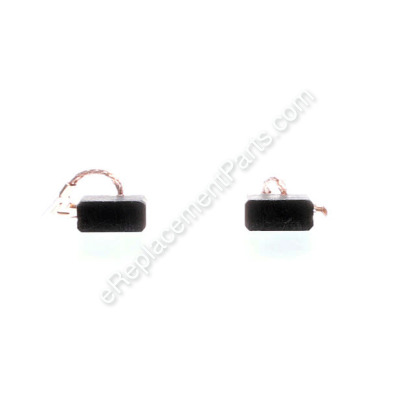
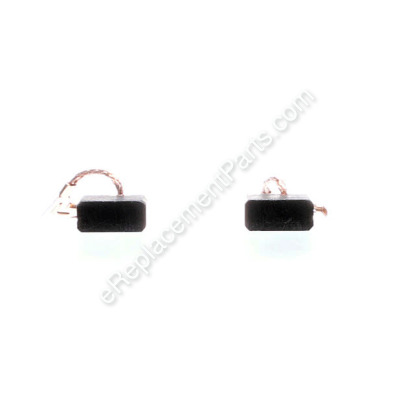
Carbon Brush Set - CB325:Makita 360 View
Carbon Brush Set - CB325:MakitaCarbon Brush Set - CB325:MakitaCarbon Brush Set - CB325:Makita 360 View
In Stock
Ships within 1 business day
Easy 15-30 minutes (26 rated repairs)?
OEM: Original Equipment Manufacturer ?
Makita
Does this d-block d-md-none fit my product?

Product Description ?

Genuine Makita replacement part.
Set of 2 Carbon Brushes with wire lead attached.

• Worn brushes are often the cause of a poorly running motor
• Replacing brushes can fix an intermittent motor
• New brushes can restore a motor’s electric braking


Carbon motor brushes are one of the most commonly replaced power tool components. Because carbon brushes are wear items, meaning that through friction and use they will gradually wear away, they will eventually require replacement. Worn brushes are common causes of intermittent motor function, reduced electric braking, and reduced motor power. A worn out brush will often be worn down near the wire lead and may be cracked, pitted, or burned. When replacing carbon brushes, be sure to also inspect your armature for burns, cracks, or other damage which indicates a larger motor problem.

  • Classification: Part
  • Weight: 0.01 lbs.
  • Also Known As: Motor Brush Set
  • Shipping: Ships Worldwide

Frequently Purchased Together ?

Compatibility

This part will fit the following 37 machines

Makita

9558PB Angle Grinder View Diagrams & Manuals
9557NB Angle Grinder View Diagrams & Manuals
9557PB Angle Grinder View Diagrams & Manuals
9554NB Angle Grinder View Diagrams & Manuals
9553NB Angle Grinder View Diagrams & Manuals
GD0600 Paddle Switch Die Grinder View Diagrams & Manuals
HR2811F 1-1/8" LED Light Rotary Hammer View Diagrams & Manuals
HR2470F 15/16" LED Light Rotary Hammer View Diagrams & Manuals
BHR202 18V LXT Lithium-Ion Cordless 7/8" SDS-Plus Rotary Hammer View Diagrams & Manuals
GD0601 1/4" Die Grinder View Diagrams & Manuals
9553B Grinder View Diagrams & Manuals
9553NBK Grinder View Diagrams & Manuals
9554NBK Grinder View Diagrams & Manuals
9555NB Grinder View Diagrams & Manuals
9555NBK Grinder View Diagrams & Manuals
9557NB2 Grinder View Diagrams & Manuals
9557PBX1 Grinder View Diagrams & Manuals
9558HN Grinder View Diagrams & Manuals
9564P Grinder View Diagrams & Manuals
BO6050J Sander View Diagrams & Manuals
GA5040 Grinder View Diagrams & Manuals
GA5040X1 Grinder View Diagrams & Manuals
HR2470FT (Type 1) Misc View Diagrams & Manuals
HR2470FT (Type 2) Misc View Diagrams & Manuals
HR2611FT (Type 1) Misc View Diagrams & Manuals
HR2611FT (Type 2) Misc View Diagrams & Manuals
HR2611F (Type 1) Misc View Diagrams & Manuals
HR2611F (Type 2) Misc View Diagrams & Manuals
HR2631F Drill View Diagrams & Manuals
HR2811FT (Type 1) Misc View Diagrams & Manuals
HR2811FT (Type 2) Misc View Diagrams & Manuals
HR2811FX Misc View Diagrams & Manuals
Show More Compatible Models
Don't see yours? Try searching our site for :

This item works with the following types of products:

  • Grinder Parts
  • Rotary Hammer Parts

This part replaces obsolete part #: 194074-2

Repair Videos ?

Watch the Repair Video for Carbon Brush Set
Articles:
Brushes Worn Out? Learn to remove and install the carbon motor brushes on your Makita grinder. Step-by-step instructions...
November 24, 2015

Customer Part Reviews ?

5
Average Rating (out of 5):
19 Reviews
Click to filter by ratings:
5 stars
19
4 stars
0
3 stars
0
2 stars
0
1 stars
0
  • Highest Rating
  • Most Recent
< PREV
  • 1
  • 2
NEXT >
  • Parts showed up quick!
    Everything was awesome! Parts were right! My 15 year old grinder is back in business as good as new! Highly recommend Ereplacementparts.com!
    Guest - July 3, 2023 Verified Purchase
    Makita parts
    Excellent service and fast shipping.
    Guest - June 29, 2023 Verified Purchase
    Easy Repair
    I bought brushes and discovered the armature was missing a few contacts after disassembling the grinder for cleaning and inspection. Ordered a new armature, removed and replaced the components, and the grinder is working like new!
    Ken - March 25, 2023 Verified Purchase
    The parts were in good condition for my grinder
    Thank You The parts were in good condition and on time
    Guest - November 10, 2022 Verified Purchase
    brushes for grinder
    Always fast on shipping and as always the right part.
    Guest - September 14, 2022 Verified Purchase
    Brushes fit great; good quality.
    The new parts arrived quickly, well packaged. It was a pretty simple replacement job. eReplacementParts is often the first place I turn to.
    Guest - September 7, 2022 Verified Purchase
    Great Parts
    The part I ordered was exact fit & of good quality, It arrived on time so I was able to get my grinder fixed quickly!
    Jeffrey - April 26, 2022 Verified Purchase
    First time buyer
    I was a little concerned about the online site, but they processed my order the next day, the only thing was the shipping, I paid for faster shipping and I ended up being charged a little more I don’t now why, and shipping lasted like the regular shipping, I know this is not store problem but usps. Other than that the product arrived perfect and exactly what I ordered. I recommend this store.
    Anonymous - April 14, 2022 Verified Purchase
    Fast shipping and great quality
    It came really quickly and it was just what I need it. Really great quality, I will probably use this site again.
    Guest - April 29, 2020 Verified Purchase
    Easy ordering,timely delivery, they work great
    Well packaged, arrived on time Thanks
    Guest - April 29, 2020 Verified Purchase
    t
    t
    t - t days ago Verified Purchase
    eReplacementParts Team
    t

    Questions & Answers ?

    Our customer Service team is at the ready daily to answer your part and product questions.

    photo of team member
    Ask our Team

    We have a dedicated staff with decades of collective experience in helping customers just like you purchase parts to repair their products.

    Does this fit my product?

    Questions & Answers for Carbon Brush Set


    No questions have been asked yet

    Customer Repair Instructions ?

    All our customer repair instructions are solicited directly from other customers just like you who have purchased and replaced this exact part.

    Easy 15-30 minutes (26 rated repairs)?

    Worn out brushes

    Brian - February 6, 2017
    👍 12 of 14 people found this instruction helpful
    Tool Type

    Grinder

    Difficulty

    Easy

    Time

    15-30 minutes

    Tools Used

    Screwdriver, Pliers, Torx bit T15

    Opened rear casing of unit to expose brush holders on each side. Lifted spring that holds each brush and pulled out worn brush and replaced with new brush. Repeat for other side.
    Did you find this story helpful?
    Thanks for voting and helping fellow customers!

    Brushes wore out, unit smoking heavily

    John - December 14, 2017
    👍 5 of 5 people found this instruction helpful
    Tool Type

    Grinder

    Difficulty

    Medium

    Time

    30-60 minutes

    Tools Used

    Screwdriver, Pliers, O-ring hook

    1. Noted position of all components as per the schematic provided on website.
    2. Disassemble all screws to remove cover and output gear assembly.
    3. With needle nose pliers carefully remove carbon brush set slip on connector. Place pressure spring to one side allowing removal of brush.
    4. Pull armature out. If rubber retaining gasket remains in unit and doesn't come out with the armature and attached to the bearing, take a gasket hook removal tool and remove the grommet being careful not to damage it.
    5. Place the grommet on the end bearing.
    6. Insert the armature assembly with grommet into the grinder body placing the grommet into the socket inside the grinder body.
    7. Attached carbon bushings into their respective positions.
    8. Place pressure springs back into their correct original positions.
    9. Reassemble grinder body in the reverse sequence.
    10. Plug grinder in. Turn on and test.
    Did you find this story helpful?
    Thanks for voting and helping fellow customers!

    Excesive sparks from brushes

    mike - July 15, 2017
    👍 2 of 2 people found this instruction helpful
    Tool Type

    Grinder

    Difficulty

    Medium

    Time

    Less than 15 minutes

    Tools Used

    Screwdriver

    Open housing and disconnected the wires, then installed the new brushes.
    Did you find this story helpful?
    Thanks for voting and helping fellow customers!

    Brushes were worn out

    gerald - June 2, 2017
    👍 3 of 4 people found this instruction helpful
    Tool Type

    Grinder

    Difficulty

    Easy

    Time

    15-30 minutes

    Tools Used

    Screwdriver, Pliers

    Removed the rear cover and disconnected the old brushes and replaced the old ones. Easy job
    Did you find this story helpful?
    Thanks for voting and helping fellow customers!

    Brushes wore out.

    Roger - April 24, 2017
    👍 2 of 2 people found this instruction helpful
    Tool Type

    Grinder

    Difficulty

    Easy

    Time

    15-30 minutes

    Tools Used

    Screwdriver

    Remove the back cover and replace the brushes.
    Did you find this story helpful?
    Thanks for voting and helping fellow customers!

    Brushes worn out

    chuck - October 10, 2016
    👍 2 of 3 people found this instruction helpful
    Tool Type

    Grinder

    Difficulty

    Easy

    Time

    15-30 minutes

    Tools Used

    Screwdriver, Pliers

    1. Took old out
    2. Put new in
    Did you find this story helpful?
    Thanks for voting and helping fellow customers!

    Brushes worn out

    george - January 26, 2016
    👍 2 of 3 people found this instruction helpful
    Tool Type

    Grinder

    Difficulty

    Easy

    Time

    15-30 minutes

    Tools Used

    Screwdriver

    Remove rear cover. Remove the brush holder by removing the screw that holds it in. Remove brush by disconnecting terminal. Insert the new brush holder in the same place of the old one. Place new brushes in the holder and release spring to hold brush in. Reconnect the new brush terminal. Then place the rear cover back on.
    Did you find this story helpful?
    Thanks for voting and helping fellow customers!

    Motor brushes were worn and arching.

    David - November 16, 2015
    👍 2 of 3 people found this instruction helpful
    Tool Type

    Grinder

    Difficulty

    Easy

    Time

    15-30 minutes

    Tools Used

    Screwdriver

    Remove the rear housing casing, polished armature and replaced the brushes. Put it back together. Works like new.
    Did you find this story helpful?
    Thanks for voting and helping fellow customers!

    Well, i explain the armature rotor was in cut

    Luis - June 2, 2020
    Tool Type

    Rotary Hammer

    Difficulty

    Easy

    Time

    30-60 minutes

    Tools Used

    Screwdriver, Power Drill, No necesary

    Basically I did a test with the multimeter and then I did another with a tool called growler, I picked up the problem.
    Did you find this story helpful?
    Thanks for voting and helping fellow customers!

    Mothing

    Geoff - April 21, 2020
    Tool Type

    Grinder

    Difficulty

    Easy

    Time

    Less than 15 minutes

    Tools Used

    Screwdriver, Pliers

    Followed your online tutorial easy! Thanks
    Did you find this story helpful?
    Thanks for voting and helping fellow customers!

    OEM stands for Original Equipment Manufacturer and means the part you’re buying is sourced directly from the manufacturer who made your product. At eReplacementParts, we sell only genuine OEM parts, guaranteeing the part you’re purchasing is of better design and of higher quality than aftermarket parts.

    Our product descriptions are a combination of data sourced directly from the manufacturers who made your product as well as content researched and curated by our content & customer service teams. This content is edited and reviewed internally before being made public to customers.

    Our customer service team are at the ready daily to answer your part and product questions. We have a dedicated staff with decades of collective experience in helping customers just like you purchase parts to repair their products.

    All our part reviews are solicited directly from other customers who have purchased this exact part. While we moderate these reviews for profanity, offensive language or personally identifiable information, these reviews are posted exactly as submitted and no alterations are made by our team.

    All our customer repair instructions are solicited directly from other customers just like you who have purchased and replaced this exact part. While we moderate these reviews for profanity, offensive language or personally identifiable information, these reviews are posted exactly as submitted and no alterations are made by our team.

    Based on data from past customer purchasing behaviors, these parts are most commonly purchased together along with the part you are viewing. These parts may be necessary or helpful to replace to complete your current repair.

    All our installation videos are created and produced in collaboration with our in-house repair technician, Mark Sodja, who has helped millions of eReplacementParts customers over the last 13 years repair their products. Mark has years of experience in selling and repairing both commercial and residential products with a specialty in gas-powered equipment.

    This data is collected from customers who submitted a repair instruction after replacing this exact part. Customers can rate how easy the repair was to complete and how long it took. We aggregate this data to provide a repair rating that allows customers to quickly determine the difficulty and time needed to perform their own repair.

    eReplacementParts.com
    7174 South 400 West
    Suite 5
    Midvale, UT 84047
    visa mastercard discover american express PayPal