
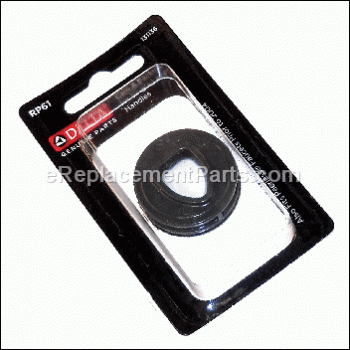


*This part replaces obsolete part #: RP61.
Product Information
Description:
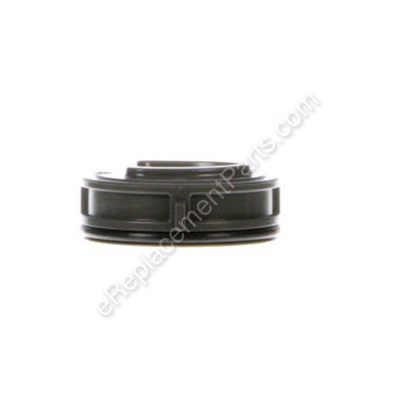
| This is a genuine Delta Faucet part sourced directly from the manufacturer for use in faucets. The cam & packing fit between the ball assembly and the spout and helps to control the temperature of the water. You may need an adjustable wrench and an allen wrench when replacing this part. It will require replacing if it becomes broken. This part is sold individually and is made of plastic and rubber. |
Frequently Purchased With

Compatibility
Products Compatibility
This item works with the following types of products:
- • Faucet
Questions & Answers for Cam & Packing
No questions have been asked yet
Repair Instructions: Submitted by Customers Like You
Tool Type:
Faucet
Repair Difficulty:
Easy
Time Spent Repairing:
Less than 15 minutes
Tools Used:
Screwdriver, Pliers, Nutdriver
faucet delta
replace seals
Did you find this story helpful?
Thanks for voting and helping fellow customers!
1 of 2 people found this instruction helpful
Tool Type:
Faucet
Repair Difficulty:
Easy
Time Spent Repairing:
15-30 minutes
Tools Used:
Adjustable Wrench, Allen wrench
Leaking
Removed faucet head allen screw plug and screw, removed lock nut and washer, removed ball assembly, removed seats and springs. Installed new parts in reverse order and checked for leaks. Rebuilt faucet works great just like new.
Did you find this story helpful?
Thanks for voting and helping fellow customers!
1 of 2 people found this instruction helpful
Tool Type:
Faucet
Repair Difficulty:
Easy
Time Spent Repairing:
Less than 15 minutes
Tools Used:
Adjustable Wrench, Allen wrench
Leaking around base of faucet.
Easy repair but allen wrenches and a larger crescent wrench are required. Loosen allen screw on faucet handle and remove handle. With a large crescent wrench loosen nut on top of faucet and remove. Slide faucet nozzle off base of faucet. On faucet base carefully pry out old O-rings so as not to scratch O-ring groove. Install new O-rings and reinstall nozzle using a slight rotating motion as you slide it over the base. Pry cover off the top of the faucet ball, do not remove ball, install new cam& packing. Reinstall faucet nut (being careful not to over tighten), handle, and tighten allen screw.
Did you find this story helpful?
Thanks for voting and helping fellow customers!
0 of 1 people found this instruction helpful
Tool Type:
Faucet
Parts Used:
Repair Difficulty:
Easy
Time Spent Repairing:
Less than 15 minutes
Tools Used:
Adjustable Wrench
Faucet leaking.
Removed the handle and unscrewed the top of the faucet. Removed and replaced the packing cam. Replaced the top of the faucet, replaced the handle, and tested to ensure the faucet shut the water off.
Did you find this story helpful?
Thanks for voting and helping fellow customers!
Reviews
1 Reviews
Average Rating (out of 5):
Click to filter by ratings:
5 stars
1
4 stars
0
3 stars
0
2 stars
0
1 stars
0
< PREV
- 1
Easy repair...worked as expected
Installed quick and easy...just what I needed
Guest -
March 2, 2020
Verified Purchase
Verified Purchase
eReplacementParts Team
< PREV
- 1
Product Information