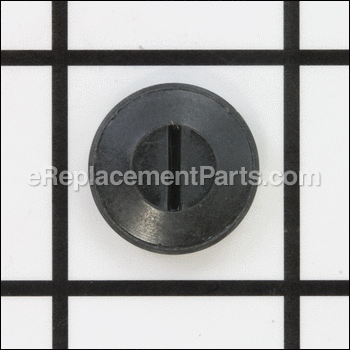

This is a genuine manufacturer-sourced replacement brush cap which is specially designed for use with Milwaukee power tools. The purpose of the cap is to secure the carbon brush in the tool, this cap has external threads that thread into the housing of the tool, be careful when removing and replacing these as they have a tendency to break or get lost. This high-quality item is made of durable plastic and it is sold individually.
Brush Cap 23-44-0135
OEM part for: Milwaukee
Part Number: 23-44-0135
$3.99
Usually ships in 7 - 12 business days
7 - 12 business days
Compatibility
This part will fit the following 18 machines
Milwaukee
6230 (SER 678-1001) 4-3/4 Inch Deep Cut Band Saw View Diagrams & Manuals
6230 (SER 678-1105) 4-3/4 Inch Deep Cut Band Saw View Diagrams & Manuals
6227 (SER 674-9466) Band Saw View Diagrams & Manuals
1670-1 (SER 472-17152) Single Speed Hole Hawg Drill View Diagrams & Manuals
1670-1 (SER 472-4782) Single Speed Hole Hawg Drill View Diagrams & Manuals
1675-1 (SER 413-27172) Two Speed Hole Hawg Drill View Diagrams & Manuals
6227 (SER 674-1001) Bandsaw View Diagrams & Manuals
6225 (SER 457-1001) Two Speed Band Saw View Diagrams & Manuals
6225 (SER 457-112000) Two Speed Band Saw View Diagrams & Manuals
6225 (SER 457-124821) Two Speed Band Saw View Diagrams & Manuals
6225 (SER 457-150887) Two Speed Band Saw View Diagrams & Manuals
6225 (SER 457-45000) Two Speed Band Saw View Diagrams & Manuals
6225 (SER 457-95000) Two Speed Band Saw View Diagrams & Manuals
6225 (SER 457-96817) Two Speed Band Saw View Diagrams & Manuals
5610 (SER 451-1001) 1 H.P. Router View Diagrams & Manuals
5620 (SER 451-1001) 1 H.P. Router View Diagrams & Manuals
6227 (SER 674-4271) Speed Control Bandsaw View Diagrams & Manuals
6226 (457-45000) Band Saw View Diagrams & Manuals
Show More Compatible Models
This item works with the following types of products:
- Band Saw Parts
- Saw Parts
- Drill Parts
- Router Parts
This part replaces obsolete part #: 23-44-0130
Questions & Answers ?
Our customer Service team is at the ready daily to answer your part and product questions.

Ask our Team
We have a dedicated staff with decades of collective experience in helping customers just like you purchase parts to repair their products.
Does this fit my product?Questions & Answers for Brush Cap
No questions have been asked yet
Customer Repair Instructions ?
All our customer repair instructions are solicited directly from other customers just like you who have purchased and replaced this exact part.
The brush tubes had overheated causing the tube carrier to melt so, no op.
David - March 22, 2019
Tool Type
Band Saw
Difficulty
Easy
Time
30-60 minutes
Tools Used
Screwdriver, Torx Bit set
Parts Used
Disassembled the handle to expose the wiring and the switch. Removed screws to the front guide roller, track and armature housing. Used flat tip screw driver to gently pry the stator housing from the gear drive cover (there is a thin gasket between the 2 parts). Removed 2 screws holding the field windings and the brush/tube carrier housings. Disconnected the white wires from the brush carriers and replaced the housings, brush carriers and brushes (after reassembly). I stoned the commutators and reassembled the saw in reverse order. The band saw works like new and the parts fit perfectly.
Did you find this story helpful?
Thanks for voting and helping fellow customers!
Broken Pulley Guard, Brush cap and blade guard
Donald - February 29, 2016
Tool Type
Band Saw
Difficulty
Hard
Time
15-30 minutes
Tools Used
Screwdriver, Pliers, Tap and die set
The brush cap and blade guard was replaced very easy, and anyone can do it, however, replacing the pulley guard requires the person to have a mechanical background to remove, and own a tap and die set to install the new pulley guard. All of the bolt holes have to be threaded, with a tap with the correct thread sizes to match the bolts. If you are not familiar using a tap and die set, do not try this or you will ruin the new pulley guard
Did you find this story helpful?
Thanks for voting and helping fellow customers!
OEM stands for Original Equipment Manufacturer and means the part you’re buying is sourced directly from the manufacturer who made your product. At eReplacementParts, we sell only genuine OEM parts, guaranteeing the part you’re purchasing is of better design and of higher quality than aftermarket parts.
Our product descriptions are a combination of data sourced directly from the manufacturers who made your product as well as content researched and curated by our content & customer service teams. This content is edited and reviewed internally before being made public to customers.
Our customer service team are at the ready daily to answer your part and product questions. We have a dedicated staff with decades of collective experience in helping customers just like you purchase parts to repair their products.
All our part reviews are solicited directly from other customers who have purchased this exact part. While we moderate these reviews for profanity, offensive language or personally identifiable information, these reviews are posted exactly as submitted and no alterations are made by our team.
All our customer repair instructions are solicited directly from other customers just like you who have purchased and replaced this exact part. While we moderate these reviews for profanity, offensive language or personally identifiable information, these reviews are posted exactly as submitted and no alterations are made by our team.
Based on data from past customer purchasing behaviors, these parts are most commonly purchased together along with the part you are viewing. These parts may be necessary or helpful to replace to complete your current repair.
All our installation videos are created and produced in collaboration with our in-house repair technician, Mark Sodja, who has helped millions of eReplacementParts customers over the last 13 years repair their products. Mark has years of experience in selling and repairing both commercial and residential products with a specialty in gas-powered equipment.
This data is collected from customers who submitted a repair instruction after replacing this exact part. Customers can rate how easy the repair was to complete and how long it took. We aggregate this data to provide a repair rating that allows customers to quickly determine the difficulty and time needed to perform their own repair.