eReplacementParts.com
877-346-4814
Porter Cable Parts

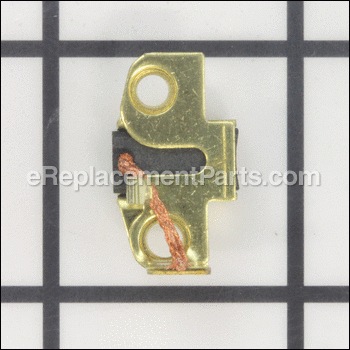
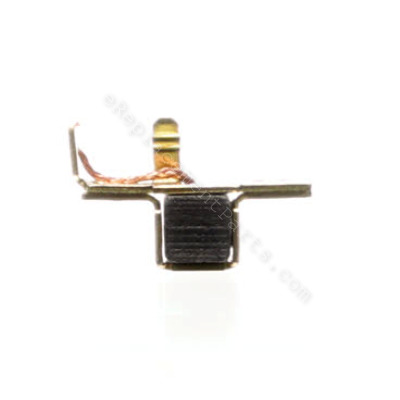
Brush Assembly N031636

OEM part for: Porter Cable, DeWALT

Part Number: N031636


Install
Videos!
Brush Assembly - N031636:Porter Cable 360 View
Brush Assembly - N031636:Porter CableBrush Assembly - N031636:Porter CableBrush Assembly - N031636:Porter Cable 360 View
In Stock
Order within the next 8 hours and your part ships today!
Easy Less than 15 minutes (8 rated repairs)?
OEM: Original Equipment Manufacturer ?
Porter CableDeWALT
Does this d-block d-md-none fit my product?

Product Description ?

Genuine OEM replacement part
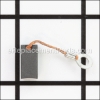
Includes 1 Carbon Brush in metal housing for easy installation.

• Worn brushes are often the cause of a poorly running motor
• Replacing brushes can fix an intermittent motor
• New brushes can restore a motor’s electric braking


Carbon motor brushes are one of the most commonly replaced power tool components.  Because carbon brushes are wear items, meaning that through friction and use they will gradually wear away, they will eventually require replacement.  Worn brushes are common causes of intermittent motor function, reduced electric braking, and reduced motor power.  A worn out brush will often be worn down near the wire lead and may be cracked, pitted, or burned.  When replacing carbon brushes, be sure to also inspect your armature for burns, cracks, or other damage which indicates a larger motor problem.

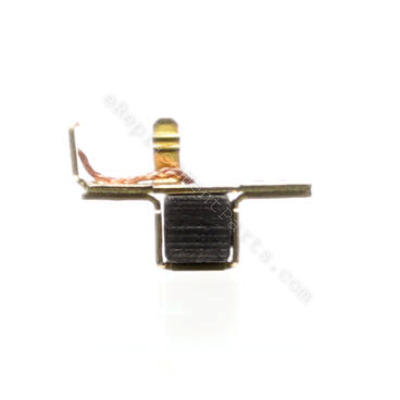
  • Classification: Part
  • Weight: 0.01 lbs.
  • Also Known As: Carbon Brush, Motor Brush
  • Shipping: Ships Worldwide

Frequently Purchased Together ?

Compatibility

This part will fit the following 25 machines

Porter Cable

7301 Type 1 Laminate Trimmer View Diagrams & Manuals
7301 Type 2 Laminate Trimmer View Diagrams & Manuals
7301 Type 3 Laminate Trimmer View Diagrams & Manuals
7649 Type 3 Bayonet Saw View Diagrams & Manuals
7335 Type 2 Random Orbit Sander 5" View Diagrams & Manuals
7336 Type 2 Random Orbit Sander 6" View Diagrams & Manuals
7424 Type 2 Random Orbit Polisher View Diagrams & Manuals
7424SP Random Orbit Polisher View Diagrams & Manuals
874798 Type 2 Laminate Trimmer View Diagrams & Manuals
7310 Type 1 Laminate Trimmer View Diagrams & Manuals
7310 Type 2 Laminate Trimmer View Diagrams & Manuals
7310 Type 3 Laminate Trimmer View Diagrams & Manuals
97355 Type 2 5" Dust Collection Variable-Speed Random-Orbit Sander View Diagrams & Manuals
97366 Type 2 6" Dust Collection Variable-Speed Random-Orbit Sander View Diagrams & Manuals
97549 Type 3 Jig Saw View Diagrams & Manuals
7549 Type 3 BAYONET SAW View Diagrams & Manuals
PC7649 (Type 3) Bayonet Saw View Diagrams & Manuals
J-7549 (Type 3) Bayonet Saw View Diagrams & Manuals
97310 (Type 2) Installation Kit View Diagrams & Manuals
22-7310-56 (Type 3) 220v Laminate Trim View Diagrams & Manuals
7424SP (Type 1) Sander/Polisher Power Tool View Diagrams & Manuals

DeWALT

D26670 Type 1 Laminate Trimmer View Diagrams & Manuals
D26670K (Type 1) Dewalt Laminate Trimmer View Diagrams & Manuals
D26670-B2 (Type 1) Laminate Trimmer Power Tool View Diagrams & Manuals
D26670-BR (Type 1) Laminate Trimmer Power Tool View Diagrams & Manuals
Show More Compatible Models
Don't see yours? Try searching our site for :

This item works with the following types of products:

  • Laminate Trimmer Parts
  • Saw Parts
  • Sander Parts
  • Polisher Parts
  • Jig saw Parts

This part replaces obsolete part #: 888028, 888386

Customer Part Reviews ?

4.6
Average Rating (out of 5):
9 Reviews
Click to filter by ratings:
5 stars
8
4 stars
0
3 stars
0
2 stars
0
1 stars
1
  • Highest Rating
  • Most Recent
< PREV
  • 1
NEXT >
  • Brush replacement on orbital sander
    Prompt delivery and new brushes were easy to install once I had the motor apart. Only minor problem I had was the variable speed comtroller prevented getting the driver in with an extension. Held the driver in position and used an ignition wrench to remove/replace the retaining screw. Great parts!!!
    Guest - December 26, 2022 Verified Purchase
    Perfect replacement
    Quick to ship and the right part for my sander. Reasonable price even with today's outrageous shipping costs.
    Guest - March 16, 2022 Verified Purchase
    Part arrived quickly and was as advertised
    Part fit nicely. Installation blog was a big help.
    James - October 25, 2021 Verified Purchase
    electric motor brushes
    Saved over $100, quick delivery and quick fix. package said they were for a weed eater but put them in my porter cable random orbital sander.
    Guest - August 24, 2021 Verified Purchase
    Got the parts when stated and they work great.
    I ordered brushes and on/off switches for our routers and trimmers. The parts worked great and we continue on.
    iGlobal - October 13, 2020 Verified Purchase
    Brush replacement
    Received in a prompt manner and installation was a breeze
    Guest - November 8, 2019 Verified Purchase
    Very pleased
    Brushes and switch are genuine parts. Super easy transaction and fast shipping. Thank you!!
    Guest - October 8, 2019 Verified Purchase
    Happy
    I have been using "Replacement Parts" for maybe 10 years really like the navigation of their site and quick delivery of their parts.
    Sam - June 1, 2019 Verified Purchase
    BAD SERVICE DISAPPOINTED
    WE PALCE TWO ORDERS BACK IN FEB.MARCH. IT WAS MONTHS BEFORE WE GOT A REPLY THAT PARTS WHERE DISCONTINUED. IT STILL TOOK APPROX. 3 MONTHS TO RECEIVE WHAT WAS ABLE TO BE SUPPLIED. IT'S OK IF THERES NO SUPPLY, ANSWERS NEED TO BE GIVE ASAP.
    Guest - June 18, 2019 Verified Purchase
    t
    t
    t - t days ago Verified Purchase
    eReplacementParts Team
    t

    Questions & Answers ?

    Our customer Service team is at the ready daily to answer your part and product questions.

    photo of team member
    Ask our Team

    We have a dedicated staff with decades of collective experience in helping customers just like you purchase parts to repair their products.

    Does this fit my product?

    Questions & Answers for Brush Assembly


    No questions have been asked yet

    Customer Repair Instructions ?

    All our customer repair instructions are solicited directly from other customers just like you who have purchased and replaced this exact part.

    Easy Less than 15 minutes (8 rated repairs)?

    The brushes had worn out.

    Robert - February 22, 2017
    👍 2 of 2 people found this instruction helpful
    Tool Type

    Sander

    Difficulty

    Easy

    Time

    15-30 minutes

    Tools Used

    Screwdriver

    Removed the outer cover by removing one screw. Each brush assembly was easily removed, the old brush removed and replaced by the new one and then screwed into place, and then the cover was reinstalled.
    Did you find this story helpful?
    Thanks for voting and helping fellow customers!

    Laminate trimmer not working due to worn brushes

    Patrick - January 20, 2016
    👍 1 of 1 people found this instruction helpful
    Tool Type

    Laminate Trimmer

    Difficulty

    Easy

    Time

    Less than 15 minutes

    Tools Used

    Screwdriver, T9 Torx driver

    Unplug Trimmer from electric outlet. Remove end cap covering brush assembly using #2 phillips screw driver. Disconnect electrical lead going to brush assembly. Remove brush holder using T9 Torx driver. Remove old brush for holder. Do Not Loose Spring. Place new brush in holder making sure spring is correctly behind new brush. Place brush and holder back in trimmer. Connect electrical leads to brush assembly. Replace end cap on trimmer. Plug cord back into outlet. Resume work.
    Did you find this story helpful?
    Thanks for voting and helping fellow customers!

    Porter Cable random orbital sander would not run.

    Ronald - December 27, 2022
    Tool Type

    Sander

    Difficulty

    Medium

    Time

    30-60 minutes

    Tools Used

    Screwdriver, Torx Head Driver

    1. Remove the rear cover by taking out one screw.
    2. DIs connected the lead from both brushes.
    3. To remove the brushes, you have to unscrew one torx head screw on each brush
    assembly. One side was easy but the variable speed swhitch made the other hard to
    remove. Had to use an open end ignition wrench to turn the torx head and back out the
    screw.
    4. Replaced the brushes and reassembled.

    NOTE: The spring that applies tension to the brush in hard to position. Important to carefully remove the old brush and observe how the spring is installed.
    Did you find this story helpful?
    Thanks for voting and helping fellow customers!

    The router would not turn on.

    Alan - November 15, 2021
    Tool Type

    Router

    Difficulty

    Easy

    Time

    Less than 15 minutes

    Tools Used

    Screwdriver

    Removed screw on top of the router and took the top off then removed 2 screws holding brushes in, replaced brushes and put it back together and it started and runs like a champ.
    Did you find this story helpful?
    Thanks for voting and helping fellow customers!

    Nothing

    Larry - February 3, 2021
    Tool Type

    Sander

    Difficulty

    Easy

    Time

    Less than 15 minutes

    Tools Used

    Screwdriver, Nothing

    Did not have any problems.
    Did you find this story helpful?
    Thanks for voting and helping fellow customers!

    brushes worn out

    Robert - August 24, 2019
    Tool Type

    Sander

    Difficulty

    Easy

    Time

    Less than 15 minutes

    Tools Used

    Screwdriver

    installed new brushes
    Did you find this story helpful?
    Thanks for voting and helping fellow customers!

    Base on router wore out

    Thomas - February 14, 2019
    Tool Type

    Router

    Difficulty

    Easy

    Time

    Less than 15 minutes

    Tools Used

    Screwdriver, Pliers, Adjustable Wrench, common sense

    Tore it apart and reassembled with new part
    Did you find this story helpful?
    Thanks for voting and helping fellow customers!

    Brushes were worn in several laminate trimmers.

    Mel - August 28, 2017
    Tool Type

    Laminate Trimmer

    Difficulty

    Easy

    Time

    Less than 15 minutes

    Tools Used

    Screwdriver, Soldering Iron

    1. Removed cap by removing the retaining screw.
    2. Be sure to notice how the switch and wires are run under and on the cap for reassembly.
    3. Removed the old brush assembly and disconnected the wire.
    4. Attached the new brush assembly and the connected wire.
    5. Be sure the spring is properly engaged so the brush makes proper contact.
    6. Aligned the switch, organized wires to eliminate pinch points and attached the cap.
    Did you find this story helpful?
    Thanks for voting and helping fellow customers!

    OEM stands for Original Equipment Manufacturer and means the part you’re buying is sourced directly from the manufacturer who made your product. At eReplacementParts, we sell only genuine OEM parts, guaranteeing the part you’re purchasing is of better design and of higher quality than aftermarket parts.

    Our product descriptions are a combination of data sourced directly from the manufacturers who made your product as well as content researched and curated by our content & customer service teams. This content is edited and reviewed internally before being made public to customers.

    Our customer service team are at the ready daily to answer your part and product questions. We have a dedicated staff with decades of collective experience in helping customers just like you purchase parts to repair their products.

    All our part reviews are solicited directly from other customers who have purchased this exact part. While we moderate these reviews for profanity, offensive language or personally identifiable information, these reviews are posted exactly as submitted and no alterations are made by our team.

    All our customer repair instructions are solicited directly from other customers just like you who have purchased and replaced this exact part. While we moderate these reviews for profanity, offensive language or personally identifiable information, these reviews are posted exactly as submitted and no alterations are made by our team.

    Based on data from past customer purchasing behaviors, these parts are most commonly purchased together along with the part you are viewing. These parts may be necessary or helpful to replace to complete your current repair.

    All our installation videos are created and produced in collaboration with our in-house repair technician, Mark Sodja, who has helped millions of eReplacementParts customers over the last 13 years repair their products. Mark has years of experience in selling and repairing both commercial and residential products with a specialty in gas-powered equipment.

    This data is collected from customers who submitted a repair instruction after replacing this exact part. Customers can rate how easy the repair was to complete and how long it took. We aggregate this data to provide a repair rating that allows customers to quickly determine the difficulty and time needed to perform their own repair.

    eReplacementParts.com
    7174 South 400 West
    Suite 5
    Midvale, UT 84047
    visa mastercard discover american express PayPal