eReplacementParts.com
877-346-4814
Black and Decker Parts

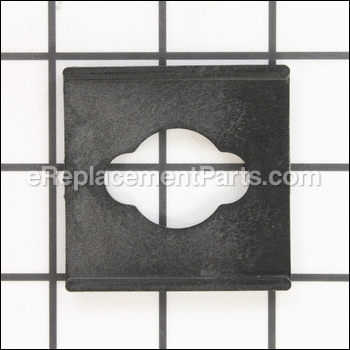
Blade Insulator 241381-01

OEM part for: DeWALT, Black and Decker

Part Number: 241381-01


Install
Videos!
Grid squares measure 1x1 inch
In Stock
Ships within 1 business day
Easy Less than 15 minutes (71 rated repairs)?
OEM: Original Equipment Manufacturer ?
DeWALTBlack and Decker
Does this d-block d-md-none fit my product?

Product Description ?

This is a genuine Black and Decker replacement part, it is sold individually.
It is made of plastic.
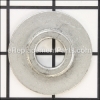
The purpose of the 241381-01 Blade Insulator is to keep the 092715-00 spacer from coming in contact with the blade and to eliminate vibration.

  • Classification: Part
  • Weight: 0.01 lbs.
  • Shipping: Ships Worldwide

Frequently Purchased Together ?

Compatibility

This part will fit the following 103 machines

Black and Decker

CMM1200 Type 1 24V Cordless Mulching Mower View Diagrams & Manuals
CMM1200 Type 2 24V Cordless Mulching Mower View Diagrams & Manuals
LM175 18" Electric Mower View Diagrams & Manuals
MM275 18" Electric Mulching Mower View Diagrams & Manuals
MM575 18" Electric LAWNHOG Mulching Mower View Diagrams & Manuals
MM675 Type 1 18" Electric "LAWNHOG&trade" Mulching Mower with Flip-Over Handle View Diagrams & Manuals
MM675 Type 2 18" Electric "LAWNHOG&trade" Mulching Mower with Flip-Over Handle View Diagrams & Manuals
MM875 Type 1 19" Electric LAWNHOG&trade Mulching Mower with Rear-Bag View Diagrams & Manuals
MM875 Type 2 19" Electric LAWNHOG&trade Mulching Mower with Rear-Bag View Diagrams & Manuals
37051 Type 1 19 Crafts Electric Mower View Diagrams & Manuals
37051 Type 2 19 Crafts Electric Mower View Diagrams & Manuals
37052 Type 1 19 Crafts Cordless Mower View Diagrams & Manuals
8000 Type 2 18 Single Mower 115 Volt View Diagrams & Manuals
8000 Type 3 18 Single Mower 115 Volt View Diagrams & Manuals
8000 Type 4 18 Single Mower 115 Volt View Diagrams & Manuals
8000 Type 5 18 Single Mower 115 Volt View Diagrams & Manuals
8000 Type 6 18 Single Mower 115 Volt View Diagrams & Manuals
8000 Type 7 18 Single Mower 115 Volt View Diagrams & Manuals
8000 Type 8 18 Single Mower 115 Volt View Diagrams & Manuals
8000 Type 9 18 Single Mower 115 Volt View Diagrams & Manuals
8000 Type A 18 Single Mower 115 Volt View Diagrams & Manuals
8000 Type AA 18 Single Mower 115 Volt View Diagrams & Manuals
8008 Type 1 Deluxe 18 Lawn Mower View Diagrams & Manuals
8008 Type 2 Deluxe 18 Lawn Mower View Diagrams & Manuals
8008 Type 3 Deluxe 18 Lawn Mower View Diagrams & Manuals
8008 Type 4 Deluxe 18 Lawn Mower View Diagrams & Manuals
8008 Type 5 Deluxe 18 Lawn Mower View Diagrams & Manuals
8008 Type 6 Deluxe 18 Lawn Mower View Diagrams & Manuals
8010 Type 2 18 Deluxe Mower 115 Volt View Diagrams & Manuals
8010 Type 3 18 Deluxe Mower 115 Volt View Diagrams & Manuals
8018 Type 1 18 Flipover Handle Mower View Diagrams & Manuals
8019 Type 1 18 Lawn Mower Flipover Handle View Diagrams & Manuals
CM500 Type 1 18 Cordless Mower View Diagrams & Manuals
CM500 Type 2 18 Cordless Mower View Diagrams & Manuals
CM500 Type 3 18 Cordless Mower View Diagrams & Manuals
CM600 Type 1 Cordless Mower View Diagrams & Manuals
CM600 Type 2 Cordless Mower View Diagrams & Manuals
CMM1000 Type 1 19 Mulching Mower View Diagrams & Manuals
CMM1000 Type 2 19 Mulching Mower View Diagrams & Manuals
CMM1000 Type 2A 19 Mulching Mower View Diagrams & Manuals
CMM1000 Type 3 19 Mulching Mower View Diagrams & Manuals
CMM1000 Type 4 19 Mulching Mower View Diagrams & Manuals
CMM1000 Type 5 19 Mulching Mower View Diagrams & Manuals
CMM625 Type 1 Cordless Mulch Mower View Diagrams & Manuals
CMM625 Type 2 Cordless Mulch Mower View Diagrams & Manuals
CMM625 Type 3 Cordless Mulch Mower View Diagrams & Manuals
CMM625 Type 4 Cordless Mulch Mower View Diagrams & Manuals
CMM630 Type 1 18 High Wheel Cordless Mower View Diagrams & Manuals
CMM630 Type 2 18 High Wheel Cordless Mower View Diagrams & Manuals
CMM650 Type 1 Cordless Mulch Mower View Diagrams & Manuals
CMM650 Type 2 Cordless Mulch Mower View Diagrams & Manuals
CMM750 Type 1 Cordless Mulch Mower View Diagrams & Manuals
CMM750 Type 2 Cordless Mulch Mower View Diagrams & Manuals
CMM750 Type 3 Cordless Mulch Mower View Diagrams & Manuals
LM100 Type 1 Steel Deck Mower View Diagrams & Manuals
LM100 Type 2 Steel Deck Mower View Diagrams & Manuals
LM100 Type 3 Steel Deck Mower View Diagrams & Manuals
LM1820 Type 1 18 Electric Lawn Mower View Diagrams & Manuals
LM1900 Type 1 Electric Mower View Diagrams & Manuals
LM400 Type 1 18 Electric Mower View Diagrams & Manuals
M100 Type 1 18 Inch Mower View Diagrams & Manuals
M100 Type 2 18 Inch Mower View Diagrams & Manuals
M200 Type 1 Flip Over Handle Mower View Diagrams & Manuals
M200 Type 2 Flip Over Handle Mower View Diagrams & Manuals
M200 Type 3 Flip Over Handle Mower View Diagrams & Manuals
M200 Type 4 Flip Over Handle Mower View Diagrams & Manuals
M200 Type 5 Flip Over Handle Mower View Diagrams & Manuals
M200 Type 6 Flip Over Handle Mower View Diagrams & Manuals
M200 Type 7 Flip Over Handle Mower View Diagrams & Manuals
M300 Type 1 18 Deluxe Mower View Diagrams & Manuals
M300 Type 2 18 Deluxe Mower View Diagrams & Manuals
M400 Type 1 Electronic Mower View Diagrams & Manuals
M700 Type 1 Rear Bagging Mower View Diagrams & Manuals
M700 Type 2 Rear Bagging Mower View Diagrams & Manuals
MM450 Type 1 Mulch N Mow View Diagrams & Manuals
MM450 Type 2 Mulch N Mow View Diagrams & Manuals
MM525 Type 1 Corded Mulch Mower View Diagrams & Manuals
MM525 Type 2 Corded Mulch Mower View Diagrams & Manuals
MM525 Type 3 Corded Mulch Mower View Diagrams & Manuals
MM525 Type 4 Corded Mulch Mower View Diagrams & Manuals
MM550 Type 1 12 Amp Mulch Mower View Diagrams & Manuals
MM550 Type 3 12 Amp Mulch Mower View Diagrams & Manuals
MM550 Type 4 12 Amp Mulch Mower View Diagrams & Manuals
MM600S Type 2 18 Electric Mower View Diagrams & Manuals
MM600 Type 1 18 Inch 4 Horse Power Mulching Mower View Diagrams & Manuals
MM600 Type 2 18 Inch 4 Horse Power Mulching Mower View Diagrams & Manuals
MM850S Type 4 19 Electric Mower View Diagrams & Manuals
MM850 Type 1 19 Mulching Mower View Diagrams & Manuals
MM850 Type 2 19 Mulching Mower View Diagrams & Manuals
MM850 Type 3 19 Mulching Mower View Diagrams & Manuals
MM850 Type 4 19 Mulching Mower View Diagrams & Manuals
MM850 Type 5 19 Mulching Mower View Diagrams & Manuals
MM1800 Type 1 18 Inch Mulching Mower View Diagrams & Manuals
M2371B Type 2 18 Inch Mower View Diagrams & Manuals
MM875 Type 3 19 Mulching Mower View Diagrams & Manuals
M200-BDK (Type 1) Flip Over Handle Mo View Diagrams & Manuals
M200-BDK (Type 2) Flip Over Handle Mo View Diagrams & Manuals
M200-BDK (Type 3) Flip Over Handle Mo View Diagrams & Manuals
M200-BDK (Type 4) Flip Over Handle Mo View Diagrams & Manuals
M200-BDK (Type 5) Flip Over Handle Mo View Diagrams & Manuals
M200-BDK (Type 6) Flip Over Handle Mo View Diagrams & Manuals
M200-BDK (Type 7) Flip Over Handle Mo View Diagrams & Manuals
B8018 (Type 1) 18inflip Hdl Mower View Diagrams & Manuals
Show More Compatible Models
Don't see yours? Try searching our site for :

This item works with the following types of products:

  • Lawn Mower Parts

Repair Videos ?

Watch the Repair Video for Blade Insulator
Articles:
Step-by-step instructions for removing and installing the blade insulator on your Black and Decker electric mower....
October 13, 2017

Customer Part Reviews ?

5
Average Rating (out of 5):
22 Reviews
Click to filter by ratings:
5 stars
21
4 stars
1
3 stars
0
2 stars
0
1 stars
0
  • Highest Rating
  • Most Recent
< PREV
  • 1
  • 2
  • 3
NEXT >
  • Worked as expected
    Arrived very quickly
    Guest - May 31, 2023 Verified Purchase
    it works great
    it fits like a glove its perfect
    Guest - June 24, 2022 Verified Purchase
    Couldn't Find this anywhere else
    My lawnmower works like new now. Also replaced the fan which really throws the grass clippings into the bag... Great Site..
    Randy - June 23, 2022 Verified Purchase
    New appropriate parts worked great
    Got the brand new parts needed that were not easy to get elsewhere.
    Guest - June 8, 2022 Verified Purchase
    B&D/DeWalt identical mower parts
    Ordered fan & blade insulatator for B&Decker, parts came up for DeWalt. They were correct! Quick shipping, mows great.
    Anonymous - October 26, 2021 Verified Purchase
    Easy repair
    It was an invaluable replacement part.
    Jeffrey - September 28, 2021 Verified Purchase
    Easy transaction
    ereplacementparts makes it easy to find a part, along with diagrams. Price was the best!
    Guest - July 27, 2021 Verified Purchase
    Part was easy to find on your website and easy to order.
    Easy repair and easy ordering. Arrived on time. Everything was very smooth. Thanks.
    Anonymous - June 17, 2021 Verified Purchase
    Great to work with
    I have found eReplacement Parts very easy to work with. Parts were delivered very quickly. Their customer service is very good.
    Guest - May 25, 2021 Verified Purchase
    Right part, great price, quick delivery
    Brand new.
    Colm - October 29, 2020 Verified Purchase
    t
    t
    t - t days ago Verified Purchase
    eReplacementParts Team
    t

    Questions & Answers ?

    Our customer Service team is at the ready daily to answer your part and product questions.

    photo of team member
    Ask our Team

    We have a dedicated staff with decades of collective experience in helping customers just like you purchase parts to repair their products.

    Does this fit my product?

    Questions & Answers for Blade Insulator


    No questions have been asked yet

    Customer Repair Instructions ?

    All our customer repair instructions are solicited directly from other customers just like you who have purchased and replaced this exact part.

    Easy Less than 15 minutes (71 rated repairs)?

    Blades would slip when mower started, took long time to build up RPM

    Dwight - April 2, 2016
    👍 11 of 11 people found this instruction helpful
    Tool Type

    Lawn Mower

    Difficulty

    Easy

    Time

    Less than 15 minutes

    Tools Used

    Wrench Set

    With power disconnected and mower upside down, used wrench to remove nut that holds the blade assembly in place (used a piece of 2"x4" to keep blade from turning). Replaced the old insulator with the new insulator, with the "REPLACE IF DAMAGED" side face up (touching the spacer). Finally, reinstalled and tightened the nut. Works great now.
    Did you find this story helpful?
    Thanks for voting and helping fellow customers!

    The blade and fan needed to be replaced.

    Daniel - April 12, 2017
    👍 4 of 4 people found this instruction helpful
    Last summer I took the blade off to sharpen. I didn't give enough attention on how the items on the blade/fan shaft went back together, which resulted with the blade not being secure, and untimely being out of balance, which damaged the fan. I decided to replace everything on the blade/fan shaft.
    Starting closest to the mower, I replaced the Spacer, no problem there. Next was the Fan, once again, no problem. Followed by the Blade, and it tells you what side should face the ground written right on it. Now, this is the point where you need to pay attention. What is next is called an Insulator followed by another spacer. The insulator has ridges on each side of it, that will straddle the blade on one side, and the metal spacer on the other side. Each have a oval hole in the center and you need to make sure each is pushed far enough on to the shaft to fit snugly on the oval part of the shaft. The tricky part for me was to keep everything lined up and inside of the ridges, plus keeping everything pushed up on the shaft to expose the threads for the Hex Nut to get started. Once the Hex Nut is started, the only thing you need to do at that point is to make sure everything stays lined up as you tighten the Hex Nut. As you tighten Hex Nut, and the blade and insulator and the metal spacer become not aligned, loosen the Hex Nut enough to get everything back in line and start tightening again. Hope this helps.
    Did you find this story helpful?
    Thanks for voting and helping fellow customers!

    Plastic parts on either side of metal blade stripped, thus no longer holding blade in place.

    Dean - May 2, 2017
    👍 3 of 3 people found this instruction helpful
    Tool Type

    Lawn Mower

    Difficulty

    Easy

    Time

    Less than 15 minutes

    Tools Used

    Wrench Set

    1. Loosened and removed nut holding blade in place.
    2. Pulled worn plastic Fan off.
    3. Pushed new replacement Fan onto the spindle.
    4. Placed blade onto Fan's nipple.
    5. Placed Plastic Blade Insulator against Blade,
    6. Placed metal spacer.
    7. Screwed on the nut and tightened.
    Did you find this story helpful?
    Thanks for voting and helping fellow customers!

    The blade would not tighten properly.

    Gerard - May 26, 2016
    👍 3 of 3 people found this instruction helpful
    Tool Type

    Lawn Mower

    Difficulty

    Easy

    Time

    Less than 15 minutes

    Tools Used

    Socket set

    A little plastic piece that fits against the blade was embossed with the words "Replace if damaged". It wasn't really damaged but the edges that fit over the blade were very worn. I sharpen my blade by hand several times during the season so there's a lot of "on/off" routines. As soon as I exchanged the old part with the new one, the problem of tightening the blade properly was solved. Simple, inexpensive replacement. Big difference.
    Did you find this story helpful?
    Thanks for voting and helping fellow customers!

    Replaced the damaged fan and blade insulator

    Frederick - November 26, 2015
    👍 2 of 2 people found this instruction helpful
    Tool Type

    Lawn Mower

    Difficulty

    Medium

    Time

    15-30 minutes

    Tools Used

    Wrench Set

    Held the blade with a thick glove on my hand, then removed the nut holding the blade on, and removed it. Removed the broken fan and reinstalled the new one on the shaft, replaced the worn blade insulator. Installed the blade and tightened the blade holding bolt.
    Did you find this story helpful?
    Thanks for voting and helping fellow customers!

    Blade insulator lost

    Ken - November 12, 2017
    👍 1 of 1 people found this instruction helpful
    Tool Type

    Lawn Mower

    Difficulty

    Easy

    Time

    Less than 15 minutes

    Tools Used

    Socket set

    Installed the new blade insulator on the shaft, below the blade, then the blade spacer. Then tightened the nut.
    Did you find this story helpful?
    Thanks for voting and helping fellow customers!

    Fan and blade insulator broke and the spacer was rough and rusted

    Bridget - October 27, 2017
    👍 1 of 1 people found this instruction helpful
    Tool Type

    Lawn Mower

    Difficulty

    Easy

    Time

    Less than 15 minutes

    Tools Used

    Socket set

    1. Removed the nut and took off the spacer, blade insulator, blade and fan
    2. Put back the new fan, old blade, new blade insulator and new spacer
    3. Tightly screwed on the hex nut with a socket wrench
    Did you find this story helpful?
    Thanks for voting and helping fellow customers!

    Lawn mower fan broke

    William - July 11, 2018
    Tool Type

    Lawn Mower

    Difficulty

    Medium

    Time

    Less than 15 minutes

    Tools Used

    Pliers

    Removed blade.
    Pried off broken fan
    Replaced fan with new fan
    Slid on blade spacer
    Slid on blade
    Slid on blade insulator
    Attached blade.
    Did you find this story helpful?
    Thanks for voting and helping fellow customers!

    Blade was not spinning in time with the electric motor

    Samuel - July 6, 2018
    Tool Type

    Lawn Mower

    Difficulty

    Easy

    Time

    Less than 15 minutes

    Tools Used

    Socket set, 19mm/ 3/4inch socket and ratchet

    This mower was being thrown out by its previous owner. I picked it up off the curb.
    1. Removed nut securing the blade with a 19mm socket.
    2. Removed blade insulator.
    3. Removed the fan, found the fan had cracked and the center hub was no longer part of the fan blade assembly. This is a common problem with the B&D mower. the fan assembly strikes nuts protruding form the bottom of the mower.
    Ordered parts using the exploded diagram on e replacements web-page. the blade was dull so I ordered one too.
    Reinstalled parts in reverse order. Fan blade assembly, mulching blade, blade insulator, and metal washer. Tightened securing nut. Rotated blade to insure there was no interference. plugged mower in and tested on a small area of my lawn. Worked perfectly.
    Did you find this story helpful?
    Thanks for voting and helping fellow customers!

    Fan blades broken, plastic spacer worn out.

    Christopher - June 21, 2018
    Tool Type

    Lawn Mower

    Difficulty

    Easy

    Time

    Less than 15 minutes

    Tools Used

    Adjustable Wrench, Large slip joint pliers.

    1. Removed nut.
    2. Removed spacer, insulator, fan.
    3. Replaced parts in reverse order.
    4. I looked at the exploded diagram on the parts ordering page to be sure I put the parts back in correct order. Print screen that when you order your parts. Make sure you are looking at the correct model and version number.
    Did you find this story helpful?
    Thanks for voting and helping fellow customers!

    OEM stands for Original Equipment Manufacturer and means the part you’re buying is sourced directly from the manufacturer who made your product. At eReplacementParts, we sell only genuine OEM parts, guaranteeing the part you’re purchasing is of better design and of higher quality than aftermarket parts.

    Our product descriptions are a combination of data sourced directly from the manufacturers who made your product as well as content researched and curated by our content & customer service teams. This content is edited and reviewed internally before being made public to customers.

    Our customer service team are at the ready daily to answer your part and product questions. We have a dedicated staff with decades of collective experience in helping customers just like you purchase parts to repair their products.

    All our part reviews are solicited directly from other customers who have purchased this exact part. While we moderate these reviews for profanity, offensive language or personally identifiable information, these reviews are posted exactly as submitted and no alterations are made by our team.

    All our customer repair instructions are solicited directly from other customers just like you who have purchased and replaced this exact part. While we moderate these reviews for profanity, offensive language or personally identifiable information, these reviews are posted exactly as submitted and no alterations are made by our team.

    Based on data from past customer purchasing behaviors, these parts are most commonly purchased together along with the part you are viewing. These parts may be necessary or helpful to replace to complete your current repair.

    All our installation videos are created and produced in collaboration with our in-house repair technician, Mark Sodja, who has helped millions of eReplacementParts customers over the last 13 years repair their products. Mark has years of experience in selling and repairing both commercial and residential products with a specialty in gas-powered equipment.

    This data is collected from customers who submitted a repair instruction after replacing this exact part. Customers can rate how easy the repair was to complete and how long it took. We aggregate this data to provide a repair rating that allows customers to quickly determine the difficulty and time needed to perform their own repair.

    eReplacementParts.com
    7174 South 400 West
    Suite 5
    Midvale, UT 84047
    visa mastercard discover american express PayPal