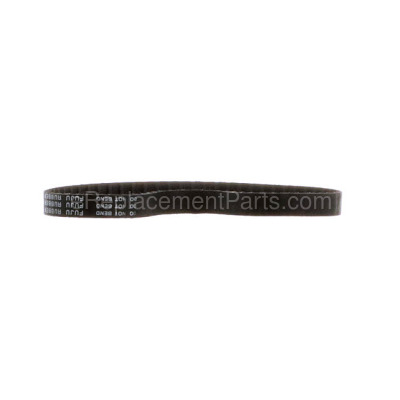


This is an authentic Delta replacement belt. It is sourced directly from original equipment manufacturer for use with band saws. It is connected to the motor pulley on one end and the wheel pulley that drives the blade. Over time belts tend to stretch and wear out eventually requiring replacement. Includes one (1) rubber belt.
You will need a screwdriver and snap ring pliers to complete this repair.
• First make sure the saw is unplugged
• Release the blade tension
• Remove the drive belt from the motor pulley
• Remove the drive belt
• Install the new drive belt
• Rotate the blade quick release lever to apply blade tension
Belt (xl130) 1341594
OEM part for: Delta
Part Number: 1341594
$93.42
In Stock
Product Description ?
- Classification: Part
- Weight: 0.01 lbs.
- Shipping: Ships Worldwide
Compatibility
This part will fit the following 4 machines
Delta
BS100 Type 1 Band Saw View Diagrams & Manuals
SM400 Type 1 Band Saw View Diagrams & Manuals
28-150 Type 2 Band Saw View Diagrams & Manuals
28-150 (Type 1) Band Saw View Diagrams & Manuals
This item works with the following types of products:
- Band Saw Parts
- Saw Parts
Customer Part Reviews ?
Average Rating (out of 5):
Click to filter by ratings:
5 stars
2
4 stars
0
3 stars
0
2 stars
0
1 stars
0
< PREV
- 1
Fit perfectly, exactly as shown, works great...
This part was new and exactly right the first time... Service was fantastic with swift shipping and prompt communication... Thanks Much!
Guest -
June 20, 2019
Verified Purchase
Arrived quickly although it was the part needed
I ordered wrong part but return was very easy and customer service was very helpful. Would definitely use your service again.
Guest -
April 28, 2019
Verified Purchase
t
t
t -
t days ago
Verified Purchase
eReplacementParts Team
t
Questions & Answers ?
Our customer Service team is at the ready daily to answer your part and product questions.

Ask our Team
We have a dedicated staff with decades of collective experience in helping customers just like you purchase parts to repair their products.
Does this fit my product?Questions & Answers for Belt (xl130)
No questions have been asked yet
Customer Repair Instructions ?
All our customer repair instructions are solicited directly from other customers just like you who have purchased and replaced this exact part.
The drive belt broak after several years of use and after cutting 2 inch hard wood.
Thomas - June 4, 2016
👍 2 of 2 people found this instruction helpful
Tool Type
Band Saw
Difficulty
Medium
Time
15-30 minutes
Tools Used
Screwdriver
Parts Used
I unscrewed the bottom drive wheel that the belt was attached to from the motor, slipped the belt on to the motor and wheel pulleys, then reattached the bottom wheel to the saw frame. not too difficult a job.
Did you find this story helpful?
Thanks for voting and helping fellow customers!
broken belt
YOUNG - February 5, 2019
Tool Type
Band Saw
Difficulty
Easy
Time
30-60 minutes
Tools Used
Screwdriver, Pliers
Parts Used
take out the wheel and removed broken belt and replacd with new one,
it was very simple,
it was very simple,
Did you find this story helpful?
Thanks for voting and helping fellow customers!
Broken drive belt
Michael - September 3, 2017
Tool Type
Band Saw
Difficulty
Easy
Time
Less than 15 minutes
Tools Used
Wrench Set
Parts Used
Removed the lower wheel replaced the drive belt on the motor drive gear reassembled the wheel and back to sawing ..
Did you find this story helpful?
Thanks for voting and helping fellow customers!
Tension Bracket was snapped off at ther connecting pin
WILLIAM - June 23, 2017
Tool Type
Band Saw
Difficulty
Medium
Time
30-60 minutes
Tools Used
Screwdriver, Pliers, Power Drill, Nutdriver, Adjustable Wrench, Razor Blade, Wire Wheel
Parts Used
Made sure power was off. Took out upper wheel to access the bracket. Removed all the screws holding the bracket. Put the lower part of the bracket in a vise to remove connecting pin. Cleaned off all exposed moving parts, cleaned off residue on both wheels so the blade would track evenly and then put everything back together.
Did you find this story helpful?
Thanks for voting and helping fellow customers!
Belt broke
Paul - December 20, 2016
Tool Type
Band Saw
Difficulty
Easy
Time
Less than 15 minutes
Tools Used
Screwdriver, Wrench Set
Parts Used
Unscrewed the pulley set screw, loosened the tent, placed the belt on the pulley, adjusted the tension, centered the belt, tighten the pulley screw. Done, back in business!
Did you find this story helpful?
Thanks for voting and helping fellow customers!
Drive belt broke
John - April 27, 2016
Tool Type
Band Saw
Difficulty
Medium
Time
15-30 minutes
Tools Used
Socket set, Allen wrench to remove blade shield
Parts Used
1. Open housing and vacuum thoroughly.
2. Release tension on saw blade. Take blade off machine.
3. With socket wrench, remove nut on lower wheel axle where it sticks through housing (on motor side of housing).
4. Pull lower wheel through on open side of housing. Remove old belt.
5. Slip new belt on motor drive wheel and put the other side over the drive pulley attached to the inside of the lower wheel.
6. Hold belt in place while slipping the lower wheel axle back through housing and into place.
7. Put the nut back on the lower wheel axle where it sticks through the housing on the motor side. Tighten.
8. Put saw blade back on, tension and adjust. Close housing.
Did you find this story helpful?
Thanks for voting and helping fellow customers!
OEM stands for Original Equipment Manufacturer and means the part you’re buying is sourced directly from the manufacturer who made your product. At eReplacementParts, we sell only genuine OEM parts, guaranteeing the part you’re purchasing is of better design and of higher quality than aftermarket parts.
Our product descriptions are a combination of data sourced directly from the manufacturers who made your product as well as content researched and curated by our content & customer service teams. This content is edited and reviewed internally before being made public to customers.
Our customer service team are at the ready daily to answer your part and product questions. We have a dedicated staff with decades of collective experience in helping customers just like you purchase parts to repair their products.
All our part reviews are solicited directly from other customers who have purchased this exact part. While we moderate these reviews for profanity, offensive language or personally identifiable information, these reviews are posted exactly as submitted and no alterations are made by our team.
All our customer repair instructions are solicited directly from other customers just like you who have purchased and replaced this exact part. While we moderate these reviews for profanity, offensive language or personally identifiable information, these reviews are posted exactly as submitted and no alterations are made by our team.
Based on data from past customer purchasing behaviors, these parts are most commonly purchased together along with the part you are viewing. These parts may be necessary or helpful to replace to complete your current repair.
All our installation videos are created and produced in collaboration with our in-house repair technician, Mark Sodja, who has helped millions of eReplacementParts customers over the last 13 years repair their products. Mark has years of experience in selling and repairing both commercial and residential products with a specialty in gas-powered equipment.
This data is collected from customers who submitted a repair instruction after replacing this exact part. Customers can rate how easy the repair was to complete and how long it took. We aggregate this data to provide a repair rating that allows customers to quickly determine the difficulty and time needed to perform their own repair.