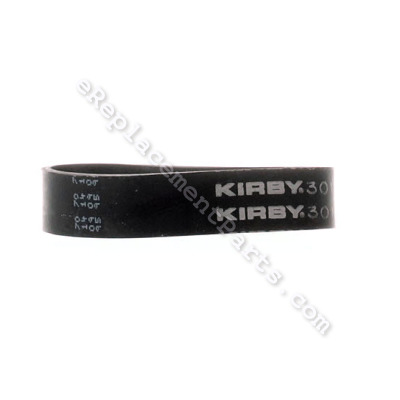


Belt K-301289
Part Number: K-301289
Order within the next 4 hours
and your part ships today!
and your part ships today!
Product Information
Description:
| Genuine Kirby replacement part, this part is sold individually. This belt is used on the Kirby Carpet Shampoo System. This is the belt that drives the Shampoo Brushroll Assembly. Over time belts will stretch and crack. Depending on how often this is used. It may be a good idea to order an extra one to keep on hand. |
Frequently Purchased With


Compatibility
Products Compatibility
This item works with the following types of products:
- • Vacuum
Questions & Answers for Belt
No questions have been asked yet
Repair Instructions: Submitted by Customers Like You
Tool Type:
Vacuum
Parts Used:
Repair Difficulty:
Easy
Time Spent Repairing:
15-30 minutes
Tools Used:
, Wire cutter
The old tube tire causing dirt and dust to fly into the air
Removed the vacuum bag
Removed the torn tube
Fasten the tube on the bottom end by screwing the end around the plastic end. Then attaching the top end to the plastic piece and installing the zip tie around that end. Very easy.
Removed the torn tube
Fasten the tube on the bottom end by screwing the end around the plastic end. Then attaching the top end to the plastic piece and installing the zip tie around that end. Very easy.
Did you find this story helpful?
Thanks for voting and helping fellow customers!
Tool Type:
Vacuum
Parts Used:
Repair Difficulty:
Medium
Time Spent Repairing:
30-60 minutes
Tools Used:
Screwdriver, Pliers, Power Drill, Socket set, Wrench Set
neutral pedal came loose from machine
disassembled vacuum complete to replace broken neutral pedal assembly, motor brushes, main drive belt, and worn suction fan.
Did you find this story helpful?
Thanks for voting and helping fellow customers!
Tool Type:
Vacuum
Parts Used:
Repair Difficulty:
Medium
Time Spent Repairing:
15-30 minutes
Tools Used:
Screwdriver, Power Drill, Socket set
the vac just needed some care
the headlight bulb was first then the fan put all together replaced belts new bag and put to the test all went well
Did you find this story helpful?
Thanks for voting and helping fellow customers!
Tool Type:
Vacuum
Parts Used:
Repair Difficulty:
Easy
Time Spent Repairing:
Less than 15 minutes
Tools Used:
, no tools were used to change the belt
Belt stretched
Removed the brush roller from the head, then removed the belt.
Installed new belt over roller, and installed roller into head.
Installed new belt over roller, and installed roller into head.
Did you find this story helpful?
Thanks for voting and helping fellow customers!
Tool Type:
Vacuum
Repair Difficulty:
Medium
Time Spent Repairing:
15-30 minutes
Tools Used:
Screwdriver, Power Drill
Fan broke and headlight was burned out
Watched the video on how to repair part - very helpful.
1. Removed screws holding housing assembly. 1 screw was difficult to remove - had to drill out head. Also removed vacuum bag.
2. Removed old fan blade,
3. Replaced fan blade
4. Reassembled housing.
5. Removed screws on headlight cover
6. Removed burned out headlight
7. Replaced with new headlight
8. Reattached headlight cover
Did you find this story helpful?
Thanks for voting and helping fellow customers!
Tool Type:
Vacuum
Parts Used:
Repair Difficulty:
Easy
Time Spent Repairing:
Less than 15 minutes
Tools Used:
, No tools needed
Had wrong size drive belt
Replaced the belt by sliding it over the brushes
Did you find this story helpful?
Thanks for voting and helping fellow customers!
Tool Type:
Vacuum
Parts Used:
Repair Difficulty:
Medium
Time Spent Repairing:
Less than 15 minutes
Tools Used:
Brush didn't turn
I had to figure out how the belt was installed. You have to take the brush off. When it is on you have to turn the front knob to take up the slack. Then turn the knob the opposite direction to put the belt on the drive shaft. It is easy once you have done this.
Did you find this story helpful?
Thanks for voting and helping fellow customers!
Reviews
3 Reviews
Average Rating (out of 5):
Click to filter by ratings:
5 stars
3
4 stars
0
3 stars
0
2 stars
0
1 stars
0
< PREV
- 1
The tailight we order fit just right with no problems, thank you.
The taillight we order was great and fit just right, Thank you,
Guest -
December 9, 2021
Verified Purchase
The part is working perfectly!
The belts for my Kirby sweeper arrived quickly and in great condition. Very impressed with eReplacementParts. We will definitely use this company again.
Guest -
May 13, 2021
Verified Purchase
Complete Satisfaction
Everyone needs to attain satisfaction in all areas of their lives and Weather Tech floor mats has met ours. They are not only precise and perfect in every way for our Subaru Impresa but they have also made my wife ecstatically happy. A side note, they arrived faster than I expected via ground mail.
Guest -
April 25, 2019
Verified Purchase
Verified Purchase
eReplacementParts Team
< PREV
- 1
Product Information