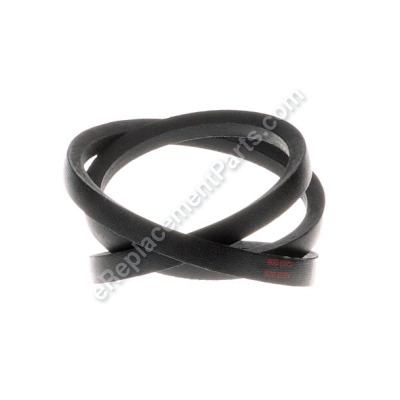


This replacement belt is an authentic OEM sourced item, not an aftermarket imitation. It is commonly used on Campbell Hausfeld air compressors. It is the main belt that drives the unit. Over time rubber belts tend to wear out and stretch requiring replacement. Please note, this item is sold individually.
To complete this repair you will need a wrench.
• Remove the belt cover
• Take out the old belt
• Secure the new belt
• Reattach the housing
Belt BT013001AV
OEM part for: Campbell Hausfeld
Part Number: BT013001AV
$61.62
In Stock
Product Description ?
- Classification: Part
- Weight: 0.16 lbs.
- Shipping: Ships Worldwide
Compatibility
This part will fit the following 6 machines
Campbell Hausfeld
VT631538 Portable Vertical Compressor View Diagrams & Manuals
VT627505 (2008) Vertical Air Compressor View Diagrams & Manuals
VT631403 (2008) Vertical Air Compressor View Diagrams & Manuals
VT631505 (2007) Portable Air Compressor View Diagrams & Manuals
VT631538 (2008) Portable Air Compressor View Diagrams & Manuals
VT636700 Portable Vertical Compressor View Diagrams & Manuals
Show More Compatible Models
This item works with the following types of products:
- Compressor Parts
This part replaces obsolete part #: BT013000AV
Customer Part Reviews ?
Average Rating (out of 5):
Click to filter by ratings:
5 stars
3
4 stars
0
3 stars
0
2 stars
0
1 stars
0
< PREV
- 1
look a photo before ordering, cross reference did not work well
actually the cross reference went to a v-belt, I should have looked a photo, it will work on one of my mowers
Guest -
September 12, 2020
Verified Purchase
Worked great
Just what I ordered, came quick, and fair price
Shelia -
May 15, 2020
Verified Purchase
Great
Fit compressor just right
Guest -
October 24, 2019
Verified Purchase
t
t
t -
t days ago
Verified Purchase
eReplacementParts Team
t
Questions & Answers ?
Our customer Service team is at the ready daily to answer your part and product questions.

Ask our Team
We have a dedicated staff with decades of collective experience in helping customers just like you purchase parts to repair their products.
Does this fit my product?Questions & Answers for Belt
No questions have been asked yet
Customer Repair Instructions ?
All our customer repair instructions are solicited directly from other customers just like you who have purchased and replaced this exact part.
The belt broke on my air compressor after years of use.
Robert - December 8, 2015
👍 3 of 3 people found this instruction helpful
Tool Type
Compressor
Difficulty
Easy
Time
Less than 15 minutes
Tools Used
Screwdriver
Parts Used
Turned power off to the compressor, put the belt over one pulley and started it on to the other pulley then slipped a screwdriver between belt and pulley and rotated the belt till the screwdriver wedged between pulley and belt. Kept turning until screwdriver released on bottom side of pulley. That's it easy as pie
Did you find this story helpful?
Thanks for voting and helping fellow customers!
Broken belt
Nathan - January 7, 2016
👍 2 of 2 people found this instruction helpful
Tool Type
Compressor
Difficulty
Easy
Time
15-30 minutes
Tools Used
Screwdriver, Wrench Set
Parts Used
Remove belt guard. And broken belt, loosen the electric motor, install new belt, adjust motor to tighten the belt, tighten the motor down, reinstall the belt guard.
Did you find this story helpful?
Thanks for voting and helping fellow customers!
Belt was so loose it actually melted as it was turning.
CHARLES - December 24, 2018
👍 1 of 1 people found this instruction helpful
Tool Type
Compressor
Difficulty
Easy
Time
15-30 minutes
Tools Used
Screwdriver, Adjustable Wrench
Parts Used
Had to remove pulpy clean out the groove and reinstalled new belt adjust the tension.
Did you find this story helpful?
Thanks for voting and helping fellow customers!
Drive belt was worn out and slipping.
Stephen - July 1, 2018
👍 1 of 1 people found this instruction helpful
Tool Type
Compressor
Difficulty
Easy
Time
Less than 15 minutes
Tools Used
Wrench Set, Pry bar
Parts Used
1. Loosened the nuts holding the motor in place.
2. Slid motor to loosen the belt tension.
3. Removed old belt and replaced with new belt.
4. Slid motor back in place to tighten the belt using a pry bar.
5. Tighten nuts.
6. Tested.
2. Slid motor to loosen the belt tension.
3. Removed old belt and replaced with new belt.
4. Slid motor back in place to tighten the belt using a pry bar.
5. Tighten nuts.
6. Tested.
Did you find this story helpful?
Thanks for voting and helping fellow customers!
Compressor belt broken
Ron - November 27, 2017
👍 1 of 1 people found this instruction helpful
Tool Type
Compressor
Difficulty
Easy
Time
Less than 15 minutes
Tools Used
Screwdriver, Socket set, Wrench Set
Parts Used
Removed the belt guard
Loosened the motor base
Removed the old belt and installed the new belt on the pulleys
Tightened the motor tension on the new belt, and tightened the bolts
Installed the belt guard
Loosened the motor base
Removed the old belt and installed the new belt on the pulleys
Tightened the motor tension on the new belt, and tightened the bolts
Installed the belt guard
Did you find this story helpful?
Thanks for voting and helping fellow customers!
Compressor belts shot
Jerry - September 6, 2017
Tool Type
Compressor
Difficulty
Easy
Time
Less than 15 minutes
Tools Used
Wrench Set
Parts Used
Removed the belt guard
Loosened the nuts on the motor base
Removed the old belt
Installed the new belt
Put the correct tension on the new belt by pushing the motor and tightening down the nuts
Installed the belt guard
Loosened the nuts on the motor base
Removed the old belt
Installed the new belt
Put the correct tension on the new belt by pushing the motor and tightening down the nuts
Installed the belt guard
Did you find this story helpful?
Thanks for voting and helping fellow customers!
Worn compressor pulley belt.
Martin - April 27, 2017
Tool Type
Compressor
Difficulty
Easy
Time
15-30 minutes
Tools Used
Nutdriver, none. just some paper towels to clean up a bit.
Parts Used
Rolled out compressor so I could access the back; unscrewed the single screw to remove pulley cover; removed the old belt, it just about fell off; installed the new pulley belt by turning the larger pulley by hand. Was rather simple; reinstalled the cover and moved the pulley back to its location; plugged it back into the electrical outlet...DONE!
Did you find this story helpful?
Thanks for voting and helping fellow customers!
The drive belt had worn and had started to shred.
Michael - March 10, 2017
Tool Type
Compressor
Difficulty
Medium
Time
30-60 minutes
Tools Used
Screwdriver, Pliers, Adjustable Wrench, Hammer and Punch
Parts Used
1. Bled residual air from compressor to disconnect piping and remove guard.
2. Loosened set screw on driven pulley and removed old belt. Pulley was rusted somewhat to the shaft. A little extra effort was required to get it free.
3. Installed new belt. checked alignment and reconnected piping.
4. Installed guard and tested.
2. Loosened set screw on driven pulley and removed old belt. Pulley was rusted somewhat to the shaft. A little extra effort was required to get it free.
3. Installed new belt. checked alignment and reconnected piping.
4. Installed guard and tested.
Did you find this story helpful?
Thanks for voting and helping fellow customers!
Belt broke
Edward - December 9, 2016
Tool Type
Compressor
Difficulty
Easy
Time
Less than 15 minutes
Tools Used
Wrench Set
Parts Used
1. Loosened 4 bolts that holds the motor in place.
2. Slide electric motor with small pulley towards large pulley.
3. Removed old belt and cleaned pulleys.
4. Installed new belt over pulleys.
5. Slide motor back in place and put some tension on the electric motor to hold the belt tight.
6. Tightened 4 bolts that holds the motor in place.
7. Turn compressor on, popped a top to celebrate the repair....
Did you find this story helpful?
Thanks for voting and helping fellow customers!
OEM stands for Original Equipment Manufacturer and means the part you’re buying is sourced directly from the manufacturer who made your product. At eReplacementParts, we sell only genuine OEM parts, guaranteeing the part you’re purchasing is of better design and of higher quality than aftermarket parts.
Our product descriptions are a combination of data sourced directly from the manufacturers who made your product as well as content researched and curated by our content & customer service teams. This content is edited and reviewed internally before being made public to customers.
Our customer service team are at the ready daily to answer your part and product questions. We have a dedicated staff with decades of collective experience in helping customers just like you purchase parts to repair their products.
All our part reviews are solicited directly from other customers who have purchased this exact part. While we moderate these reviews for profanity, offensive language or personally identifiable information, these reviews are posted exactly as submitted and no alterations are made by our team.
All our customer repair instructions are solicited directly from other customers just like you who have purchased and replaced this exact part. While we moderate these reviews for profanity, offensive language or personally identifiable information, these reviews are posted exactly as submitted and no alterations are made by our team.
Based on data from past customer purchasing behaviors, these parts are most commonly purchased together along with the part you are viewing. These parts may be necessary or helpful to replace to complete your current repair.
All our installation videos are created and produced in collaboration with our in-house repair technician, Mark Sodja, who has helped millions of eReplacementParts customers over the last 13 years repair their products. Mark has years of experience in selling and repairing both commercial and residential products with a specialty in gas-powered equipment.
This data is collected from customers who submitted a repair instruction after replacing this exact part. Customers can rate how easy the repair was to complete and how long it took. We aggregate this data to provide a repair rating that allows customers to quickly determine the difficulty and time needed to perform their own repair.