
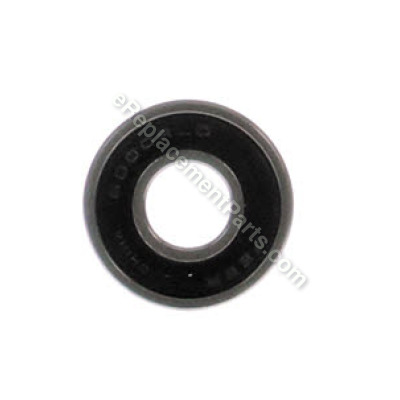


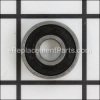
This ball bearing is used in various Milwaukee grinders and PEX expanders. This is an authentic replacement part produced by the original manufacturer. Ball bearings reduce friction and wear that occurs between moving parts. They are high wear components that need replacement when used regularly. Sold individually.
Ball Bearing 02-04-1005
OEM part for: Milwaukee
Part Number: 02-04-1005
$6.80
In Stock
Jump To:
Frequently Purchased Together ?


Compatibility
This part will fit the following 31 machines
Milwaukee
5192-2 (SER 669-1001) Grinder View Diagrams & Manuals
5192-2 (SER 669A) Grinder View Diagrams & Manuals
5192-2 (SER 669B) Grinder View Diagrams & Manuals
5192-2 (SER 669C) Grinder View Diagrams & Manuals
5192-7 (SER 669-1001) Grinder View Diagrams & Manuals
5192 (SER 669-33651) Grinder View Diagrams & Manuals
5192 (SER 669A) Grinder View Diagrams & Manuals
5192 (SER 669B) Grinder View Diagrams & Manuals
5192 (SER 669C) Grinder View Diagrams & Manuals
5192 (SER 669D) Grinder View Diagrams & Manuals
5325 (SER 551-1001) Rotary Hammer View Diagrams & Manuals
5325 (SER 551-4000) Rotary Hammer View Diagrams & Manuals
2432-20 (SER C73A) 12 Volt Pex Expander View Diagrams & Manuals
5192 (SER 699-33651) D.I. Grinder View Diagrams & Manuals
5192 (SER 669-1001) D.I. Grinder View Diagrams & Manuals
5192 (SER 669-8001) D.I. Grinder View Diagrams & Manuals
5192 (SER 669-12000) D.I. Grinder View Diagrams & Manuals
5192 (SER 699A) D.I. Grinder View Diagrams & Manuals
5192 (SER 699B) D.I. Grinder View Diagrams & Manuals
5192 (SER 699C) D.I. Grinder View Diagrams & Manuals
5192 (SER 699D) D.I. Grinder View Diagrams & Manuals
5192 (SER 699E) D.I. Grinder View Diagrams & Manuals
5194 (SER 803-A) D.I. Grinder View Diagrams & Manuals
5194 (SER 803B) D.I. Grinder View Diagrams & Manuals
5194 (SER 803C) D.I. Grinder View Diagrams & Manuals
5194 (SER 803D) D.I. Grinder View Diagrams & Manuals
5194 (SER 803E) D.I. Grinder View Diagrams & Manuals
5194 (SER 803F) D.I. Grinder View Diagrams & Manuals
2432-20 (C62A) 12 Volt Pex Expander View Diagrams & Manuals
243220 12 Volt PEX Expander View Diagrams & Manuals
2432-22 12 Volt PEX Expander View Diagrams & Manuals
Show More Compatible Models
This item works with the following types of products:
- Grinder Parts
- Rotary Hammer Parts
This part replaces obsolete part #: 02-04-1015
Repair Videos ?
Watch the Repair Video for
Ball Bearing

Questions & Answers ?
Our customer Service team is at the ready daily to answer your part and product questions.

Ask our Team
We have a dedicated staff with decades of collective experience in helping customers just like you purchase parts to repair their products.
Does this fit my product?Questions & Answers for Ball Bearing
No questions have been asked yet
Customer Repair Instructions ?
All our customer repair instructions are solicited directly from other customers just like you who have purchased and replaced this exact part.
end grinder front bearing was worn out
Darin - May 9, 2022
Tool Type
Grinder
Difficulty
Easy
Time
15-30 minutes
Tools Used
Screwdriver, Pliers, Hammer
Followed video for repair with part purchase:
Removed head of end grinder
disassembled shaft and removed
removed bearings from case
installed new bearings
reinstalled shaft and lubricated
reattached head to motor
Removed head of end grinder
disassembled shaft and removed
removed bearings from case
installed new bearings
reinstalled shaft and lubricated
reattached head to motor
Did you find this story helpful?
Thanks for voting and helping fellow customers!
Shaft bearing sel distructed.
Ray - September 6, 2019
Tool Type
Grinder
Difficulty
Medium
Time
30-60 minutes
Tools Used
, star bits. bearing installation tool
Removed old bearings and brushes, reassembled and tested the DI grinder.
Did you find this story helpful?
Thanks for voting and helping fellow customers!
Bearing and housing wear causeing rough operation and noisey.
Ray - December 20, 2018
Tool Type
Grinder
Difficulty
Easy
Time
30-60 minutes
Tools Used
Screwdriver, Power Drill, #20 star driver bit
Replaced the replaced gear case, gear case cover and rear bearing.
Did you find this story helpful?
Thanks for voting and helping fellow customers!
Spindle shaft was broken at the collet
William - January 15, 2016
Tool Type
Grinder
Difficulty
Easy
Time
30-60 minutes
Tools Used
Screwdriver, Socket set, bench vise, custom sized punch, 5lb. sledgehammer
Removed the nose section from the tool. Removed the internal split ring from the nose of the unit. Tapped the old shaft out from the nose end. Using a long small diameter punch, knock the old nose bearing out. Apply a small amount of additional grease to the inside of the new bearing. Tap the new nose bearing into place & replace internal split ring. Using the Collet nut without the internal teeth, drive the new shaft into the new nose bearing. Taking the new gear end bearing & the drive gear you removed from the old shaft, drive them firmly onto the shaft. Check for ease of rotation & put some new grease in the cup where the gears mesh. Attach the rebuilt nose section to the body of tool, Tighten the 4 screws firmly. Replace Collet jaws in Collet nut and spin shaft , making sure there are no binds in the rotation. Plug tool in & check for any vibrations. You're ready to get back to work now.
Did you find this story helpful?
Thanks for voting and helping fellow customers!
Removing gear was a problem no clearence
Douglas - November 28, 2015
Tool Type
Grinder
Difficulty
Hard
Time
1-2 hours
Tools Used
Screwdriver, Wrench Set, heat to remove gear/ proper punch
Removing die grinder head easy 4 screws, should have proper tool for screws and a
spanned to remove recessed nut. The problem is there is no way to pull gear you have to heat
and drive the shaft out of the gear. Easy to remove bearings and replace, again the problem
in assembly is heating the gear and seating.
spanned to remove recessed nut. The problem is there is no way to pull gear you have to heat
and drive the shaft out of the gear. Easy to remove bearings and replace, again the problem
in assembly is heating the gear and seating.
Did you find this story helpful?
Thanks for voting and helping fellow customers!
OEM stands for Original Equipment Manufacturer and means the part you’re buying is sourced directly from the manufacturer who made your product. At eReplacementParts, we sell only genuine OEM parts, guaranteeing the part you’re purchasing is of better design and of higher quality than aftermarket parts.
Our product descriptions are a combination of data sourced directly from the manufacturers who made your product as well as content researched and curated by our content & customer service teams. This content is edited and reviewed internally before being made public to customers.
Our customer service team are at the ready daily to answer your part and product questions. We have a dedicated staff with decades of collective experience in helping customers just like you purchase parts to repair their products.
All our part reviews are solicited directly from other customers who have purchased this exact part. While we moderate these reviews for profanity, offensive language or personally identifiable information, these reviews are posted exactly as submitted and no alterations are made by our team.
All our customer repair instructions are solicited directly from other customers just like you who have purchased and replaced this exact part. While we moderate these reviews for profanity, offensive language or personally identifiable information, these reviews are posted exactly as submitted and no alterations are made by our team.
Based on data from past customer purchasing behaviors, these parts are most commonly purchased together along with the part you are viewing. These parts may be necessary or helpful to replace to complete your current repair.
All our installation videos are created and produced in collaboration with our in-house repair technician, Mark Sodja, who has helped millions of eReplacementParts customers over the last 13 years repair their products. Mark has years of experience in selling and repairing both commercial and residential products with a specialty in gas-powered equipment.
This data is collected from customers who submitted a repair instruction after replacing this exact part. Customers can rate how easy the repair was to complete and how long it took. We aggregate this data to provide a repair rating that allows customers to quickly determine the difficulty and time needed to perform their own repair.