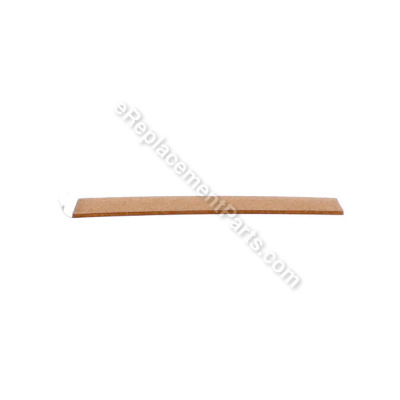


This genuine item is supplied by the original equipment manufacturer for use with Ridgid belt sanders. The backing pad is made of a thin material and is sold individually. When replacing this part a screwdriver might be required during the installation process. It may become broken and will need to be replaced.
Backing Pad 300674005
OEM part for: Ridgid
Part Number: 300674005
$3.99
In Stock
Jump To:
Frequently Purchased Together ?

Compatibility
This item works with the following types of products:
- Sander Parts
Customer Part Reviews ?
Average Rating (out of 5):
Click to filter by ratings:
5 stars
2
4 stars
0
3 stars
0
2 stars
0
1 stars
0
< PREV
- 1
Simple replacement
Ordered Friday, received Tuesday. Exact part with no hassle replacement.
Guest -
August 3, 2019
Verified Purchase
About as simple as it gets. Great price on OEM Part.
My sander backing plate was worn through and shredding belts. Looked elsewhere for a replacement, but they lacked the cork heat sink on the back side. So glad I found eReplacementParts. They have the OEM parts I need to repair my equipment and keep things in working order. I share your sight with friends and family, and will be ordering more parts for other damaged tools soon. Keep up the good work!
Michael -
May 23, 2019
Verified Purchase
t
t
t -
t days ago
Verified Purchase
eReplacementParts Team
t
Questions & Answers ?
Our customer Service team is at the ready daily to answer your part and product questions.

Ask our Team
We have a dedicated staff with decades of collective experience in helping customers just like you purchase parts to repair their products.
Does this fit my product?Questions & Answers for Backing Pad
No questions have been asked yet
Customer Repair Instructions ?
All our customer repair instructions are solicited directly from other customers just like you who have purchased and replaced this exact part.
Backer pad was worn out and shredding belts
Michael - May 23, 2019
Tool Type
Sander
Difficulty
Easy
Time
Less than 15 minutes
Tools Used
Screwdriver
Parts Used
1. Remove two short screws from leading edge of plate with a Torx 20 screwdriver or bit. Be careful not to lose the lock washers.
2. My new sander plate had a big inventory sticker on it. That label must be removed before installation. Take your time and try not to shred it. Use PB Blaster or WD40 or similar lubricating agent to remove all adhesive from the plate. Avoid getting the lube on the cork side. Wipe it clean after the adhesive is removed.
3. Install the new plate with original two screws. Hand tighten. Don't use a power driver or you risk stripping the aluminum base. (If screws loosen during use, put a drop of medium strength thread locker on the threads and reinstall.)
4. Put on a new sanding belt and you're back in business.
Did you find this story helpful?
Thanks for voting and helping fellow customers!
Old plate was worn thru
Jason - July 20, 2018
Tool Type
Sander
Difficulty
Easy
Time
Less than 15 minutes
Tools Used
Screwdriver
Parts Used
Simple, remove two screws and plate, replace with new one! Easy
Did you find this story helpful?
Thanks for voting and helping fellow customers!
The backing pad on the Ridgid was worn out due to use
Thomas - June 21, 2018
Tool Type
Sander
Difficulty
Easy
Time
Less than 15 minutes
Tools Used
Screwdriver, Torx screwdriver
Parts Used
1. Removed the sanding belt
2. Removed the two torx screws holding the old pad to the sander
3. Installed the new backing pad with the torx screws just removed
4. Re-installed the sanding belt and went back to using the belt sander
It was an easy fix and resolved the issue with the sanding belts tearing due to getting caught on the worn out backing pad.
Did you find this story helpful?
Thanks for voting and helping fellow customers!
The backing pad had worn down on the center rear and began tearing up the belts.
Shane - June 29, 2017
Tool Type
Sander
Difficulty
Easy
Time
Less than 15 minutes
Tools Used
Screwdriver
Parts Used
Removed 2 screws, took the old pad off and put the new one on. I unscrewed the tracking knob and removed it then I screwed the new knob in.
Did you find this story helpful?
Thanks for voting and helping fellow customers!
Bottom pad worn
John - January 6, 2017
Tool Type
Sander
Difficulty
Hard
Time
Less than 15 minutes
Tools Used
, Torx bit
Parts Used
Remove two screws from the old cork and steel pad and remove it
Install the new pad with the two screws
Install the new pad with the two screws
Did you find this story helpful?
Thanks for voting and helping fellow customers!
Release lever cracked, backing pad wore down, idle arm support was damaged
Em - December 5, 2016
Tool Type
Sander
Difficulty
Medium
Time
30-60 minutes
Tools Used
Socket set, Torx
Removed the worn parts. Had trouble removing the cam-arm and cam from the Idle arm support. Lube on the cam helped. It's best to set the cam in place before adding the cam-shaft by compressing the release spring. After that, reassembly is straight forward.
Did you find this story helpful?
Thanks for voting and helping fellow customers!
When I purchased this sander these parts were missing. It has been a few years since I purchased this product at a major retail store (as is) but I knew the brand well and that parts could be bought.
Wayne - November 14, 2016
Tool Type
Sander
Difficulty
Medium
Time
15-30 minutes
Tools Used
Screwdriver
1. I replaced the brushes and installed the new keepers.
2. Replaced the front knob handle although it did not have the tightening screw (sold separately)
3. Installed the backing pad and belts (wa-la) works like a charm.
2. Replaced the front knob handle although it did not have the tightening screw (sold separately)
3. Installed the backing pad and belts (wa-la) works like a charm.
Did you find this story helpful?
Thanks for voting and helping fellow customers!
OEM stands for Original Equipment Manufacturer and means the part you’re buying is sourced directly from the manufacturer who made your product. At eReplacementParts, we sell only genuine OEM parts, guaranteeing the part you’re purchasing is of better design and of higher quality than aftermarket parts.
Our product descriptions are a combination of data sourced directly from the manufacturers who made your product as well as content researched and curated by our content & customer service teams. This content is edited and reviewed internally before being made public to customers.
Our customer service team are at the ready daily to answer your part and product questions. We have a dedicated staff with decades of collective experience in helping customers just like you purchase parts to repair their products.
All our part reviews are solicited directly from other customers who have purchased this exact part. While we moderate these reviews for profanity, offensive language or personally identifiable information, these reviews are posted exactly as submitted and no alterations are made by our team.
All our customer repair instructions are solicited directly from other customers just like you who have purchased and replaced this exact part. While we moderate these reviews for profanity, offensive language or personally identifiable information, these reviews are posted exactly as submitted and no alterations are made by our team.
Based on data from past customer purchasing behaviors, these parts are most commonly purchased together along with the part you are viewing. These parts may be necessary or helpful to replace to complete your current repair.
All our installation videos are created and produced in collaboration with our in-house repair technician, Mark Sodja, who has helped millions of eReplacementParts customers over the last 13 years repair their products. Mark has years of experience in selling and repairing both commercial and residential products with a specialty in gas-powered equipment.
This data is collected from customers who submitted a repair instruction after replacing this exact part. Customers can rate how easy the repair was to complete and how long it took. We aggregate this data to provide a repair rating that allows customers to quickly determine the difficulty and time needed to perform their own repair.