


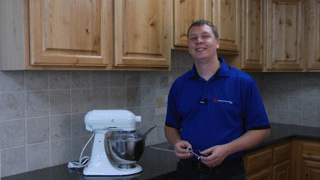
Why Read This Article?
Finish Nailer Repair - Replacing the Driver Guide (Ridgid Part # 79004001022)
Article Breakdown
Finish Nailer Repair - Replacing the Driver Guide (Ridgid Part # 79004001022)
Video
Tools & Materials
- Phillips-head screwdriver
- Needle-nose pliers
Safety Guidelines
 For this repair we used a KitchenAid stand mixer. The circuit boards differ by mixer type so before you begin the repair, make sure you find the right board for your mixer by using our KitchenAid product locator.
Replacing the Board
Before you remove the board you should note where each of the four board wires goes. This will save you a bit of time, though KitchenAid does label the wires in case your forget to check them.
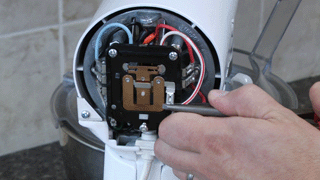
1. Remove the rear cover
Remove the screw that secures the rear cover. Then you can remove the rear cover.
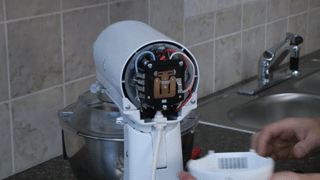
2. Remove the phase board screw
The phase board is fastened by a single screw. Remove the screw to free the phase board.
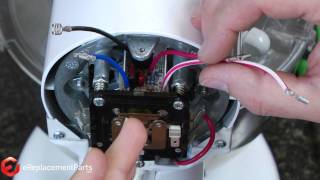
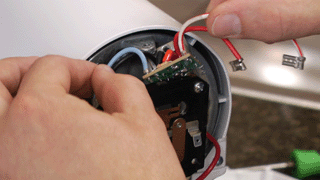
3. Disconnect the wires
Use a pair of needle-nose pliers to disconnect the wire connections.
4. Remove the board
Now you can remove the board from the mixer. It fits snugly, so you will most likely need to tilt it up over the control board to slide it out.
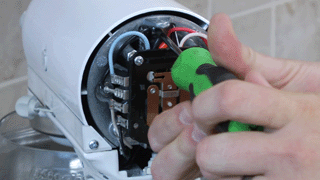
5. Install the new board
Now you can install the new board. You will need to slide it in and down to clear the control board.
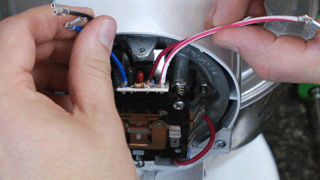
Then you can set it in place and fasten the screw.
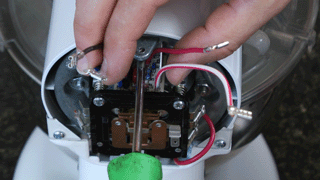
6. Connect the wires
Connect the four wires to the mixer. If you forget where each wire goes, KitchenAid labels them as follows: RW for the red and white wire, RD for the red wire, BK for the black wire, and BL for the blue wire.

7. Replace the cover
Now just replace the cover and fasten the screw to finalize the repair.
[Back to Top]
Conclusion
Replacing the circuit board on a KitchenAid mixer is an easy repair that anyone comfortable with basic repairs can perform in about 20 minutes. The repair only requires a screwdriver and pliers and will save you a lot of money compared to the repair shop.
Before you begin any appliance repair, be sure to get the right appliance parts with our easy-to-use parts finder.
[Back to Top]
What We're About
