


Why Read This Article?
Finish Nailer Repair - Replacing the Driver Guide (Ridgid Part # 79004001022)
Article Breakdown
Finish Nailer Repair - Replacing the Driver Guide (Ridgid Part # 79004001022)
Video

Tools & Materials
- a scwrench
or
- a wrench
- a screwdriver
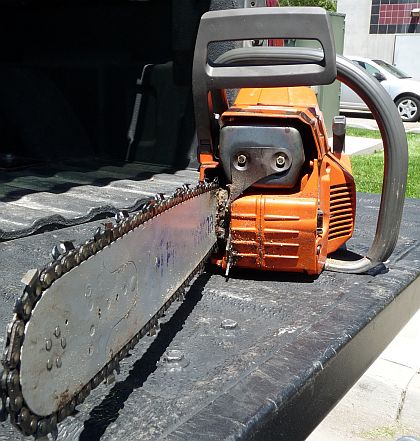 Chainsaw chain tension should be checked and tightened often. We explain simple steps for how to tension a chainsaw chain below.
Correct Chainsaw Chain Tension
Chainsaw chain tension should be checked and tightened often. We explain simple steps for how to tension a chainsaw chain below.
Correct Chainsaw Chain Tension
Before explaining the tensioning steps, we should explain what proper chainsaw chain tension looks like.
Good Tension-
A properly-tensioned chainsaw chain should still be just a little loose on the chainsaw guide bar, but the chain needs to be tight enough that you can't pull the drive links out of the bar nose.
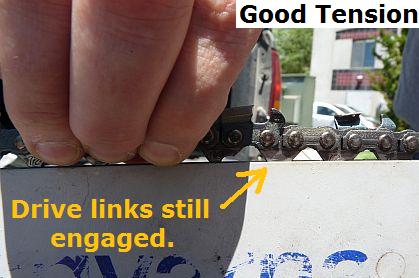
To determine whether or not your chainsaw's chain tension needs to be adjusted, pull the chain away from the guide bar a little to see if the drive links remain engaged or not.
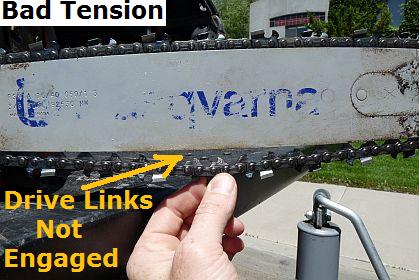
Bad Tension-
A loose chainsaw chain will look like the one pictured below when it is pulled away from the guide bar. If the chain's drive links are disengaged from the guide bar when pulled, then it's time to tighten it up.
Chainsaw chains can also be overtightened.
There should be at least a little play in the chain, just not enough for the drive links to leave the guide bar. Tightening a chainsaw chain too tightly risks breaking it during operation. [Back to top]
Steps to Tension a Chainsaw Chain
Even though tensioning a chainsaw chain is easy and takes less than a minute, it's important to do each step carefully and correctly. Forgetting to do something like lift the guide bar nose when tightening it can seriously affect your tool.
Most chainsaws come with "scwrench" (screwdriver/wrench) that matches their side plate nut and tension adjustment screw size.
1. Loosen the nuts on the guide bar side panel.
This will give the guide bar and chain the room they need to be adjusted.
The brakes of some chainsaws are attached directly to the side panel. If this is the case, make sure to unlock the brake before removing the side panel.
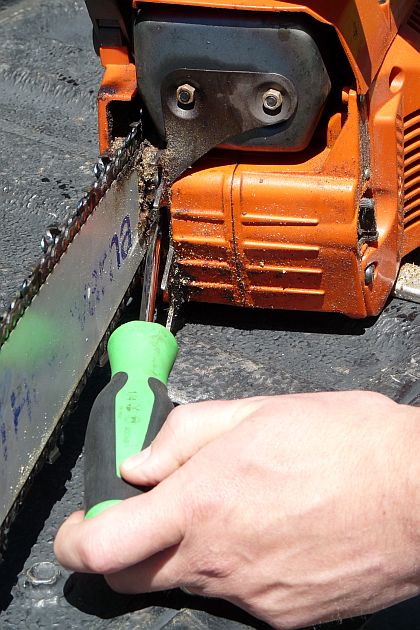
2. Adjust the tensioning screw.
Tension adjustment screws are located to the side of chainsaw guide bars.

Tightening the screw will tighten the chain, and loosening will loosen the chain. Double check the chain to see that it's at the correct tightness before moving on.
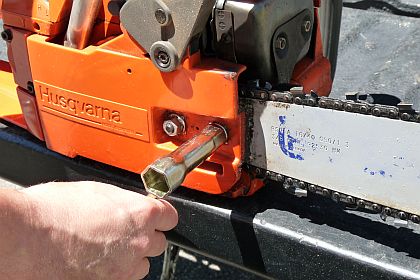
3. Tighten the guide bar side panel nuts.
- It is very important to lift the nose of the chainsaw while tightening the nuts that secure the side panel and guide bar (see picture below).
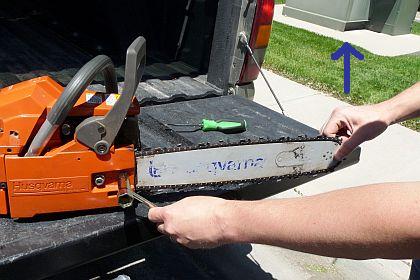
It's just that easy once the know-how is in place! Your chainsaw chain is now properly tensioned.
[Back to top]
Conclusion
Keep those chainsaws and chainsaw chains running the best condition possible. Our power tool and equipment information tools and parts replacement service is here to help you get the most out of your equipment investments.
Visit our Chainsaw Chains page to our inventory of available replacement chains and other chainsaw accessories. For chainsaw repairs, type your saw's model number in the search field at the top of this page.
eReplacementParts.com stocks thousands of parts for many major chainsaw brands, including Echo chainsaw parts.
[Back to top]
What we're about.
