Why Read This Article?
Finish Nailer Repair - Replacing the Driver Guide (Ridgid Part # 79004001022)
Article Breakdown
Finish Nailer Repair - Replacing the Driver Guide (Ridgid Part # 79004001022)
Tools & Materials

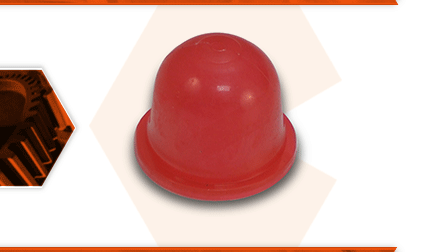
The purge bulb, more commonly called the primer bulb, manually pumps fuel into the carburetor, which purges the air out of the carburetor. Without a functioning purge bulb, you must pull the starter rope multiple times, until the carburetor diaphragm can pump enough fuel into the carburetor for the engine to start. Over time, the purge bulb will harden and crack, due to its constant exposure to fuel. Once cracked, it will no longer pump fuel into the carb, causing a hard-starting engine.
Let's get started.
REMOVING THE PURGE BULB 1. Drain the fuel.
a. Drain any excess fuel from the fuel tank.
2. Remove the air filter.
a. Depress the tab on the side of the air filter cover to disengage the catch.
b. Pivot the air filter cover away from the air filter base.
c. Remove the air filter cover from the blower.
d. Remove the air filter from the base.
3. Remove the carburetor.
a. Remove the two screws securing the air filter base (and the carburetor) to the engine.
b. Remove the air filter base from the carburetor.
c. Note the location of the two fuel lines (on the carburetor) to simplify reinstallation.
d. Use long-nosed pliers to disconnect the fuel lines from the carburetor.
e. Remove the carburetor from the unit.
4. Remove the purge bulb.
a. Remove the two screws securing the purge bulb mounting plate to the carburetor.
b. Remove the purge bulb mounting plate from the carburetor. Use a small screwdriver to pry the plate away from the carburetor (if necessary).
c. Remove the purge bulb from the carburetor (or from the mounting plate).
INSTALLING THE NEW PURGE BULB
5. Install the purge bulb.
a. Install the new purge bulb into the mounting plate.
b. Install the purge bulb mounting plate (and the purge bulb) onto the carburetor.
c. Secure the purge bulb mounting plate with the screws.
REASSEMBLING THE UNIT
6. Reinstall the carburetor.
a. Connect the two fuel lines to the carburetor (in their original configuration).
b. Thread the mounting screws through the air filter base.
c. Install the carburetor onto the mounting screws (on the air filter base).
d. Install the air filter base (and carburetor) onto the engine.
e. Secure the air filter base (and carburetor) with the screws.
7. Reinstall the air filter.
a. Install the air filter into the air filter base.
b. Align the hinge-tab on the air filter cover with the hinge-slot on the air filter base.
c. Pivot the air filter cover into position (over the air filter) and press the cover firmly against the base to engage the locking tab.


