


Why Read This Article?
Finish Nailer Repair - Replacing the Driver Guide (Ridgid Part # 79004001022)
Article Breakdown
Finish Nailer Repair - Replacing the Driver Guide (Ridgid Part # 79004001022)
Video

Tools & Materials

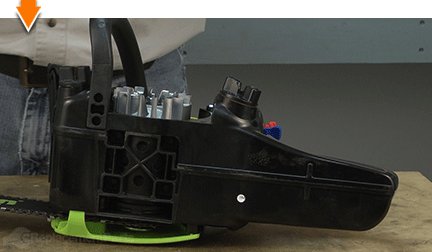
Chainsaw need a checkup? It's time to face the fix. Whether you are a legendary lumberjack or a weekend woodworker, eReplacementParts.com provides the parts, procedures and facts you need to fearlessly fix what fails you.
Is there a pile of rope lying next to your engine's starter? If so, you probably need a new starter spring. The starter spring attaches to the starter pulley. When you pull the starter rope, it is the starter spring that winds the rope back into the starter.
After years of use, the starter spring will wear. Most commonly, the spring will break at either end (where it attaches to either the pulley or the housing). This wear can be accelerated by using excessive force when pulling on the starter rope, or if the starter rope is routinely pulled out to its full length.
When the starter spring breaks, it won't retract the rope back into the starter. This article provides step-by-step instructions for replacing the starter recoil spring on a Poulan chainsaw.
Let's get started.
 REMOVING THE STARTER RECOIL SPRING [top]
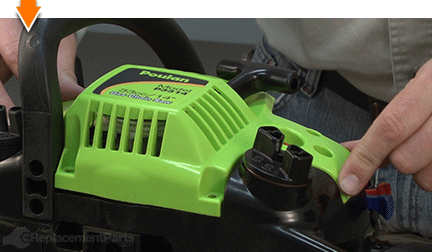
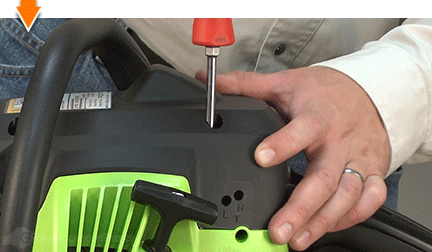
1. Remove the top cover.
REMOVING THE STARTER RECOIL SPRING [top]
1. Remove the top cover.
Remove the (3) screws securing the top cover to the saw.
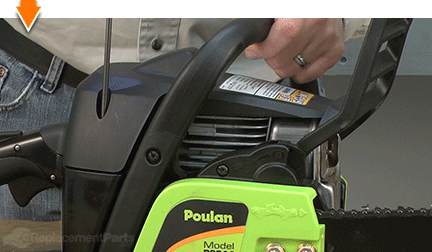
Lift the top cover away from the saw.
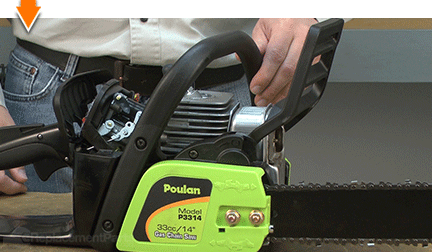
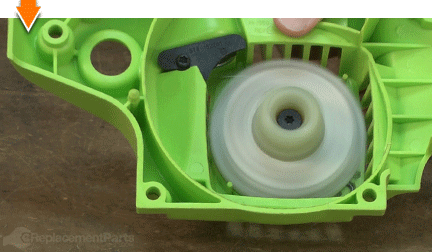
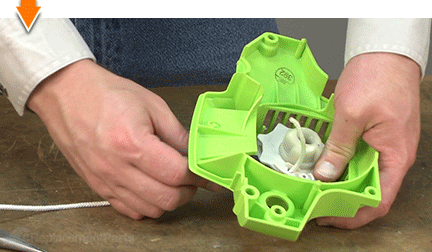
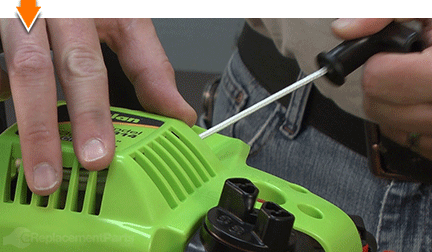
2. Remove the starter assembly.
Remove the (4) screws securing the starter assembly to the (side) of the saw.
Remove the starter assembly from the saw.
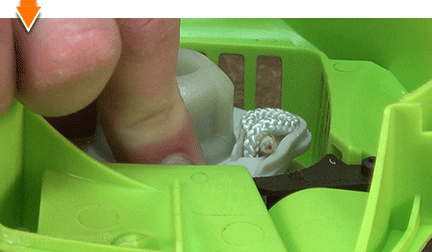
3. Discharge the starter recoil spring.
Pull (and hold) the starter rope (about halfway) out of the starter assembly (as if starting the engine).
Fold the starter rope in half and tie a (temporary) knot in the rope as close to the starter housing as possible.
Allow the rope to recoil into the starter assembly until the temporary knot engages the starter housing.
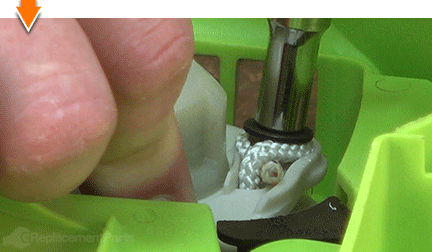
Slide the starter handle away from the knotted-end of the starter rope.
Untie the knot in the end of the starter rope (or use scissors to cut the knot, if necessary).
Slide the starter handle off the starter rope.
Untie the temporary knot in the middle of the starter rope.
Release the starter rope; allow the rope to recoil all the way into the starter housing.
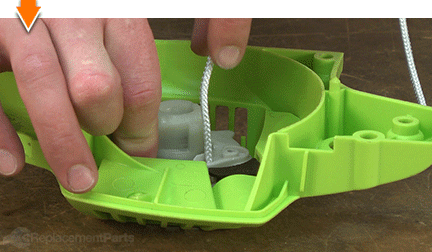
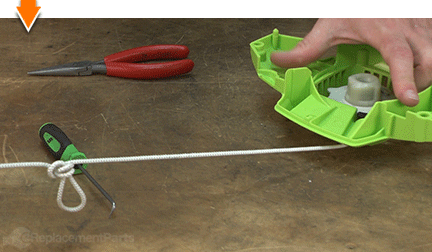
4. Remove the starter rope from the starter pulley.
Unwind the (entire length of) starter rope from the starter pulley.
Remove the screw securing the starter rope to the pulley.
Remove the starter rope from the starter pulley.
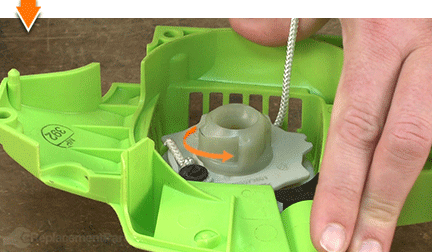
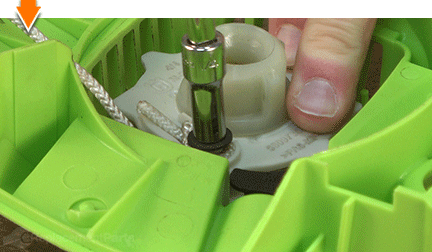
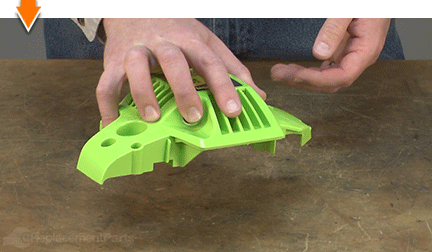
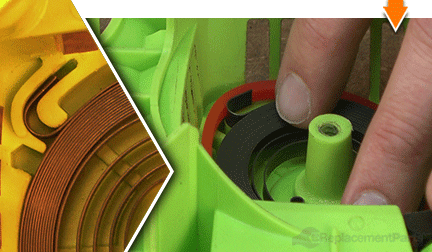
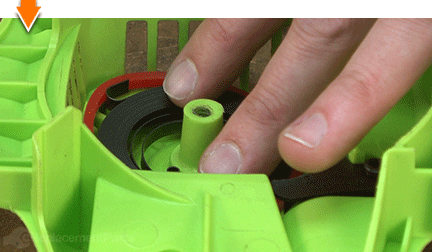
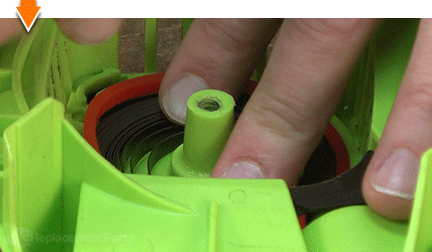
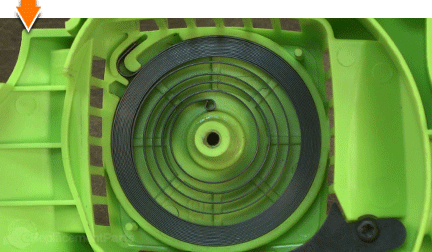
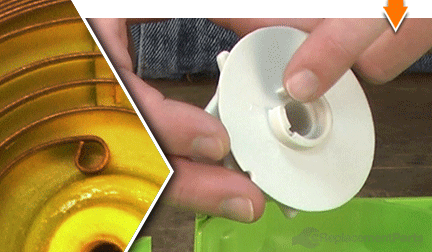
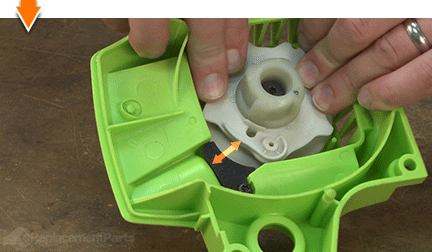
5. Remove the starter hub and pulley.
Remove the screw securing the hub and pulley to the starter housing.
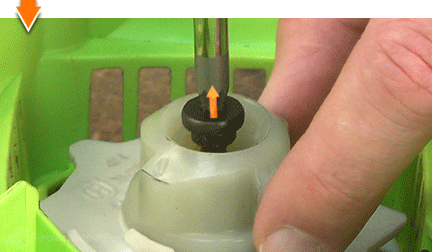
Lift the starter hub away from the starter pulley.
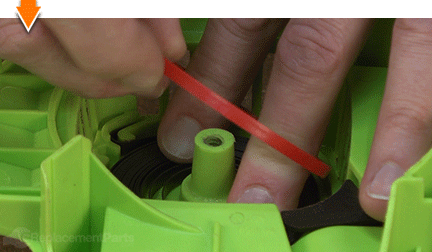
Lift the assist-spring away from the starter pulley.
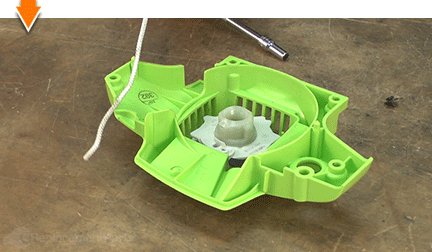
Slowly lift the starter pulley away from the starter housing, ensuring that the starter spring remains seated within the housing. Do not lift the starter spring out of the housing at this point. Doing so may cause the spring to rapidly expand in an uncontrolled (and potentially dangerous) manner.
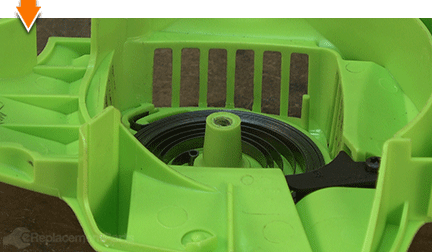
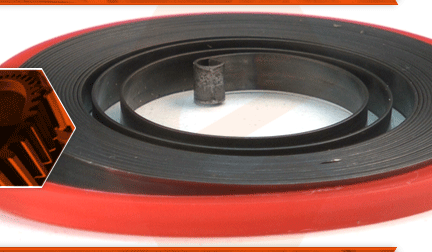
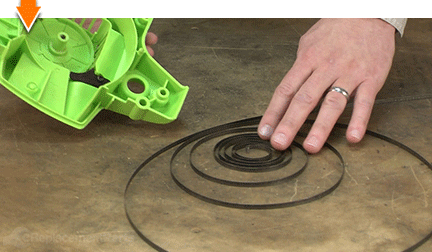
6. Remove the starter spring from the starter housing.
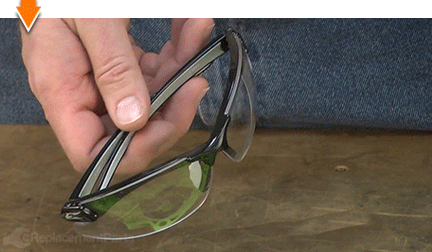
Wear safety glasses and protective gloves.

Rotate the starter assembly so that the starter spring faces the work surface.
Firmly tap (and hold) the housing against the work surface to disengage the starter spring. Caution: Once disengaged, the starter spring will expand significantly (as much as 3 or 4 feet in diameter). Often, the spring will try to "escape" from the housing at the least secure point; so it is important to maintain pressure on the housing (against the work table) until the spring is safely decompressed.
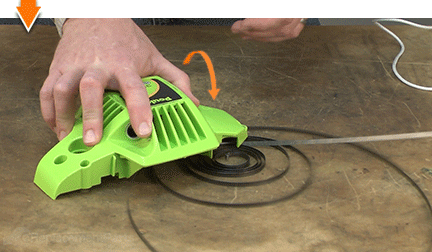
Carefully remove the starter spring from the housing.
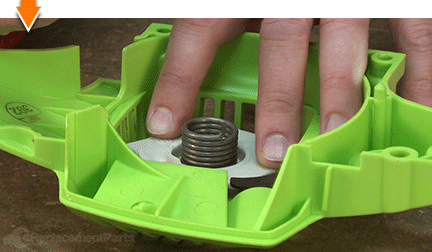
INSTALLING THE NEW STARTER RECOIL SPRING [top] 7. Install the starter spring.
Wear safety glasses and protective gloves! While the new starter spring is compressed and contained by the outer band, the band is not a reliable safety device. Be very careful handling (and installing) the new spring to prevent it from prematurely expanding.
Align the outer hook on the new starter spring with the slot in the starter housing, and lay the new starter spring into the housing.
Apply downward (and constant) pressure to the spring.
Use long-nosed pliers to press the hook into the slot on the housing.

Continue to maintain downward pressure on the new starter spring while slowly allowing the spring to expand into the housing.
Once the spring has expanded slightly, remove the compression band.
Continue allowing the new starter spring to decompress (rotate) until it stops rotating on its own.
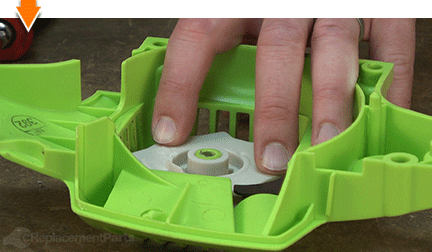
REASSEMBLING THE UNIT [top] 8. Reinstall the starter pulley and hub.
Align the slot on the bottom of the starter pulley with the tab on the inside of the starter spring.
Install the starter pulley into the starter housing, and rotate (or rock) the pulley slightly until the slot on the pulley engages the tab on the spring.
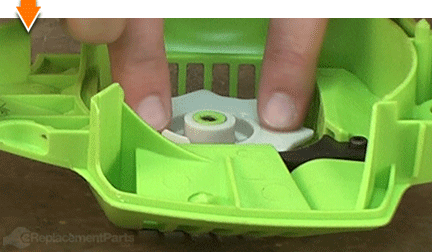
Install the assist spring onto the starter pulley, ensuring that the stem on the spring engages the hole on the pulley.
Install the starter hub over the starter assist spring, ensuring that the upper stem on the assist spring aligns with the hole on the hub.
Secure the starter pulley and hub to the starter housing with the screw.
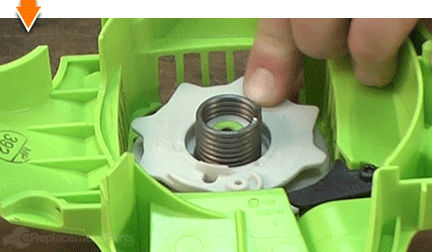
9. Recoil the starter spring.
Maintain a firm grip on the starter pulley while rotating it in a clockwise direction. Be careful not to release the pulley during this step. Doing so can result in injuries to your fingertips.
Continue rotating the starter pulley in a clockwise direction until it cannot be rotated any further.
Once the spring is fully tensioned; rotate the pulley in a counter-clockwise direction until the hole on the pulley (for the starter rope) aligns with the eyelet in the starter housing. Do not release the pulley at this point.
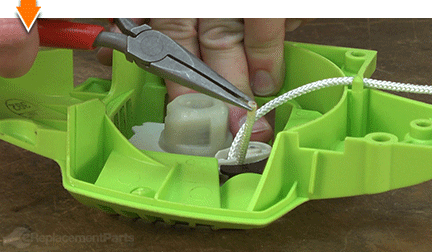
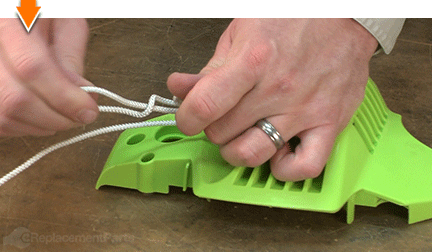
10. Reinstall the starter rope.
Keep pressure on the starter pulley (to prevent it from uncoiling), and thread the end of the starter rope (from top to bottom) through the opening in the starter pulley.
Use long-nosed pliers to extract the starter rope from the bottom of the starter pulley.
Thread the end of the starter rope through the eyelet on the starter housing (from inside to outside).
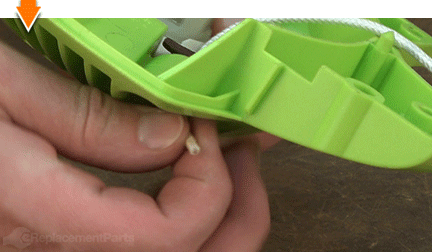
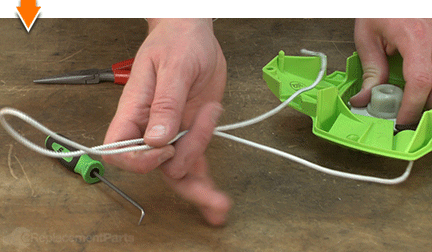
Pull the starter rope through the starter housing until approximately two inches of rope remain exposed above the starter pulley.
Loop the exposed portion of the starter rope around itself and tuck the loop into the groove on the starter pulley.
Secure the starter rope to the starter pulley with the screw. Do not allow the starter pulley to unwind at this point.
11. Reinstall the starter handle.
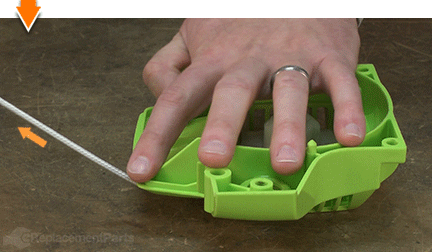
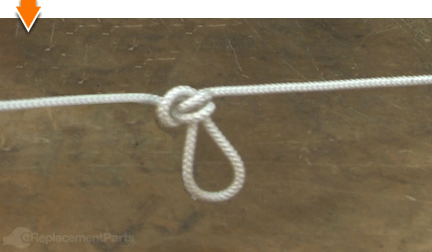
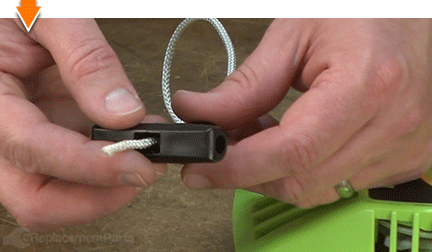
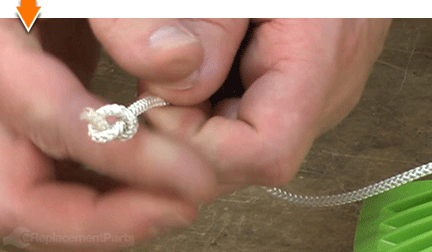
Fold the starter rope in half and tie a (temporary) knot in the rope.
Allow the rope to recoil into the starter assembly until the temporary knot engages the starter housing.

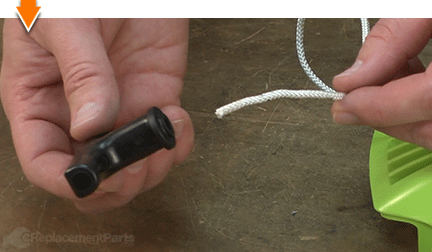
Thread the starter rope through the center of the starter handle.
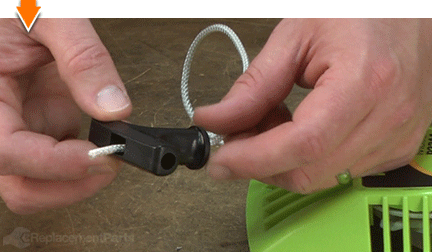
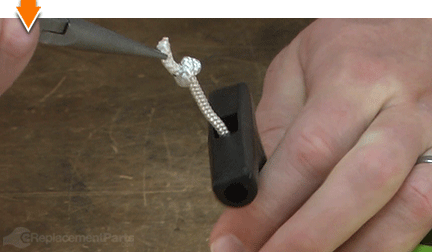
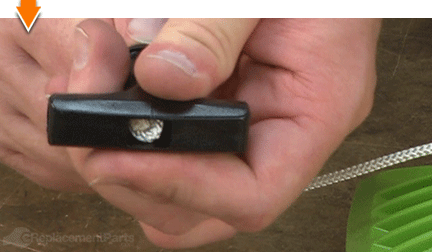
Tie an overhand knot in the end of the starter rope.
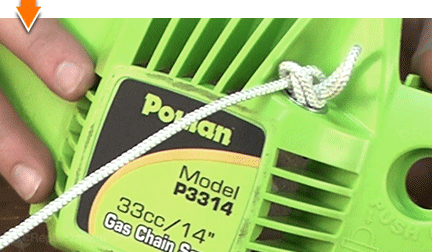
Tuck the knot into the recess in the top of the starter handle.
Untie the temporary knot in the middle of the starter rope.
Allow the rope to recoil all the way into the starter housing.

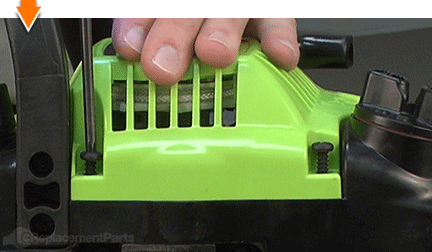
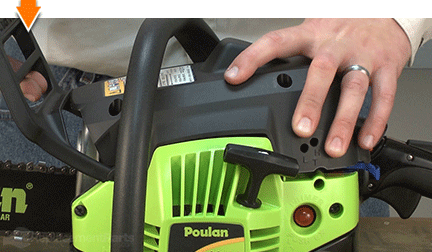
12. Reinstall the starter assembly.
Install the starter assembly to the engine.
Pull the starter rope slowly until the flywheel engages the starter assembly.
Secure the starter assembly to the engine with the (4) screws.
13. Reinstall the top cover.
Install the top cover onto the saw.
Secure the top cover with the (3) screws.

Do-it-yourself repairs like these are easier than you might think: From lawn machines to cordless drills, kitchen mixers to outdoor grills. Our "how-to" articles walk you through each repair from start to finish.
So, doing-it-yourself means never having to do it alone.
