


Why Read This Article?
Finish Nailer Repair - Replacing the Driver Guide (Ridgid Part # 79004001022)
Article Breakdown
Finish Nailer Repair - Replacing the Driver Guide (Ridgid Part # 79004001022)
Video

Tools & Materials


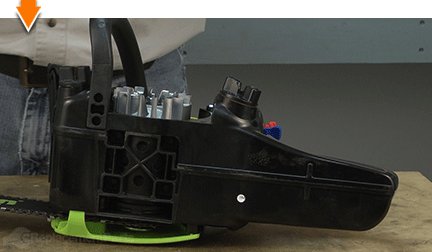
Chainsaw need a checkup? It's time to face the fix. Whether you are a legendary lumberjack or a weekend woodworker, eReplacementParts.com provides the parts, procedures and facts you need to fearlessly fix what fails you.
Does it take forever to get your engine started? You just might need a new purge bulb. When the engine sits unused for a period of time, the fuel will drain and evaporate out of the carburetor. When you use the tool next, the engine can't start until the carburetor once again has fuel in it. The purge bulb (more commonly called the primer bulb) manually pumps fuel into the carburetor, which purges the air out of the carburetor.
Without a functioning purge bulb, you must pull the starter rope multiple times until the carburetor diaphragm can pump enough fuel back into the carburetor for the engine to start.
Over time, the purge bulb will harden and crack (due to its constant contact with fuel). Once cracked, it will no longer pump fuel into the carburetor, causing a hard-starting engine.
This article provides step-by-step instructions for replacing the primer (purge bulb) on a Poulan chainsaw.
Let's get started.
 REMOVING THE PRIMER BULB [top]
1. Drain the fuel.
REMOVING THE PRIMER BULB [top]
1. Drain the fuel.
Drain any excess fuel from the tank.
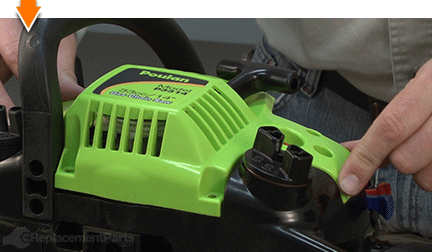
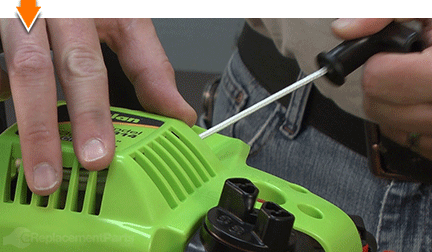
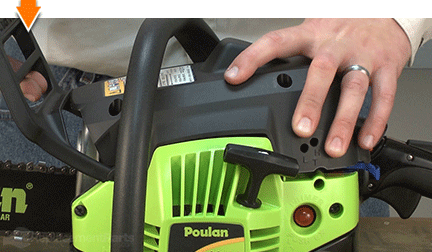
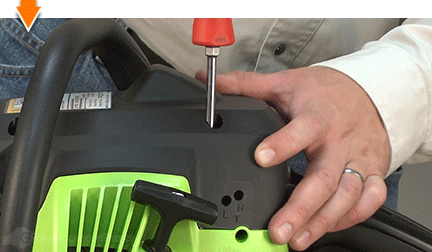
2. Remove the top cover.
Remove the (3) screws securing the top cover to the saw.
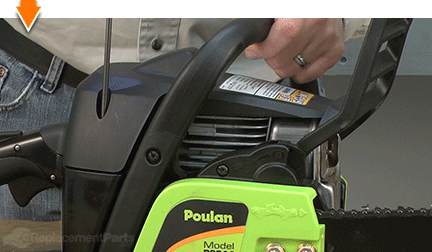
Lift the top cover away from the saw.
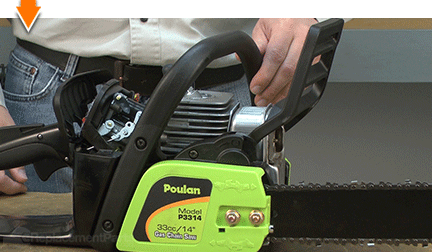
3. Remove the starter assembly.
Remove the (4) screws securing the starter assembly to the (side) of the saw.
Remove the starter assembly from the saw.
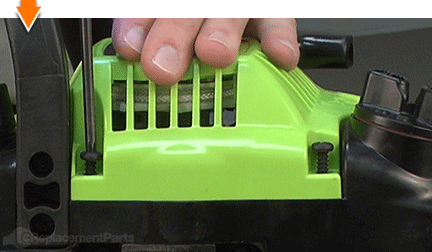
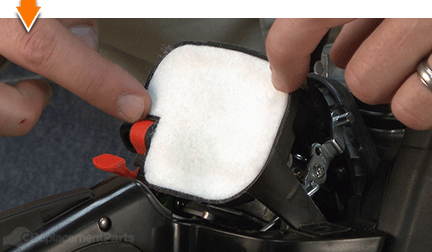
4. Remove the air filter housing.
Remove the air filter cover.
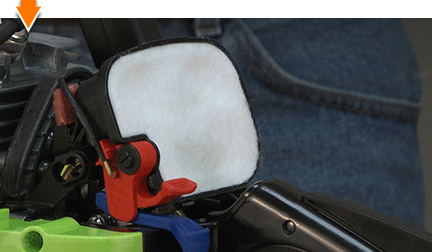
Remove the air filter from the housing.
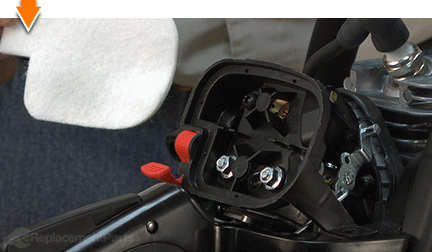
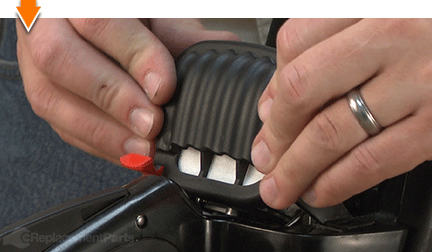
Remove the (1) screw securing the air filter housing to the engine.

Remove the (2) nuts securing the air filter housing to the engine.
Lift the air filter housing away from the carburetor assembly.

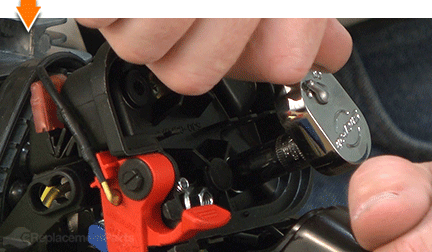
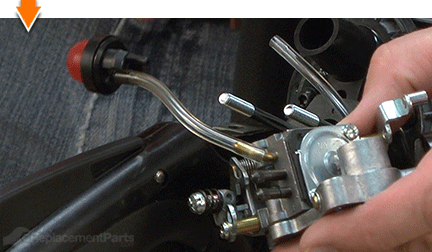
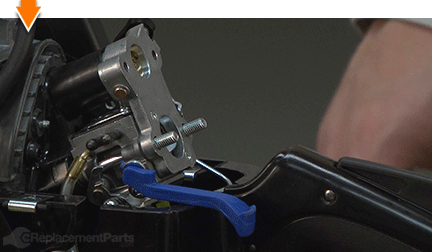
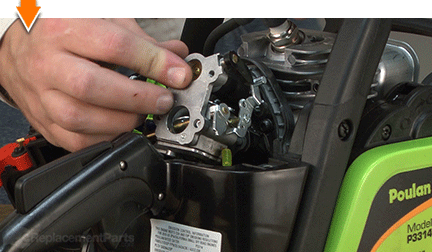
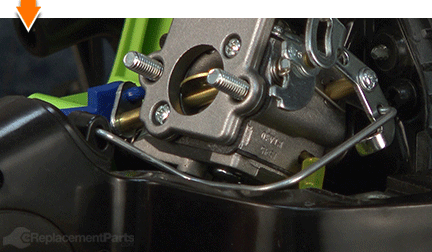
5. Remove the carburetor.
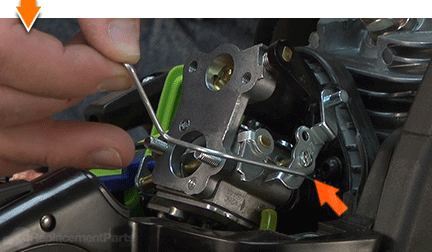
Remove the choke lever from the carburetor.
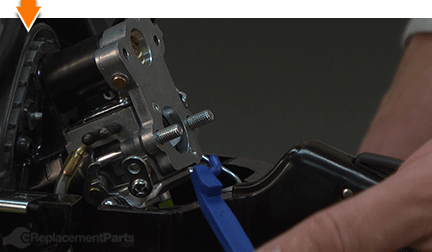
Disconnect the (primer-side) fuel line from the carburetor.
Pull and hold the throttle trigger to expose the throttle linkage attachment point (on the trigger).
Disconnect the linkage from the throttle trigger.
Disconnect and remove the throttle linkage from the carburetor.

Slide the carburetor assembly off the mounting bolts and away from the engine.

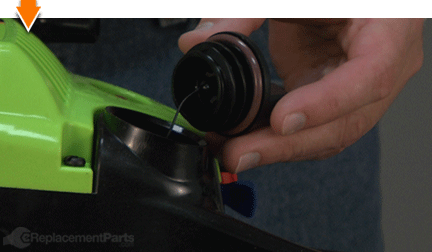
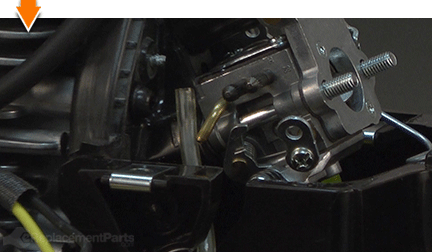
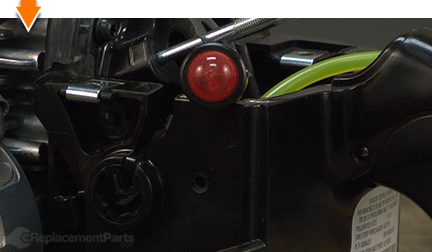
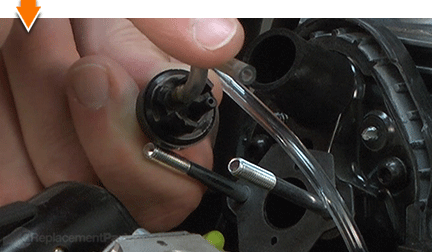
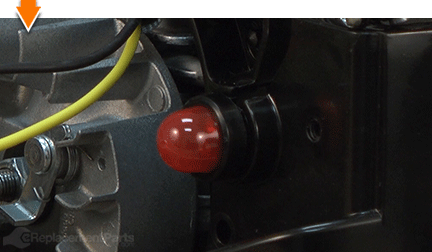
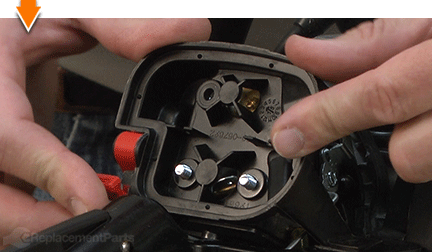
6. Remove the purge bulb.
Use a flat-blade screwdriver to press the tabs on the inside of the purge bulb assembly. This will release the purge bulb from the housing.
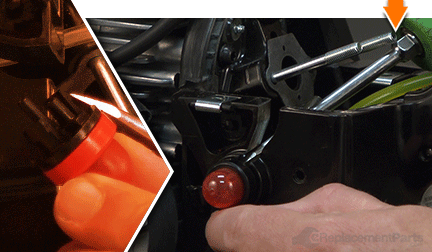
Slide the purge bulb assembly out of the engine housing.
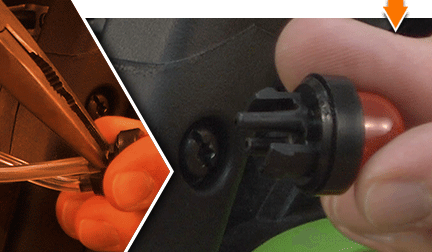
Use long-nosed pliers to disconnect the (two) fuel lines from the purge bulb.
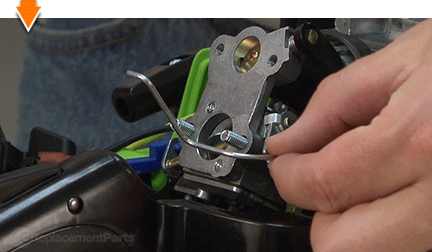
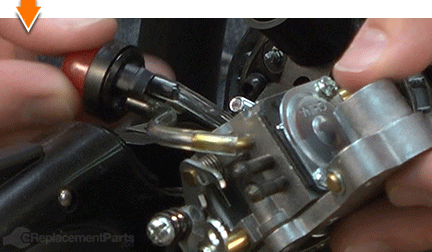
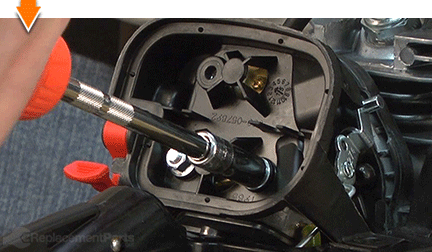
INSTALLING THE NEW PRIMER BULB [top] 7. Connect the purge bulb.
Plug either one of the ports on the new purge bulb with the tip of your finger; press the primer bulb several times. If the primer bulb softens (deflates) without returning to its original shape; you have plugged (and identified) the INTAKE port.
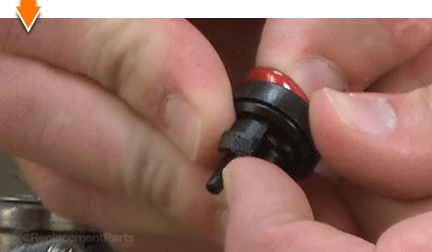
If the primer bulb hardens (and wont allow further priming); you have plugged (and identified) the RETURN port.

Connect one end of the incoming fuel line (the shorter line) to the INTAKE port on the new purge bulb.
Connect the other end of the INCOMING fuel line to the carburetor.
Connect the FUEL RETURN line to the RETURN port on new purge bulb.
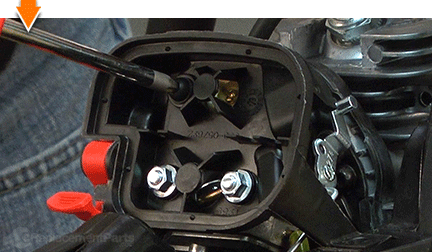
8. Install the purge bulb.
Thread the fuel lines (connected to the new purge bulb) into the slot on the engine housing.
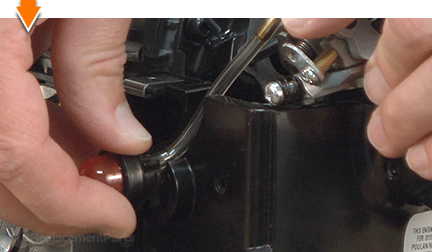
Press the new purge bulb into the housing until the plastic tabs engage the housing (the assembly usually snaps into place).
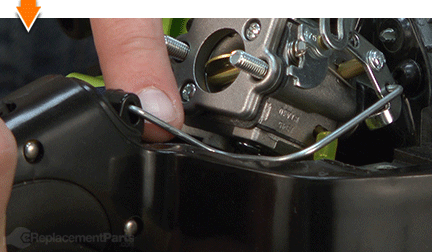
REASSEMBLING THE UNIT [top] 9. Reinstall the carburetor.
Install the choke lever onto the carburetor.
Slide the carburetor onto the two mounting posts on the engine.
Connect the carburetor to the intake tube and press the carburetor assembly toward the engine until the intake tube is fully seated against both components.

Connect the throttle linkage to the carburetor linkage.
Pull and hold the throttle trigger to expose the attachment point for the trigger-portion of the throttle linkage.

Connect the throttle linkage to the throttle trigger.
10. Reinstall the air filter housing.
Slide the air filter housing over the carburetor mounting posts.
Secure the air filter housing to the engine with the (2) nuts.
Secure the air filter housing to the carburetor with the (1) screw.
Install the air filter.
Install the air filter cover.
11. Reinstall the starter assembly.
Install the starter assembly to the engine.
Pull the starter rope slowly until the flywheel engages the starter assembly.
Secure the starter assembly to the engine with the (4) screws.
12. Reinstall the top cover.
Install the top cover onto the saw.
Secure the top cover with the (3) screws.

Do-it-yourself repairs like these are easier than you might think: From lawn machines to cordless drills, kitchen mixers to outdoor grills. Our "how-to" articles walk you through each repair from start to finish.
So, doing-it-yourself means never having to do it alone.
