


Why Read This Article?
Finish Nailer Repair - Replacing the Driver Guide (Ridgid Part # 79004001022)
Article Breakdown
Finish Nailer Repair - Replacing the Driver Guide (Ridgid Part # 79004001022)
Video

Tools & Materials

Trimmer out of whack? It's time to face the fix. Whether you are a legendary landscaper or a weekend weed whacker, eReplacementParts.com provides the parts, procedures and facts you need to fearlessly fix what fails you.
The starter grip is the handle that attaches to the starter rope. It is the handle you pull to start the engine. After years of use, the grip can fatigue, causing it to crack or break. It can also be damaged in an accident, such as dropping the tool.
This article provides step-by-step instructions for removing and installing the starter grip on a Ryobi string trimmer.
Let's get started.
 REMOVING THE STARTER GRIP [top]
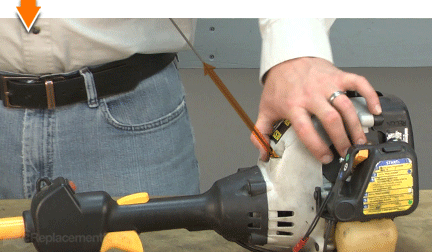
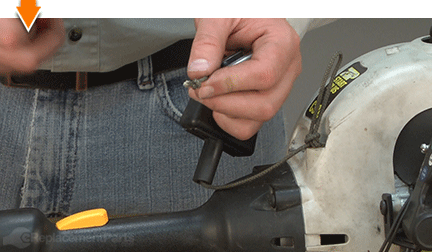
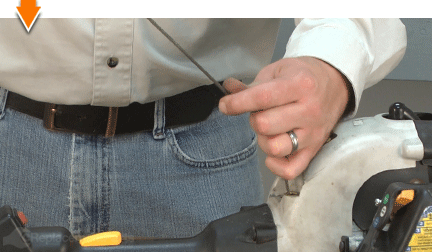
1. Uncoil the starter rope.
REMOVING THE STARTER GRIP [top]
1. Uncoil the starter rope.
Pull the starter rope SLOWLY out of the starter assembly (as if starting the engine).
Tie a temporary knot in the starter rope as close to the starter assembly as possible.
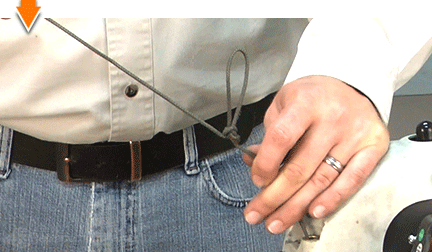
Allow the rope to recoil into the starter assembly until the knot engages the housing.
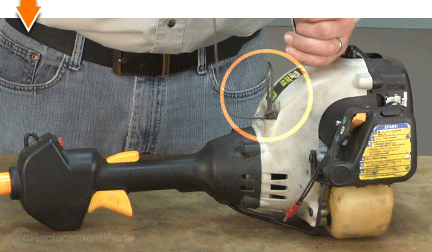
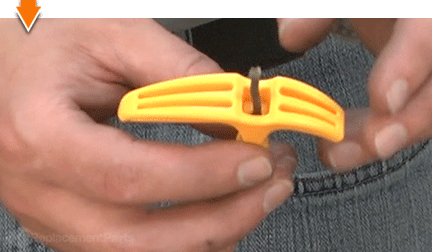
2. Remove the starter grip.
The starter grip is secured to the starter rope by a knot. Depending on the type of grip on your specific unit, this knot may visible (at the top of the starter grip); or it may be concealed beneath a mounting plate.
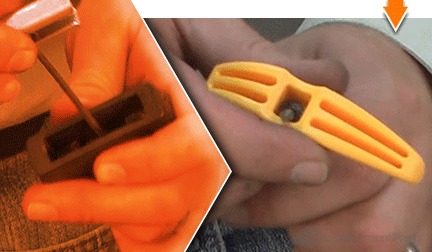
Slide the starter grip away from the knotted end of the starter rope.
Use scissors or wire clippers to remove the knot from the end of the starter rope.
Remove the starter grip from the starter rope.
INSTALLING THE NEW STARTER GRIP [top] 3. Install the starter grip.
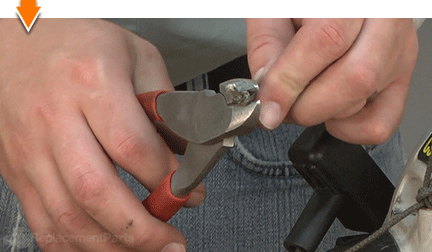
Thread the starter rope through the new starter grip.
Tie an overhand knot in the end of the starter rope.
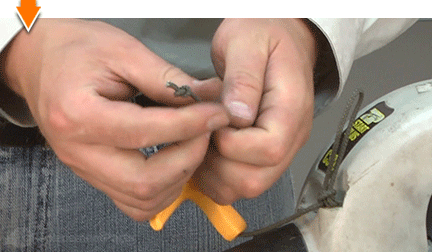
Tuck the knot into the top of the new starter grip.

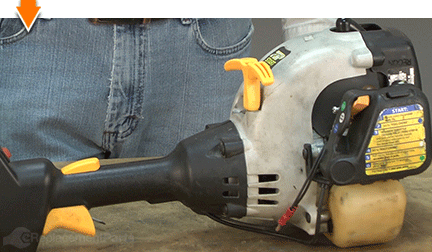
REASSEMBLING THE UNIT [top] 4. Recoil the starter rope.
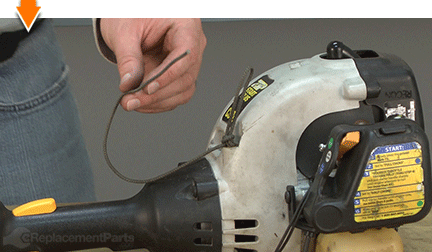
Untie the temporary knot in the starter rope.
Allow the starter rope to recoil fully into the starter assembly.

Do-it-yourself repairs like these are easier than you might think: From lawn machines to cordless drills, kitchen mixers to outdoor grills. Our "how-to" articles walk you through each repair from start to finish.
So, doing-it-yourself means never having to do it alone.
