


Why Read This Article?
Finish Nailer Repair - Replacing the Driver Guide (Ridgid Part # 79004001022)
Article Breakdown
Finish Nailer Repair - Replacing the Driver Guide (Ridgid Part # 79004001022)
Video

Tools & Materials

Trimmer out of whack? It's time to face the fix. Whether you are a legendary landscaper or a weekend weed whacker, eReplacementParts.com provides the parts, procedures and facts you need to fearlessly fix what fails you.
Does your engine shut off randomly? Does it seem to shut off whenever it gets hot? If so, you might have a bad ignition module. The ignition coil, along with the flywheel, create the electric charge for the spark plug. A failing ignition module can cause a variety of problems, from the engine simply not starting, to random or sporadic failures.
Ignition modules don't fail very often, and many of the symptoms related to a bad ignition coil can also be caused by other engine components; so it's important to thoroughly test the coil (and other engine components) when making a diagnosis.
The most common mistake when diagnosing an ignition coil is to test it by removing the spark plug, and grounding the plug to the engine (to test for spark). The spark plug operates in a pressurized environment inside the cylinder; much different from the ambient air outside.
To recreate what happens inside the cylinder, you will need to use a spark tester. A tester with an adjustable gap is best, as it will allow you to stress the coil by increasing the width of the gap, which forces the coil to create more power to jump it.
This article provides step-by-step instructions for removing and installing the ignition module on a Ryobi string trimmer.
Let's get started.
 REMOVING THE IGNITION MODULE [top]
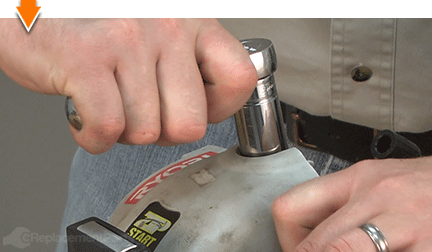
1. Remove the rear motor housing.
REMOVING THE IGNITION MODULE [top]
1. Remove the rear motor housing.
Remove the screws securing the rear motor housing to the engine.
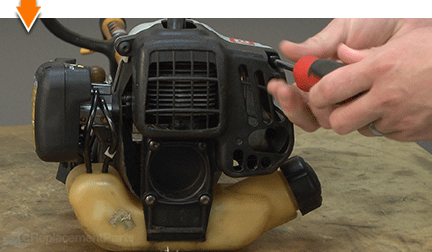
Remove the rear housing from the engine.
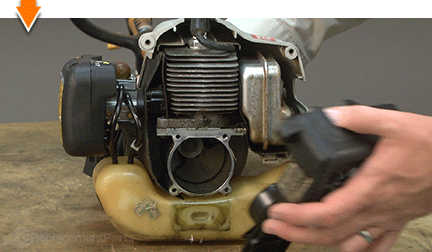
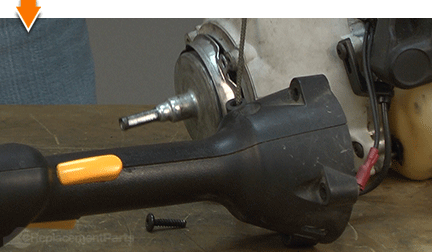
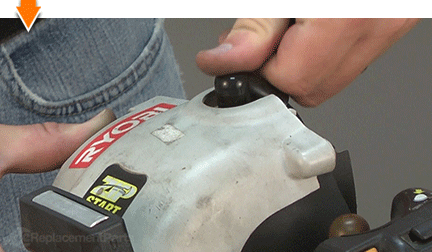
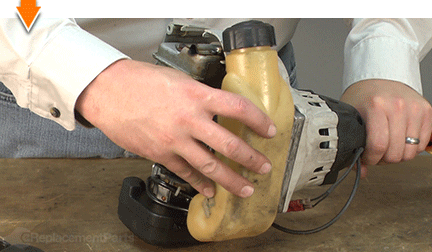
2. Remove the shaft and handle assembly.
Remove the (4) screws securing the shaft and handle assembly to the engine.
Separate the shaft and handle assembly from the engine.
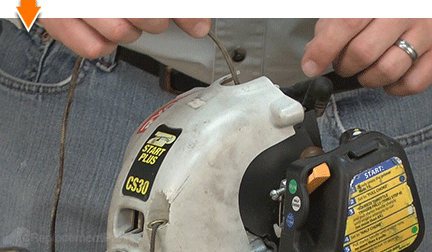
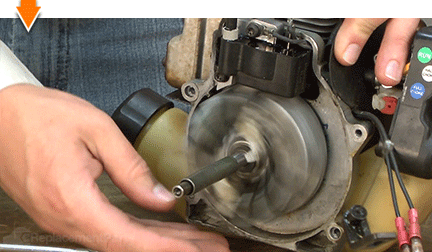
3. Bind the engine (this is necessary to remove the clutch drum).
Disconnect the spark plug boot from the spark plug.
Use a spark plug wrench (or socket) to loosen the spark plug.
Remove the spark plug from the engine.
Insert the end of an old starter rope (or similar rope) into the engine cylinder (through the spark plug hole). Continue feeding the rope into the cylinder until the piston is unable to move.
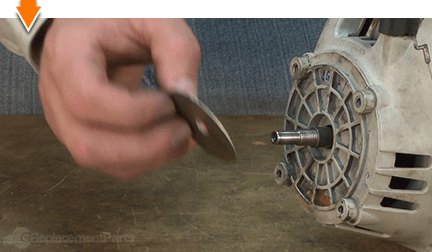
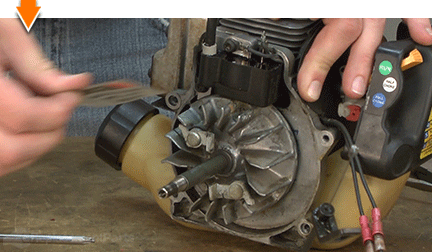
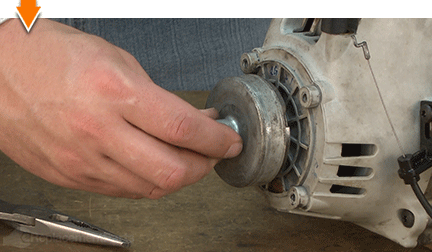
4. Remove the clutch drum.
Loosen the internal screw securing the clutch drum to the shaft.
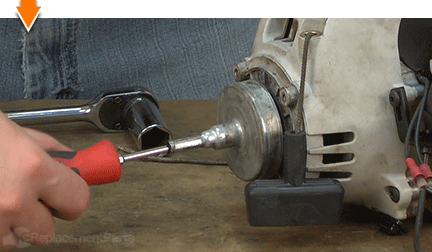
Remove the clutch drum.
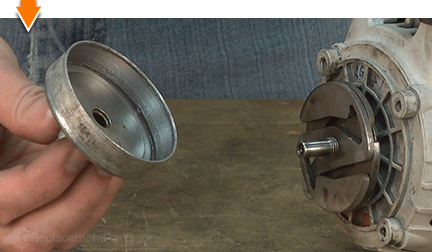
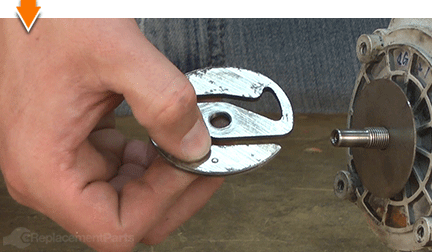
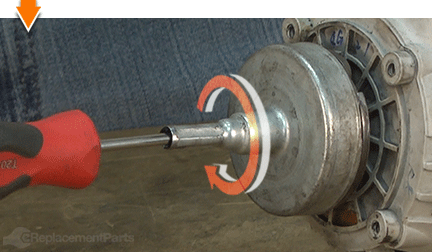
5. Remove the clutch plates.
The two clutch plates are threaded onto the shaft. Each plate needs to be removed individually. To avoid damaging the contact surface of the clutch plates (i.e. the surface that contacts the inside of the clutch drum), the following method should be used.
Position the blade of a screwdriver against the inner spoke of the outer clutch plate.
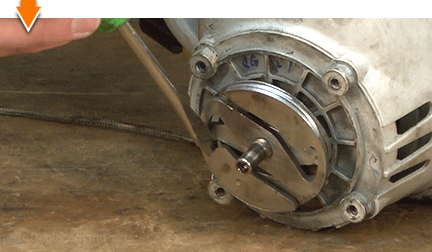
Strike the end of the screwdriver with a hammer to loosen the clutch plate (the plate is threaded onto the shaft).
Unscrew and remove the outer clutch plate from the shaft.
Repeat this step to remove the inner clutch plate.
Remove the clutch washer from the shaft.
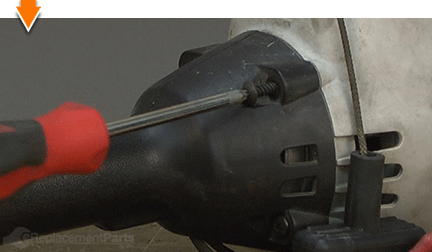
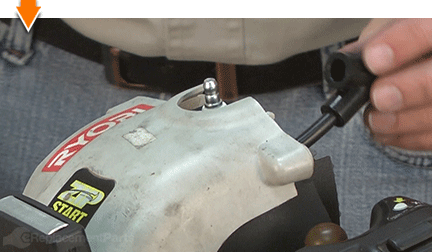
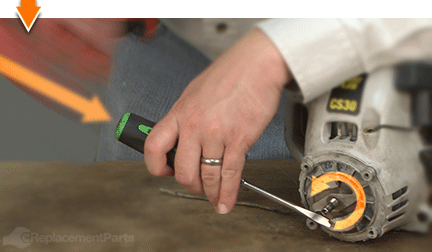
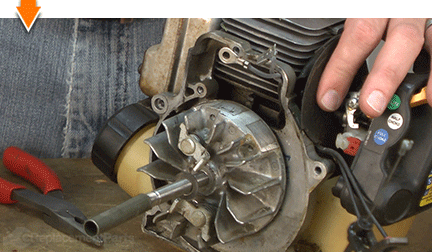
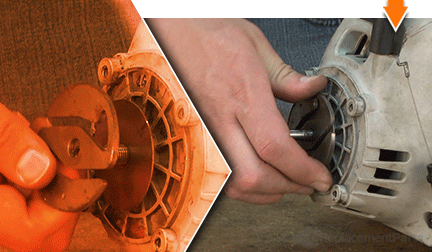
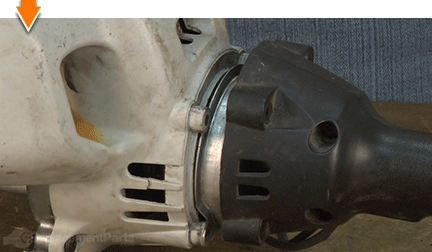
6. Remove the starter housing.
Remove the (4) screws securing the starter housing to the engine.
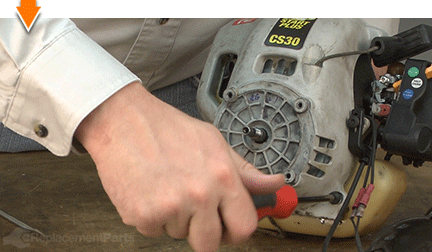
Remove the starter housing from the engine.
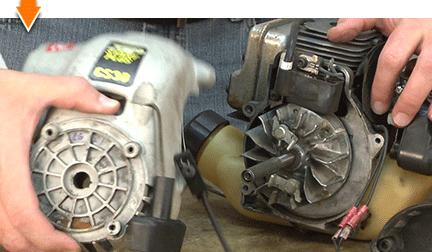
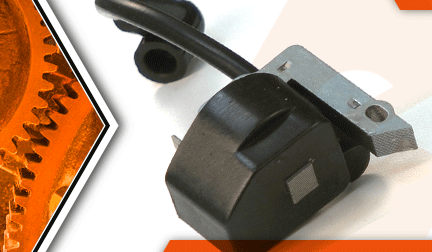
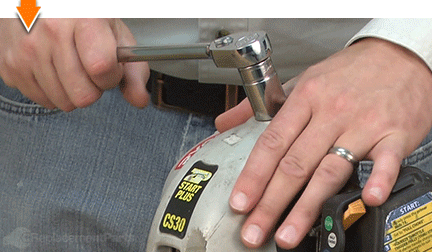
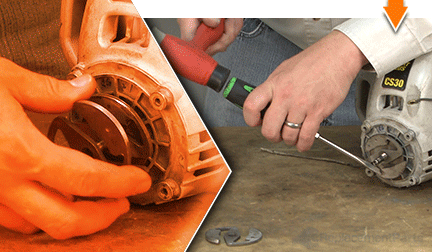
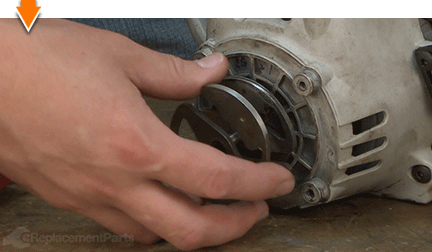
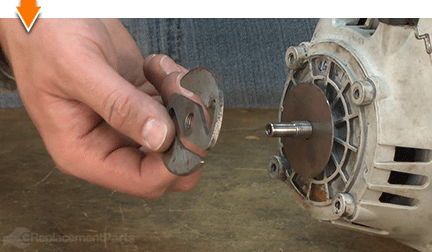
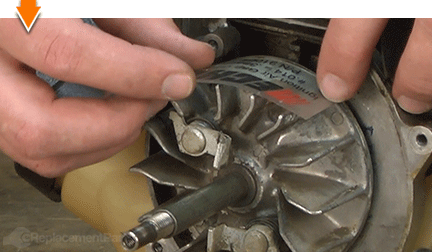
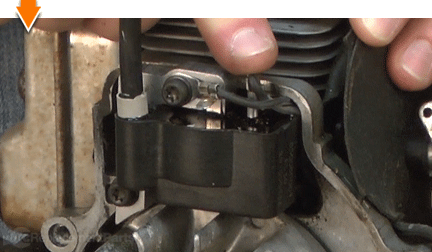
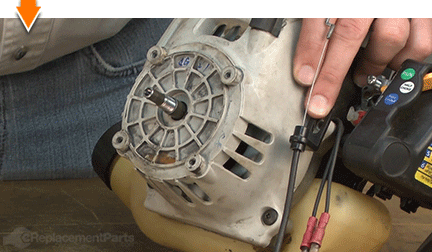
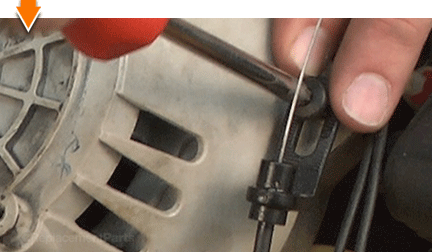
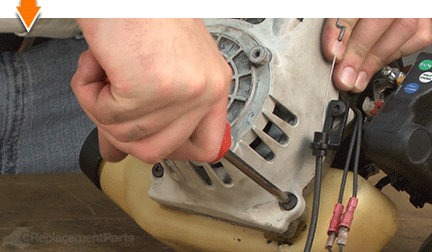
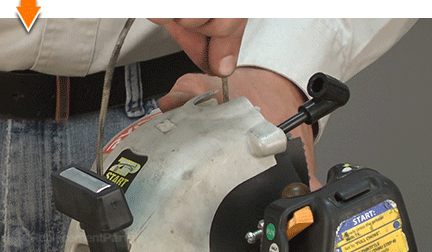
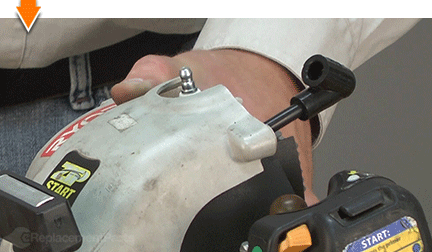
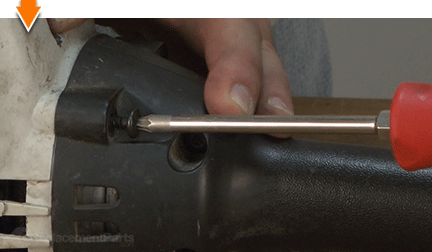
7. Remove the ignition module.
Use long-nosed pliers to disconnect the wire from the terminal on the ignition module.
Remove the (2) screws securing the ignition module to the engine.
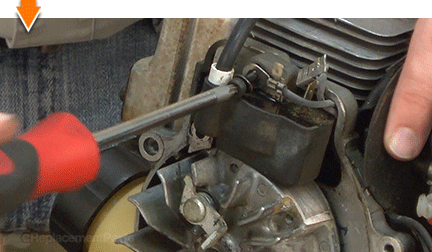
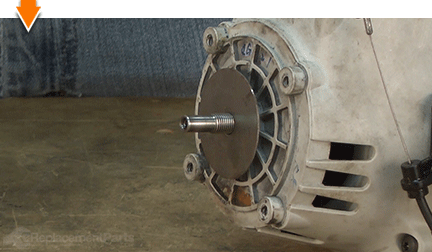
Remove the ignition module.
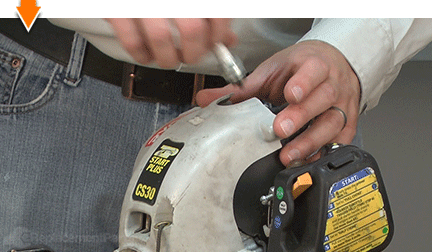
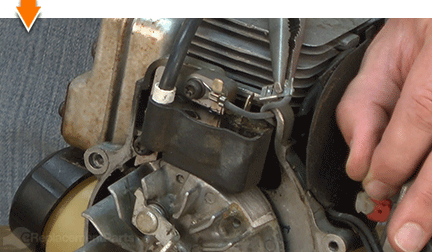
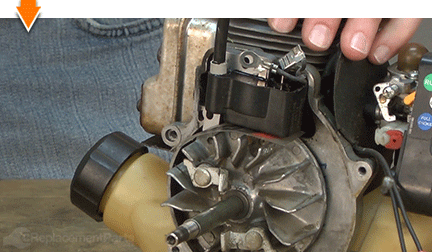
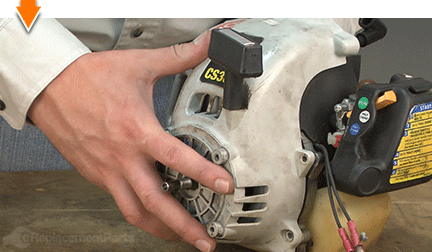
INSTALLING THE NEW IGNITION MODULE [top] 8. Install the ignition module.
An ignition air gapping gauge is recommended to accurately complete this step. However, if you do not have an ignition gapping gauge (measuring #.014 or .35mm) it is acceptable to use one thick business card or two thin business cards as substitutes.
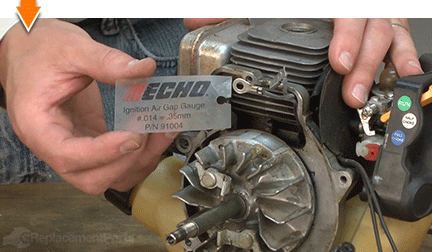
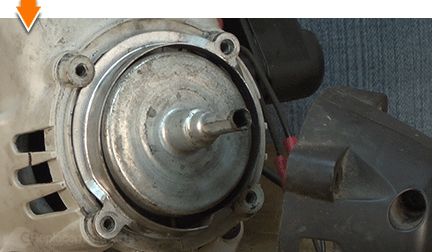
There are two magnets on the outside of the flywheel. Rotate the flywheel until the magnets are facing the top of the motor.
Place the ignition air gapping gauge on the flywheel (over the magnets).
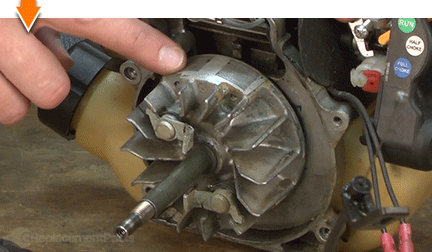
Place the new ignition module in its approximate position above the flywheel and install (but do not tighten) the screws.
Install (but do not fully tighten) the module mounting bolts.
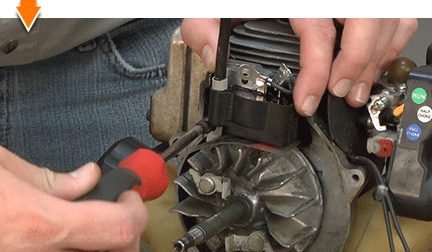
Adjust the ignition module until the contacts engage the magnets of the flywheel (through the gapping gauge).

Secure the ignition module to the engine with the (2) bolts.
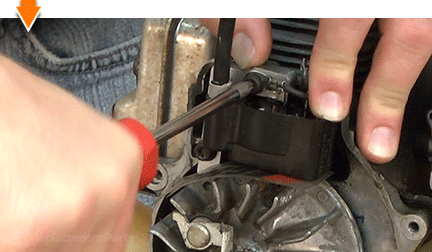
Remove the gapping gauge.
Rotate the flywheel to verify clearance between the flywheel and the new ignition module.
Reconnect the ignition wire.
REASSEMBLING THE UNIT [top] 9. Reinstall the starter housing.
Install the starter housing onto the engine.
Align the throttle cable bracket with the mounting hole nearest the carburetor.
Secure the throttle cable bracket with the screw.
Secure the starter housing to the engine with the remaining (3) screws.
10. Reinstall the clutch plates.
Install the clutch washer.
Note that each clutch plate contains a small indent. The indent should face AWAY from the clutch washer.
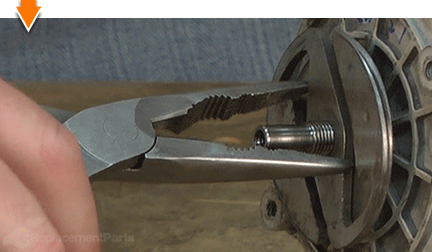
Thread either of the two clutch plates onto the shaft (it does not matter which plate is installed first).
Use long-nosed pliers to partially tighten the clutch plate. (The plates will tighten automatically as the trimmer is used, so it is not necessary to tighten them fully at this point).
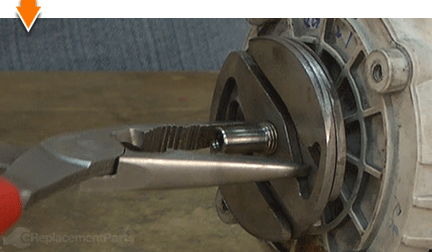
Repeat this step to install (and secure) the second clutch plate.
11. Reinstall the clutch drum.
Install the clutch drum over the clutch plates.
Secure the clutch drum with the screw.
12. Reinstall the spark plug.
Remove the rope from the cylinder.
Thread the spark plug into the cylinder.
Secure the spark plug using a spark plug wrench or socket.
Install the spark plug boot.
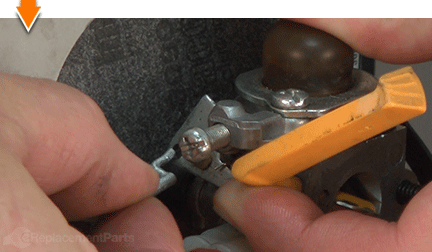
13. Reconnect the throttle cable to the carburetor.
Connect the throttle cable z-connector to the throttle linkage on the carburetor.
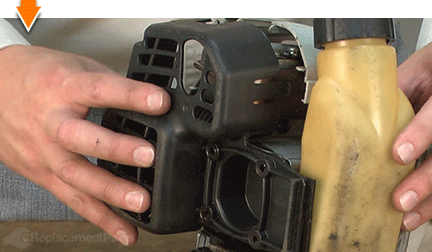
14. Reinstall the shaft and handle assembly.
Install the ring guard and align the mounting holes with the holes on the housing.
Install the shaft and handle assembly onto the engine; ensuring that the shaft fully engages the clutch drum.
Secure the shaft and handle assembly with the (4) screws.
15. Reinstall the rear motor housing.
Align the fuel tank with the rubber bumpers on the engine assembly.
Install the rear motor housing.
Secure the rear motor housing with the screws.

Do-it-yourself repairs like these are easier than you might think: From lawn machines to cordless drills, kitchen mixers to outdoor grills. Our "how-to" articles walk you through each repair from start to finish.
So, doing-it-yourself means never having to do it alone.
