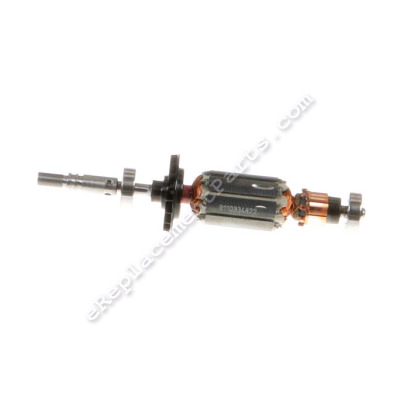
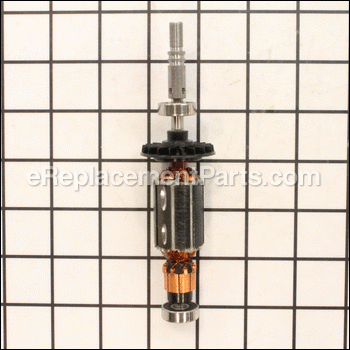
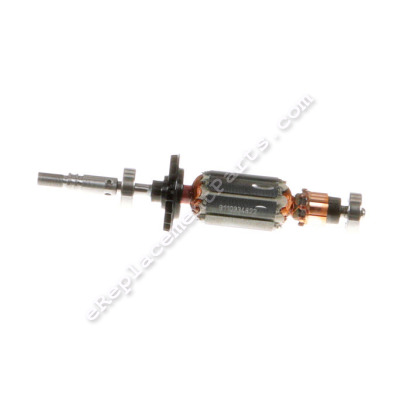
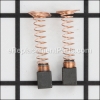
This genuine OEM sourced replacement armature and bearing assembly that is specially made for Dremel rotary tools. The armature is one of the main components inside an electric motor, in combination with the motor's field it creates a magnetic field, which causes the armature to rotate. It is a complete assembly which includes a high-quality metal armature, a plastic fan, armature bearing and commutator end bearing. It is highly recommended to replace both carbon brushes when replacing an armature. Please note this assembly is sold individually.
Armature & Bearing Assembly 2610013850
OEM part for: Dremel
Part Number: 2610013850
Jump To:
Frequently Purchased Together ?
Compatibility
This part will fit the following 2 machines
Dremel
This item works with the following types of products:
- Multi-Tool Parts
Customer Part Reviews ?
- 1
Questions & Answers ?
Our customer Service team is at the ready daily to answer your part and product questions.

Ask our Team
We have a dedicated staff with decades of collective experience in helping customers just like you purchase parts to repair their products.
Does this fit my product?Questions & Answers for Armature & Bearing Assembly
Customer Repair Instructions ?
All our customer repair instructions are solicited directly from other customers just like you who have purchased and replaced this exact part.
The lock and armature and bearing assembly were worn and I couldn't lock dremel to remove insert bits. After replacing the parts it's like new again!
Tool Type
MultiTool
Difficulty
Easy
Time
15-30 minutes
Tools Used
Screwdriver, Allen wrench and some glue
Armature burnt
Tool Type
MultiTool
Difficulty
Easy
Time
Less than 15 minutes
Tools Used
Screwdriver
Parts Used
Remove the brushes
Remove the screws from the housing and separate them
Remove the old armature
Install the new armature
Screw the housings together
Replace the brushes and the nose piece
Lock button broken n motor got stuck overheated
Tool Type
MultiTool
Difficulty
Easy
Time
15-30 minutes
Tools Used
Screwdriver
Burnt out motor in the mulitool, broken armature and bad brush wear.
Tool Type
MultiTool
Difficulty
Easy
Time
15-30 minutes
Tools Used
Screwdriver, Pliers, Right size torx screw driver.
2.) Took out the screwdriver (Torx) and unscrewed the screws.
3.) Took a small screwdriver to take out the brushes and unscrew the shaft collar as well.
4.) Opened up the casing to the multi-tool.
5.) Keeping in mind not to lose the locking mechanism (shaft lock) for the shaft when opening the case.
6.) Gently pull the wires out from the speed switch and pull the rubber cover to the back bearing.
7.) Slid the armature out of the field assembly for inspection of parts and pull the speed switch off of the field assembly. ( Note put speed switch aside because it will be used later in the assembly process.)
8.) Opened the part boxes to the field assembly and armature w/bearing assembly.
9.) Inspected new parts to make sure everything was in order. Then assembled new field assembly and armature w/bearing assembly together by sliding the armature through the field assembly.
10.) Put the assembled new parts in the case and making sure I put the rubber cover on the end of the bearing to the armature.
11.) Plug in the speed switch to the field assembly that was taken out in step 7. Make sure it goes together and plugs in firmly to the field assembly. ( Note: the armature w/bearing assembly should be easy to rotate back and forth.)
12.) Plug in the power wires into the speed switch making sure the wires are in firmly.
13.) Put the assembly back into the case by making sure everything was in right place. ( Don't forget to make sure the shaft lock is in place still in the case.)
14.) Before closing up the case make sure the armature w/bearing assembly turns free in either direction so the parts have free movement. ( Note: If need takes the pliers and gently press together on the fan and the shaft to move the fan up or down so it is centered on the space provided in the case.)
15.) When everything moves freely put the case back together with the Torx screws, also put the new brushes in and screw in the shaft collar as well.
16.) Once everything is back together, plug in the multitool and turn on the speed switch. If done correctly everything should work properly and now the tool is ready to use.
I damaged the lock button holes in the armature while not paying attention and putting pressure on the lock button while using the Dremel.
Tool Type
MultiTool
Difficulty
Easy
Time
Less than 15 minutes
Tools Used
Screwdriver, #10 Torx bit., sharp razor.
Parts Used
1. Use a sharp razor and cut the decals on both sides of the tool lengthwise along the groove.
2. Remove the 2 brushes.
3. Use a #10 Torx bit to remove the 4 screws holding the tool together.
4. Carefully open the Dremel and set the two side pieces aside.
5. Carefully and gently lift the armature assembly.
6. Remove the damaged armature by sliding it forward and out.
7. Install the new armature.
8. The rest is the reverse of the above steps.
9. Make sure the armature spins freely before inserting the screws. If it doesn't, make sure it is
seated properly.
10. Wear gloves and/or oil any surfaces you touch, otherwise oil from your fingers will cause
surfaces to rust.
OEM stands for Original Equipment Manufacturer and means the part you’re buying is sourced directly from the manufacturer who made your product. At eReplacementParts, we sell only genuine OEM parts, guaranteeing the part you’re purchasing is of better design and of higher quality than aftermarket parts.
Our product descriptions are a combination of data sourced directly from the manufacturers who made your product as well as content researched and curated by our content & customer service teams. This content is edited and reviewed internally before being made public to customers.
Our customer service team are at the ready daily to answer your part and product questions. We have a dedicated staff with decades of collective experience in helping customers just like you purchase parts to repair their products.
All our part reviews are solicited directly from other customers who have purchased this exact part. While we moderate these reviews for profanity, offensive language or personally identifiable information, these reviews are posted exactly as submitted and no alterations are made by our team.
All our customer repair instructions are solicited directly from other customers just like you who have purchased and replaced this exact part. While we moderate these reviews for profanity, offensive language or personally identifiable information, these reviews are posted exactly as submitted and no alterations are made by our team.
Based on data from past customer purchasing behaviors, these parts are most commonly purchased together along with the part you are viewing. These parts may be necessary or helpful to replace to complete your current repair.
All our installation videos are created and produced in collaboration with our in-house repair technician, Mark Sodja, who has helped millions of eReplacementParts customers over the last 13 years repair their products. Mark has years of experience in selling and repairing both commercial and residential products with a specialty in gas-powered equipment.
This data is collected from customers who submitted a repair instruction after replacing this exact part. Customers can rate how easy the repair was to complete and how long it took. We aggregate this data to provide a repair rating that allows customers to quickly determine the difficulty and time needed to perform their own repair.

