eReplacementParts.com
877-346-4814
Paramount Parts

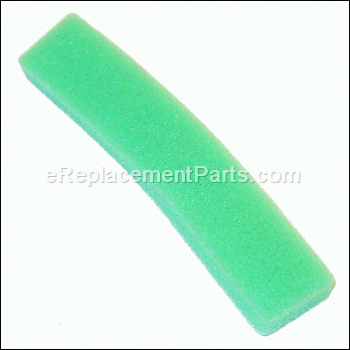
Air Filter 530027530

OEM part for: Paramount, Weed Eater, Poulan, Husqvarna, Craftsman, Jonsered

Part Number: 530027530


Install
Videos!
Air Filter - 530027530:Paramount 360 View
Air Filter - 530027530:ParamountAir Filter - 530027530:ParamountAir Filter - 530027530:ParamountAir Filter - 530027530:ParamountAir Filter - 530027530:Paramount 360 View
In Stock
Order within the next 10 hours and your part ships today!
Medium 30-60 minutes (6 rated repairs)?
OEM: Original Equipment Manufacturer ?
ParamountWeed EaterPoulanHusqvarnaCraftsmanJonsered
Does this d-block d-md-none fit my product?

Product Description ?

This is a genuine manufacturer sourced replacement air filter designed for use on gas powered trimmers. It helps to remove dust and other contaminants from going into the carburetor and the engine. This is a foam item which is sold individually. Please note the air filter cover and the plate are both sold separately.

Replacing this air filter you will need a hex key or an allen wrench.

• Remove the filter cover
• Take out the old air filter
• Secure the new one in place
• Secure the filter cover

  • Classification: Part
  • Weight: 0.01 lbs.
  • Shipping: Ships Worldwide

Frequently Purchased Together ?

Compatibility

This part will fit the following 116 machines

Paramount

PLT2245 Gas Trimmer View Diagrams & Manuals
PLT2248 Gas Trimmer View Diagrams & Manuals
PLT2651 Gas Trimmer View Diagrams & Manuals
PLT2857 Gas Trimmer View Diagrams & Manuals

Weed Eater

BC30B Gas Trimmer View Diagrams & Manuals
BC3100 Gas Trimmer View Diagrams & Manuals
GTI15 Gas Trimmer View Diagrams & Manuals
GTI15T Gas Trimmer View Diagrams & Manuals
GTI16 Gas Trimmer View Diagrams & Manuals
GTI16 SUPER Gas Trimmer View Diagrams & Manuals
GTI16D Gas Trimmer View Diagrams & Manuals
GTI17 Gas Trimmer View Diagrams & Manuals
GTI17C Gas Trimmer View Diagrams & Manuals
GTI17LE Gas Trimmer View Diagrams & Manuals
GTI17T Gas Trimmer View Diagrams & Manuals
GTI17XP Gas Trimmer View Diagrams & Manuals
GTI18 Gas Trimmer View Diagrams & Manuals
GTI18K Gas Trimmer View Diagrams & Manuals
GTI18KT Gas Trimmer View Diagrams & Manuals
GTI18T Gas Trimmer View Diagrams & Manuals
GTI19 Gas Trimmer View Diagrams & Manuals
GTI19T Gas Trimmer View Diagrams & Manuals
GTI52 Gas Trimmer View Diagrams & Manuals
HP30 Gas Trimmer View Diagrams & Manuals
SST45 Gas Trimmer View Diagrams & Manuals
TBC57 Gas Trimmer View Diagrams & Manuals
TT-125 Gas Trimmer View Diagrams & Manuals
TT-20 Gas Trimmer View Diagrams & Manuals
TT-85 Gas Trimmer View Diagrams & Manuals
XT-90 Gas Trimmer View Diagrams & Manuals
XT-50 Gas Trimmer View Diagrams & Manuals
XT-85 Gas Trimmer View Diagrams & Manuals
XT100 Gas Trimmer View Diagrams & Manuals
XT125 Gas Trimmer View Diagrams & Manuals
XT125K Gas Trimmer View Diagrams & Manuals
XT125KT Gas Trimmer View Diagrams & Manuals
XT125T Gas Trimmer View Diagrams & Manuals
XT125TR Gas Trimmer View Diagrams & Manuals
XT20 Gas Trimmer View Diagrams & Manuals
XT20T Gas Trimmer View Diagrams & Manuals
XT30D Gas Trimmer View Diagrams & Manuals
XT40 Gas Trimmer View Diagrams & Manuals
XT40T Gas Trimmer View Diagrams & Manuals
XT50 Gas Trimmer View Diagrams & Manuals
XT50T Gas Trimmer View Diagrams & Manuals
XT85 Gas Trimmer View Diagrams & Manuals
XT85T Gas Trimmer View Diagrams & Manuals
XT125KT (Export) Gas Trimmer View Diagrams & Manuals

Poulan

PP111 Gas Trimmer View Diagrams & Manuals
PP114 Gas Trimmer View Diagrams & Manuals
PP117 Gas Trimmer View Diagrams & Manuals
PP175 Gas Trimmer View Diagrams & Manuals
PP176 Gas Trimmer View Diagrams & Manuals
PP185 Gas Trimmer View Diagrams & Manuals
PP185R Gas Trimmer View Diagrams & Manuals
PP195 Gas Trimmer View Diagrams & Manuals
PP196 Gas Trimmer View Diagrams & Manuals

Husqvarna

26 L (1993-05) Line Trimmer View Diagrams & Manuals
26 LC (1991-01) Line Trimmer View Diagrams & Manuals
26 LC (1991-04) Line Trimmer View Diagrams & Manuals
26 LC (1993-05) Line Trimmer View Diagrams & Manuals
26 R (1993-05) Line Trimmer View Diagrams & Manuals
26 RLC (1988-01) Line Trimmer View Diagrams & Manuals
32 L (1996-10) Line Trimmer View Diagrams & Manuals
32 LCN (1991-01) Line Trimmer View Diagrams & Manuals
32 RL (1990-01) Line Trimmer View Diagrams & Manuals
32 RLC (1990-01) Line Trimmer View Diagrams & Manuals
32R (1990-01) Trimmer View Diagrams & Manuals
BC30B (2006-05) Handheld Trimmer View Diagrams & Manuals
23 R (1993-05) Brushcutter View Diagrams & Manuals
23 L (1993-05) Trimmer View Diagrams & Manuals
23 LC (1993-05) Trimmer View Diagrams & Manuals
23 LC (1991-04) Trimmer View Diagrams & Manuals
23 LCN (1991-04) Trimmer View Diagrams & Manuals

Craftsman

358797270 Trimmer View Diagrams & Manuals
358797160 Weed Wacker View Diagrams & Manuals
358797100 Trimmer View Diagrams & Manuals
358797150 Trimmer View Diagrams & Manuals
358796090 Trimmer View Diagrams & Manuals
358797101 Trimmer View Diagrams & Manuals
358797121 Trimmer View Diagrams & Manuals
358797130 Trimmer View Diagrams & Manuals
358797140 Trimmer View Diagrams & Manuals
358797161 Trimmer View Diagrams & Manuals
358797180 Trimmer View Diagrams & Manuals
358798150 Trimmer View Diagrams & Manuals
358798151 Trimmer View Diagrams & Manuals
358798151-32CC Trimmer View Diagrams & Manuals
358798230 Trimmer View Diagrams & Manuals
358798430 Trimmer View Diagrams & Manuals
358798451 Trimmer View Diagrams & Manuals
358798452 Trimmer View Diagrams & Manuals
358798460 Trimmer View Diagrams & Manuals
358798461 Trimmer View Diagrams & Manuals
358798490 Trimmer View Diagrams & Manuals
358799120 Trimmer View Diagrams & Manuals
358799220 Trimmer View Diagrams & Manuals
358799240 Trimmer View Diagrams & Manuals
358799290 Trimmer View Diagrams & Manuals
358799290-32CC Trimmer View Diagrams & Manuals
358795020 Brushwacker View Diagrams & Manuals
358797210 Sears Brushwacker View Diagrams & Manuals
358797250 Sears Gas Brushwacker View Diagrams & Manuals
358797260 Sears Brushwacker (32cc) View Diagrams & Manuals
358798260 Brushwacker View Diagrams & Manuals
358798270 Brushwacker View Diagrams & Manuals
358798271 Brushwacker View Diagrams & Manuals
358798470 Trimmer/weedwacker View Diagrams & Manuals
358798471 Line Trimmer/weedwacker/brushwacker/brush Cutter* View Diagrams & Manuals
358799250 Weedwacker View Diagrams & Manuals
358799260 Weedwacker View Diagrams & Manuals

Jonsered

GT26 (1991-02) Trimmer View Diagrams & Manuals
GT26 (1992-03) Trimmer View Diagrams & Manuals
GT32 (1991-02) Trimmer View Diagrams & Manuals
GT32 (1992-03) Trimmer View Diagrams & Manuals
GT32 L (2002-08) Trimmer View Diagrams & Manuals
Show More Compatible Models
Don't see yours? Try searching our site for :

This item works with the following types of products:

  • Trimmer Parts

Customer Part Reviews ?

5
Average Rating (out of 5):
1 Review
Click to filter by ratings:
5 stars
1
4 stars
0
3 stars
0
2 stars
0
1 stars
0
  • Highest Rating
  • Most Recent
< PREV
  • 1
NEXT >
  • Perfect fit slipped right in place
    Exact size
    Guest - May 9, 2023 Verified Purchase
    t
    t
    t - t days ago Verified Purchase
    eReplacementParts Team
    t

    Questions & Answers ?

    Our customer Service team is at the ready daily to answer your part and product questions.

    photo of team member
    Ask our Team

    We have a dedicated staff with decades of collective experience in helping customers just like you purchase parts to repair their products.

    Does this fit my product?

    Questions & Answers for Air Filter


    No questions have been asked yet

    Customer Repair Instructions ?

    All our customer repair instructions are solicited directly from other customers just like you who have purchased and replaced this exact part.

    Medium 30-60 minutes (6 rated repairs)?

    Damaged cutter head assembly/Poor running condition

    Jeffrey - April 3, 2016
    👍 2 of 2 people found this instruction helpful
    Tool Type

    Trimmer

    Difficulty

    Medium

    Time

    15-30 minutes

    Tools Used

    Screwdriver, Wrench Set, Allen wrench set

    After verifying the problems with the trimmer's cutter head and the clogged and deteriorated air filter I ordered the parts and waited for them to arrive. Parts showed up quickly and I set to work installing the air filter. To replace it you simply remove the two allen drive screws that mount the air filter cover on the back, remove the old filter element and discard. Press-in the new foam filter element and reinstall the cover.

    The cutter head was already removed from my trimmer when I got it so I cleaned the threads on the shaft and easily spun on the cutter head. To snug it on I used an adjustable wrench to hold the nut at the end of the shaft. It was necessary to disassemble the cutter head assembly to properly tighten it onto the shaft.
    Did you find this story helpful?
    Thanks for voting and helping fellow customers!

    Fuel line fell apart in tank & clogged the carb

    Gerry - May 21, 2018
    👍 1 of 1 people found this instruction helpful
    Tool Type

    Trimmer

    Difficulty

    Medium

    Time

    30-60 minutes

    Tools Used

    Screwdriver, Pliers, torx driver

    My brother bought this Weed Eater at Good Will for $6.99 and gave it to me. I looked it over and saw the fuel line broke up in the tank and that was the reason why someone donated it to Good Will--it wouldn't run anymore. I soaked the fuel tank in Dawn dish soap after removing about 6 pieces of broken up 1/8" fuel line and the fuel filter. I pulled the carburetor apart--soaked all parts in hot dawn soap to remove dirt and grime--soaked all parts overnight--morning rinsed everything--blew out all parts and carburetor passages. I then reassembled the carburetor using the new diaphragms and gaskets I purchased from E-replacement parts. Installed the carburetor back on the Weed Eater GTI 17XP and put new .80" trimmer string on the auto-feed head. I put the choke on fuel-pulled rope-it popped once--put choke to next open latch--pulled rope--it started right up--running a little lean--richened about 1/3 turn high speed needle valve. This Weed Eater now runs fantastic and the line automatically releases to the same about 8" length if break off any line with its sensor feed head. I have other weed trimmers but this GTI 17XP is now my go to weed trimmer. With shipping this repair costed me about $33 for a great trimmer. I was excited to see if I could fix this trimmer and grew impatient that it took 5 days from Utah to Wisconsin but the wait was rewarded with now my favorite trimmer.
    Did you find this story helpful?
    Thanks for voting and helping fellow customers!

    Weed eater would not run on open choke or idle

    Michael - May 26, 2017
    Tool Type

    Trimmer

    Difficulty

    Medium

    Time

    More than 2 hours

    Tools Used

    Screwdriver, Pick, calipers

    1. Rebuilt carburetor using Carb Kwik repair kit, rebuild went well. Used my dial calipers to set needle settings per instructions. Used pick to remove old gas filter screen in carburetor. Soaked carburetor in cleaner for a few minutes then used low air pressure to blow out all holes. Used illustrated parts breakdown on eRplacementParts to ensure gaskets and diaphragms where properly placed during reassembly.
    2. Installed new air filter
    3. Also had to install new fuel lines from gas tank to carburetor. Got fuel lines locally.
    4. Initially, weed eater did not run for more than a few seconds. Had to adjust idle mixture screw. Now it runs and cuts grass again.
    This project was medium difficulty only because of the small space to work on my weed eater. Just don't lose your screws and all will go well.
    Did you find this story helpful?
    Thanks for voting and helping fellow customers!

    Gas line old, brittle and broke off between bottom of gas tank and carb.

    Cameron - May 14, 2017
    Tool Type

    Trimmer

    Difficulty

    Easy

    Time

    15-30 minutes

    Tools Used

    Pliers, Needle Nose, allen set, piece of wire

    1) Drain gas from gas tank. Removed handle/gas tank assy (1screw). Remove air cleaner cover and remove old air filter (2 screws)
    2) Fished out old gas line filter using piece of stiff wire. Wire bent in a 'U' shape on one end to grab old gas line from inside the gas tank.
    3) Inserted new gas line thru the gas line hole in the bottom of the tank. Push plenty of gas line into tank until you can grab it with a needle nose pliers of the wire hook and pull out through the gas tank fill hole.
    4) Trim gas line and insert gas line into new filter. Push gas line tight to gas filter.
    5) Pull on gas line coming out of the bottom of the tank to shorten amount of gas line in the tank. Leave enough gas line in tank so gas filter lays on the bottom of the tank.
    6) Cut other end of gas line to reach carb gas inlet. Insert gas line over gas inlet on the carb.
    7) Trim new filter to length and insert into cover. Reinstall air cleaner cover, tighten screws.
    8) Fill with fresh gas/oil mixture. Pull a few times to prime the new gas line and fire it up.
    Did you find this story helpful?
    Thanks for voting and helping fellow customers!

    Carburetor needed rebuilding

    ROBERT - March 10, 2017
    Tool Type

    Trimmer

    Difficulty

    Easy

    Time

    30-60 minutes

    Tools Used

    Screwdriver, Pliers, Allen wrench

    Remove the air cleaner assembly
    Remove the screws holding the carburetor
    Remove air filter plate, primer, the fuel lines and throttle from the carburetor
    Remove the carburetor, use the kit to rebuild it
    Install the rebuilt carburetor, air filter plate and fuel lines and throttle
    Replace the air filter, and the rest of the air cleaner assembly
    Did you find this story helpful?
    Thanks for voting and helping fellow customers!

    Trimmer had not been used for years would not start because it was not getting fuel.

    KEN - August 7, 2016
    Tool Type

    Trimmer

    Difficulty

    Easy

    Time

    15-30 minutes

    Tools Used

    Screwdriver, carb cleaner

    Watched some videos on U Tube on rebuilding carburetors. selected the pertinent parts and ordered them. removed carb, stripped off gaskets , pump etc. sprayed carb block with cleaner and let it soak over night.used compressed air to clear away cleaner. assembled parts in original order.used fresh fuel and trimmer started on second pull. I felt lucky. Ken

    Used print out of diagram of carb and parts to verify correct reassemble of parts.


    Did you find this story helpful?
    Thanks for voting and helping fellow customers!

    OEM stands for Original Equipment Manufacturer and means the part you’re buying is sourced directly from the manufacturer who made your product. At eReplacementParts, we sell only genuine OEM parts, guaranteeing the part you’re purchasing is of better design and of higher quality than aftermarket parts.

    Our product descriptions are a combination of data sourced directly from the manufacturers who made your product as well as content researched and curated by our content & customer service teams. This content is edited and reviewed internally before being made public to customers.

    Our customer service team are at the ready daily to answer your part and product questions. We have a dedicated staff with decades of collective experience in helping customers just like you purchase parts to repair their products.

    All our part reviews are solicited directly from other customers who have purchased this exact part. While we moderate these reviews for profanity, offensive language or personally identifiable information, these reviews are posted exactly as submitted and no alterations are made by our team.

    All our customer repair instructions are solicited directly from other customers just like you who have purchased and replaced this exact part. While we moderate these reviews for profanity, offensive language or personally identifiable information, these reviews are posted exactly as submitted and no alterations are made by our team.

    Based on data from past customer purchasing behaviors, these parts are most commonly purchased together along with the part you are viewing. These parts may be necessary or helpful to replace to complete your current repair.

    All our installation videos are created and produced in collaboration with our in-house repair technician, Mark Sodja, who has helped millions of eReplacementParts customers over the last 13 years repair their products. Mark has years of experience in selling and repairing both commercial and residential products with a specialty in gas-powered equipment.

    This data is collected from customers who submitted a repair instruction after replacing this exact part. Customers can rate how easy the repair was to complete and how long it took. We aggregate this data to provide a repair rating that allows customers to quickly determine the difficulty and time needed to perform their own repair.

    eReplacementParts.com
    7174 South 400 West
    Suite 5
    Midvale, UT 84047
    visa mastercard discover american express PayPal