
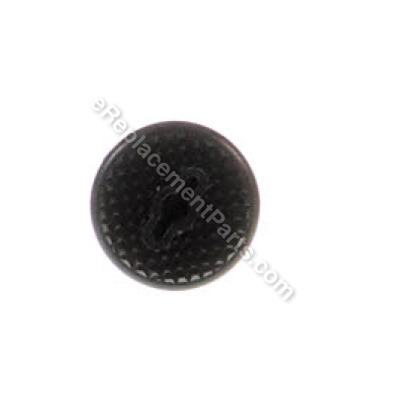


This is an authentic OEM sourced replacement brush cap. It is specially designed for Makita power tools. The purpose of the brush cap is to secure the carbon brush in the holder. Please note, this plastic item is sold individually.
You would need a flathead screwdriver to install or remove this brush cap.
Brush Holder Cap 643954-4
OEM part for: Makita
Part Number: 643954-4
$4.99
In Stock
Jump To:
Product Description ?
- Classification: Part
- Weight: 0.01 lbs.
- Shipping: Ships Worldwide
Frequently Purchased Together ?


Compatibility
This part will fit the following 38 machines
Makita
6347DWDE Drill View Diagrams & Manuals
6343D Cordless Drill View Diagrams & Manuals
8443D Cordless Drill View Diagrams & Manuals
BDF460 Cordless Drill View Diagrams & Manuals
BHP460 Hammer Driver Drill View Diagrams & Manuals
SC190DWDE 18V Cordless Rebar Cutter View Diagrams & Manuals
BGA452 Angle Grinder View Diagrams & Manuals
8443DWDE Hammer Drill View Diagrams & Manuals
BGA452Z 18V LXT Lithium-Ion Cordless 4-1/2" Cut-Off/Angle Grinder View Diagrams & Manuals
XAG01 18V LXT Lithium-Ion Cordless Grinder Kit View Diagrams & Manuals
XAG01Z 18V LXT Lithium-Ion 4-1/2" Cut-Off/Angle Grinder View Diagrams & Manuals
6317DWAE Drill View Diagrams & Manuals
6337DWAE Drill View Diagrams & Manuals
6347D Drill View Diagrams & Manuals
BDF460SH Drill View Diagrams & Manuals
BDF460SHE Drill View Diagrams & Manuals
BGA450Z (Type 1) Grinder View Diagrams & Manuals
BGA450Z (Type 2) Grinder View Diagrams & Manuals
BGA452F (Type 1) Grinder View Diagrams & Manuals
BGA452F (Type 2) Grinder View Diagrams & Manuals
BGA452F (Type 3) Grinder View Diagrams & Manuals
BGA452 (Type 2) Grinder View Diagrams & Manuals
BGA452 (Type 3) Grinder View Diagrams & Manuals
BGA452Z (Type 1) Grinder View Diagrams & Manuals
BGA452Z (Type 2) Grinder View Diagrams & Manuals
BGA452Z (Type 3) Grinder View Diagrams & Manuals
BHP460SH Drill View Diagrams & Manuals
BHP460SHE Drill View Diagrams & Manuals
BHR200SHE Rotary Hammer View Diagrams & Manuals
LXCU01Z (Type 1) Saw View Diagrams & Manuals
LXCU01Z (Type 2) Saw View Diagrams & Manuals
LXJP02 (Type 1) Misc View Diagrams & Manuals
LXJP02 (Type 2) Misc View Diagrams & Manuals
LXJP02Z (Type 1) Misc View Diagrams & Manuals
LXJP02Z (Type 2) Misc View Diagrams & Manuals
SC190D Misc View Diagrams & Manuals
XCU01Z Saw View Diagrams & Manuals
XJP03Z Misc View Diagrams & Manuals
Show More Compatible Models
This item works with the following types of products:
- Drill Parts
- Cordless Drill Parts
- Hammer Drill Parts
- Grinder Parts
Repair Videos ?
Watch the Repair Video for
Brush Holder Cap

Customer Part Reviews ?
Average Rating (out of 5):
Click to filter by ratings:
5 stars
3
4 stars
1
3 stars
0
2 stars
0
1 stars
0
< PREV
- 1
Great service for the community
I have used you guys for years and it has been really good for me to maintain my tools . The website is great and easy to use . The pictures are a great help in picking the parts needed for the repair and shipping is fast . Thank you so much for providing such a great service . Have a great day .
Guest -
October 7, 2022
Verified Purchase
Perfect fit
Brand new my grinder works now like new
Luis -
November 12, 2020
Verified Purchase
service is top of the line
great parts all work great service A+++++++++++
Guest -
September 4, 2020
Verified Purchase
Good quality part ,
Good part Zach fit but just like OEM
Shipping was a little slow but I guess everything is a little slow at this point in time. I was just glad to get my parts so I can fix my tool Thanks
Guest -
November 24, 2021
Verified Purchase
t
t
t -
t days ago
Verified Purchase
eReplacementParts Team
t
Questions & Answers ?
Our customer Service team is at the ready daily to answer your part and product questions.

Ask our Team
We have a dedicated staff with decades of collective experience in helping customers just like you purchase parts to repair their products.
Does this fit my product?Questions & Answers for Brush Holder Cap
No questions have been asked yet
Customer Repair Instructions ?
All our customer repair instructions are solicited directly from other customers just like you who have purchased and replaced this exact part.
Would not turn on
Adrian - September 27, 2018
Tool Type
Grinder
Difficulty
Easy
Time
15-30 minutes
Tools Used
Screwdriver
Took item apart, replaced brushes and some other components, put it back the way it was, very simple, too simple to explain in detail.
Did you find this story helpful?
Thanks for voting and helping fellow customers!
Stuck and worn brushes.
Tommy - April 5, 2018
Tool Type
Grinder
Difficulty
Easy
Time
Less than 15 minutes
Tools Used
Screwdriver
Removed the cap and the brushes. Cleaned the armature, blew out, dropped in the new brushes, replaced the cap, installed the battery, runs great!
Did you find this story helpful?
Thanks for voting and helping fellow customers!
Missing brush holder cap.
Wilfredo - February 21, 2018
Tool Type
Grinder
Difficulty
Easy
Time
Less than 15 minutes
Tools Used
Screwdriver, Pliers
Parts Used
Just open and replace.
Did you find this story helpful?
Thanks for voting and helping fellow customers!
Low on power, sometimes wouldn't turn on.
Jack - January 8, 2017
Tool Type
Grinder
Difficulty
Easy
Time
Less than 15 minutes
Tools Used
Screwdriver
1. Removed the metal head. (4 screws)
2. Removed the screws holding the body together. (5 screws)
3. Removed the two dust brush covers and the two screw on brush covers.
4. Removed the two brushes.
5. Removed the brush holder with two wires. (mine was melted from the heat.)
6. Greased the gear head with a light grease. (I used superlube)
7. Reassemble in opposite order of taking it apart.
Did you find this story helpful?
Thanks for voting and helping fellow customers!
End bell, brushes and holder caps fused together - won't run
James - October 8, 2016
Tool Type
Cordless Drill
Difficulty
Medium
Time
15-30 minutes
Tools Used
Screwdriver, Pliers, Very fine emery cloth
1. Disassembled drill/driver carefully noting how parts are properly located into place, particularly switches and selectors.
2. Assembled new end bell, brushes and caps together.
3. Removed damaged end bell assembly from shaft.
4. Cleaned commutator plates with very fine emery paper.
5. Assembled new assembly to shaft.
6. Reassembled drill/driver following details noted in step 1.
2. Assembled new end bell, brushes and caps together.
3. Removed damaged end bell assembly from shaft.
4. Cleaned commutator plates with very fine emery paper.
5. Assembled new assembly to shaft.
6. Reassembled drill/driver following details noted in step 1.
Did you find this story helpful?
Thanks for voting and helping fellow customers!
Brush cap missing
Irvin - May 20, 2016
Tool Type
Cordless Drill
Difficulty
Easy
Time
Less than 15 minutes
Tools Used
Screwdriver
Parts Used
Simply screwed in the replacement brush cap that I purchased.
Did you find this story helpful?
Thanks for voting and helping fellow customers!
The brush set and end bell had been overheated due to a hard job
Richard - April 8, 2016
Tool Type
Cordless Drill
Difficulty
Medium
Time
30-60 minutes
Tools Used
Screwdriver, Pliers, Vice
It is a matter of taking the halves apart by removing screws, and having a good schematic to go by before you start. Taking photos is not a bad idea!
The parts simply unplug and re-plug to replace them. The beam type spring on the front of the drill that provides the detents for the torque on the screw drive function fell out and it wasn't clear how it went in (it slides into a groove on the left side) from the drawings.
Be very cautious with small parts/springs because they can shoot out of there holders.
Did you find this story helpful?
Thanks for voting and helping fellow customers!
OEM stands for Original Equipment Manufacturer and means the part you’re buying is sourced directly from the manufacturer who made your product. At eReplacementParts, we sell only genuine OEM parts, guaranteeing the part you’re purchasing is of better design and of higher quality than aftermarket parts.
Our product descriptions are a combination of data sourced directly from the manufacturers who made your product as well as content researched and curated by our content & customer service teams. This content is edited and reviewed internally before being made public to customers.
Our customer service team are at the ready daily to answer your part and product questions. We have a dedicated staff with decades of collective experience in helping customers just like you purchase parts to repair their products.
All our part reviews are solicited directly from other customers who have purchased this exact part. While we moderate these reviews for profanity, offensive language or personally identifiable information, these reviews are posted exactly as submitted and no alterations are made by our team.
All our customer repair instructions are solicited directly from other customers just like you who have purchased and replaced this exact part. While we moderate these reviews for profanity, offensive language or personally identifiable information, these reviews are posted exactly as submitted and no alterations are made by our team.
Based on data from past customer purchasing behaviors, these parts are most commonly purchased together along with the part you are viewing. These parts may be necessary or helpful to replace to complete your current repair.
All our installation videos are created and produced in collaboration with our in-house repair technician, Mark Sodja, who has helped millions of eReplacementParts customers over the last 13 years repair their products. Mark has years of experience in selling and repairing both commercial and residential products with a specialty in gas-powered equipment.
This data is collected from customers who submitted a repair instruction after replacing this exact part. Customers can rate how easy the repair was to complete and how long it took. We aggregate this data to provide a repair rating that allows customers to quickly determine the difficulty and time needed to perform their own repair.