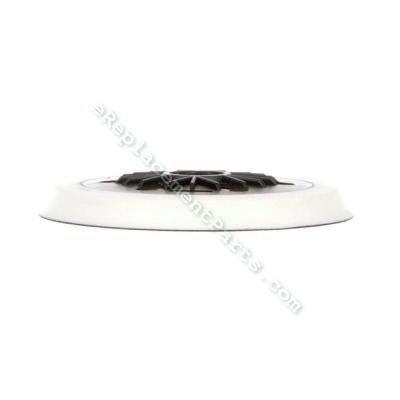


This sander pad is a Genuine OEM replacement part used on Bosch Sanders/Polishers. This item is Sold Individually and it is designed to work with Hook and Loop (Velcro) Sandpaper.
Over time this part we wear out and will need to be replaced. This Pad will directly replace a worn or damaged sander pad. Changing the pad is easy and will only require an Allen Wrench.
• First remove single screw from center of sander pad using Allen wrench.
• Remove old pad and clean up the friction ring
• Install new pad and secure it using the same screw
This sander pad is also cataloged under part number 2610917411.
Hook And Loop Sander Pad 2610917411
OEM part for: Bosch
Part Number: 2610917411
$13.06
In Stock
Jump To:
Product Description ?
- 6 inch 6 holes
- Classification: Part
- Weight: 0.35 lbs.
- Shipping: Ships Worldwide
Frequently Purchased Together ?


Compatibility
This part will fit the following 11 machines
Bosch
3727DVS (0601372739) 6" Random Orbit Sander View Diagrams & Manuals
1250DEVS (0601250739) 6" Dual-Mode Random Orbit Sander/Polisher View Diagrams & Manuals
1250DEVS (0601250774) 6" Dual-Mode Random Orbit Sander/Polisher View Diagrams & Manuals
3727DEVS (0601372639) Random Orbit Sander View Diagrams & Manuals
ROS65VC Eccentric Disc Sander View Diagrams & Manuals
GEX 150 TURBO (0601250740) Random Orbital Sander View Diagrams & Manuals
GEX 150 TURBO (0601250775) Random Orbital Sander View Diagrams & Manuals
GEX 150 TURBO (0601250777) Random Orbital Sander View Diagrams & Manuals
GEX 125150 AVE (3601C7B141) Random Orbital Sander View Diagrams & Manuals
GEX 150 AVE (3601C7B151) Random Orbital Sander View Diagrams & Manuals
GEX 125150 AVE (3601C7B1K1) Random Orbital Sander View Diagrams & Manuals
Show More Compatible Models
This item works with the following types of products:
- Sander Parts
- Polisher Parts
This part replaces obsolete part #: RS6045, 2608601106
Customer Part Reviews ?
Average Rating (out of 5):
Click to filter by ratings:
5 stars
8
4 stars
2
3 stars
0
2 stars
0
1 stars
1
< PREV
- 1
- 2
Easy process to order in the order was received promptly
Correct part, easy install sander working great
Guest -
December 15, 2022
Verified Purchase
Easy Fix, only one bolt needed to be removed.
The sander works great
Guest -
September 26, 2022
Verified Purchase
Replacement Sanding Disk for industrial grade sander.
Easy lookup, fast service, shipped as promised; part fits and I'm back in business.
Guest -
April 14, 2022
Verified Purchase
Great part
Timely delivery, right part, sander fixed
Guest -
June 26, 2021
Verified Purchase
Easy replacement, only had to remove one bolt to replace pad.
Bosch pad was in good condition and was easy to replace, working like new.
Guest -
July 29, 2020
Verified Purchase
easy repair
worked great
Guest -
October 22, 2019
Verified Purchase
The perfect repair
Great service. The part was exactly what was described and arrived promptly with minimal downtime for my sander.
Guest -
May 13, 2019
Verified Purchase
Easy repaired
Exactly what I asked for 2 minute install perfect
Guest -
April 27, 2019
Verified Purchase
Easy repair
This was a perfect match for my sander. Fast shipping.
Guest -
February 22, 2022
Verified Purchase
Perfect replacement
Arrived fast and in great shape!
John V -
February 1, 2022
Verified Purchase
t
t
t -
t days ago
Verified Purchase
eReplacementParts Team
t
Questions & Answers ?
Our customer Service team is at the ready daily to answer your part and product questions.

Ask our Team
We have a dedicated staff with decades of collective experience in helping customers just like you purchase parts to repair their products.
Does this fit my product?Questions & Answers for Hook And Loop Sander Pad
Does this pad fit my bosch 1250devs? And is it soft, medium or hard?
Chris
for model number 1250
asked on 2023-02-13
Hello Chris, Thank you for contacting us. We have researched the model you have provided and have confirmed the part you are looking for is Part Number:2610917411. We hope this helps, good luck with the repair!
eReplacementParts Team February 13, 2023
Customer Repair Instructions ?
All our customer repair instructions are solicited directly from other customers just like you who have purchased and replaced this exact part.
Worn out sander pad
paul - December 17, 2015
👍 4 of 4 people found this instruction helpful
Tool Type
Sander
Difficulty
Easy
Time
Less than 15 minutes
Tools Used
, Allen Wrench
Parts Used
Remove single screw from center of sander pad using Allen wrench. Remove old pad. install new pad making sure replacement part is properly seated. Insert sander pad screw and tighten. This repair is a walk in the park and will have you back up in running in no time!
Did you find this story helpful?
Thanks for voting and helping fellow customers!
Sander stopped working and Hook & Loop pad was worn out.
stephen - March 4, 2016
👍 1 of 1 people found this instruction helpful
Tool Type
Sander
Difficulty
Easy
Time
15-30 minutes
Tools Used
, Star drive bit , wire stripper , crimping tool.
Unplug machine, look inside to assess problem. Mine showed melting of the trigger switch/power wire connection. Note location of all wires before disassembling. remove four wires and inspect...the melted one may need to be cleaned up. While machine is open, it's a good time to blow out all dust/clean with compressed air. Insert splices on two incoming power wires and reattach all four wires in original locations. Reassemble in reverse order.
Remove old pad by taking out one bolt. remove old friction ring (note orientation and just pull it off ) install new ring and sanding pad in reverse order.
Test your repair and have fun ! I have a sander that's good as new.
Remove old pad by taking out one bolt. remove old friction ring (note orientation and just pull it off ) install new ring and sanding pad in reverse order.
Test your repair and have fun ! I have a sander that's good as new.
Did you find this story helpful?
Thanks for voting and helping fellow customers!
Sander pad missing, friction ring damaged, hex-socket head-cap screw broken off in driver
Phillip - May 26, 2023
Tool Type
Sander
Difficulty
Medium
Time
More than 2 hours
Tools Used
Screwdriver, Power Drill, Wrench Set, small star-drive bits needed
1. The hard part was drilling out the broken hex-socket head-cap screw. I did that with a metal-compatible drill bit to start a hole, using lubricant, followed by a left-hand screw extractor bit. It takes patience to do this; this is a blind bolt, with no access to the inside end.
2. The entire tool can be easily disassembled with small star-drive bits (I used an iFixit electronics repair kit--the basic one); and a Philips screwdriver. I took it apart both for repair access and to clean it. If you're just replacing the sander pad you will not need to do any disassembly. You may be able to replace a friction ring without taking off the piece to which it attaches--not sure on that, but if you have to remove it, it's just three or four small Philips screws. The friction ring just fits over a flange on the black plastic piece.
3. My sander was caked with epoxy dust so I thoroughly cleaned all of it with an old toothbrush, toothpick, and shopvac.
4. Be aware that if you pull out the armature, you won't be able to get it back in past the motor brushes without removing the top housing of the tool and temporarily unscrewing the brush housings to pull back the brushes. This is easy. It also allows you to check the condition of the brushes and clean any dust off them and the armature, which could accelerate wear.
5. It's easy to re-assemble the tool using the exploded-parts diagram as a guide. Make sure to do it in order or you'll have to take it back apart if you forget a step.
6. The new hex-socket head-cap screw will need to be tightened quite firmly or it will back itself out quickly on high speed, especially if you have lubricated the threads.
Did you find this story helpful?
Thanks for voting and helping fellow customers!
backing on sander pad failed
Richard - December 13, 2020
Tool Type
Sander
Difficulty
Easy
Time
Less than 15 minutes
Tools Used
, allen wrench
Parts Used
1. Removed old sander pad with Allen wrench
2. Put on new sander pad with Allen wrench
2. Put on new sander pad with Allen wrench
Did you find this story helpful?
Thanks for voting and helping fellow customers!
1. sander pad was worn out 2.Cord was damaged and needed to be replaced.
Dan - June 25, 2020
Tool Type
Sander
Difficulty
Medium
Time
30-60 minutes
Tools Used
Screwdriver, Wrench Set
NEW SANDER PAD
Completely trivial. Unscrew the old pad using an Allen wrench. Screw on the new one. The whole job takes less than 5 minutes
NEW CORD
Took the sander apart, discarded the old cord, installed the new card, reassembled everything.The most difficult part was reassembly. It took a few tries to get all the wires in their proper locations
Did you find this story helpful?
Thanks for voting and helping fellow customers!
Hook & Loop worn out
Neal - November 29, 2019
Tool Type
Sander
Difficulty
Easy
Time
Less than 15 minutes
Tools Used
, Allen wrench
Replaced pad
Did you find this story helpful?
Thanks for voting and helping fellow customers!
pad no longer held sanding discs
Stephen - April 17, 2019
Tool Type
Sander
Difficulty
Easy
Time
Less than 15 minutes
Tools Used
Screwdriver
Parts Used
removed old pad (4 screws) installed new, 5 minutes
Did you find this story helpful?
Thanks for voting and helping fellow customers!
random orbit sander-aggressive mode was shot due to no gears left in sling ring?
Alfred - February 7, 2019
Tool Type
Sander
Difficulty
Medium
Time
30-60 minutes
Tools Used
Screwdriver, Power Drill, Socket set
not finished yet, as I need to order internal parts yet! Otherwise, replacement of brushes was a snap, and the bearing should be elementary as well. The Bosch products are well build and well designed. Nice work Bosch Folks!
Did you find this story helpful?
Thanks for voting and helping fellow customers!
Hook and loop worn out
Henry - June 22, 2018
Tool Type
Sander
Difficulty
Easy
Time
Less than 15 minutes
Tools Used
, Allen wrench
Parts Used
Take old pad off, put new pad on.
Did you find this story helpful?
Thanks for voting and helping fellow customers!
Sander pad came apart.
Mark - May 20, 2018
Tool Type
Sander
Difficulty
Easy
Time
Less than 15 minutes
Tools Used
, Allen wrench
Parts Used
I simply took the old part off, and put the new one on.
Did you find this story helpful?
Thanks for voting and helping fellow customers!
Load More Install Stories
OEM stands for Original Equipment Manufacturer and means the part you’re buying is sourced directly from the manufacturer who made your product. At eReplacementParts, we sell only genuine OEM parts, guaranteeing the part you’re purchasing is of better design and of higher quality than aftermarket parts.
Our product descriptions are a combination of data sourced directly from the manufacturers who made your product as well as content researched and curated by our content & customer service teams. This content is edited and reviewed internally before being made public to customers.
Our customer service team are at the ready daily to answer your part and product questions. We have a dedicated staff with decades of collective experience in helping customers just like you purchase parts to repair their products.
All our part reviews are solicited directly from other customers who have purchased this exact part. While we moderate these reviews for profanity, offensive language or personally identifiable information, these reviews are posted exactly as submitted and no alterations are made by our team.
All our customer repair instructions are solicited directly from other customers just like you who have purchased and replaced this exact part. While we moderate these reviews for profanity, offensive language or personally identifiable information, these reviews are posted exactly as submitted and no alterations are made by our team.
Based on data from past customer purchasing behaviors, these parts are most commonly purchased together along with the part you are viewing. These parts may be necessary or helpful to replace to complete your current repair.
All our installation videos are created and produced in collaboration with our in-house repair technician, Mark Sodja, who has helped millions of eReplacementParts customers over the last 13 years repair their products. Mark has years of experience in selling and repairing both commercial and residential products with a specialty in gas-powered equipment.
This data is collected from customers who submitted a repair instruction after replacing this exact part. Customers can rate how easy the repair was to complete and how long it took. We aggregate this data to provide a repair rating that allows customers to quickly determine the difficulty and time needed to perform their own repair.