
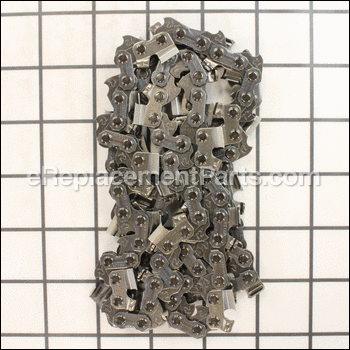
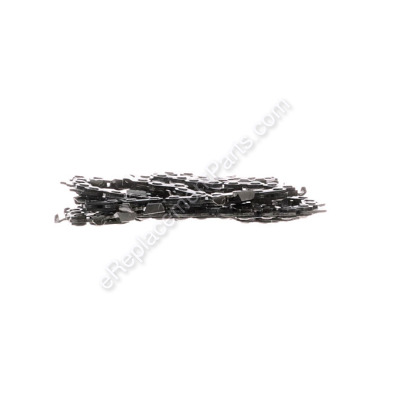


This a genuine OEM sourced replacement part. It is specially made for a Poulan gas powered chainsaw. The chain is a crucial component of a saw, it fits over the bar and it is what cuts the wood. Over time chains tend to stretch, become dull or break. Keeping an eye on your chain should let you know when it is the right time to replace it. This metal chain is only for use on a 20" bar. Includes (1) metal chain per order.
Knowing how to replace a chain is an essential part of owning a chainsaw. You will need a wrench set and a screwdriver to get that job done.
• Remove the guide bar side panel
• Release the chain tension
• Remove the old chain
• Secure the new chain
• Align the guide bar
• Reattach the side plate
• Tighten the chain in accordance with the owners manual
Chain (20-inch) 577180501
OEM part for: Poulan
Part Number: 577180501
Jump To:
Product Description ?
- 3/8" 20"
- Classification: Part
- Weight: 0.80 lbs.
- Shipping: Ships Worldwide
Frequently Purchased Together ?


Compatibility
This part will fit the following 1 machine
Poulan
This item works with the following types of products:
- Chain Saw Parts
- Saw Parts
Repair Videos ?

|
Step-by-step instructions for removing and installing the chain on your Poulan Pro chainsaw....
November 08, 2017
|

Customer Part Reviews ?
- 1
Questions & Answers ?
Our customer Service team is at the ready daily to answer your part and product questions.

Ask our Team
We have a dedicated staff with decades of collective experience in helping customers just like you purchase parts to repair their products.
Does this fit my product?Questions & Answers for Chain (20-inch)
Customer Repair Instructions ?
All our customer repair instructions are solicited directly from other customers just like you who have purchased and replaced this exact part.
Missing would not stay running after it got hot.
Tool Type
Chain Saw
Difficulty
Easy
Time
1-2 hours
Tools Used
Screwdriver, Socket set, Spark Plug Wrench
Carburetor removed the top of the saw were air cleaner is located. removed air cleaner and all plastic covering once again did a thorough cleaning. removed old Carburetor with purge. thorough clean Carburetor Area. Reinstalled new Carburetor with purge W47. Tightening Carburetor to factory specification. Reinstalled new air cleaner. all plastic covering Filled up with new mixed fuel added new bar oil. after 3 to 4 pulls saw started right up did some small adjustments on the Carburetor which was easy now saw runs like a new saw. doing a thorough cleaning make life easier to when doing this kind of repair. I recommend adjusting the Carburetor as needed they will wear out if you don't take care of them keeping clean Mixed gas in them help as well. Some folk don't think about it while out cutting wood but dirt can still get in from around the fuel cap good idea to clean around the cap before refilling the fuel that will save lot Carburetor troubles and Issues. I any case I purchased my replacement parts from eReplacementParts.com and everything went as I planed and hope for. thanks to eReplacementParts.com
chain worn
Tool Type
Chain Saw
Difficulty
Easy
Time
Less than 15 minutes
Tools Used
Screwdriver, Nutdriver
removed and replaced bar and chain
Bar bent and chain broke
Tool Type
Chain Saw
Difficulty
Easy
Time
Less than 15 minutes
Tools Used
Screwdriver
2. Removed bent bar.
3. Placed bar and chain on guide assembly.
4. Replaced nuts.
5. Adjusted tension.
Clutch came apart
Tool Type
Chain Saw
Difficulty
Easy
Time
Less than 15 minutes
Tools Used
Nutdriver, Hammer, punch, safety glasses, chain file set
Nothing wrong
Tool Type
Chain Saw
Difficulty
Easy
Time
Less than 15 minutes
Tools Used
, Chainsaw wrench
Parts Used
Clutch cover retaining ring was bent
Tool Type
Chain Saw
Difficulty
Easy
Time
Less than 15 minutes
Tools Used
, Chainsaw adjustment wrench
Chain was dull.
Tool Type
Chain Saw
Difficulty
Easy
Time
15-30 minutes
Tools Used
Socket set
Parts Used
Chain worn.
Tool Type
Chain Saw
Difficulty
Medium
Time
15-30 minutes
Tools Used
Screwdriver, Socket set
Parts Used
Remove the clutch cover
Remove the the old chain
Installed the new chain
Installed the clutch cover
Adjusted the tension to the bar and chain
Worn out air filter, chain worn out and stretched
Tool Type
Chain Saw
Difficulty
Easy
Time
15-30 minutes
Tools Used
Screwdriver, Socket set, Wrench Set
Would'nt Start
Tool Type
Chain Saw
Difficulty
Easy
Time
15-30 minutes
Tools Used
Screwdriver, Pliers, Wrench Set
OEM stands for Original Equipment Manufacturer and means the part you’re buying is sourced directly from the manufacturer who made your product. At eReplacementParts, we sell only genuine OEM parts, guaranteeing the part you’re purchasing is of better design and of higher quality than aftermarket parts.
Our product descriptions are a combination of data sourced directly from the manufacturers who made your product as well as content researched and curated by our content & customer service teams. This content is edited and reviewed internally before being made public to customers.
Our customer service team are at the ready daily to answer your part and product questions. We have a dedicated staff with decades of collective experience in helping customers just like you purchase parts to repair their products.
All our part reviews are solicited directly from other customers who have purchased this exact part. While we moderate these reviews for profanity, offensive language or personally identifiable information, these reviews are posted exactly as submitted and no alterations are made by our team.
All our customer repair instructions are solicited directly from other customers just like you who have purchased and replaced this exact part. While we moderate these reviews for profanity, offensive language or personally identifiable information, these reviews are posted exactly as submitted and no alterations are made by our team.
Based on data from past customer purchasing behaviors, these parts are most commonly purchased together along with the part you are viewing. These parts may be necessary or helpful to replace to complete your current repair.
All our installation videos are created and produced in collaboration with our in-house repair technician, Mark Sodja, who has helped millions of eReplacementParts customers over the last 13 years repair their products. Mark has years of experience in selling and repairing both commercial and residential products with a specialty in gas-powered equipment.
This data is collected from customers who submitted a repair instruction after replacing this exact part. Customers can rate how easy the repair was to complete and how long it took. We aggregate this data to provide a repair rating that allows customers to quickly determine the difficulty and time needed to perform their own repair.