


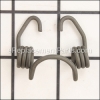
This is a Manufacturer Approved replacement part designed for Trimmers/Edgers. This blade adjustment rod is made out of Metal and it is Sold Individually. Blade adjustment rod lets you adjust the position of the blade for bevel cutting.
When replacing this Rod you will need Pliers, Socket set, Wrench Set.
Rod-adjust 747-04110A
OEM part for: MTD, Troy-Bilt, Bolens, Yard Man, Craftsman, Cub Cadet, Husky, Yard Machines
Part Number: 747-04110A
$17.44
In Stock
Jump To:
Product Description ?
- Classification: Part
- Weight: 0.06 lbs.
- Shipping: Ships Worldwide
Frequently Purchased Together ?


Compatibility
This part will fit the following 102 machines
Troy-Bilt
25B-554E011 (2007) Edger View Diagrams & Manuals
25B-554E011 (2008) Edger View Diagrams & Manuals
25B-554E011 (2009) Edger View Diagrams & Manuals
25B-554E066 (2007) Edger View Diagrams & Manuals
25B-554E066 (2008) Edger View Diagrams & Manuals
25B-554E066 (2009) Edger View Diagrams & Manuals
25B-554F211 (2007) Edger View Diagrams & Manuals
25B-554F266 (2007) Edger View Diagrams & Manuals
25B-554F266 (2008) Edger View Diagrams & Manuals
25B-554F266 (2009) Edger View Diagrams & Manuals
25B-554L766 (2005) Edger View Diagrams & Manuals
25A-553F063 (2003) Edger View Diagrams & Manuals
25A-554L766 (2004) 4.5HP Edger View Diagrams & Manuals
25B-554D766 (2006) Edger View Diagrams & Manuals
25B-554D711 Gas Lawn Edger View Diagrams & Manuals
25B-554F266 (2010) Edger View Diagrams & Manuals
25B-554E011 (2011) Edger View Diagrams & Manuals
25B-554E066 (2011) Edger View Diagrams & Manuals
25B-554F266 (2011) Edger View Diagrams & Manuals
25B-554E011 (2010) Edger View Diagrams & Manuals
25B-554E066 (2010) Edger View Diagrams & Manuals
25B-554E011 (2012) Edger View Diagrams & Manuals
25B-554E066 (2012) Edger View Diagrams & Manuals
25B-554F266 (2012) Edger View Diagrams & Manuals
25B-554F711 (2012) Edger View Diagrams & Manuals
TB554 (25B-554H711)(2013) Edger View Diagrams & Manuals
TB554 (25B-554H766)(2013) Edger View Diagrams & Manuals
TB554 (25B-554H711)(2014) Edger View Diagrams & Manuals
TB554 (25B-554H766)(2014) Edger View Diagrams & Manuals
TB554 (25B-554M711)(2014) Edger View Diagrams & Manuals
TB554 (25B-554M766)(2014) Edger View Diagrams & Manuals
TB554 (25B-554M711)(2015) Edger View Diagrams & Manuals
TB554 (25B-554M766)(2015) Edger View Diagrams & Manuals
25B-554M711 (2016) Edger View Diagrams & Manuals
25B-554M766 (2016) Edger View Diagrams & Manuals
25B-554M711 (TB 554)(2017) Edger View Diagrams & Manuals
25B-554M766 (TB 554)(2017) Edger View Diagrams & Manuals
25B-554M711 (TB 554)(2018) Edger View Diagrams & Manuals
25B-554M766 (TB 554)(2018) Edger View Diagrams & Manuals
25B-55MA766 (TB 554)(2019) Edger View Diagrams & Manuals
25A-55SD766 (TB550)(2021) Tb 550 Edger View Diagrams & Manuals
25B-554H711 (TB554)(2013) Edger View Diagrams & Manuals
25B-554H711 (TB554)(2014) Edger View Diagrams & Manuals
25B-554H766 (TB554)(2013) Edger View Diagrams & Manuals
25B-554H766 (TB554)(2014) Edger View Diagrams & Manuals
25B-554M711 (TB554)(2014) Edger View Diagrams & Manuals
25B-554M711 (TB554)(2015) Edger View Diagrams & Manuals
25B-554M766 (TB554)(2014) Edger View Diagrams & Manuals
25B-554M766 (TB554)(2015) Edger View Diagrams & Manuals
25B-55MA766 (TB554)(2020) Tb 554 Edger View Diagrams & Manuals
Bolens
25B-550A765 (2005) Edger View Diagrams & Manuals
25A-550A765 (2004) Edger View Diagrams & Manuals
25A-550A163 (2003) Edger View Diagrams & Manuals
Yard Man
25A-551B401 (2003) Edger View Diagrams & Manuals
25A-552A701 (2004) Edger View Diagrams & Manuals
25B-554F201 (2008) Edger View Diagrams & Manuals
MTD
25B-551A029 Edger View Diagrams & Manuals
25B-551A729 (2006) Gas Lawn Edger View Diagrams & Manuals
25A-550A129 (2003) Trimmer View Diagrams & Manuals
25A-550A163 (2003) Edger View Diagrams & Manuals
25A-550A765 (2004) Edger View Diagrams & Manuals
25B-550A765 (2005) Edger View Diagrams & Manuals
25B-554M897 (2016) Trimmer View Diagrams & Manuals
25B-554D099 (247.772460)(2009) Edger View Diagrams & Manuals
25B-554D099 (247.772460)(2010) Edger View Diagrams & Manuals
25B-554G299 (247.79651)(2010) Edger View Diagrams & Manuals
25B-554D099 (247.772460)(2011) Edger View Diagrams & Manuals
25B-554G299 (247.796510)(2011) Edger View Diagrams & Manuals
25B-554D099 (247.77246)(2012) Edger View Diagrams & Manuals
25B-554G299 (247.79651)(2012) Edger View Diagrams & Manuals
25B-554G799 (247.772461)(2012) Edger View Diagrams & Manuals
25B-554J799 (247.76246)(2013) Edger View Diagrams & Manuals
25B-554K799 (247.762461)(2014) Edger View Diagrams & Manuals
25B-554K799 (247.762461)(2015) Edger View Diagrams & Manuals
25B-55SD799 (2016) Edger View Diagrams & Manuals
25B-55SD799 (247.762660)(2017) Edger View Diagrams & Manuals
25A-551B401 (2003) Edger View Diagrams & Manuals
25A-552A701 (2004) Edger View Diagrams & Manuals
25B-554F201 (2008) Edger View Diagrams & Manuals
Craftsman
247762460 Edger View Diagrams & Manuals
247762461 Edger View Diagrams & Manuals
247772460 Edger View Diagrams & Manuals
247772461 Edger View Diagrams & Manuals
24779651 Edger View Diagrams & Manuals
247796510 Edger View Diagrams & Manuals
24779656 Edger View Diagrams & Manuals
247762660 Edger View Diagrams & Manuals
CMXGKAM1158708 (25B-55S5793)(2019) Lawn Edger View Diagrams & Manuals
Cub Cadet
LE100 (25B-552J710) (2014) 25B-552J710 Cc Edger Trencher View Diagrams & Manuals
LE100 (25B-552J710) (2015) 25B-552J710 View Diagrams & Manuals
25B-552J710 (2016) Edger View Diagrams & Manuals
25B-552J710 Le 100 View Diagrams & Manuals
25B-552J710 (2017) Le 100 Edger View Diagrams & Manuals
25B-55SD710 (2018) Le 100 Edger View Diagrams & Manuals
25B-55SD710 (2019) Le 100 Edger View Diagrams & Manuals
25B-55SD710 (2020) Le 100 Edger View Diagrams & Manuals
Husky
25A-554L731 (2004) Trimmer View Diagrams & Manuals
25B-554L731 (2005) Trimmer View Diagrams & Manuals
25B-554L731 (2006) Trimmer View Diagrams & Manuals
Yard Machines
25B-52J1700 (2014) Edger View Diagrams & Manuals
25B-52J1700 (2015) Edger View Diagrams & Manuals
25B-551A029 (2007) Edger View Diagrams & Manuals
Show More Compatible Models
This item works with the following types of products:
- Edger Parts
- Trimmer Parts
This part replaces obsolete part #: 747-04110
Customer Part Reviews ?
Average Rating (out of 5):
Click to filter by ratings:
5 stars
12
4 stars
0
3 stars
0
2 stars
0
1 stars
0
< PREV
- 1
- 2
Part fine! Repair a chalenge..
Had to loosen belt tensioner and clamp back spring to get to the rod.
Guest -
November 16, 2023
Verified Purchase
easy to replaced
Arrived in good condition
Guest -
October 28, 2023
Verified Purchase
Easy repair the part fit perfectly
The part arived quickly and works great
Guest -
August 1, 2022
Verified Purchase
Quick Response
My order was sent quickly; and, the part I ordered fit perfectly. Repair went smoothly!!
Guest -
September 30, 2021
Verified Purchase
received the belt and alignment rod ordered easily and quickly
It was a challenge to install the alignment rod
Guest -
December 7, 2020
Verified Purchase
Great parts
The parts are great and you always seem to have what I'm looking for
Guest -
October 15, 2019
Verified Purchase
Happy
Exactly what I needed and arrived on time.
Guest -
October 6, 2019
Verified Purchase
the right part
my order arrived quickly and was properly filled ,the part fit like a glove , what more can you ask for
Guest -
September 10, 2019
Verified Purchase
Fit perfectly!
Came as promised fit perfectly.
Guest -
September 2, 2019
Verified Purchase
Worked as expected
My edger is working like new
Guest -
July 24, 2019
Verified Purchase
t
t
t -
t days ago
Verified Purchase
eReplacementParts Team
t
Questions & Answers ?
Our customer Service team is at the ready daily to answer your part and product questions.

Ask our Team
We have a dedicated staff with decades of collective experience in helping customers just like you purchase parts to repair their products.
Does this fit my product?Questions & Answers for Rod-adjust
No questions have been asked yet
Customer Repair Instructions ?
All our customer repair instructions are solicited directly from other customers just like you who have purchased and replaced this exact part.
Blade angle adjusting rod broke
Matthew - June 15, 2016
👍 14 of 16 people found this instruction helpful
Tool Type
Edger
Difficulty
Hard
Time
30-60 minutes
Tools Used
Screwdriver, Socket set, Tie wraps
Parts Used
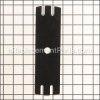
1. Removed adjusting rod "plate"
2. Used tie wraps to keep torsion block in place while I replaced rod, etc,
3. Bolted adjusting rod "plate" back on one bolt at a time after I cut the tie wrap that went through that bolt hole.
It took me close to an hour the first time this broke because I had to figure out a way to do it by myself, but it broke again within a week and I replaced it in 10 minutes by myself. You can avoid breaking the rod adjust if you use the trenching tri-blade instead of the rectangular blade. It was a pain to do by myself the first time because the tension spring came off and it was difficult to put back together alone. I had to take the belt guard and belt off the front pulley. It was a nightmare.
Did you find this story helpful?
Thanks for voting and helping fellow customers!
Edger blade angle adjustment angle rod was broken. Could not use unit due to blade moving side to side.
james - June 29, 2016
👍 6 of 8 people found this instruction helpful
Tool Type
Edger
Difficulty
Medium
Time
15-30 minutes
Tools Used
Screwdriver, Pliers, Socket set
Parts Used
1.Looked at the PDF manual for the unit to see how to replace the rod.
2.Followed the steps given in the manual.
3.Removed spring cotter key.
4.Pushed the rod with the large spring back and removed the broken angle adjustment rod.
5.Inserted the new rod, put the rod spring back in place and inserted the cotter key.
2.Followed the steps given in the manual.
3.Removed spring cotter key.
4.Pushed the rod with the large spring back and removed the broken angle adjustment rod.
5.Inserted the new rod, put the rod spring back in place and inserted the cotter key.
Did you find this story helpful?
Thanks for voting and helping fellow customers!
Blade Angle Adjustment arm on Edger broke
Stephen - June 3, 2018
👍 2 of 2 people found this instruction helpful
Tool Type
Edger
Difficulty
Medium
Time
15-30 minutes
Tools Used
Screwdriver, Pliers, Wrench Set, None
Parts Used
Unbolted assembly, which removed drive belt
Removed cotter pin
Removed spring
Removed broken arm
Installed new arm
Installed spring & cotter pin
Installed assembly
Slipped drive belt back on to assembly
Removed cotter pin
Removed spring
Removed broken arm
Installed new arm
Installed spring & cotter pin
Installed assembly
Slipped drive belt back on to assembly
Did you find this story helpful?
Thanks for voting and helping fellow customers!
Rod adjust broken
Claude - July 2, 2017
👍 2 of 2 people found this instruction helpful
Tool Type
Edger
Difficulty
Easy
Time
15-30 minutes
Tools Used
Screwdriver, Socket set
Parts Used
1. Removed belt.
2. Removed entire blade assembly.
3. Removed broken rod adjust.
4. Reinstalled in reverse order.
Pay attention to the tension spring and how it is mounted or it may take a while to figure the proper mounting procedure.
All in all a fairly simple job.
Rod-adjust is soft metal and can break easily.
This was my second replacement.
Did you find this story helpful?
Thanks for voting and helping fellow customers!
angle adjustment arm broken
Lloyd - September 26, 2019
👍 1 of 1 people found this instruction helpful
Tool Type
Edger
Difficulty
Hard
Time
1-2 hours
Tools Used
Socket set, Wrench Set, clamp, grease gun
Parts Used
1. Loosen belt pulley, do not remove, to gain access to nuts holding blade arm assembly
2. Remove 4 bolts holding blade arm assembly using a socket and wrench
3. Remove blade arm assembly
4. Remove old adjustment arm
5. Clean grease channel
6. Apply grease to arm channel
7. Place blade arm assembly holding bracket using a clamp to compress the spring, most difficult process
8. Insert 4 bolts into holding bracket
9. Install tension spring and new angle adjustment arm
10. Place belt over blade pulley
11. Install blade assembly arm
12. Tighten belt pulley
13. Grease fitting on holding bracket
Did you find this story helpful?
Thanks for voting and helping fellow customers!
Lever for blade angle broke
Marc - May 31, 2023
Tool Type
Edger
Difficulty
Easy
Time
Less than 15 minutes
Tools Used
Pliers
Removed cotter key and broken lever. Installed new lever, spring ang cotter key.
Did you find this story helpful?
Thanks for voting and helping fellow customers!
Angle adjustment got bent
Jene - June 23, 2022
Tool Type
Edger
Difficulty
Medium
Time
15-30 minutes
Tools Used
Screwdriver, Pliers, Socket set
Removed old , replaced with new
Did you find this story helpful?
Thanks for voting and helping fellow customers!
Blade adjustment arm broke
John - August 2, 2020
Tool Type
Edger
Difficulty
Medium
Time
30-60 minutes
Tools Used
Pliers, Socket set
There are several step by steps described already. The only suggestion I can add is to pay attention when replacing the torsion spring. I made a bonehead mistake and installed incorrectly the first time.
Did you find this story helpful?
Thanks for voting and helping fellow customers!
Blade adjuster arm
Simon - September 25, 2019
Tool Type
Edger
Difficulty
Medium
Time
15-30 minutes
Tools Used
Socket set
Parts Used
Removed the four bolts that holds on the blade adjuster
Remove Carter pin
Remove broken part
Replace with new part
Remove Carter pin
Remove broken part
Replace with new part
Did you find this story helpful?
Thanks for voting and helping fellow customers!
Broken
Donnie - May 29, 2019
Tool Type
Edger
Difficulty
Medium
Time
15-30 minutes
Tools Used
Screwdriver, Pliers, Adjustable Wrench
Parts Used
Had to remove the belt
Did you find this story helpful?
Thanks for voting and helping fellow customers!
Load More Install Stories
OEM stands for Original Equipment Manufacturer and means the part you’re buying is sourced directly from the manufacturer who made your product. At eReplacementParts, we sell only genuine OEM parts, guaranteeing the part you’re purchasing is of better design and of higher quality than aftermarket parts.
Our product descriptions are a combination of data sourced directly from the manufacturers who made your product as well as content researched and curated by our content & customer service teams. This content is edited and reviewed internally before being made public to customers.
Our customer service team are at the ready daily to answer your part and product questions. We have a dedicated staff with decades of collective experience in helping customers just like you purchase parts to repair their products.
All our part reviews are solicited directly from other customers who have purchased this exact part. While we moderate these reviews for profanity, offensive language or personally identifiable information, these reviews are posted exactly as submitted and no alterations are made by our team.
All our customer repair instructions are solicited directly from other customers just like you who have purchased and replaced this exact part. While we moderate these reviews for profanity, offensive language or personally identifiable information, these reviews are posted exactly as submitted and no alterations are made by our team.
Based on data from past customer purchasing behaviors, these parts are most commonly purchased together along with the part you are viewing. These parts may be necessary or helpful to replace to complete your current repair.
All our installation videos are created and produced in collaboration with our in-house repair technician, Mark Sodja, who has helped millions of eReplacementParts customers over the last 13 years repair their products. Mark has years of experience in selling and repairing both commercial and residential products with a specialty in gas-powered equipment.
This data is collected from customers who submitted a repair instruction after replacing this exact part. Customers can rate how easy the repair was to complete and how long it took. We aggregate this data to provide a repair rating that allows customers to quickly determine the difficulty and time needed to perform their own repair.