

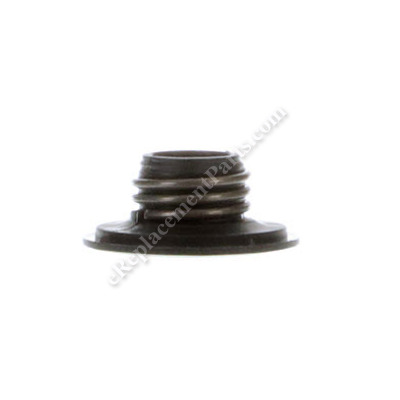


This is an authentic Husqvarna replacement part that has been sourced from the original manufacturer to be used with chainsaws. The worm gear is used to rotate the oil pump piston as the clutch spins. This item is available as an individual replacement part.
Worm Gear Assy 536860001
OEM part for: Husqvarna, Craftsman, Jonsered
Part Number: 536860001
$4.99
Usually ships in 7 - 12 business days
7 - 12 business days
Jump To:
Frequently Purchased Together ?


Compatibility
This part will fit the following 14 machines
Husqvarna
435 (2008-05) Chainsaw View Diagrams & Manuals
435 E (2008-05) Chainsaw View Diagrams & Manuals
440 E (2008-05) Chainsaw View Diagrams & Manuals
135 (2011-08) From Chain Saw View Diagrams & Manuals
135 E (2011-08) From Chain Saw View Diagrams & Manuals
140 (2012-01) From Chain Saw View Diagrams & Manuals
140 E (2012-01) From Chain Saw View Diagrams & Manuals
435 E II Chain Saw View Diagrams & Manuals
435 II Chain Saw View Diagrams & Manuals
440 E II Chain Saw View Diagrams & Manuals
440 II Chain Saw View Diagrams & Manuals
Craftsman
358381800 Chainsaw View Diagrams & Manuals
Jonsered
CS2240 (2011-05) Chain Saw View Diagrams & Manuals
CS2240 S (2011-05) Chain Saw View Diagrams & Manuals
Show More Compatible Models
This item works with the following types of products:
- Chain Saw Parts
- Saw Parts
This part replaces obsolete part #: 5442124-01, 544212402, 544212401
Customer Part Reviews ?
Average Rating (out of 5):
Click to filter by ratings:
5 stars
1
4 stars
1
3 stars
0
2 stars
0
1 stars
0
< PREV
- 1
Excellent
Excellent 👌
Guest -
February 11, 2023
Verified Purchase
Worm gear for chain saw
No body had part in store ... took a long time to receive from on line but was received first from here .... ordered 3 from different places one still not received one month later .... crazy .... thanks
Guest -
May 21, 2020
Verified Purchase
t
t
t -
t days ago
Verified Purchase
eReplacementParts Team
t
Questions & Answers ?
Our customer Service team is at the ready daily to answer your part and product questions.

Ask our Team
We have a dedicated staff with decades of collective experience in helping customers just like you purchase parts to repair their products.
Does this fit my product?Questions & Answers for Worm Gear Assy
No questions have been asked yet
Customer Repair Instructions ?
All our customer repair instructions are solicited directly from other customers just like you who have purchased and replaced this exact part.
The chain oiler pump was defective on my 450 20 inch Husqvarna chainsaw
Glenn - April 28, 2018
👍 1 of 1 people found this instruction helpful
Tool Type
Chain Saw
Difficulty
Easy
Time
Less than 15 minutes
Tools Used
Screwdriver, Everything is torx with an occasional phillips head screw
1 Pull spark plug and stuff a nylon rope into the cylinder to remove the clutch assembly.
2 Get a wrench or spanner type tool and place it in the clutch and rotate it clock wise until it the ads off the shaft ( The rope you cramped cyl stops the piston from moving )
3 REMOVE THE clutch asst. And the cover exposing the pump
4 REMOVE the old parts clean and inspect for blockage pre oil the new pump parts re install the cover then the clutch assy. fill the oiler with bar oil
5 Before installing the chain and bar start the saw and check to see if the oil is coming out.if so put the bar and chain on and get to cutting, oh yeah
Did you find this story helpful?
Thanks for voting and helping fellow customers!
Leaking bar oil.
Alexander - March 1, 2018
👍 1 of 1 people found this instruction helpful
Tool Type
Chain Saw
Difficulty
Easy
Time
15-30 minutes
Tools Used
Screwdriver, Socket set, Custom cut socket to remove the clutch.
Took the bar and chain off, removed the clutch, and sprocket. Took out the Oiler pump assembly, drained, and thoroughly cleaned the oil tank. Reinstalled all the new parts, leak fixed. Runs great
Did you find this story helpful?
Thanks for voting and helping fellow customers!
inspect, clean,lube & replace worn parts
Lawrence - March 23, 2022
Tool Type
Chain Saw
Difficulty
Medium
Time
1-2 hours
Tools Used
Screwdriver, Pliers, Socket set, Wrench Set
removed chain guard, chain & chain bar, clutch, pin bearing sleeve, oil hose & any part that has been chaffed. cleaned out saw dust/oil build ups.replaced parts where needed.installed chain & bar. adjusted to. proper tension. lubed internal parts on the rebuild. gapped new spark plug & replaced. put in 50:1 gas mix & bar oil.
started up saw & checked bar oil spray on a piece of cardboard. good as new !!
started up saw & checked bar oil spray on a piece of cardboard. good as new !!
Did you find this story helpful?
Thanks for voting and helping fellow customers!
The parts from eReplacements were very useful
Joseph - January 26, 2021
Tool Type
Chain Saw
Difficulty
Easy
Time
30-60 minutes
Tools Used
Screwdriver, Socket set
The parts were used to repair the oil leak on a Husqvarna 440e chainsaw. These saws are notorious for their oil leaks. Your parts arrived quickly and were very useful. I highly recommend your services.
Thanks
Thanks
Did you find this story helpful?
Thanks for voting and helping fellow customers!
Oiler on chainsaw not working
Lawrence - November 18, 2020
Tool Type
Chain Saw
Difficulty
Easy
Time
15-30 minutes
Tools Used
Screwdriver, Socket set
A quick YouTube tutorial and an easy job.
Did you find this story helpful?
Thanks for voting and helping fellow customers!
The chain would jam and lock up during use
douglas - March 9, 2020
Tool Type
Chain Saw
Difficulty
Easy
Time
30-60 minutes
Tools Used
Screwdriver, Pliers, Wrench Set
Took the chain and bar off the saw.
Removed the drive sprocket/ clutch assembly.
Removed the oil pump drive.
Cleaned all parts and reassembled.
Tested saw and got ready to cut firewood
To remove the clutch assembly, I had to take the spark plug out and put about 3 inches of starter rope in the cylinder to lock the piston in place.
I used a hammer and punch to spin the clutch off the crankshaft. (left hand threads)
Did you find this story helpful?
Thanks for voting and helping fellow customers!
I had a melted worm gear due to overheating, so it was so di
Naoto - June 29, 2019
Tool Type
Chain Saw
Difficulty
Hard
Time
More than 2 hours
Tools Used
Screwdriver, Wrench Set
I replaced them and check if oil pump is working.
My chainsaw is good condition now.
My chainsaw is good condition now.
Did you find this story helpful?
Thanks for voting and helping fellow customers!
General wear & tear of clutch drive and chain drive area..
John - February 11, 2017
👍 1 of 2 people found this instruction helpful
Tool Type
Chain Saw
Difficulty
Medium
Time
15-30 minutes
Tools Used
Screwdriver, Hammer & punch plus a short length of rope
1. Remove chain and bar.
2. Remove spark plug and insert short length of rope (enough to stop the piston from completing a stroke) leaving enough to grip for removal latter.
3. Place punch on outer portion of clutch assembly but inside the clutch drum and strike with hammer to loosen/unscrew clutch (counter-clockwise).
4. Remove clutch, drum and worm gear assemblies.
5. Install new parts in reverse order they were removed.
6. On Cover use screwdriver to remove screw on worn cover lid, remove and replace.
Notes: Use safety glasses if using compressed air to blow off debris, disposable gloves are recommended, and remove rope from cylinder before replacing spark plug (it was only used to keep the piston from reaching top of stroke so that the clutch assembly could be unscrewed and screwed back on).
Did you find this story helpful?
Thanks for voting and helping fellow customers!
OEM stands for Original Equipment Manufacturer and means the part you’re buying is sourced directly from the manufacturer who made your product. At eReplacementParts, we sell only genuine OEM parts, guaranteeing the part you’re purchasing is of better design and of higher quality than aftermarket parts.
Our product descriptions are a combination of data sourced directly from the manufacturers who made your product as well as content researched and curated by our content & customer service teams. This content is edited and reviewed internally before being made public to customers.
Our customer service team are at the ready daily to answer your part and product questions. We have a dedicated staff with decades of collective experience in helping customers just like you purchase parts to repair their products.
All our part reviews are solicited directly from other customers who have purchased this exact part. While we moderate these reviews for profanity, offensive language or personally identifiable information, these reviews are posted exactly as submitted and no alterations are made by our team.
All our customer repair instructions are solicited directly from other customers just like you who have purchased and replaced this exact part. While we moderate these reviews for profanity, offensive language or personally identifiable information, these reviews are posted exactly as submitted and no alterations are made by our team.
Based on data from past customer purchasing behaviors, these parts are most commonly purchased together along with the part you are viewing. These parts may be necessary or helpful to replace to complete your current repair.
All our installation videos are created and produced in collaboration with our in-house repair technician, Mark Sodja, who has helped millions of eReplacementParts customers over the last 13 years repair their products. Mark has years of experience in selling and repairing both commercial and residential products with a specialty in gas-powered equipment.
This data is collected from customers who submitted a repair instruction after replacing this exact part. Customers can rate how easy the repair was to complete and how long it took. We aggregate this data to provide a repair rating that allows customers to quickly determine the difficulty and time needed to perform their own repair.