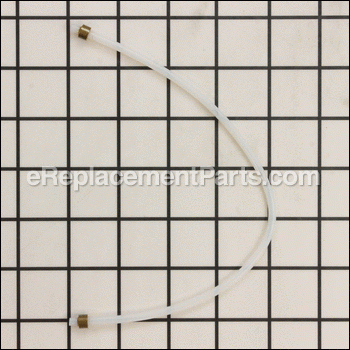

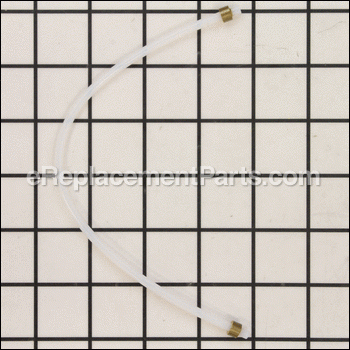

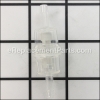
This authentic OEM tube, also referred to as a hose, is specially made for espresso machines. It has two bushes on either end and helps to control the flow of water inside the appliance. The hose should be replaced if it is cracked, worn down, or deformed. A faulty hose will result in water leakages, and damage to the internal parts of the equipment. Ensure the machine is switched off before beginning the repair. Remove the back panel of the espresso machine to access the tube. Carefully remove the fasteners holding the tube in place and pull it out of the machine. Place the new tube inside the appliance and reinstall the fasteners. Reattach the back panel to complete the repair.
Tube Ptfe Di2-de4 L=270 2bushe 5513212881
OEM part for: DeLonghi
Part Number: 5513212881
$8.32
In Stock
Jump To:
Frequently Purchased Together ?


Compatibility
This part will fit the following 62 machines
DeLonghi
BAR12FU Espresso/Cappuccino Maker View Diagrams & Manuals
BAR42E Espresso/Cappuccino Maker View Diagrams & Manuals
BCO264B Espresso/Cappuccino/Coffee Combo Cafe Nero View Diagrams & Manuals
EAM3300 Magnifica View Diagrams & Manuals
EAM3400 Magnifica View Diagrams & Manuals
EAM3400.N Magnifica View Diagrams & Manuals
EAM3500 Magnifica View Diagrams & Manuals
EAM3500.N Magnifica View Diagrams & Manuals
EAM4400 Magnifica View Diagrams & Manuals
EAM4500 Magnifica View Diagrams & Manuals
EC140B Espresso Maker Black View Diagrams & Manuals
ESAM3300 Magnifica View Diagrams & Manuals
ESAM3300.S Magnifica View Diagrams & Manuals
ESAM3500.N Magnifica View Diagrams & Manuals
ESAM4500 Magnifica View Diagrams & Manuals
ESAM5400 Coffee Maker View Diagrams & Manuals
ESAM5500.B Coffee Maker View Diagrams & Manuals
ESAM5500.M Coffee Maker View Diagrams & Manuals
ESAM6600 Magnifica View Diagrams & Manuals
ECAM23210B Fully Automatic Coffee Maker View Diagrams & Manuals
EC860 Espresso Machine View Diagrams & Manuals
ECAM22.110.SB Coffee Maker View Diagrams & Manuals
EN680.M Metal Nespresso View Diagrams & Manuals
EN670.B Nespressor Coffee Maker View Diagrams & Manuals
ESAM5600 Coffee Makers View Diagrams & Manuals
ESAM3500N (0132215019)(X0132215019) Magnifica Digital Espresso And Coffee Machine View Diagrams & Manuals
BAR12 (132103004) Espresso Pump View Diagrams & Manuals
EAM3500 (0132215003) Magnifica Digital Super Automatic Espresso/Coffee Machine View Diagrams & Manuals
ECAM23210SB (132213032) Magnifica S Automatic Espresso Machine View Diagrams & Manuals
ESAM5500B (132215047) Perfecta Automatic Espresso, Cappuccino Maker View Diagrams & Manuals
ESAM4500 (132215030) Fully Automatic Bean To Cup Machine View Diagrams & Manuals
EC860 Dedica Cappuccino Maker View Diagrams & Manuals
ESAM5400 (132214023) Perfecta Espresso Machine View Diagrams & Manuals
BAR42 (132152004) Espresso Pump View Diagrams & Manuals
ECAM28465M (0132215217) Primadonna S Automatic Espresso Machine View Diagrams & Manuals
ECAM22110B Magnifica Xs Automatic Espresso Machine View Diagrams & Manuals
ECAM45760B Superautomatic Cappuccino System View Diagrams & Manuals
EAM3300 (132213001) Magnifica Fully Automatic Expresso View Diagrams & Manuals
ECAM23210B Magnifica S Automatic Espresso Machine View Diagrams & Manuals
BAR42E (132152004) Espresso Pump View Diagrams & Manuals
EAM3400 (0132214004) Magnifica Fully Automatic Expresso View Diagrams & Manuals
EC140B (132103058) Espresso Coffee Maker View Diagrams & Manuals
ESAM3300EXD Superautomatic Capachino System View Diagrams & Manuals
ESAM6600 (132215018) Digital Super-Automatic Espresso Machine View Diagrams & Manuals
ECAM23120SB Superautomatic Capachino System View Diagrams & Manuals
ESAM5600SL (132215132) Perfecta Automatic Espresso Machine View Diagrams & Manuals
ESAM5500M (132215043) Automatic Expresso Maker View Diagrams & Manuals
ESAM3300EXHD Super Automatic Capachino System View Diagrams & Manuals
ECAM23450SL (132215123) Magnifica Super Automatic Espresso/Cappuccino Machine View Diagrams & Manuals
BCO264B (132552001) Cafe Nero Combo Coffee And Espresso Maker View Diagrams & Manuals
ECAM28465MD Superautomatic Capachino System View Diagrams & Manuals
ECAM26455M (132215147) Primadonna S De Luxe Ecam View Diagrams & Manuals
ECAM25462S (0132215218) Cappuccino Maker View Diagrams & Manuals
ECAM22110SB Magnifica Xs Automatic Espresso Machine View Diagrams & Manuals
ECAM23120SBS11 (0132213126) Coffee Maker View Diagrams & Manuals
EAM4500 (132215010) Fully Automatic View Diagrams & Manuals
ESAM6900M (0132219002) Primadonna Exclusive Coffee Maker View Diagrams & Manuals
ECAM23460 Magnifica S Automatic Espresso Machine View Diagrams & Manuals
ESAM3300S Magnifica Automatic Espresso/Cappuccino View Diagrams & Manuals
ECAM23260 Magnifica Smart Cappuccino Machine View Diagrams & Manuals
ECAM28465B Coffee Maker With Grinder View Diagrams & Manuals
ECAM23260SB Magnifica S Smart Cappuccino Maker View Diagrams & Manuals
Show More Compatible Models
This item works with the following types of products:
- Espresso Parts
- Coffee Maker Parts
This part replaces obsolete part #: 5532108300, 5532120500
Customer Part Reviews ?
Average Rating (out of 5):
Click to filter by ratings:
5 stars
0
4 stars
0
3 stars
1
2 stars
0
1 stars
0
< PREV
- 1
Part is not what looking for
Part is not looking for, but customer service is very nice to support.
Guest -
March 2, 2020
Verified Purchase
t
t
t -
t days ago
Verified Purchase
eReplacementParts Team
t
Questions & Answers ?
Our customer Service team is at the ready daily to answer your part and product questions.

Ask our Team
We have a dedicated staff with decades of collective experience in helping customers just like you purchase parts to repair their products.
Does this fit my product?Questions & Answers for Tube Ptfe Di2-de4 L=270 2bushe
No questions have been asked yet
Customer Repair Instructions ?
All our customer repair instructions are solicited directly from other customers just like you who have purchased and replaced this exact part.
lLeaking tube
David - March 22, 2016
👍 1 of 1 people found this instruction helpful
Tool Type
Coffee Maker
Difficulty
Easy
Time
Less than 15 minutes
Tools Used
Screwdriver, Pliers
Parts Used
Remove panels of coffee maker, remove leaking tube, replace with new tube, replace panels.
Did you find this story helpful?
Thanks for voting and helping fellow customers!
Hose leaked, old washer
Marcel - November 6, 2020
Tool Type
Coffee Maker
Difficulty
Easy
Time
15-30 minutes
Tools Used
Screwdriver, Pliers
Opened machine
Took retaining clips off the hose
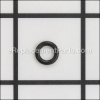
Applied silicone grease on the washer and replaced hose with new washers.
Very easy job.
Took retaining clips off the hose
Applied silicone grease on the washer and replaced hose with new washers.
Very easy job.
Did you find this story helpful?
Thanks for voting and helping fellow customers!
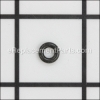
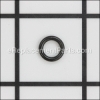
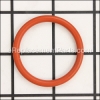
Leaking water during expresso making rreplaced 1 tube and several Orings, required silacone lube for rings
ALLEN - January 30, 2018
Tool Type
Coffee Maker
Difficulty
Medium
Time
1-2 hours
Tools Used
Screwdriver, Take pictures at each stage of disassembly
1 Removed back and L side of coffee maker, Removed coffee press capsule via port behind water reservoir. Lift top off
2 Remove 4 screws holding press capsule together, take pix so levers on bottom can be put in exactly same position. Then remove piston, the remove O-rings, clean grooves thoroughly, grease new rings, and replace them
3 Remove center phillips screw on screen on piston top, clean thoroughly w soap/water and replace
3A. Reassemble piston into press capsule, take care to insert the spring under the top level lever, and refer to your picture to reassemble to press capsule.
4. Examine tube location, remove and replace. DO not disassemble steam generator unless A. there is evidence of leakage or your unit is not producing adequate steam on steam setting.
5. Re-assemble tops side and back.
Did you find this story helpful?
Thanks for voting and helping fellow customers!
OEM stands for Original Equipment Manufacturer and means the part you’re buying is sourced directly from the manufacturer who made your product. At eReplacementParts, we sell only genuine OEM parts, guaranteeing the part you’re purchasing is of better design and of higher quality than aftermarket parts.
Our product descriptions are a combination of data sourced directly from the manufacturers who made your product as well as content researched and curated by our content & customer service teams. This content is edited and reviewed internally before being made public to customers.
Our customer service team are at the ready daily to answer your part and product questions. We have a dedicated staff with decades of collective experience in helping customers just like you purchase parts to repair their products.
All our part reviews are solicited directly from other customers who have purchased this exact part. While we moderate these reviews for profanity, offensive language or personally identifiable information, these reviews are posted exactly as submitted and no alterations are made by our team.
All our customer repair instructions are solicited directly from other customers just like you who have purchased and replaced this exact part. While we moderate these reviews for profanity, offensive language or personally identifiable information, these reviews are posted exactly as submitted and no alterations are made by our team.
Based on data from past customer purchasing behaviors, these parts are most commonly purchased together along with the part you are viewing. These parts may be necessary or helpful to replace to complete your current repair.
All our installation videos are created and produced in collaboration with our in-house repair technician, Mark Sodja, who has helped millions of eReplacementParts customers over the last 13 years repair their products. Mark has years of experience in selling and repairing both commercial and residential products with a specialty in gas-powered equipment.
This data is collected from customers who submitted a repair instruction after replacing this exact part. Customers can rate how easy the repair was to complete and how long it took. We aggregate this data to provide a repair rating that allows customers to quickly determine the difficulty and time needed to perform their own repair.