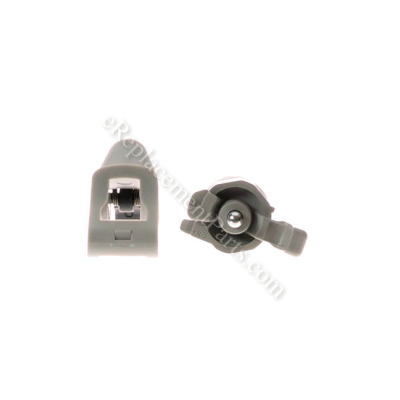


This is a Genuine Manufacturer Sourced replacement part used on some Dewalt Framing Nailers. This Assembly includes a new valve, trigger and o-rings. If your tool is leaking air or the trigger valve is stuck, replacing this part may resolve the issue.
Trigger Valve Assembly 5140095-73
OEM part for: DeWALT
Part Number: 5140095-73
$48.34
In Stock
Jump To:
Frequently Purchased Together ?


Compatibility
This part will fit the following 14 machines
DeWALT
D51823 Type 1 Clipped Head Framing Nailer View Diagrams & Manuals
D51823 Type 2 Clipped Head Framing Nailer View Diagrams & Manuals
D51823 Type 2A Clipped Head Framing Nailer View Diagrams & Manuals
D51845 Type 1 Round Head Framing Nailer View Diagrams & Manuals
D51845 Type 2 Round Head Framing Nailer View Diagrams & Manuals
D51845 Type 2A Round Head Framing Nailer View Diagrams & Manuals
D51822 Type 1 Clipped Head Framing Nailer View Diagrams & Manuals
D51844 Type 1 Round Head Framing Nailer View Diagrams & Manuals
D51822 Type 3 Framing Nailer View Diagrams & Manuals
D51823 Type 3 Framing Nailer View Diagrams & Manuals
D51844 Type 3 Framing Nailer View Diagrams & Manuals
D51845 Type 3 Framing Nailer View Diagrams & Manuals
D51822 Type 2 Framing Nailer View Diagrams & Manuals
D51844 Type 2 Framing Nailer View Diagrams & Manuals
Show More Compatible Models
This item works with the following types of products:
- Nailer Parts
This part replaces obsolete part #: 641006-00, 390738-00
Customer Part Reviews ?
Average Rating (out of 5):
Click to filter by ratings:
5 stars
3
4 stars
1
3 stars
0
2 stars
0
1 stars
0
< PREV
- 1
It worked great! I will be ordering from you again no dealt. Thank you
The instructions we spot on the part fit perfect.
Guest -
August 23, 2022
Verified Purchase
Quick fix with an exact match part
The new trigger valve fixed this nailer that was continually dry firing without touching the trigger.
Guest -
September 20, 2021
Verified Purchase
Quick repair
Great parts. Easy repair. Nailer works, again. Thanks!
Guest -
April 20, 2020
Verified Purchase
Rapair was an easy one, had no problems everything fit well and worked like new after repair.
New part all fit excellent there was an upgrade to this repair, which I was explained in a note included with part, all went well great job.
Guest -
June 4, 2019
Verified Purchase
t
t
t -
t days ago
Verified Purchase
eReplacementParts Team
t
Questions & Answers ?
Our customer Service team is at the ready daily to answer your part and product questions.

Ask our Team
We have a dedicated staff with decades of collective experience in helping customers just like you purchase parts to repair their products.
Does this fit my product?Questions & Answers for Trigger Valve Assembly
No questions have been asked yet
Customer Repair Instructions ?
All our customer repair instructions are solicited directly from other customers just like you who have purchased and replaced this exact part.
Air would leak from the trigger area when the trigger was depressed.
Jeremy - February 11, 2016
👍 11 of 13 people found this instruction helpful
Tool Type
Nailer
Difficulty
Medium
Time
Less than 15 minutes
Tools Used
, punch
Parts Used
Punch out the pin holding the trigger and the two pins holding the trigger valve assembly. Place a rag over the trigger valve assembly and connect pressurized air line to the nailer to dislodge the assembly. Oil o-rings on new assembly and insert carefully. replace trigger and pins. I would suggest cleaning all the dirt and grime away from the trigger area before taking it apart.
Did you find this story helpful?
Thanks for voting and helping fellow customers!
Air was leaking around nail gun trigger
Sherri - September 16, 2016
👍 4 of 4 people found this instruction helpful
Tool Type
Nailer
Difficulty
Medium
Time
30-60 minutes
Tools Used
, Hammer & a skinning punch
Parts Used
Removed the pins, took out the old trigger, and put in the new one. Be aware of the spring and don't mix up the pins, which are different sizes.
Did you find this story helpful?
Thanks for voting and helping fellow customers!
Nailer inoperable; O-rings on trigger worn out
Bill - September 9, 2016
👍 3 of 3 people found this instruction helpful
Tool Type
Nailer
Difficulty
Easy
Time
Less than 15 minutes
Tools Used
, torx, pin punch
Parts Used
1. remove nail track/feed using T-25 torx
2. use pin punch to drive out roll pin(s) holding trigger assembly
3. pull/blow out old trigger
4. apply light coat of silicone grease to new trigger O-rings
5. gently/carefully insert and seat new trigger (do not force, be careful not to cut O-rings)
6. reinsert/press roll pin(s) back in
7. re-attach nail feed guide
8. attach air supply, check for leaks, test ---- you're done [hopefully]
Did you find this story helpful?
Thanks for voting and helping fellow customers!
Leaking air at the trigger valve
Sandra - September 12, 2016
👍 3 of 3 people found this instruction helpful
Tool Type
Nailer
Difficulty
Easy
Time
15-30 minutes
Tools Used
Pliers, Small hammer and punch
Parts Used
Removed the pins with a small punch and hammer. Took out the trigger and trigger valve, inserted the new one, and replaced pins. Cleaned everything before replacing new parts. Works like a charm. Thanks guys. Sure beats buying a new one!
Did you find this story helpful?
Thanks for voting and helping fellow customers!
Nailer would not fire, leaked air from trigger when pulled
Eric - July 26, 2016
👍 3 of 3 people found this instruction helpful
Tool Type
Nailer
Difficulty
Medium
Time
15-30 minutes
Tools Used
, Punch and hammer
Parts Used
Replaced trigger valve, took out four pins to remove trigger and valve assembly.
Did you find this story helpful?
Thanks for voting and helping fellow customers!
Nailer would not shoot nails, air leak around trigger
Steven - March 6, 2016
👍 2 of 2 people found this instruction helpful
Tool Type
Nailer
Difficulty
Easy
Time
15-30 minutes
Tools Used
, allen wrench, punch, hammer,pliars
Parts Used
Punch out pins that holds trigger in, pull out old trigger, may need pliers, oil hole put new trigger in. The black o rings will last but the clear o rings will not, be sure to use the recommended oil for your gun, the wrong oil can damage your o rings.
Did you find this story helpful?
Thanks for voting and helping fellow customers!
Trigger o rings
Gary - November 15, 2020
Tool Type
Nailer
Difficulty
Easy
Time
Less than 15 minutes
Tools Used
Adjustable Wrench, Allen wrench and a punch
Parts Used
Pushed the pins out put the new one in
Did you find this story helpful?
Thanks for voting and helping fellow customers!
All the gaskets were pretty much turned to mush and no longer held air pressure.
Brian - May 5, 2020
Tool Type
Nailer
Difficulty
Easy
Time
Less than 15 minutes
Tools Used
Pliers, Allen wrench, hammer and punch
Parts Used
1) I used a gasket kit to replace all the main body o rings.
2) figured out that the trigger gaskets also failed and replaced that kit.
2) figured out that the trigger gaskets also failed and replaced that kit.
Did you find this story helpful?
Thanks for voting and helping fellow customers!
air nailer would not fire
Michael - April 17, 2020
Tool Type
Nailer
Difficulty
Easy
Time
Less than 15 minutes
Tools Used
, Pin punch
Parts Used
1. removed gromet keeper on triger pin
2. used pin puch to drive out two retaining pins
3. removed triger assembly
4. cleaned triger area
5. reversed process for installation
2. used pin puch to drive out two retaining pins
3. removed triger assembly
4. cleaned triger area
5. reversed process for installation
Did you find this story helpful?
Thanks for voting and helping fellow customers!
When you pulled the trigger it would continually shoot nails out unill you were out of nails.
Bradley - May 24, 2019
Tool Type
Nailer
Difficulty
Easy
Time
15-30 minutes
Tools Used
Screwdriver, Nutdriver
Parts Used
1. Pound out the roll pins.
2. Remove trigger assembly.
3. Install new trigger assembly
4. Pound in roll pins.
2. Remove trigger assembly.
3. Install new trigger assembly
4. Pound in roll pins.
Did you find this story helpful?
Thanks for voting and helping fellow customers!
Load More Install Stories
OEM stands for Original Equipment Manufacturer and means the part you’re buying is sourced directly from the manufacturer who made your product. At eReplacementParts, we sell only genuine OEM parts, guaranteeing the part you’re purchasing is of better design and of higher quality than aftermarket parts.
Our product descriptions are a combination of data sourced directly from the manufacturers who made your product as well as content researched and curated by our content & customer service teams. This content is edited and reviewed internally before being made public to customers.
Our customer service team are at the ready daily to answer your part and product questions. We have a dedicated staff with decades of collective experience in helping customers just like you purchase parts to repair their products.
All our part reviews are solicited directly from other customers who have purchased this exact part. While we moderate these reviews for profanity, offensive language or personally identifiable information, these reviews are posted exactly as submitted and no alterations are made by our team.
All our customer repair instructions are solicited directly from other customers just like you who have purchased and replaced this exact part. While we moderate these reviews for profanity, offensive language or personally identifiable information, these reviews are posted exactly as submitted and no alterations are made by our team.
Based on data from past customer purchasing behaviors, these parts are most commonly purchased together along with the part you are viewing. These parts may be necessary or helpful to replace to complete your current repair.
All our installation videos are created and produced in collaboration with our in-house repair technician, Mark Sodja, who has helped millions of eReplacementParts customers over the last 13 years repair their products. Mark has years of experience in selling and repairing both commercial and residential products with a specialty in gas-powered equipment.
This data is collected from customers who submitted a repair instruction after replacing this exact part. Customers can rate how easy the repair was to complete and how long it took. We aggregate this data to provide a repair rating that allows customers to quickly determine the difficulty and time needed to perform their own repair.