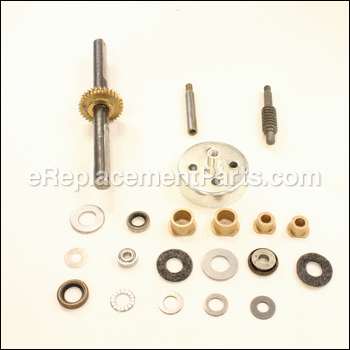
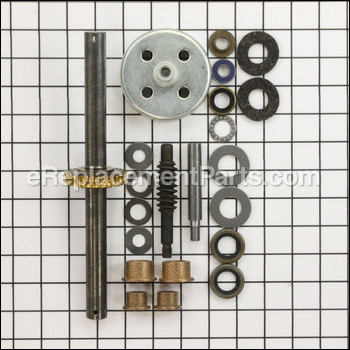
Transmission Assembly 06200-V06-305
OEM part for: Honda
Part Number: 06200-V06-305
Compatibility
This part will fit the following 3 machines
Honda
This item works with the following types of products:
Customer Part Reviews ?
- 1
Questions & Answers ?
Our customer Service team is at the ready daily to answer your part and product questions.

Ask our Team
We have a dedicated staff with decades of collective experience in helping customers just like you purchase parts to repair their products.
Does this fit my product?Questions & Answers for Transmission Assembly
Customer Repair Instructions ?
All our customer repair instructions are solicited directly from other customers just like you who have purchased and replaced this exact part.
Tines stopped turning on my Honda Rototiller Model FG 100
Tool Type
Engine
Difficulty
Easy
Time
More than 2 hours
Tools Used
Screwdriver, Pliers, Power Drill, Socket set, Wrench Set, Adjustable Wrench, Not really
Parts Used
I also had to drill out the rivets on the soil guard and drill out the holes. Used 1/4 20 bolts to bolt it back together. I also applied lock tight on all the bolts when I reassembled everything.
Actually the job went better that I had expected it to. Next day back in my garden and the tiller was like brand new once again. I've always emptied the fuel and ran it dry before putting it back in my storage shed. I bought the Tiller 18 years ago and it fires up on the second pull. I've replaced the fuel lines I guess two or three times since I bought it years ago. Great little machine. Keep the oil changed, always empty the fuel before putting up and rinse off any dirt.
The parts plus shipping cost $148, a whole lot cheaper than buying a new one.
Good luck if you are a do it yourselfer. RC in Houston, TX.
Transmission gears striped
Tool Type
Engine
Difficulty
Easy
Time
15-30 minutes
Tools Used
Socket set
Parts Used
Tiller transmission
Tool Type
Engine
Difficulty
Medium
Time
1-2 hours
Tools Used
Screwdriver, Socket set, Wrench Set, Adjustable Wrench
Parts Used
Bushing was broken, teething tine shaft broken and severely worn thin.
Tool Type
Engine
Difficulty
Medium
Time
More than 2 hours
Tools Used
Screwdriver, Power Drill, Socket set, Wrench Set, Special Transmission Clutch Tool
Parts Used
1. Removed transmission assembly from engine.
2. Disassembled the transmission.
3. Removed damaged parts.
4. Scraped off sealant from both side for transmission housing.
5. Cleaned transmission housing.
6. Found out from instructions a special tool was needed to attach the clutch drum to the shaft and screw gear.
* ( Would have been nice to know before purchase. I wasn't willing to pay $45 to purchase one so I bought a 1 1/2" socket at Lowes and made my own which took a couple of hours. Also, the metal on the upper shaft was soft enough that when my torque wrench malfunctioned it allowed the bottom screw gear thread to slightly mushroom the upper shaft. Thank goodness I was watching.)
7. Assembled the bushings and seals on the transmission housing and transmission gears to the clutch drum.
8. Applied Permatex Red RTV High Temp Sealant to both the inside of each housing. (Not willing to pay $25 for Honda's sealant. I've done car and truck engine rebuilds so I couldn't see Honda's product being superior.)
9. Put the gears inside the housing and reassembled.
10. Filled transmission with required grease.
11.Attached transmission to engine.
12. Started engine on first pull and the tines turned like they did when it was new.
FG 100 Transmission Gears Stripped
Tool Type
Engine
Difficulty
Medium
Time
1-2 hours
Tools Used
Screwdriver, Pliers, Power Drill, Socket set, Wrench Set, Nutdriver, torque wrench
Parts Used
OEM stands for Original Equipment Manufacturer and means the part you’re buying is sourced directly from the manufacturer who made your product. At eReplacementParts, we sell only genuine OEM parts, guaranteeing the part you’re purchasing is of better design and of higher quality than aftermarket parts.
Our product descriptions are a combination of data sourced directly from the manufacturers who made your product as well as content researched and curated by our content & customer service teams. This content is edited and reviewed internally before being made public to customers.
Our customer service team are at the ready daily to answer your part and product questions. We have a dedicated staff with decades of collective experience in helping customers just like you purchase parts to repair their products.
All our part reviews are solicited directly from other customers who have purchased this exact part. While we moderate these reviews for profanity, offensive language or personally identifiable information, these reviews are posted exactly as submitted and no alterations are made by our team.
All our customer repair instructions are solicited directly from other customers just like you who have purchased and replaced this exact part. While we moderate these reviews for profanity, offensive language or personally identifiable information, these reviews are posted exactly as submitted and no alterations are made by our team.
Based on data from past customer purchasing behaviors, these parts are most commonly purchased together along with the part you are viewing. These parts may be necessary or helpful to replace to complete your current repair.
All our installation videos are created and produced in collaboration with our in-house repair technician, Mark Sodja, who has helped millions of eReplacementParts customers over the last 13 years repair their products. Mark has years of experience in selling and repairing both commercial and residential products with a specialty in gas-powered equipment.
This data is collected from customers who submitted a repair instruction after replacing this exact part. Customers can rate how easy the repair was to complete and how long it took. We aggregate this data to provide a repair rating that allows customers to quickly determine the difficulty and time needed to perform their own repair.


