
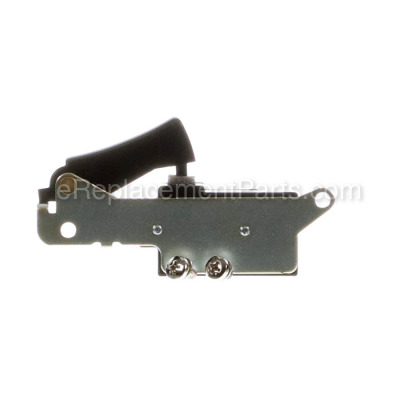


This replacement switch is specially manufactured for use on Hitachi demolition and rotary hammers. It is a genuine OEM sourced item, not an aftermarket imitation. This is the part of the tool handling on/off operations. Over time, moving mechanical components of the switch will begin to fail requiring replacement. This switch has a plastic body and it is sold individually.
To replace this switch you will need a screwdriver.
• Remove screws used to hold two pieces of the housing set together
• Disconnect wires from the old switch and remove it from the housing
• Secure the new switch in the housing
• Connect wires to it
• Reassemble and test the unit
Switch (a) (1 P Screw Type) W/ 992891
OEM part for: Metabo HPT (Hitachi)
Part Number: 992891
$33.43
Usually ships in 7 - 12 business days
7 - 12 business days
Jump To:
Product Description ?
- Classification: Part
- Weight: 0.08 lbs.
- Shipping: Ships Worldwide
Frequently Purchased Together ?

Compatibility
This part will fit the following 30 machines
Metabo HPT (Hitachi)
H55SC 3/4" Hex Demolition Hammer View Diagrams & Manuals
DH38YE 1-1/2" Rotary Hammer, 2-Mode, Spline Shank View Diagrams & Manuals
DH50SBK 2" Spline Shank Rotary Hammer View Diagrams & Manuals
H65 1-1/8" Hex Demolition Hammer View Diagrams & Manuals
H85 H85 1-1/8" Hex Demolition Hammer View Diagrams & Manuals
H85KIT 1-1/8" Hex Demolition Hammer View Diagrams & Manuals
H85KIT2 1-1/8" Hex Demolition Hammer View Diagrams & Manuals
H85KIT4 1-1/8" Hex Demolition Hammer View Diagrams & Manuals
H90SB 1-1/8" Hex Demolition Hammer View Diagrams & Manuals
H90SBKIT 1-1/8" Hex Demolition Hammer View Diagrams & Manuals
H90SBKIT2 1-1/8" Hex Demolition Hammer View Diagrams & Manuals
H90SBKIT4 1-1/8" Hex Demolition Hammer View Diagrams & Manuals
H90SE 1-1/8" Hex 70lb Breaker View Diagrams & Manuals
DH38YA SPLINE 1/2" Rotary Hammer View Diagrams & Manuals
H45SA Demolition Hammer View Diagrams & Manuals
H45SB Hammer View Diagrams & Manuals
H45SB2 3/4" HEX 21/32" Round Demolition Hammer 8AMP View Diagrams & Manuals
PH-65A Demo Hammer View Diagrams & Manuals
VRY38 Rotary Hammer View Diagrams & Manuals
H55SCM 24lb 3/4-Inch Hex Demolition Hammer, 10.4 Amp View Diagrams & Manuals
H70SD Hammer Drill View Diagrams & Manuals
H90 Hammer Drill View Diagrams & Manuals
DH28Y Hammer Drill View Diagrams & Manuals
DH50SA1 Hammer Drill View Diagrams & Manuals
H41SA Hammer Drill View Diagrams & Manuals
H41SC Hammer Drill View Diagrams & Manuals
H55SCK Demolition Hammer View Diagrams & Manuals
H70SA Hammer Drill View Diagrams & Manuals
H90SC Hammer Drill View Diagrams & Manuals
H90SEKIT4 Demolition Hammer View Diagrams & Manuals
Show More Compatible Models
This item works with the following types of products:
- Demolition Hammer Parts
- Rotary Hammer Parts
Customer Part Reviews ?
Average Rating (out of 5):
Click to filter by ratings:
5 stars
3
4 stars
0
3 stars
0
2 stars
0
1 stars
0
< PREV
- 1
work good.
arrive quick it was in good condition.
Guest -
August 27, 2021
Verified Purchase
Correct, hard to find part, legit business..
New, orig part, fast shipping, good communication. Decent/ok price.
1st time ordering, would recommend and use again.
Guest -
April 5, 2021
Verified Purchase
correct switch worked great 5 minute fix
easy fix same as OEM
Guest -
October 16, 2019
Verified Purchase
t
t
t -
t days ago
Verified Purchase
eReplacementParts Team
t
Questions & Answers ?
Our customer Service team is at the ready daily to answer your part and product questions.

Ask our Team
We have a dedicated staff with decades of collective experience in helping customers just like you purchase parts to repair their products.
Does this fit my product?Questions & Answers for Switch (a) (1 P Screw Type) W/
No questions have been asked yet
Customer Repair Instructions ?
All our customer repair instructions are solicited directly from other customers just like you who have purchased and replaced this exact part.
Intermittent power
George - March 11, 2019
Tool Type
Demolition Hammer
Difficulty
Easy
Time
15-30 minutes
Tools Used
Screwdriver, Allen wrench
Did you find this story helpful?
Thanks for voting and helping fellow customers!
Trigger switch failure.
Michael - April 25, 2018
Tool Type
Demolition Hammer
Difficulty
Easy
Time
Less than 15 minutes
Tools Used
Screwdriver
Parts Used
*** MAKE SURE MACHINE IS UNPLUGGED FROM POWER SOURCE***
1. Remove the three #2 Phillips screws from the handle.
2. Remove the handle itself revealing the switch and hookups.
3. Remove the switch from the unit.
4. Remove the switch from the rubber protective housing.
5. Remove the (2) screws labeled 1, 2, and the crimped on ring connectors from those screws.
6. Discard the broken switch!
7. Install the new switch,
8. Reconnect the crimped on ring connectors using the (2) screws into positions labeled 1, 2.
9. Install the reconnected switch into rubber protective housing.
10. Install the switch back into the unit.
11. Reinstall the handle make sure all wires are inside and nothing is pinched.
12. Reinstall the three #2 Phillips screws into the handle.
Plug the machine back into the appropriate power source and test!
Did you find this story helpful?
Thanks for voting and helping fellow customers!
Old hammer drill had no power.
Bernie - December 3, 2017
Tool Type
Hammer Drill
Difficulty
Medium
Time
1-2 hours
Tools Used
Screwdriver, Pliers
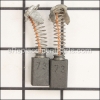
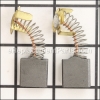
Replace the switch and brushes, now it's like new.
Did you find this story helpful?
Thanks for voting and helping fellow customers!
Switch broke
Bob - March 10, 2017
Tool Type
Demolition Hammer
Difficulty
Easy
Time
Less than 15 minutes
Tools Used
Screwdriver
Parts Used
Remove the screws from the handle and separate.
Take a picture of where the internal part are located
Remove the cord clamp
Disconnect the wires and remove the old switch
Connect the wires to the new switch
Install the cord clamp and switch
Screw the handle back on
Take a picture of where the internal part are located
Remove the cord clamp
Disconnect the wires and remove the old switch
Connect the wires to the new switch
Install the cord clamp and switch
Screw the handle back on
Did you find this story helpful?
Thanks for voting and helping fellow customers!
OEM stands for Original Equipment Manufacturer and means the part you’re buying is sourced directly from the manufacturer who made your product. At eReplacementParts, we sell only genuine OEM parts, guaranteeing the part you’re purchasing is of better design and of higher quality than aftermarket parts.
Our product descriptions are a combination of data sourced directly from the manufacturers who made your product as well as content researched and curated by our content & customer service teams. This content is edited and reviewed internally before being made public to customers.
Our customer service team are at the ready daily to answer your part and product questions. We have a dedicated staff with decades of collective experience in helping customers just like you purchase parts to repair their products.
All our part reviews are solicited directly from other customers who have purchased this exact part. While we moderate these reviews for profanity, offensive language or personally identifiable information, these reviews are posted exactly as submitted and no alterations are made by our team.
All our customer repair instructions are solicited directly from other customers just like you who have purchased and replaced this exact part. While we moderate these reviews for profanity, offensive language or personally identifiable information, these reviews are posted exactly as submitted and no alterations are made by our team.
Based on data from past customer purchasing behaviors, these parts are most commonly purchased together along with the part you are viewing. These parts may be necessary or helpful to replace to complete your current repair.
All our installation videos are created and produced in collaboration with our in-house repair technician, Mark Sodja, who has helped millions of eReplacementParts customers over the last 13 years repair their products. Mark has years of experience in selling and repairing both commercial and residential products with a specialty in gas-powered equipment.
This data is collected from customers who submitted a repair instruction after replacing this exact part. Customers can rate how easy the repair was to complete and how long it took. We aggregate this data to provide a repair rating that allows customers to quickly determine the difficulty and time needed to perform their own repair.