eReplacementParts.com
877-346-4815
Makita Parts

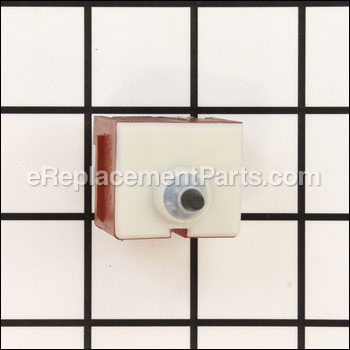
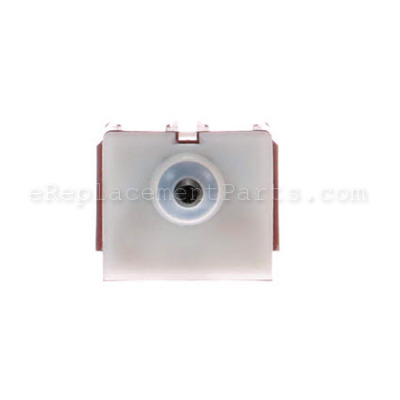
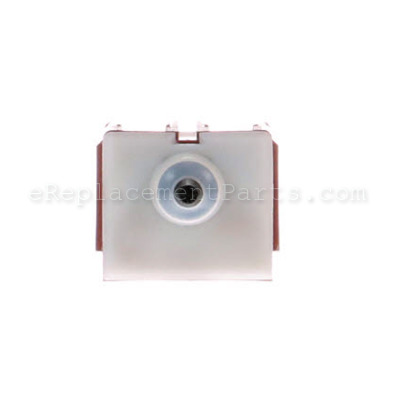
Switch 650579-7

OEM part for: Makita

Part Number: 650579-7


Install
Videos!
Switch - 650579-7:Makita 360 View
Switch - 650579-7:MakitaSwitch - 650579-7:MakitaSwitch - 650579-7:Makita 360 View
In Stock
Ships within 1 business day
Easy 15-30 minutes (10 rated repairs)?
OEM: Original Equipment Manufacturer ?
Makita
Does this d-block d-md-none fit my product?

Product Description ?

This is a Push-Button type switch that has 4 terminals, 2 internal and 2 external. This genuine Makita replacement part is sold individually.

rnrnSwitches are commonly replaced parts in tools. A switch handles on/off and variable speed operations. They also have a role in electric breaking; they can momentarily reverse electrical polarity. Because switches use mechanical internals, they will degrade and wear out over time, eventually needing replacement. Some common signs of a broken or failing switch are as follows:
• The tool has completely stopped functioning – it will not start.
• The tool operates intermittently, requiring multiple tries to turn on, until eventually it won’t start at all.
• The variable speed function and electric braking aren’t working properly.

  • Classification: Part
  • Weight: 0.01 lbs.
  • Shipping: Ships Worldwide

Compatibility

This part will fit the following 75 machines

Makita

9558PB Angle Grinder View Diagrams & Manuals
9557NB Angle Grinder View Diagrams & Manuals
9557PB Angle Grinder View Diagrams & Manuals
BGA452 Angle Grinder View Diagrams & Manuals
GD0600 Paddle Switch Die Grinder View Diagrams & Manuals
9566PC 6" SJS Cutoff / Angle Grinder View Diagrams & Manuals
9565PC 5" SJS Angle Grinder View Diagrams & Manuals
9564PC 4-1/2" SJS Angle Grinder View Diagrams & Manuals
BGA452Z 18V LXT Lithium-Ion Cordless 4-1/2" Cut-Off/Angle Grinder View Diagrams & Manuals
GD0601 1/4" Die Grinder View Diagrams & Manuals
GA4534 Paddle Switch Angle Grinder View Diagrams & Manuals
LXDG01 18V LXT Lithium-Ion Cordless 1/4" Die Grinder View Diagrams & Manuals
LXDG01Z 18V LXT Lithium-Ion Cordless 1/4" Die Grinder View Diagrams & Manuals
LXNJ01Z 18V LXT Lithium-Ion Cordless 16 Gauge Nibbler Tool Only View Diagrams & Manuals
XAG01 18V LXT Lithium-Ion Cordless Grinder Kit View Diagrams & Manuals
XAG01Z 18V LXT Lithium-Ion 4-1/2" Cut-Off/Angle Grinder View Diagrams & Manuals
XDG01Z 8V LXT Lithium-Ion Cordless 1/4" Die Grinder View Diagrams & Manuals
9557NB2 Grinder View Diagrams & Manuals
9557PBX1 Grinder View Diagrams & Manuals
9564P Grinder View Diagrams & Manuals
9565PCV Grinder View Diagrams & Manuals
9566PCX1 Grinder View Diagrams & Manuals
BGA450Z (Type 1) Grinder View Diagrams & Manuals
BGA450Z (Type 2) Grinder View Diagrams & Manuals
BGA452F (Type 1) Grinder View Diagrams & Manuals
BGA452F (Type 2) Grinder View Diagrams & Manuals
BGA452F (Type 3) Grinder View Diagrams & Manuals
BGA452 (Type 2) Grinder View Diagrams & Manuals
BGA452 (Type 3) Grinder View Diagrams & Manuals
BGA452Z (Type 1) Grinder View Diagrams & Manuals
BGA452Z (Type 2) Grinder View Diagrams & Manuals
BGA452Z (Type 3) Grinder View Diagrams & Manuals
BJS161F (Type 1) Misc View Diagrams & Manuals
BJS161F (Type 2) Misc View Diagrams & Manuals
BJS161 (Type 1) Misc View Diagrams & Manuals
BJS161 (Type 2) Misc View Diagrams & Manuals
BJS161Z (Type 1) Misc View Diagrams & Manuals
BJS161Z (Type 2) Misc View Diagrams & Manuals
GD0801C Grinder View Diagrams & Manuals
LXDG01 (Type 1) Grinder View Diagrams & Manuals
LXDG01 (Type 2) Grinder View Diagrams & Manuals
LXDG01Z1 (Type 1) Grinder View Diagrams & Manuals
LXDG01Z1 (Type 2) Grinder View Diagrams & Manuals
LXDG01Z (Type 1) Grinder View Diagrams & Manuals
LXDG01Z (Type 2) Grinder View Diagrams & Manuals
LXJP02 (Type 1) Misc View Diagrams & Manuals
LXJP02 (Type 2) Misc View Diagrams & Manuals
LXJP02Z (Type 1) Misc View Diagrams & Manuals
LXJP02Z (Type 2) Misc View Diagrams & Manuals
LXNJ01 (Type 1) Misc View Diagrams & Manuals
LXNJ01 (Type 2) Misc View Diagrams & Manuals
LXNJ01Z (Type 1) Misc View Diagrams & Manuals
LXNJ01Z (Type 2) Misc View Diagrams & Manuals
XAG03M Grinder View Diagrams & Manuals
XAG03MB Grinder View Diagrams & Manuals
XAG03Z Grinder View Diagrams & Manuals
XAG04T Grinder View Diagrams & Manuals
XAG04Z Grinder View Diagrams & Manuals
XAG09Z Grinder View Diagrams & Manuals
XAG16Z Grinder View Diagrams & Manuals
XAG17ZU Grinder View Diagrams & Manuals
XCS02T1 Grinder View Diagrams & Manuals
XCS02ZK Grinder View Diagrams & Manuals
XDG01 Grinder View Diagrams & Manuals
XDG01T Grinder View Diagrams & Manuals
XDG02Z Grinder View Diagrams & Manuals
Show More Compatible Models
Don't see yours? Try searching our site for :

This item works with the following types of products:

  • Grinder Parts
  • Nibbler Parts

This part replaces obsolete part #: 650561-6, 6505616

Repair Videos ?

Watch the Repair Video for Switch
Articles:
Glitch in your switch? Step-by-step instructions show you how to remove and install the switch in your Makita grinder....
November 24, 2015

Customer Part Reviews ?

4.8
Average Rating (out of 5):
6 Reviews
Click to filter by ratings:
5 stars
5
4 stars
1
3 stars
0
2 stars
0
1 stars
0
  • Highest Rating
  • Most Recent
< PREV
  • 1
NEXT >
  • Easy to replace and save your tool
    The grinder stopped working all of the sudden. Took out a couple screws and did a continuity test on the switch which turned out to be the problem. Instead of throwing the tool away, I bought a new switch for a fraction of the price of a new grinder. Once I had the new switch, the repair took less than five minutes and it works perfectly.
    Devin - February 11, 2023 Verified Purchase
    Makita 4 1/2" angle grinder switch
    Easy install and a perfect fit!
    Guest - August 15, 2020 Verified Purchase
    fit exactly
    arrived quickly, exact replacement
    Guest - July 17, 2020 Verified Purchase
    Great service
    They always have what I need.
    Guest - July 15, 2020 Verified Purchase
    Exactly what I needed...
    I thought my grinder was toast, but the new switch installed and functions perfectly. Thanks.
    Guest - May 24, 2019 Verified Purchase
    Angle grinder parts
    Correct parts, however one was broken apparently due to light packaging. Refund was quickly accomplished.
    David - May 14, 2019 Verified Purchase
    t
    t
    t - t days ago Verified Purchase
    eReplacementParts Team
    t

    Questions & Answers ?

    Our customer Service team is at the ready daily to answer your part and product questions.

    photo of team member
    Ask our Team

    We have a dedicated staff with decades of collective experience in helping customers just like you purchase parts to repair their products.

    Does this fit my product?

    Questions & Answers for Switch


    No questions have been asked yet

    Customer Repair Instructions ?

    All our customer repair instructions are solicited directly from other customers just like you who have purchased and replaced this exact part.

    Easy 15-30 minutes (10 rated repairs)?

    Bad switch

    Ed - December 7, 2016
    👍 2 of 2 people found this instruction helpful
    Tool Type

    Grinder

    Difficulty

    Easy

    Time

    15-30 minutes

    Tools Used

    Screwdriver

    R & R switch.
    Did you find this story helpful?
    Thanks for voting and helping fellow customers!

    Grinder would not turn on. Paddle switch felt weird

    Dustin - August 6, 2018
    👍 1 of 1 people found this instruction helpful
    Tool Type

    Grinder

    Difficulty

    Medium

    Time

    Less than 15 minutes

    Tools Used

    Screwdriver, Pliers

    Took rear plastics off of grinder and removed the paddle which contacts the switch. Removed switch and transferred new wires to the new switch. Works like new again. Common problem I've found with these grinders but as a professional metal fabricator I wouldn't use any other type. Glad I found someplace with replacement switches.
    Did you find this story helpful?
    Thanks for voting and helping fellow customers!

    Grinder stopped working. Seemed like a bad switch.

    Christopher - November 29, 2017
    👍 1 of 1 people found this instruction helpful
    Tool Type

    Grinder

    Difficulty

    Easy

    Time

    15-30 minutes

    Tools Used

    Screwdriver

    Opened up the grinder. Disconnected the old switch, connected the new switch. Put grinder back together. Works just fine again. Easy repair.
    Did you find this story helpful?
    Thanks for voting and helping fellow customers!

    Grinder would not stop

    Brian - September 19, 2021
    Tool Type

    Grinder

    Difficulty

    Easy

    Time

    15-30 minutes

    Tools Used

    Screwdriver

    Removed 2 screws. Removed back half of housing. Discounted old switch. Re-connected new switch. Replaced housing. Replaced screws.
    Did you find this story helpful?
    Thanks for voting and helping fellow customers!

    switch sticking on

    Glenn - March 23, 2021
    Tool Type

    Grinder

    Difficulty

    Easy

    Time

    15-30 minutes

    Tools Used

    Screwdriver

    watched the video, worked good!
    Did you find this story helpful?
    Thanks for voting and helping fellow customers!

    broken on and off switch

    Richard - January 15, 2021
    Tool Type

    Grinder

    Difficulty

    Medium

    Time

    30-60 minutes

    Tools Used

    Screwdriver

    Die grinder would not start. Removed screws from handle. Removed switch and tested it with ohm meter showing switch not closing. Ordered new switch and installed it. Everything works great.
    Did you find this story helpful?
    Thanks for voting and helping fellow customers!

    Swicht burn

    Carlos - February 18, 2020
    Tool Type

    Grinder

    Difficulty

    Medium

    Time

    30-60 minutes

    Tools Used

    Screwdriver

    Remove cover.
    Remove old swicht
    Remove carbon brush.
    Cover back
    Did you find this story helpful?
    Thanks for voting and helping fellow customers!

    Switch defective, intermittent

    Mark - November 26, 2019
    Tool Type

    Grinder

    Difficulty

    Medium

    Time

    Less than 15 minutes

    Tools Used

    Screwdriver, Pliers

    Switch Replacement
    1. Removed two screws from base housing and remove both halves of housing.
    2. Disconnected two push connections from base of switch.
    3. Pushed switch partially out of housing to expose Phillips head screws.
    4. Removed two Phillips head screws to release switch wires.
    5. Remove switch.
    6. Replaced switch, reconnecting wires to Phillips head screws, positioning with pliers.
    7. Reseat switch in housing completely.
    8. Reattach wires with push on clips with pliers.
    9. Tug on each wire to verify attachment. (Tuck away extra wire lead to facilitate reattachment of housing.)
    Brush Replacement
    1. Move brush retainer spring to the side gently with pliers. Do not pull out spring.
    2. Disconnect push on connector at end of braided wire pigtail on brush. (View replacement brush for construction visual, if necessary.)
    3. Remove old brush. ( Look for pitting, scoring or chips on brush. Remove all pieces if broken. This is also an opportunity to view condition of commutator plates on armature through brush pocket.)
    4. Insert new brush, noting orientation of connection pigtail.
    5. Reconnect push on clip at end of pigtail with needlenose pliers.
    6. Replace retaining spring gently on top of new brush.
    7. Tuck away braided pigtail.
    8. Repeat process with second brush.
    9. Replace lower housing cover side, making sure wires are positioned out of the way and housing half seats fully with no resistance.
    10. Replace second housing half, aligning screw holes while listening for an audible snap when halves mate.
    11. Reinsert and tighten screws.
    12. Plug in and test unit for function.
    Did you find this story helpful?
    Thanks for voting and helping fellow customers!

    The switch switches were bad on the two grinders

    Kevin - December 1, 2018
    Tool Type

    Grinder

    Difficulty

    Easy

    Time

    15-30 minutes

    Tools Used

    Screwdriver

    Replacing the switches on the Milwaukee and DeWalt grinder replacing the switches on the DeWalt and Milwaukee grinders or easy
    Did you find this story helpful?
    Thanks for voting and helping fellow customers!

    Grinder switch was stuck in the On position - tool ran as soon it was plugged in

    Susan - August 30, 2018
    Tool Type

    Grinder

    Difficulty

    Easy

    Time

    15-30 minutes

    Tools Used

    Screwdriver, Pliers, YouTube video by eReplacementParts

    I followed the great YouTube video provided by eReplacementParts:
    https://youtu.be/meFXCaWystw

    This video clearly shows all the steps and made me confident that if I ordered the part, the fix would be pretty easy. It was exactly the same model of Makita grinder and well explained. I had a little bit of trouble fitting the two halves if the black plastic housing back - there are some channels that the wires need to be pushed into to make them fit snugly and not get in the way of joining the two parts back together. But that that just took a little care and patience. The grinder works like new now.
    Did you find this story helpful?
    Thanks for voting and helping fellow customers!

    OEM stands for Original Equipment Manufacturer and means the part you’re buying is sourced directly from the manufacturer who made your product. At eReplacementParts, we sell only genuine OEM parts, guaranteeing the part you’re purchasing is of better design and of higher quality than aftermarket parts.

    Our product descriptions are a combination of data sourced directly from the manufacturers who made your product as well as content researched and curated by our content & customer service teams. This content is edited and reviewed internally before being made public to customers.

    Our customer service team are at the ready daily to answer your part and product questions. We have a dedicated staff with decades of collective experience in helping customers just like you purchase parts to repair their products.

    All our part reviews are solicited directly from other customers who have purchased this exact part. While we moderate these reviews for profanity, offensive language or personally identifiable information, these reviews are posted exactly as submitted and no alterations are made by our team.

    All our customer repair instructions are solicited directly from other customers just like you who have purchased and replaced this exact part. While we moderate these reviews for profanity, offensive language or personally identifiable information, these reviews are posted exactly as submitted and no alterations are made by our team.

    Based on data from past customer purchasing behaviors, these parts are most commonly purchased together along with the part you are viewing. These parts may be necessary or helpful to replace to complete your current repair.

    All our installation videos are created and produced in collaboration with our in-house repair technician, Mark Sodja, who has helped millions of eReplacementParts customers over the last 13 years repair their products. Mark has years of experience in selling and repairing both commercial and residential products with a specialty in gas-powered equipment.

    This data is collected from customers who submitted a repair instruction after replacing this exact part. Customers can rate how easy the repair was to complete and how long it took. We aggregate this data to provide a repair rating that allows customers to quickly determine the difficulty and time needed to perform their own repair.

    eReplacementParts.com
    7174 South 400 West
    Suite 5
    Midvale, UT 84047
    visa mastercard discover american express PayPal