
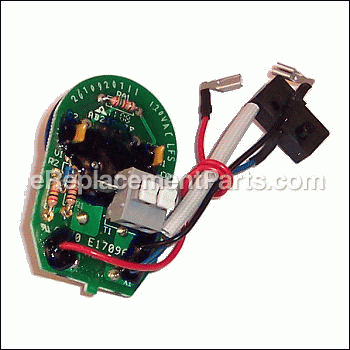
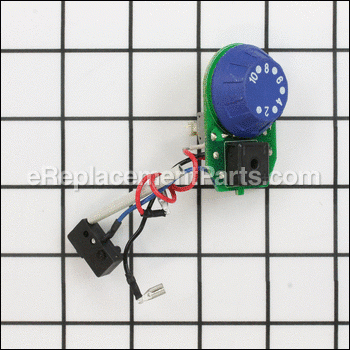
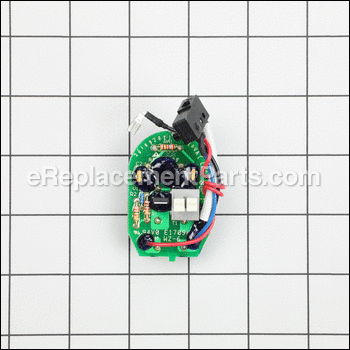
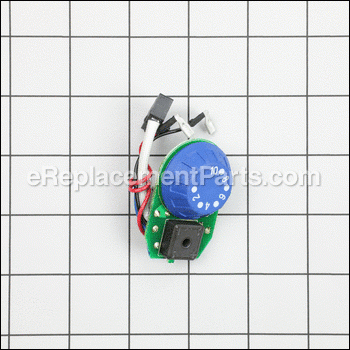
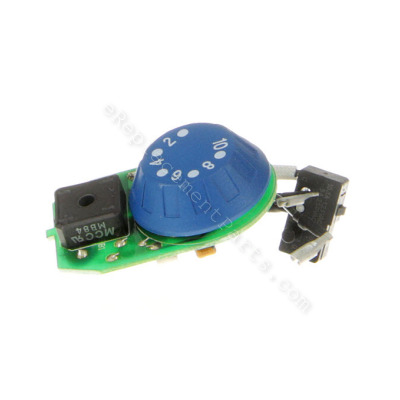


This is a genuine Dremel replacement part that has been sourced from the original manufacturer to be used with variable speed rotary tools. The links the power cord and the motor assembly. The speed control is used to regulate the electricity that sent to the motor to control its output. This item is sold as an individual replacement part.
Speed Control 2610920711
OEM part for: Dremel
Part Number: 2610920711
$23.36
Usually ships in 7 - 12 business days
7 - 12 business days
Jump To:
Frequently Purchased Together ?

Compatibility
This part will fit the following 1 machine
Dremel
400 XPR Variable Speed Rotary Tool View Diagrams & Manuals
This item works with the following types of products:
- Multi-Tool Parts
Questions & Answers ?
Our customer Service team is at the ready daily to answer your part and product questions.

Ask our Team
We have a dedicated staff with decades of collective experience in helping customers just like you purchase parts to repair their products.
Does this fit my product?Questions & Answers for Speed Control
No questions have been asked yet
Customer Repair Instructions ?
All our customer repair instructions are solicited directly from other customers just like you who have purchased and replaced this exact part.
The speed controller on my Dremel 400 failed
Rolf - January 9, 2020
Tool Type
MultiTool
Difficulty
Medium
Time
15-30 minutes
Tools Used
Screwdriver, Small torx driver
Parts Used
1. Remove the Brush caps. Using a small torx driver and remove all of the screws holding the case together
2. Carefully separate the housing paying close attention to the shaft locking pin and button direction plus the power switch locations.
3. Note the power cord (white Black location) press the small tabs and remove the power cord. Also take note of how the wires were routed.
4. Disconnect and replace the speed controller, careful not to damage the connectors. Re-connect the power cord.
5. I decided to replace the brushes while I was at it.
6. Replace all of the parts into one side of the housing paying close attention to the shaft lock pin.
7, Carefully put the the housing together you should not have to force anything. put all of the screws back snugly but don't over tighten or you will strip them.
8. Replace the brush caps making sure the spring is oriented correctly so it puts pressure on the brush.
9. make sure the shaft spins freely and the shaft lock pin and power switches move and work as before.
10 Plug in and tear up some wood.
Did you find this story helpful?
Thanks for voting and helping fellow customers!
Dremel 400 xpr tune up
joe - January 2, 2019
Tool Type
MultiTool
Difficulty
Medium
Time
30-60 minutes
Tools Used
, pick-electronic spray cleaner-oil-Magnification
Watched several videos , Study brushes magnified before removal!! Slot only!!Remove brush doors with pick pushing inward at opening.Remove hanging clip ,front nut and collar ,screws THEN flip over.Start at front and slowly separate .Electronic spray cleaner,compressed air.Remove bearing covers with needle and added 2 drops of oil each.Reshaped blue plastic on/off slide for switch and lightly grease.Reassemble --Just like new.
NOTE--The blue slide is a real issue for the 400 and 4000 models.Sometimes they won't turn off the Dremel and other times wont turn on.It is a most overlooked issue until you study it closely.It deforms at the switch side due to heat and age.EASY fix. Good Luck
NOTE--The blue slide is a real issue for the 400 and 4000 models.Sometimes they won't turn off the Dremel and other times wont turn on.It is a most overlooked issue until you study it closely.It deforms at the switch side due to heat and age.EASY fix. Good Luck
Did you find this story helpful?
Thanks for voting and helping fellow customers!
Would work intermittently and not fast at all .
Skip - January 31, 2018
Tool Type
MultiTool
Difficulty
Easy
Time
15-30 minutes
Tools Used
Pliers, Torx #10
First removed brushes then took it apart with Torx #10 screws pulled old speed control out a bit drew a picture of where wires were placed took wires off old control put wired on new speed control set back in place then installed other half side, then installed new brushes & covers plugged it in works like new wish I could have ordered an armature too, thanks for the good quality parts.
Did you find this story helpful?
Thanks for voting and helping fellow customers!
OEM stands for Original Equipment Manufacturer and means the part you’re buying is sourced directly from the manufacturer who made your product. At eReplacementParts, we sell only genuine OEM parts, guaranteeing the part you’re purchasing is of better design and of higher quality than aftermarket parts.
Our product descriptions are a combination of data sourced directly from the manufacturers who made your product as well as content researched and curated by our content & customer service teams. This content is edited and reviewed internally before being made public to customers.
Our customer service team are at the ready daily to answer your part and product questions. We have a dedicated staff with decades of collective experience in helping customers just like you purchase parts to repair their products.
All our part reviews are solicited directly from other customers who have purchased this exact part. While we moderate these reviews for profanity, offensive language or personally identifiable information, these reviews are posted exactly as submitted and no alterations are made by our team.
All our customer repair instructions are solicited directly from other customers just like you who have purchased and replaced this exact part. While we moderate these reviews for profanity, offensive language or personally identifiable information, these reviews are posted exactly as submitted and no alterations are made by our team.
Based on data from past customer purchasing behaviors, these parts are most commonly purchased together along with the part you are viewing. These parts may be necessary or helpful to replace to complete your current repair.
All our installation videos are created and produced in collaboration with our in-house repair technician, Mark Sodja, who has helped millions of eReplacementParts customers over the last 13 years repair their products. Mark has years of experience in selling and repairing both commercial and residential products with a specialty in gas-powered equipment.
This data is collected from customers who submitted a repair instruction after replacing this exact part. Customers can rate how easy the repair was to complete and how long it took. We aggregate this data to provide a repair rating that allows customers to quickly determine the difficulty and time needed to perform their own repair.