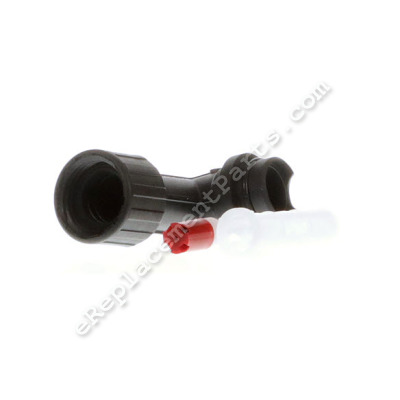
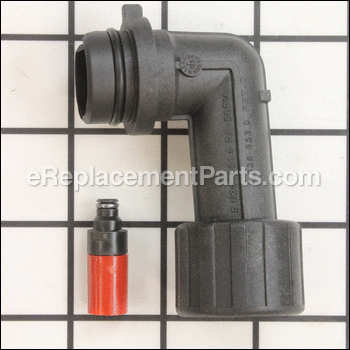
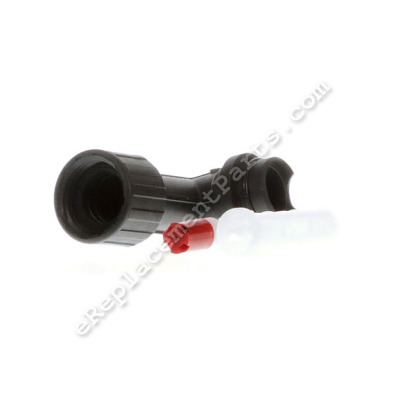
This is a genuine OEM sourced replacement part designed for use with Karcher pressure washers. It is made out of plastic and it is sold individually. This assembly includes a micro filter.
• Remove the screws that hold the outer cover together and remove it
• Remove the screws that hold the pump together
• Separate the plastic pump from the metal housing
• Remove old inlet elbow and replace it with a new one
• Reassembly the tool
Reservedelssett 9.001-188.0
OEM part for: Karcher
Part Number: 9.001-188.0
Product Description ?
- Classification: Part
- Weight: 0.09 lbs.
- Shipping: Ships Worldwide
Compatibility
This part will fit the following 10 machines
Karcher
This item works with the following types of products:
- Pressure Washer Parts
Customer Part Reviews ?
- 1
Questions & Answers ?
Our customer Service team is at the ready daily to answer your part and product questions.

Ask our Team
We have a dedicated staff with decades of collective experience in helping customers just like you purchase parts to repair their products.
Does this fit my product?Questions & Answers for Reservedelssett
Customer Repair Instructions ?
All our customer repair instructions are solicited directly from other customers just like you who have purchased and replaced this exact part.
Inlet elbow cracked then broke off
Tool Type
Pressure Washer
Difficulty
Medium
Time
30-60 minutes
Tools Used
Nutdriver, Hammer
Parts Used
Inlet Elbow broke
Tool Type
Pressure Washer
Difficulty
Medium
Time
30-60 minutes
Tools Used
Screwdriver, Allen Wrench
Parts Used
2. Removed the plastic outer body.
3. Pulled pump/motor assembly from body
4. Removed 4 screws from the front of the pump body.
5. Pulled front of pump assembly off.
6. Remove inlet elbow assembly from pump casting.
7. Install inlet elbow assembly into pump casting.
8. Reassembled using the steps above in reverse order.
9. Tested unit to make sure it worked.
Make sure plunger for start switch is in the correct position on the pump assembly or the unit will not start.
Broken supply hose connection
Tool Type
Pressure Washer
Difficulty
Medium
Time
30-60 minutes
Tools Used
Screwdriver, Allen wrench, hammer & dowel downloaded exploded view of par
Parts Used
Broken water inlet elbow
Tool Type
Pressure Washer
Difficulty
Easy
Time
15-30 minutes
Tools Used
Screwdriver, Pliers, Wrench Set, Adjustable Wrench
Parts Used
2. Remove bottom and top case
3. Remove pump and motor
4. Remove old broken elbow and replace with new elbow
5. Reverse all above
water inlet elbow broke off
Tool Type
Pressure Washer
Difficulty
Medium
Time
30-60 minutes
Tools Used
Screwdriver, rubber hammer
Parts Used
1. disassemble and remove handle and wheel assembly from body.
2. remove about 10 torx screws holding body halves together.
3. remove 4 hex head bolts holding inlet assembly to pump body.
4. pry out inlet assembly from inlet body, very tight, go slow, take your time. watch out for switch
at end of assembly, it must go back inside a slot when you reassemble.
5. install new pieces in place of old, look at karcher parts diagram for positions.
6. use rubber hammer to gently pound new elbow assembly back into body. make sure switch goes into correct slot. body is very tight, go very slow and pound gently, it will go in eventually.
7. reassemble everything in reverse order of taking them apart.
Inlet nozzle broke
Tool Type
Pressure Washer
Difficulty
Medium
Time
30-60 minutes
Tools Used
Screwdriver, Power Drill, Socket set, Nutdriver, Freazer hammer, the guy that said put it in freezer best adv
Parts Used
2. Lift assembly out stand on end, front cover aluminum remove 4 allen bolts. Also remove
clip and hose for soap.
3. Put cover assembly in freezer over night.
4. Next day lay out 2 2x4s to set cover width apart so as plastic filler can be pushed out.
5. Nut driver that slips into outlet hole tight when it bottoms gently tap the nut driver the
plastic assembly will fall out of aluminum cover.
6 I did not replace any seals but i did use water grade grease where it all slips together, set
the plastic cover on 2x4 gently tap together after new elbow in place, be sure to grease o
rings so they don't bind getting elbow in place.
7. Greased and bolted together using a cross patter to tighten and gently seat plastic into
frame. Reverse rest of process.
8. Works like new
Elbow replacement for inlet
Tool Type
Pressure Washer
Difficulty
Medium
Time
1-2 hours
Tools Used
Screwdriver, Wrench Set, Nutdriver
Parts Used
Low pressure elbow broke
Tool Type
Pressure Washer
Difficulty
Easy
Time
15-30 minutes
Tools Used
Screwdriver, Power Drill
Parts Used
Inlet Elbow Kit broken
Tool Type
Pressure Washer
Difficulty
Hard
Time
1-2 hours
Tools Used
Screwdriver, Pliers, Nutdriver, Cleaning materials
Inlet Elbow cracked from improper storage years ago
Tool Type
Pressure Washer
Difficulty
Medium
Time
30-60 minutes
Tools Used
Screwdriver, Pliers, Torx Drivers
Parts Used
2. Located and proved the part to be defective.
3. Went to eReplacementparts.com, found the schematic and part....ordered same.
4. Received and replaced part.
5. Verified the fix, and off we go! Thanks for the help!
OEM stands for Original Equipment Manufacturer and means the part you’re buying is sourced directly from the manufacturer who made your product. At eReplacementParts, we sell only genuine OEM parts, guaranteeing the part you’re purchasing is of better design and of higher quality than aftermarket parts.
Our product descriptions are a combination of data sourced directly from the manufacturers who made your product as well as content researched and curated by our content & customer service teams. This content is edited and reviewed internally before being made public to customers.
Our customer service team are at the ready daily to answer your part and product questions. We have a dedicated staff with decades of collective experience in helping customers just like you purchase parts to repair their products.
All our part reviews are solicited directly from other customers who have purchased this exact part. While we moderate these reviews for profanity, offensive language or personally identifiable information, these reviews are posted exactly as submitted and no alterations are made by our team.
All our customer repair instructions are solicited directly from other customers just like you who have purchased and replaced this exact part. While we moderate these reviews for profanity, offensive language or personally identifiable information, these reviews are posted exactly as submitted and no alterations are made by our team.
Based on data from past customer purchasing behaviors, these parts are most commonly purchased together along with the part you are viewing. These parts may be necessary or helpful to replace to complete your current repair.
All our installation videos are created and produced in collaboration with our in-house repair technician, Mark Sodja, who has helped millions of eReplacementParts customers over the last 13 years repair their products. Mark has years of experience in selling and repairing both commercial and residential products with a specialty in gas-powered equipment.
This data is collected from customers who submitted a repair instruction after replacing this exact part. Customers can rate how easy the repair was to complete and how long it took. We aggregate this data to provide a repair rating that allows customers to quickly determine the difficulty and time needed to perform their own repair.


