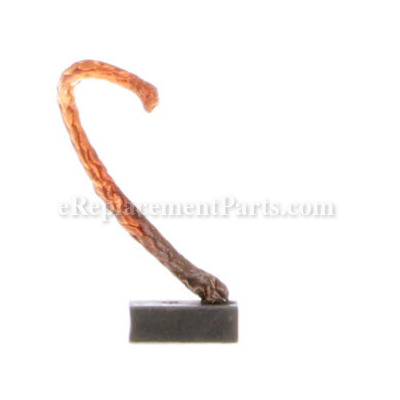


This is an authentic OEM sourced replacement carbon brush designed for use with Black and Decker lawn mowers. This assembly includes one (1) carbon brush with a lead wire attached. Please note the spring and brush holder are sold separately.
Carbon brushes are a commonly replaced item on electric motors. Due to constant with contact with armature brushes will gradually wear down and will require replacement. It is advised to replace both brushes at the same type.
You would need a screwdriver to complete this job.
• Make sure the unit is unplugged
• Remove the brush cap and take out the old brush
• Secure the new brush with a cap and test the tool
Shunted Brush 241648-01
OEM part for: Black and Decker
Part Number: 241648-01
$63.86
Usually ships in 7 - 12 business days
7 - 12 business days
Product Description ?
- Classification: Part
- Weight: 0.01 lbs.
- Shipping: Ships Worldwide
Compatibility
This part will fit the following 15 machines
Black and Decker
CMM1200 Type 1 24V Cordless Mulching Mower View Diagrams & Manuals
CMM1200 Type 2 24V Cordless Mulching Mower View Diagrams & Manuals
CMM625 Type 1 Cordless Mulch Mower View Diagrams & Manuals
CMM625 Type 2 Cordless Mulch Mower View Diagrams & Manuals
CMM625 Type 3 Cordless Mulch Mower View Diagrams & Manuals
CMM625 Type 4 Cordless Mulch Mower View Diagrams & Manuals
CMM630 Type 1 18 High Wheel Cordless Mower View Diagrams & Manuals
CMM630 Type 2 18 High Wheel Cordless Mower View Diagrams & Manuals
CM1836 Type 1 36V 18in Mower View Diagrams & Manuals
CM1936 Type 1 36V 19in Mower View Diagrams & Manuals
CM1936 Type 2 36V 19in Mower View Diagrams & Manuals
CMM1200 Type 3 Lawn Mower View Diagrams & Manuals
CM1836 (Type 2) 18" Cordless Mulching Rear bag Mower View Diagrams & Manuals
CMM1200 (Type 2A) 24v Lawn Mower Power Tool View Diagrams & Manuals
CMM1200 (Type 4) 24v Lawn Mower Power Tool View Diagrams & Manuals
Show More Compatible Models
This item works with the following types of products:
- Lawn Mower Parts
This part replaces obsolete part #: 241648-00
Questions & Answers ?
Our customer Service team is at the ready daily to answer your part and product questions.

Ask our Team
We have a dedicated staff with decades of collective experience in helping customers just like you purchase parts to repair their products.
Does this fit my product?Questions & Answers for Shunted Brush
No questions have been asked yet
Customer Repair Instructions ?
All our customer repair instructions are solicited directly from other customers just like you who have purchased and replaced this exact part.
Motor would cut out under load. Would start fine but stall when cutting
Matthew - February 28, 2018
👍 5 of 5 people found this instruction helpful
Tool Type
Lawn Mower
Difficulty
Easy
Time
15-30 minutes
Tools Used
Screwdriver, T7
Parts Used
Removed Cover (4xT7 screws)
Disconnected +ve battery terminal - covered terminal and tucked cable away.
Removed Brush cover 1x T7... Identified worn brush making less surface contact with Motor armature.
Removed Brush from spring loaded brush holder.
Cut brush connection away from cable.
Crimped new brush connection to cable.
Pushed the brush back into spring loaded brush holder.
Held brush retracted - and slotted brush holder into place. allowed brush to rest against the motor armature
Fitted brush cover.
Repeated for 2nd Brush.
Reconnected +ve battery lead
Re fitted mower cover
Did you find this story helpful?
Thanks for voting and helping fellow customers!
Part of the magnet broke in the motor and in turn split the shunted brushes
Steve - May 9, 2017
👍 1 of 1 people found this instruction helpful
Tool Type
Lawn Mower
Difficulty
Easy
Time
15-30 minutes
Tools Used
Screwdriver, Pliers, Adjustable Wrench
Parts Used
There's nothing difficult with the repair, but using the new terminal to clamp the connect between the power leads and the shunted brush isn't too easy to make it neat. But then again it doesn't have to be too neat. As long as they are clamped together reasonably, the terminal should fit back in ok to the slot for it in the motor..
Did you find this story helpful?
Thanks for voting and helping fellow customers!
OEM stands for Original Equipment Manufacturer and means the part you’re buying is sourced directly from the manufacturer who made your product. At eReplacementParts, we sell only genuine OEM parts, guaranteeing the part you’re purchasing is of better design and of higher quality than aftermarket parts.
Our product descriptions are a combination of data sourced directly from the manufacturers who made your product as well as content researched and curated by our content & customer service teams. This content is edited and reviewed internally before being made public to customers.
Our customer service team are at the ready daily to answer your part and product questions. We have a dedicated staff with decades of collective experience in helping customers just like you purchase parts to repair their products.
All our part reviews are solicited directly from other customers who have purchased this exact part. While we moderate these reviews for profanity, offensive language or personally identifiable information, these reviews are posted exactly as submitted and no alterations are made by our team.
All our customer repair instructions are solicited directly from other customers just like you who have purchased and replaced this exact part. While we moderate these reviews for profanity, offensive language or personally identifiable information, these reviews are posted exactly as submitted and no alterations are made by our team.
Based on data from past customer purchasing behaviors, these parts are most commonly purchased together along with the part you are viewing. These parts may be necessary or helpful to replace to complete your current repair.
All our installation videos are created and produced in collaboration with our in-house repair technician, Mark Sodja, who has helped millions of eReplacementParts customers over the last 13 years repair their products. Mark has years of experience in selling and repairing both commercial and residential products with a specialty in gas-powered equipment.
This data is collected from customers who submitted a repair instruction after replacing this exact part. Customers can rate how easy the repair was to complete and how long it took. We aggregate this data to provide a repair rating that allows customers to quickly determine the difficulty and time needed to perform their own repair.