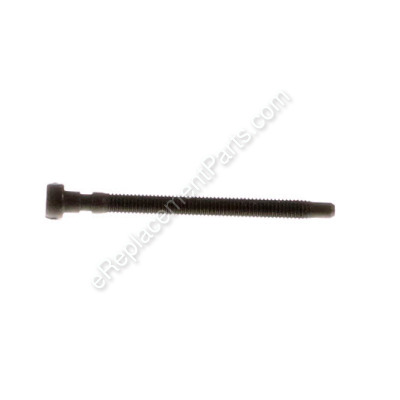


This replacement screw is specially designed for use with Husqvarna chainsaws. It is supplied directly from original equipment manufacturer. This kit allows you to tighten or loosen the the chain tension. Usually if the bar doesn’t adjust when you turn the tension screw, either the bolt or tensioner nut is worn or damaged. Includes one (1) metal screw. Please note you will need a flat head screwdriver to secure/remove this item.
Screw 501546301
OEM part for: Husqvarna, Jonsered
Part Number: 501546301
$5.29
In Stock
Jump To:
Frequently Purchased Together ?


Compatibility
This part will fit the following 104 machines
Husqvarna
42 (1988-10) Chainsaw View Diagrams & Manuals
42 (1992-03) Chainsaw View Diagrams & Manuals
42 (1994-04) Chainsaw View Diagrams & Manuals
42 (1994-12) Chainsaw View Diagrams & Manuals
44 (1980-04) Chainsaw View Diagrams & Manuals
44 (1981-02) Chainsaw View Diagrams & Manuals
44 (1983-03) Chainsaw View Diagrams & Manuals
44 (1984-01) Chainsaw View Diagrams & Manuals
44 (1985-05) Chainsaw View Diagrams & Manuals
44 (1985-11) Chainsaw View Diagrams & Manuals
44 (1986-05) Chainsaw View Diagrams & Manuals
44 (1987-01) Chainsaw View Diagrams & Manuals
44 (1988-08) Chainsaw View Diagrams & Manuals
444 (1980-02) Chainsaw View Diagrams & Manuals
444 (1981-03) Chainsaw View Diagrams & Manuals
444 (1983-01) Chainsaw View Diagrams & Manuals
444 (1984-01) Chainsaw View Diagrams & Manuals
55 EU1 (2007-02) Chainsaw View Diagrams & Manuals
55 Rancher (2007-02) Chainsaw View Diagrams & Manuals
55 Rancher EPA (2006-02) Chainsaw View Diagrams & Manuals
55 Rancher EPA (1998-08) Chainsaw View Diagrams & Manuals
55 Rancher EPA (2000-05) Chainsaw View Diagrams & Manuals
55 Rancher EPA (2004-01) Chainsaw View Diagrams & Manuals
50 (1985-02) Chainsaw View Diagrams & Manuals
50 (1986-06) Chainsaw View Diagrams & Manuals
50 (1987-06) Chainsaw View Diagrams & Manuals
50 (1988-03) Chainsaw View Diagrams & Manuals
50 (1989-01) Chainsaw View Diagrams & Manuals
50 (1983-01) Chainsaw View Diagrams & Manuals
50 (1990-01) Chainsaw View Diagrams & Manuals
51 (1990-01) Chainsaw View Diagrams & Manuals
51 (1991-10) Chainsaw View Diagrams & Manuals
51 (1994-06) Chainsaw View Diagrams & Manuals
51 (1998-06) Chainsaw View Diagrams & Manuals
51 (2000-05) Chainsaw View Diagrams & Manuals
51 EPA (1998-06) Chainsaw View Diagrams & Manuals
51 EPA (2000-05) Chainsaw View Diagrams & Manuals
55 (1990-01) Chainsaw View Diagrams & Manuals
55 (1991-10) Chainsaw View Diagrams & Manuals
55 (1994-06) Chainsaw View Diagrams & Manuals
55 (1998-06) Chainsaw View Diagrams & Manuals
55 (2000-05) Chainsaw View Diagrams & Manuals
55 (2006-02) Chainsaw View Diagrams & Manuals
55 (2007-02) Chainsaw View Diagrams & Manuals
55 EPA (1998-06) Chainsaw View Diagrams & Manuals
55 EPA (2000-05) Chainsaw View Diagrams & Manuals
55 EU1 (2006-02) Chainsaw View Diagrams & Manuals
340 (2001-09) Chainsaw View Diagrams & Manuals
340 (2004-03) Chainsaw View Diagrams & Manuals
340 (2005-05) Chainsaw View Diagrams & Manuals
340 (2006-06) Chainsaw View Diagrams & Manuals
340 (2007-01) Chainsaw View Diagrams & Manuals
340 E (2005-05) Chainsaw View Diagrams & Manuals
340 E (2006-06) Chainsaw View Diagrams & Manuals
340 EPA (1999-09) Chainsaw View Diagrams & Manuals
340 EPA (2003-01) Chainsaw View Diagrams & Manuals
340 EPA (2004-03) Chainsaw View Diagrams & Manuals
345 (2001-09) Chainsaw View Diagrams & Manuals
345 (2004-03) Chainsaw View Diagrams & Manuals
345 E (2005-05) Chainsaw View Diagrams & Manuals
345 EPA (2003-01) Chainsaw View Diagrams & Manuals
345 EPA (2004-03) Chainsaw View Diagrams & Manuals
350 (2001-09) Chainsaw View Diagrams & Manuals
350 (2004-03) Chainsaw View Diagrams & Manuals
350 (2005-05) Chainsaw View Diagrams & Manuals
350 (2006-06) Chainsaw View Diagrams & Manuals
350 EPA (2006-06) Chainsaw View Diagrams & Manuals
350 EPA (2003-01) Chainsaw View Diagrams & Manuals
350 EPA (2004-03) Chainsaw View Diagrams & Manuals
238 (1985-11) Chainsaw View Diagrams & Manuals
238 (1986-02) Chainsaw View Diagrams & Manuals
238 (1986-10) Chainsaw View Diagrams & Manuals
238 (1987-04) Chainsaw View Diagrams & Manuals
238 (1987-11) Chainsaw View Diagrams & Manuals
242 (1987-06) Chainsaw View Diagrams & Manuals
242 (1989-05) Chainsaw View Diagrams & Manuals
242 (1990-01) Chainsaw View Diagrams & Manuals
242 (1998-05) Chainsaw View Diagrams & Manuals
242 (1998-06) Chainsaw View Diagrams & Manuals
246 (1994-12) Chainsaw View Diagrams & Manuals
133 (1980-10) Chainsaw View Diagrams & Manuals
234 (1983-01) Chainsaw View Diagrams & Manuals
234 (1984-04) Chainsaw View Diagrams & Manuals
238 (1984-01) Chainsaw View Diagrams & Manuals
238 (1985-05) Chainsaw View Diagrams & Manuals
345EPA (1999-09) Chainsaw View Diagrams & Manuals
Jonsered
2141 (2000-08) Chain Saw View Diagrams & Manuals
2141 (2001-09) Chain Saw View Diagrams & Manuals
2145 (2000-08) Chain Saw View Diagrams & Manuals
2145 (2001-09) Chain Saw View Diagrams & Manuals
2150 (2000-08) Chain Saw View Diagrams & Manuals
2150 (2001-09) Chain Saw View Diagrams & Manuals
CS2141 (2003-01) Chain Saw View Diagrams & Manuals
CS2141 (2004-03) Chain Saw View Diagrams & Manuals
CS2141 (2007-01) Chain Saw View Diagrams & Manuals
CS2141 EPA (2004-03) Chain Saw View Diagrams & Manuals
CS2145 (2003-01) Chain Saw View Diagrams & Manuals
CS2145 (2004-03) Chain Saw View Diagrams & Manuals
CS2145 (2007-01) Chain Saw View Diagrams & Manuals
CS2145 EPA (2004-03) Chain Saw View Diagrams & Manuals
CS2150 (2003-01) Chain Saw View Diagrams & Manuals
CS2150 (2004-03) Chain Saw View Diagrams & Manuals
CS2150 (2007-01) Chain Saw View Diagrams & Manuals
CS2150 EPA (2004-03) Chain Saw View Diagrams & Manuals
Show More Compatible Models
This item works with the following types of products:
- Chain Saw Parts
- Saw Parts
Customer Part Reviews ?
Average Rating (out of 5):
Click to filter by ratings:
5 stars
4
4 stars
0
3 stars
0
2 stars
0
1 stars
0
< PREV
- 1
Repair
Part was a perfect match and fit. Delivery was on time and prompt. Very pleased with selection/order process/and delivery. Will definitely return to this source.
Guest -
December 8, 2020
Verified Purchase
part received as expected. OEM part and packaging
perfect fit, easy install.
Guest -
October 14, 2020
Verified Purchase
Easy repair
Arrived quickly, was what I needed.
Guest -
April 28, 2020
Verified Purchase
Easy fix
Part fit as it should. Good quality
Guest -
November 11, 2019
Verified Purchase
t
t
t -
t days ago
Verified Purchase
eReplacementParts Team
t
Questions & Answers ?
Our customer Service team is at the ready daily to answer your part and product questions.

Ask our Team
We have a dedicated staff with decades of collective experience in helping customers just like you purchase parts to repair their products.
Does this fit my product?Questions & Answers for Screw
No questions have been asked yet
Customer Repair Instructions ?
All our customer repair instructions are solicited directly from other customers just like you who have purchased and replaced this exact part.
Chain adjustment screw and plastic nut went missing.
Philip - April 14, 2016
👍 7 of 8 people found this instruction helpful
Tool Type
Chain Saw
Difficulty
Medium
Time
15-30 minutes
Tools Used
Screwdriver, Socket set, impact wrench
Parts Used
The actual replacement of the parts was pretty simple but had to remove the clutch assembly to get to it. After researching how to remove clutch on that model, which wasn't to simple, (I'm not a mechanic), everything else went smoothly. It takes an impact tool to remove the clutch. Had to put some rope in the spark plug hole to jam the cylinder to keep it from turning. Found a youtube video on removing that clutch which was very helpful.
It's important to note that the plastic or nylon nut must be threaded completely down to the head of the screw where there is a groove for it. Without that plastic nut, the screw could loosen up during use and fall out. Likely why mine went missing to start with.
The saw is an old model but runs good. Glad to be able to find parts for it to keep it going. New saws aren't cheap.
Did you find this story helpful?
Thanks for voting and helping fellow customers!
Chain adjuster fell apart.
Richard - February 8, 2017
👍 1 of 1 people found this instruction helpful
Tool Type
Chain Saw
Difficulty
Easy
Time
15-30 minutes
Tools Used
Screwdriver
Parts Used
Plastic nut was pushed onto the screw adjuster. Screw was then screwed into the bar pall.
Did you find this story helpful?
Thanks for voting and helping fellow customers!
Chain tensioner on Husqvarna 55 chain saw.
John - September 15, 2023
Tool Type
Chain Saw
Difficulty
Easy
Time
Less than 15 minutes
Tools Used
Screwdriver, Wrench Set
Parts Used
Loosened chain bar, installed tensioner screw.
Did you find this story helpful?
Thanks for voting and helping fellow customers!
The chain tensioner was not working
Donald - April 13, 2021
Tool Type
Chain Saw
Difficulty
Easy
Time
15-30 minutes
Tools Used
, Hex wrench
Parts Used
Removed clutch cover, charm and bar. Loosened hex nut on stainless steel tensioner cover. Clutch didn’t need to be removed. Removed old screw and pawl. Nut was already missing. Threaded new nut onto screw all the way to the head end where it fit into recess in the screw. Threaded pawl onto screw part way. Retightened hex screw. Bar chain and clutch cover reinstalled and back in business.
Did you find this story helpful?
Thanks for voting and helping fellow customers!
Chain tightner was missing
ROBERT - November 2, 2020
Tool Type
Chain Saw
Difficulty
Easy
Time
Less than 15 minutes
Tools Used
Screwdriver, Pliers
Parts Used
Screwed the new tightner with screw and keeper and works great.
Did you find this story helpful?
Thanks for voting and helping fellow customers!
Chain tensioner inoperable
Michael - May 2, 2020
Tool Type
Chain Saw
Difficulty
Easy
Time
Less than 15 minutes
Tools Used
Screwdriver, Wrench Set
Parts Used
1. Remove the sprocket drive cover
2. Remove the chain and bar
3. Clean the debris from the tensioner area
4. Place the nut in the end of the slot closest to engine
5. Thread screw through the slide pin (it will be tight to thread)
6. Slide screw and pin back toward engine and seat end of screw into nut
7. Replace bar, chain, and cover
8. Tension chain properly
9. Tighten cover
Did you find this story helpful?
Thanks for voting and helping fellow customers!
chain adjustment screw came off
dempsey - April 20, 2020
Tool Type
Chain Saw
Difficulty
Easy
Time
Less than 15 minutes
Tools Used
Screwdriver
Parts Used
screwed the new screw in with the provided nut
Did you find this story helpful?
Thanks for voting and helping fellow customers!
the old pawl broke so i just replaced all parts that were involved
Scott - January 25, 2019
Tool Type
Chain Saw
Difficulty
Easy
Time
Less than 15 minutes
Tools Used
Screwdriver, Scrench
Parts Used
removed bar and chain cover, bar and chain and chain guard plate. replaced pawl, screw and nut, reinstalled chain guard plate bar, chain and bar and chain cover
Did you find this story helpful?
Thanks for voting and helping fellow customers!
Replace chain tensioning parts
Patricia - January 9, 2019
Tool Type
Chain Saw
Difficulty
Easy
Time
30-60 minutes
Tools Used
Screwdriver, Socket set, Wrench Set, Impact wrench to break clutch loose (left handed thread!)
Parts Used
Removed sprocket and clutch. Replace pawl, screw and nut.
Did you find this story helpful?
Thanks for voting and helping fellow customers!
Thread stripped in pawl.
LARRY - December 12, 2017
Tool Type
Chain Saw
Difficulty
Easy
Time
Less than 15 minutes
Tools Used
Screwdriver, Pliers
Parts Used
Put pawl in slot and added screw. Put blade and chain on.
Did you find this story helpful?
Thanks for voting and helping fellow customers!
Load More Install Stories
OEM stands for Original Equipment Manufacturer and means the part you’re buying is sourced directly from the manufacturer who made your product. At eReplacementParts, we sell only genuine OEM parts, guaranteeing the part you’re purchasing is of better design and of higher quality than aftermarket parts.
Our product descriptions are a combination of data sourced directly from the manufacturers who made your product as well as content researched and curated by our content & customer service teams. This content is edited and reviewed internally before being made public to customers.
Our customer service team are at the ready daily to answer your part and product questions. We have a dedicated staff with decades of collective experience in helping customers just like you purchase parts to repair their products.
All our part reviews are solicited directly from other customers who have purchased this exact part. While we moderate these reviews for profanity, offensive language or personally identifiable information, these reviews are posted exactly as submitted and no alterations are made by our team.
All our customer repair instructions are solicited directly from other customers just like you who have purchased and replaced this exact part. While we moderate these reviews for profanity, offensive language or personally identifiable information, these reviews are posted exactly as submitted and no alterations are made by our team.
Based on data from past customer purchasing behaviors, these parts are most commonly purchased together along with the part you are viewing. These parts may be necessary or helpful to replace to complete your current repair.
All our installation videos are created and produced in collaboration with our in-house repair technician, Mark Sodja, who has helped millions of eReplacementParts customers over the last 13 years repair their products. Mark has years of experience in selling and repairing both commercial and residential products with a specialty in gas-powered equipment.
This data is collected from customers who submitted a repair instruction after replacing this exact part. Customers can rate how easy the repair was to complete and how long it took. We aggregate this data to provide a repair rating that allows customers to quickly determine the difficulty and time needed to perform their own repair.