
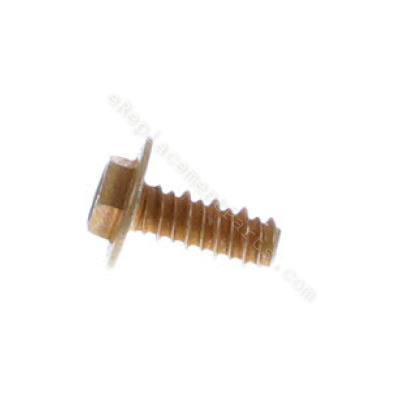


This replacement screw is a genuine item that is sourced from original equipment manufacturer. It is a high quality hardware that is commonly used with walk-behind lawn mowers. This screw has multiple uses depending on your model. Please make sure to check appropriate diagrams for correct location and use of this hardware. You will need a wrench when working with this screw.
Screw, 5/16-14 X .750 710-04995A
OEM part for: Yard Machines, MTD, Bolens, Yard Man, Troy-Bilt, Cub Cadet, Husky
Part Number: 710-04995A
$3.99
In Stock
Jump To:
Frequently Purchased Together ?


Compatibility
This part will fit the following 827 machines
MTD
11A-A44E065 (2011) Lawn Mower View Diagrams & Manuals
11A-A0JC006 (2011) Push Lawn Mower View Diagrams & Manuals
11A-A0JC027 (2011) Push Lawn Mower View Diagrams & Manuals
11A-B0JC006 (2011) Push Lawn Mower View Diagrams & Manuals
11A-B2M7004 (2011) Push Lawn Mower View Diagrams & Manuals
11A-B22Q704 (2011) Push Lawn Mower View Diagrams & Manuals
12AVB2M7004 (2011) Self Propelled Lawn Mower View Diagrams & Manuals
12AGB2JA004 (2011) Self Propelled Lawn Mower View Diagrams & Manuals
11A-A1JC027 (2011) 21" Push Mower View Diagrams & Manuals
12AVB2K9095 (2011) 21" Self-Propelled Lawn Mower View Diagrams & Manuals
11A-A1JC027 (2012) 21" Push Mower View Diagrams & Manuals
12AKC3KQ095 (2012) 21" Self-Propelled Lawn Mower View Diagrams & Manuals
12AKD3K9095 (2012) 21" Self-Propelled Lawn Mower View Diagrams & Manuals
12AVB26N704 (2012) 21" Self-Propelled Lawn Mower View Diagrams & Manuals
11A-B13M729 (2012) Lawn Mower View Diagrams & Manuals
11A-B13M729 (2013) Lawn Mower View Diagrams & Manuals
12AVB2J1704 (2013) Lawn Tractor View Diagrams & Manuals
11A-A0JT706 (2013) Lawn Mower View Diagrams & Manuals
11A-A0JT827 (2012) Lawn Mower View Diagrams & Manuals
11A-A0S5706 Lawn Mower View Diagrams & Manuals
11A-A1JT706 (2013) Lawn Mower View Diagrams & Manuals
11A-A1JT827 (2012) Lawn Mower View Diagrams & Manuals
11A-A1S5706 Lawn Mower View Diagrams & Manuals
11A-B0JT706 (2012) Lawn Mower View Diagrams & Manuals
11A-B23T704 Lawn Mower View Diagrams & Manuals
11A-B26M004 (2012) Lawn Mower View Diagrams & Manuals
11A-B2BN704 Lawn Mower View Diagrams & Manuals
11A-B2J1704 (2012) 11A-B2J1704 2012 View Diagrams & Manuals
12A-A1JC006 (2011) Lawn Mower View Diagrams & Manuals
12AGB26G704 (2012) Lawn Mower View Diagrams & Manuals
12AGB2JZ704 (2012) Lawn Mower View Diagrams & Manuals
12AKC31E095 (2013) Lawn Mower View Diagrams & Manuals
12AKD31H095 (2013) Lawn Mower View Diagrams & Manuals
12AKD37K095 (2012) Lawn Mower View Diagrams & Manuals
12AKD3KB095 Lawn Mower View Diagrams & Manuals
12AVB26M004 (2012) Lawn Mower View Diagrams & Manuals
11A-A1S5706 (2014) Lawn Mower View Diagrams & Manuals
11A-A40M700 (2013) Lawn Mower View Diagrams & Manuals
11A-B22Q704 (2013) Lawn Mower View Diagrams & Manuals
11A-B22Q704 (2012) Lawn Mower View Diagrams & Manuals
11A-B23T704 (2014) Lawn Mower View Diagrams & Manuals
11A-B23T704 (2013) Lawn Mower View Diagrams & Manuals
12AKC31E095 (2014) Lawn Mower View Diagrams & Manuals
12AKD31H095 (2014) Lawn Mower View Diagrams & Manuals
12AKD3KB095 (2014) Lawn Mower View Diagrams & Manuals
12AVB26N704 Lawn Mower View Diagrams & Manuals
12AVB26N704 (2013) Lawn Mower View Diagrams & Manuals
12AVD32Q704 (2012) Lawn Mower View Diagrams & Manuals
12AVD32Q704 (2013) Lawn Mower View Diagrams & Manuals
12AVD32Q704 (2011) Lawn Mower View Diagrams & Manuals
11A-A18N255 Walk Behind Gas Lawn Mower View Diagrams & Manuals
12AVC62J719 (2015) Lawn Mower View Diagrams & Manuals
12AVC6RQ719 (2015) Lawn Mower View Diagrams & Manuals
12AVB2RQ719 (2016) Lawn Mower View Diagrams & Manuals
12AVD6RQ719 (2016) Lawn Mower View Diagrams & Manuals
12AVB2RQ719 (2017) Lawn Mower View Diagrams & Manuals
11A-A14A065 (2011) Push Walk Behind Mower View Diagrams & Manuals
11A-A14S265 (2011) Push Walk Behind Mower View Diagrams & Manuals
11A-A44R265 (2011) Push Walk Behind Mower View Diagrams & Manuals
11A-B04E065 (2012) Push Walk Behind Mower View Diagrams & Manuals
11A-B04R765 (2012) Push Walk Behind Mower View Diagrams & Manuals
11A-B06R765 (2013) Push Walk Behind Mower View Diagrams & Manuals
11A-B0BL765 (2014) Push Walk Behind Mower View Diagrams & Manuals
11A-A06M078 (2013) Lawn Mower View Diagrams & Manuals
11A-A06N778 (2013) Lawn Mower View Diagrams & Manuals
11A-A06N778 (2014) Lawn Mower View Diagrams & Manuals
11A-A0BG778 (2014) Lawn Mower View Diagrams & Manuals
11A-A0A9778 (2015) Lawn Mower View Diagrams & Manuals
12A-B2A3778 (2017) Lawn Mower View Diagrams & Manuals
12A-A06M078 (2013) Lawn Mower View Diagrams & Manuals
12A-A06N778 (2013) Lawn Mower View Diagrams & Manuals
12A-B25U778 (2013) Lawn Mower View Diagrams & Manuals
12A-A06N778 (2014) Lawn Mower View Diagrams & Manuals
12A-A0BG778 (2014) Lawn Mower View Diagrams & Manuals
12A-B25U778 (2014) Lawn Mower View Diagrams & Manuals
12A-B2BV778 (2014) Lawn Mower View Diagrams & Manuals
12A-A0A9778 (2015) Lawn Mower View Diagrams & Manuals
12A-B2A3778 (2015) Lawn Mower View Diagrams & Manuals
12A-A0A9778 (2016) Lawn Mower View Diagrams & Manuals
12A-B2A3778 (2016) Lawn Mower View Diagrams & Manuals
12A-A0A9778 (2017) Lawn Mower View Diagrams & Manuals
11A-A44E897 (2011) Lawn Mower View Diagrams & Manuals
11A-B04A897 (2011) Lawn Mower View Diagrams & Manuals
11A-B29Q897 (2011) Lawn Mower View Diagrams & Manuals
11A-A09Q897 (2012) Lawn Mower View Diagrams & Manuals
11A-A40M897 (2012) Lawn Mower View Diagrams & Manuals
11A-B03K897 (2012) Lawn Mower View Diagrams & Manuals
11A-B29Q897 (2012) Lawn Mower View Diagrams & Manuals
11A-A09Q897 (2013) Lawn Mower View Diagrams & Manuals
11A-A40M897 (2013) Lawn Mower View Diagrams & Manuals
11A-B03K897 (2013) Lawn Mower View Diagrams & Manuals
11A-B29Q897 (2013) Lawn Mower View Diagrams & Manuals
11A-A40X897 (2014) Lawn Mower View Diagrams & Manuals
11A-B0BA897 (2014) Lawn Mower View Diagrams & Manuals
11A-B29V897 (2014) Lawn Mower View Diagrams & Manuals
11A-A0A9897 (2015) Lawn Mower View Diagrams & Manuals
11A-A40X897 (2015) Lawn Mower View Diagrams & Manuals
11A-B0BA897 (2015) Lawn Mower View Diagrams & Manuals
11A-B29V897 (2015) Lawn Mower View Diagrams & Manuals
11A-A2AQ897 (P21XL-H)(2016) Lawn Mower View Diagrams & Manuals
11A-A4BA897 (P21)(2016) Lawn Mower View Diagrams & Manuals
11A-B0BA897 (P21HW)(2016) Lawn Mower View Diagrams & Manuals
11A-B29V897 (P21HWXL)(2016) Lawn Mower View Diagrams & Manuals
11A-A2AQ897 (P21XL-H)(2017) Lawn Mower View Diagrams & Manuals
11A-A4S5897 (P21)(2017) Lawn Mower View Diagrams & Manuals
12AVB29Q897 (2011) Lawn Mower View Diagrams & Manuals
12AVB29Q897 (2012) Lawn Mower View Diagrams & Manuals
12AVD39Q897 (2012) Lawn Mower View Diagrams & Manuals
12ALD33Q897 (2013) Lawn Mower View Diagrams & Manuals
12AVB29Q897 (2013) Lawn Mower View Diagrams & Manuals
12AVD39Q897 (2013) Lawn Mower View Diagrams & Manuals
12AKD39V897 (2014) Lawn Mower View Diagrams & Manuals
12ALD39W897 (2014) Lawn Mower View Diagrams & Manuals
12AVB29V897 (2014) Lawn Mower View Diagrams & Manuals
12ABD29V897 (2015) Lawn Mower View Diagrams & Manuals
12AVB29V897 (2015) Lawn Mower View Diagrams & Manuals
12A-A2A9897 (SP21)(2016) Lawn Mower View Diagrams & Manuals
12ABD2AQ897 (SP21S-H)(2016) Lawn Mower View Diagrams & Manuals
12ACD29W897 (SP21SE)(2016) Lawn Mower View Diagrams & Manuals
SP21S (12ABD29V897)(2016) Lawn Mower View Diagrams & Manuals
12ABD29V897 (SP21S)(2017) Lawn Mower View Diagrams & Manuals
12ABD2AQ897 (SP21S-H)(2017) Lawn Mower View Diagrams & Manuals
ZHD-L60 (17ANDALD897)(2017) Lawn Tractor View Diagrams & Manuals
11A-B2AQ794 (2014) Lawn Mower View Diagrams & Manuals
12A-B2AQ794 (2014) Lawn Mower View Diagrams & Manuals
11A-A28G099 (247.38909)(2010) Lawn Mower View Diagrams & Manuals
11A-A28H299 (247.37117)(2010) Lawn Mower View Diagrams & Manuals
11A-A28L099 (247.38903)(2010) Lawn Mower View Diagrams & Manuals
11A-A28P299 (247.37111)(2010) Lawn Mower View Diagrams & Manuals
11A-B28G099 (247.38911)(2010) Lawn Mower View Diagrams & Manuals
11A-B28H299 (247.37118)(2010) Lawn Mower View Diagrams & Manuals
11A-B28L099 (247.38908)(2010) Lawn Mower View Diagrams & Manuals
11A-B28P299 (247.37116)(2010) Lawn Mower View Diagrams & Manuals
11A-25G099 (247.389170)(2011) Lawn Mower View Diagrams & Manuals
11A-A08X099 (247.38520)(2011) Lawn Mower View Diagrams & Manuals
11A-A15A099 (247.38821)(2011) Lawn Mower View Diagrams & Manuals
11A-A15B299 (247.37185)(2011) Lawn Mower View Diagrams & Manuals
11A-A25E099 (247.38923)(2011) Lawn Mower View Diagrams & Manuals
11A-A25F299 (247.37110)(2011) Lawn Mower View Diagrams & Manuals
11A-A25G099 (247.38917)(2011) Lawn Mower View Diagrams & Manuals
11A-A25H299 (247.37125)(2011) Lawn Mower View Diagrams & Manuals
11A-B05E099 (247.38529)(2011) Lawn Mower View Diagrams & Manuals
11A-B25E099 (247.38916)(2011) Lawn Mower View Diagrams & Manuals
11A-B25F299 (247.37124)(2011) Lawn Mower View Diagrams & Manuals
11A-B25G099 (247.38918)(2011) Lawn Mower View Diagrams & Manuals
11A-B25H299 (247.37126)(2011) Lawn Mower View Diagrams & Manuals
11A-A03P799 (247.37000)(2012) Lawn Mower View Diagrams & Manuals
11A-A25F799 (247.37031)(2012) Lawn Mower View Diagrams & Manuals
11A-B03R799 (247.37010)(2012) Lawn Mower View Diagrams & Manuals
11A-B13R799 (247.37030)(2012) Lawn Mower View Diagrams & Manuals
11A-B25F799 (247.37034)(2012) Lawn Mower View Diagrams & Manuals
11A-B25N799 (247.37037)(2012) Lawn Mower View Diagrams & Manuals
11A-A03P799 (247.37000)(2013) Lawn Mower View Diagrams & Manuals
11A-A16T799 (247.38821)(2013) Lawn Mower View Diagrams & Manuals
11A-A25F799 (247.37031)(2013) Lawn Mower View Diagrams & Manuals
11A-B03R799 (247.37010)(2013) Lawn Mower View Diagrams & Manuals
11A-B13R799 (247.37030)(2013) Lawn Mower View Diagrams & Manuals
11A-B21E099 (247.37432)(2013) Lawn Mower View Diagrams & Manuals
11A-B21K799 (247.374330)(2013) Lawn Mower View Diagrams & Manuals
11A-B25F799 (247.37034)(2013) Lawn Mower View Diagrams & Manuals
11A-B25N799 (247.37037)(2013) Lawn Mower View Diagrams & Manuals
11A-B26T799 (247.37430)(2013) Lawn Mower View Diagrams & Manuals
11A-A0BR799 (247.37000.1)(2014) Lawn Mower View Diagrams & Manuals
11A-A1BW799 (247.998161)(2014) Lawn Mower View Diagrams & Manuals
11A-A25F799 (247.370310)(2014) Lawn Mower View Diagrams & Manuals
11A-B0BS799 (247.37010.1)(2014) Lawn Mower View Diagrams & Manuals
11A-B1BS799 (247.370301)(2014) Lawn Mower View Diagrams & Manuals
11A-B25F799 (247.370340)(2014) Lawn Mower View Diagrams & Manuals
11A-B25N799 (247.370370)(2014) Lawn Mower View Diagrams & Manuals
11A-B2B2799 (247.370371)(2014) Lawn Mower View Diagrams & Manuals
11A-B2BW799 (247.37430.1)(2014) Lawn Mower View Diagrams & Manuals
11A-B2BX799 (247.370341)(2014) Lawn Mower View Diagrams & Manuals
11A-A00X799 (247.37218)(2015) Lawn Mower View Diagrams & Manuals
11A-A0BR799 (247.37000.1)(2015) Lawn Mower View Diagrams & Manuals
11A-A1BW799 (247.998161)(2015) Lawn Mower View Diagrams & Manuals
11A-A2BX799 (247.370311)(2015) Lawn Mower View Diagrams & Manuals
11A-B0BS799 (247.37010.1)(2015) Lawn Mower View Diagrams & Manuals
11A-B28S799 (247.37237)(2015) Lawn Mower View Diagrams & Manuals
11A-B2BW799 (247.37430.1)(2015) Lawn Mower View Diagrams & Manuals
11A-B2BX799 (247.370341)(2015) Lawn Mower View Diagrams & Manuals
11A-A00X799 (37218)(2016) Lawn Mower View Diagrams & Manuals
11A-A2A5799 (2016) Lawn Mower View Diagrams & Manuals
11A-B28S799 (37237)(2016) Lawn Mower View Diagrams & Manuals
11A-B2BW799 (37430)(2016) Lawn Mower View Diagrams & Manuals
11A-A2A5799 (247.380310)(2017) Lawn Mower View Diagrams & Manuals
11A-B28S799 (247.372370)(2017) Lawn Mower View Diagrams & Manuals
11A-B2BW799 (247.374301)(2017) Lawn Mower View Diagrams & Manuals
12A-A23P799 (247.37440)(2013) Lawn Mower View Diagrams & Manuals
12A-A2BR799 (247.37440.1)(2014) Lawn Mower View Diagrams & Manuals
12A-A2B8799 (247.37440.1)(2015) Lawn Mower View Diagrams & Manuals
12A-B28S799 (247.377050)(2015) Lawn Mower View Diagrams & Manuals
12ABB22J799 (247.3773OO)(2015) Lawn Mower View Diagrams & Manuals
12ABD32J799 (247.37591)(2015) Lawn Mower View Diagrams & Manuals
12AKD38S799 (247.379990)(2015) Lawn Mower View Diagrams & Manuals
12AVC1B8799 (247.378970)(2015) Lawn Mower View Diagrams & Manuals
12A-A2B8799 (37700)(2016) Lawn Mower View Diagrams & Manuals
12A-B28S799 (37705)(2016) Lawn Mower View Diagrams & Manuals
12ABB22J799 (37730)(2016) Lawn Mower View Diagrams & Manuals
12AGB25P799 (37744)(2016) Lawn Mower View Diagrams & Manuals
12AKD38S799 (37999)(2016) Lawn Mower View Diagrams & Manuals
12AKD3AQ799 (37900)(2016) Lawn Mower View Diagrams & Manuals
12AVB15R799 (2016) Lawn Mower View Diagrams & Manuals
12AVB25V799 (37441)(2016) Lawn Mower View Diagrams & Manuals
12AVC1B8799 (2016) Lawn Mower View Diagrams & Manuals
12AVD75R799 (2016) Lawn Mower View Diagrams & Manuals
12A-A2B8799 (247.377000)(2017) Lawn Mower View Diagrams & Manuals
12A-B28S799 (247.377050)(2017) Lawn Mower View Diagrams & Manuals
12A-B2AQ799 (247.377450)(2017) Lawn Mower View Diagrams & Manuals
12AGB25P799 (247.37744)(2017) Lawn Mower View Diagrams & Manuals
12AVB15R799 (247.397600)(2017) Lawn Mower View Diagrams & Manuals
12AVB25V799 (247.374410)(2017) Lawn Mower View Diagrams & Manuals
12AVD75R799 (247.397700)(2017) Lawn Mower View Diagrams & Manuals
12B-A2B8799 (247.377001)(2017) Lawn Mower View Diagrams & Manuals
12B-B28S799 (2017) Lawn Mower View Diagrams & Manuals
12BGB25P799 (247.377441)(2017) Lawn Mower View Diagrams & Manuals
12BVB15R799 (2017) Lawn Mower View Diagrams & Manuals
12BVB25V799 (247.374411)(2017) Lawn Mower View Diagrams & Manuals
12B-B28S799 (247.377051)(2018) Lawn Mower View Diagrams & Manuals
18A-188-799 (247.370480)(2010) Lawn Mower View Diagrams & Manuals
CC500 (11A-18M9010) (2010) 11A-18M9 Push Walk Behind Mower View Diagrams & Manuals
CC500 (11A-18M9010) (2011) 11A-18M9 Push Walk Behind Mower View Diagrams & Manuals
CC500 (11A-18M9010) (2012) 11A-18M9 Push Walk Behind Mower View Diagrams & Manuals
CC500BAT (18A-189-710) (2010) 18A-189 Electric Mower View Diagrams & Manuals
CC500BAT (18A-189-710) (2011) 18A-189-710 Electric Mower View Diagrams & Manuals
CC500EL (18A-182-710) (2011) 18A-182-710 Electric Mower View Diagrams & Manuals
11A-B24A059 (2011) Lawn Mower View Diagrams & Manuals
11A-B2M7059 (2011) Lawn Mower View Diagrams & Manuals
11A-B22C759 (2012) Lawn Mower View Diagrams & Manuals
11A-B24A059 (2012) Lawn Mower View Diagrams & Manuals
11A-B23M759 (2013) Lawn Mower View Diagrams & Manuals
12AVB2M7059 (2011) Lawn Mower View Diagrams & Manuals
12AVB2BG704 (2014) Lawn Mower View Diagrams & Manuals
12AVB2A9704 (2016) Lawn Mower View Diagrams & Manuals
12AKD3KH095 (2016) Lawn Mower View Diagrams & Manuals
RM110 (11A-B12F783)(2015) Lawn Mower View Diagrams & Manuals
RM120 (11A-B22J783)(2015) Lawn Mower View Diagrams & Manuals
11A-A1KB783 (RM140)(2016) Lawn Mower View Diagrams & Manuals
11A-B22J783 (RM120)(2016) Lawn Mower View Diagrams & Manuals
11A-B2KB783 (RM160)(2016) Lawn Mower View Diagrams & Manuals
RM105 (11A-B1SD783)(2016) Lawn Mower View Diagrams & Manuals
11A-B1SD783 (RM 105)(2017) Lawn Mower View Diagrams & Manuals
RM210 (12AVB22J783)(2015) Lawn Mower View Diagrams & Manuals
RM220 (12AGB2S6783)(2015) Lawn Mower View Diagrams & Manuals
12AKD3KB783 (RM360)(2016) Lawn Mower View Diagrams & Manuals
12AVB2KB783 (RM205)(2016) Lawn Mower View Diagrams & Manuals
12BGB2S6783 (RM220)(2016) Lawn Mower View Diagrams & Manuals
11A-A18M055 (2010) Push Walk Behind Mower View Diagrams & Manuals
11A-A24T055 (2010) Push Walk Behind Mower View Diagrams & Manuals
11A-A24Z255 (2010) Push Walk Behind Mower View Diagrams & Manuals
11A-A18M055 (2011) Push Walk Behind Mower View Diagrams & Manuals
11A-A19Q701 (2011) Push Walk Behind Mower View Diagrams & Manuals
11A-A24T055 (2011) Push Walk Behind Mower View Diagrams & Manuals
11A-A24Z255 (2011) Push Walk Behind Mower View Diagrams & Manuals
11A-B29Q701 (2011) Push Walk Behind Mower View Diagrams & Manuals
11A-B2M7001 (2011) Push Walk Behind Mower View Diagrams & Manuals
11A-A19Q701 (2012) Push Walk Behind Mower View Diagrams & Manuals
11A-B29Q701 (2012) Push Walk Behind Mower View Diagrams & Manuals
11A-A19Q701 (2013) Push Walk Behind Mower View Diagrams & Manuals
11A-B29Q701 (2013) Push Walk Behind Mower View Diagrams & Manuals
12A-B29Q701 (2011) Self Propelled Walk Behind Mower View Diagrams & Manuals
12AEB2JA001 (2011) Self Propelled Walk Behind Mower View Diagrams & Manuals
12AVD39Q701 (2011) Self Propelled Walk Behind Mower View Diagrams & Manuals
12A-B29Q701 (2012) Self Propelled Walk Behind Mower View Diagrams & Manuals
12AEB2JZ701 (2012) Self Propelled Walk Behind Mower View Diagrams & Manuals
12AVD39Q701 (2012) Self Propelled Walk Behind Mower View Diagrams & Manuals
12A-B29Q701 (2013) Self Propelled Walk Behind Mower View Diagrams & Manuals
12AEB2JZ701 (2013) Self Propelled Walk Behind Mower View Diagrams & Manuals
12AVB22J701 (2013) Self Propelled Walk Behind Mower View Diagrams & Manuals
12A-B2AQ701 (2014) Self Propelled Walk Behind Mower View Diagrams & Manuals
12AVB22J701 (2014) Self Propelled Walk Behind Mower View Diagrams & Manuals
Bolens
11A-A44R265 (2011) Push Lawn Mower View Diagrams & Manuals
11A-A14A065 (2011) Push Lawn Mower View Diagrams & Manuals
11A-A14S265 (2011) Push Lawn Mower View Diagrams & Manuals
11A-B04E065 (2012) Gas Push Lawn Mower View Diagrams & Manuals
11A-B04R765 (2012) Lawn Mower View Diagrams & Manuals
11A-B06R765 (2013) Lawn Mower View Diagrams & Manuals
11A-B0BL765 (2014) Lawn Mower View Diagrams & Manuals
Yard Man
11A-A18M055 (2010) Push lawn Mower View Diagrams & Manuals
11A-A18M055 (2011) Push lawn Mower View Diagrams & Manuals
11A-A24T055 (2010) Push lawn Mower View Diagrams & Manuals
11A-A24T055 (2011) Push lawn Mower View Diagrams & Manuals
11A-A24Z255 (2010) Push lawn Mower View Diagrams & Manuals
11A-A24Z255 (2011) Push lawn Mower View Diagrams & Manuals
11A-B2M7001 (2011) Push lawn Mower View Diagrams & Manuals
11A-A19Q701 (2011) Push lawn Mower View Diagrams & Manuals
11A-B29Q701 (2011) Push lawn Mower View Diagrams & Manuals
12A-B29Q701 (2011) Self Propelled Lawn Mower View Diagrams & Manuals
12AEB2JA001 (2011) Self Propelled Lawn Mower View Diagrams & Manuals
12AVD39Q701 (2011) Self Propelled Lawn Mower View Diagrams & Manuals
11A-A19Q701 (2012) Lawn Mower View Diagrams & Manuals
11A-A19Q701 (2013) Lawn Mower View Diagrams & Manuals
11A-B29Q701 (2013) Lawn Mower View Diagrams & Manuals
11A-B29Q701 (2012) Lawn Mower View Diagrams & Manuals
12A-B29Q701 (2013) Lawn Mower View Diagrams & Manuals
12A-B29Q701 (2012) Lawn Mower View Diagrams & Manuals
12A-B2AQ701 (2014) Lawn Mower View Diagrams & Manuals
12AEB2JZ701 (2013) Lawn Mower View Diagrams & Manuals
12AEB2JZ701 (2012) Lawn Mower View Diagrams & Manuals
12AVB22J701 (2014) Lawn Mower View Diagrams & Manuals
12AVB22J701 (2013) Lawn Mower View Diagrams & Manuals
12AVD39Q701 (2012) Lawn Mower View Diagrams & Manuals
11A-A22J701 (2013) Lawn Mower View Diagrams & Manuals
11A-B02J701 (2013) Lawn Mower View Diagrams & Manuals
11A-B22J701 (2013) Lawn Mower View Diagrams & Manuals
11A-A12N701 (2014) Lawn Mower View Diagrams & Manuals
11A-A1AQ701 (2014) Lawn Mower View Diagrams & Manuals
11A-A22J701 (2014) Lawn Mower View Diagrams & Manuals
11A-B02J701 (2014) Lawn Mower View Diagrams & Manuals
11A-B22J701 (2014) Lawn Mower View Diagrams & Manuals
11A-B22N701 (2014) Lawn Mower View Diagrams & Manuals
11A-B2AQ701 (2014) Lawn Mower View Diagrams & Manuals
12A-A1M9001 (2012) Lawn Mower View Diagrams & Manuals
12AEB2JZ001 (2013) Lawn Mower View Diagrams & Manuals
12A-B22N701 (2014) Lawn Mower View Diagrams & Manuals
12AGB2S6001 (2014) Lawn Mower View Diagrams & Manuals
12AGB2S6701 (2014) Lawn Mower View Diagrams & Manuals
12AKD32N701 (2014) Lawn Mower View Diagrams & Manuals
12AKD3AQ701 (2014) Lawn Mower View Diagrams & Manuals
11A-A18N255 (2010) Push Walk-Behind Mower View Diagrams & Manuals
11A-A18N255 (2011) Push Walk-Behind Mower View Diagrams & Manuals
12A-A1JY701 (2012) Self-Propelled Walk-Behind Mower View Diagrams & Manuals
12AEB2JA001 (2012) Self-Propelled Walk-Behind Mower View Diagrams & Manuals
Yard Machines
11A-A44E000 (2011) Push Lawn Mower View Diagrams & Manuals
11A-A44E029 (2011) Push Lawn Mower View Diagrams & Manuals
11A-A44R229 (2011) Push Lawn Mower View Diagrams & Manuals
11A-A14E029 (2011) Push Lawn Mower View Diagrams & Manuals
11A-A04D000 (2011) Push Lawn Mower View Diagrams & Manuals
11A-A14R229 (2011) Push Lawn Mower View Diagrams & Manuals
11A-B16M029 (2010) Push Lawn Mower View Diagrams & Manuals
11A-B24A000 (2011) Push Lawn Mower View Diagrams & Manuals
11A-B16N229 (2010) Push Lawn Mower View Diagrams & Manuals
11A-B16N229 (2011) Push Lawn Mower View Diagrams & Manuals
12A-A04A000 (2011) Self Propelled Lawn Mower View Diagrams & Manuals
12A-A14O029 (2011) Self Propelled Lawn Mower View Diagrams & Manuals
12A-A14X229 (2011) Self Propelled Lawn Mower View Diagrams & Manuals
11A-A00J000 (2011) Push Lawn Mower View Diagrams & Manuals
11A-B04E000 (2011) Push Lawn Mower View Diagrams & Manuals
11A-B16M029 (2011) Push Lawn Mower View Diagrams & Manuals
11A-A00M700 (2013) Lawn Mower View Diagrams & Manuals
11A-A00M700 (2012) Lawn Mower View Diagrams & Manuals
11A-A0S5700 (2014) Lawn Mower View Diagrams & Manuals
11A-A22J700 (2014) Lawn Mower View Diagrams & Manuals
11A-B00X700 (2014) Lawn Mower View Diagrams & Manuals
11A-B06R700 (2013) Lawn Mower View Diagrams & Manuals
11A-B13M729 (2014) Lawn Mower View Diagrams & Manuals
11A-B96N729 (2014) Lawn Mower View Diagrams & Manuals
11A-B96N729 (2013) Lawn Mower View Diagrams & Manuals
12A-A03M700 (2013) Lawn Mower View Diagrams & Manuals
12A-A03M700 (2012) Lawn Mower View Diagrams & Manuals
12A-A0BE700 (2014) Lawn Mower View Diagrams & Manuals
12A-A13K729 (2013) Lawn Mower View Diagrams & Manuals
12A-A13K729 (2014) Lawn Mower View Diagrams & Manuals
12A-A13K729 (2012) Lawn Mower View Diagrams & Manuals
12A-A1BA729 (2014) Lawn Mower View Diagrams & Manuals
11A-A23K700 (2013) Lawn Mower View Diagrams & Manuals
11A-A56R729 (2013) Lawn Mower View Diagrams & Manuals
11A-A00X700 (2014) Lawn Mower View Diagrams & Manuals
11A-A2BA700 (2014) Lawn Mower View Diagrams & Manuals
11A-A40X700 (2014) Lawn Mower View Diagrams & Manuals
11A-A56R729 (2014) Lawn Mower View Diagrams & Manuals
11A-A5BL729 (2014) Lawn Mower View Diagrams & Manuals
11A-B0BL700 (2014) Lawn Mower View Diagrams & Manuals
11A-B0S5700 (2014) Lawn Mower View Diagrams & Manuals
11A-B1BE729 (2014) Lawn Mower View Diagrams & Manuals
11A-B9BG729 (2014) Lawn Mower View Diagrams & Manuals
11A-A0JT700 (2015) Lawn Mower View Diagrams & Manuals
11A-A1S5700 (2015) Lawn Mower View Diagrams & Manuals
11A-A2BA700 (2015) Lawn Mower View Diagrams & Manuals
11A-B0BL729 (2015) Lawn Mower View Diagrams & Manuals
11A-B0S5700 (2015) Lawn Mower View Diagrams & Manuals
11A-B1BE729 (2015) Lawn Mower View Diagrams & Manuals
11A-B9A9729 (2015) Lawn Mower View Diagrams & Manuals
11B-B1BE729 (2015) Lawn Mower View Diagrams & Manuals
11A-A00X700 (2016) Lawn Mower View Diagrams & Manuals
11A-A1S5700 (2016) Lawn Mower View Diagrams & Manuals
11A-A2S5700 (2016) Lawn Mower View Diagrams & Manuals
11A-B0BL700 (2016) Lawn Mower View Diagrams & Manuals
11A-B0BL729 (2016) Lawn Mower View Diagrams & Manuals
11A-B0S5700 (2016) Lawn Mower View Diagrams & Manuals
11A-B1BE729 (2016) Lawn Mower View Diagrams & Manuals
11A-B9A9729 (2016) Lawn Mower View Diagrams & Manuals
11A-A00X700 (2017) Lawn Mower View Diagrams & Manuals
11A-A1S5700 (2017) Lawn Mower View Diagrams & Manuals
11A-A2M5700 (2017) Lawn Mower View Diagrams & Manuals
11A-A2S5700 (2017) Lawn Mower View Diagrams & Manuals
11A-B0BL700 (2017) Lawn Mower View Diagrams & Manuals
11A-B0BL729 (2017) Lawn Mower View Diagrams & Manuals
11A-B0S5700 (2017) Lawn Mower View Diagrams & Manuals
11A-B1BE729 (2017) Lawn Mower View Diagrams & Manuals
11A-B9A9729 (2017) Lawn Mower View Diagrams & Manuals
11A-B0BL729 (2018) Lawn Mower View Diagrams & Manuals
11A-B1BE729 (2018) Lawn Mower View Diagrams & Manuals
11A-B9A9729 (2018) Lawn Mower View Diagrams & Manuals
12A-A02J700 (2014) Lawn Mower View Diagrams & Manuals
12A-A02J700 (2016) Lawn Mower View Diagrams & Manuals
12A-A0M5700 (2017) Lawn Mower View Diagrams & Manuals
11A-A0MA700 (2018) Walk-Behind Mower View Diagrams & Manuals
11A-B1SD700 (2018) Walk-Behind Mower View Diagrams & Manuals
11A-B2S5700 (2018) Walk-Behind Mower View Diagrams & Manuals
11B-A0S5700 (2019) Walk-Behind Mower View Diagrams & Manuals
11B-B0S5700 (2019) Walk-Behind Mower View Diagrams & Manuals
12B-A0SD700 (2019) Walk-Behind Mower View Diagrams & Manuals
11A-A00J000 (2012) Push Walk-Behind Mower View Diagrams & Manuals
11A-A00X700 (2018) Push Walk-Behind Mower View Diagrams & Manuals
11A-A0S5700 (2015) Push Walk-Behind Mower View Diagrams & Manuals
11A-A0S5700 (2016) Push Walk-Behind Mower View Diagrams & Manuals
11A-A0S5700 (2017) Push Walk-Behind Mower View Diagrams & Manuals
11A-A1S5700 (2018) Push Walk-Behind Mower View Diagrams & Manuals
11A-A22J700 (2015) Push Walk-Behind Mower View Diagrams & Manuals
11A-A22J700 (2016) Push Walk-Behind Mower View Diagrams & Manuals
11A-A2BL752 (2021) Push Walk-Behind Mower View Diagrams & Manuals
11A-A2S5700 (2018) Push Walk-Behind Mower View Diagrams & Manuals
11A-B04E000 (2012) Push Walk-Behind Mower View Diagrams & Manuals
11A-B0BL700 (2018) Push Walk-Behind Mower View Diagrams & Manuals
11A-B0BL700 (2019) Push Walk-Behind Mower View Diagrams & Manuals
11A-B0MA700 (2021) Push Walk-Behind Mower View Diagrams & Manuals
11A-B0S5700 (2018) Push Walk-Behind Mower View Diagrams & Manuals
11B-A0MA700 (2021) Push Walk-Behind Mower View Diagrams & Manuals
11B-A0S5700 (2020) Push Walk-Behind Mower View Diagrams & Manuals
11B-B0BL700 (2020) Push Walk-Behind Mower View Diagrams & Manuals
11B-B0S5700 (2020) Push Walk-Behind Mower View Diagrams & Manuals
12A-A0BE700 (2016) Self-Propelled Walk-Behind Mower View Diagrams & Manuals
12A-A0BE700 (2017) Self-Propelled Walk-Behind Mower View Diagrams & Manuals
12A-A0BE700 (2018) Self-Propelled Walk-Behind Mower View Diagrams & Manuals
12A-A0M5700 (2018) Self-Propelled Walk-Behind Mower View Diagrams & Manuals
12A-A1BA729 (2015) Self-Propelled Walk-Behind Mower View Diagrams & Manuals
12A-A1BA729 (2016) Self-Propelled Walk-Behind Mower View Diagrams & Manuals
12A-A1BA729 (2017) Self-Propelled Walk-Behind Mower View Diagrams & Manuals
12A-A1BA729 (2018) Self-Propelled Walk-Behind Mower View Diagrams & Manuals
Troy-Bilt
11A-A26M011 (2010) Push Walk-Behind Mower View Diagrams & Manuals
11A-A26M066 (2010) Push Walk-Behind Mower View Diagrams & Manuals
11A-A26N211 (2010) Push Walk-Behind Mower View Diagrams & Manuals
11A-A26N266 (2010) Push Walk-Behind Mower View Diagrams & Manuals
11A-B29Q711 (2010) Push Walk-Behind Mower View Diagrams & Manuals
11A-B29Q766 (2010) Push Walk-Behind Mower View Diagrams & Manuals
TB110 (11A-A26M011) (2011) Push Walk-Behind Mower View Diagrams & Manuals
TB110 (11A-A26M066) (2011) Push Walk-Behind Mower View Diagrams & Manuals
TB110 (11A-A26N211) (2011) Push Walk-Behind Mower View Diagrams & Manuals
TB130 (11A-B29Q711) (2011) Push Walk-Behind Mower View Diagrams & Manuals
TB130 (11A-B29Q766) (2011) Push Walk-Behind Mower View Diagrams & Manuals
TB110 (11A-A23N011) (2012) Push Walk-Behind Mower View Diagrams & Manuals
TB110 (11A-A23N066) (2012) Push Walk-Behind Mower View Diagrams & Manuals
TB110 (11A-A23O211) (2012) Push Walk-Behind Mower View Diagrams & Manuals
TB130 (11A-B29Q711) (2012) Push Walk-Behind Mower View Diagrams & Manuals
TB130 (11A-B29Q766) (2012) Push Walk-Behind Mower View Diagrams & Manuals
12A-A26M011 (2010) Push Walk-Behind Mower View Diagrams & Manuals
TB210 (12A-A26M011) (2010) Self-Propelled Walk-Behind Mower View Diagrams & Manuals
12A-A26M066 (2010) Self-Propelled Walk-Behind Mower View Diagrams & Manuals
TB210 (12A-A26M066) (2010) Self-Propelled Walk-Behind Mower View Diagrams & Manuals
12A-A26N211 (2010) Self-Propelled Walk-Behind Mower View Diagrams & Manuals
TB210 (12A-A26N211) (2010) Self-Propelled Walk-Behind Mower View Diagrams & Manuals
12AEA29L011 (2010) Self-Propelled Walk-Behind Mower View Diagrams & Manuals
TB270ES (12AEA29L011) (2010) Self-Propelled Walk-Behind Mower View Diagrams & Manuals
12AEA29L066 (2010) Self-Propelled Walk-Behind Mower View Diagrams & Manuals
TB270ES (12AEA29L066) (2010) Self-Propelled Walk-Behind Mower View Diagrams & Manuals
12AEA29M211 (2010) Self-Propelled Walk-Behind Mower View Diagrams & Manuals
TB270ES (12AEA29M211) (2010) Self-Propelled Walk-Behind Mower View Diagrams & Manuals
12AVA29Q711 (2010) Self-Propelled Walk-Behind Mower View Diagrams & Manuals
TB250 (12AVA29Q711) (2010) Self-Propelled Walk-Behind Mower View Diagrams & Manuals
12AVA29Q766 (2010) Self-Propelled Walk-Behind Mower View Diagrams & Manuals
TB250 (12AVA29Q766) (2010) Self-Propelled Walk-Behind Mower View Diagrams & Manuals
12AVB26M011 (2010) Self-Propelled Walk-Behind Mower View Diagrams & Manuals
TB230 (12AVB26M011) (2010) Self-Propelled Walk-Behind Mower View Diagrams & Manuals
TB230 (12AVB26M066) (2010) Self-Propelled Walk-Behind Mower View Diagrams & Manuals
12AVB26M066 (2010) Self-Propelled Walk-Behind Mower View Diagrams & Manuals
12AVB26N211 (2010) Self-Propelled Walk-Behind Mower View Diagrams & Manuals
TB230 (12AVB26N211) (2010) Self-Propelled Walk-Behind Mower View Diagrams & Manuals
TB210 (12A-A26M011) (2011) Self-Propelled Walk-Behind Mower View Diagrams & Manuals
TB210 (12A-A26M066) (2011) Self-Propelled Walk-Behind Mower View Diagrams & Manuals
TB210 (12A-A26N211) (2011) Self-Propelled Walk-Behind Mower View Diagrams & Manuals
TB230 (12AVB26M011) (2011) Self-Propelled Walk-Behind Mower View Diagrams & Manuals
TB230 (12AVB26M066) (2011) Self-Propelled Walk-Behind Mower View Diagrams & Manuals
TB230 (12AVB26N211) (2011) Self-Propelled Walk-Behind Mower View Diagrams & Manuals
TB260 (12AVB29Q711) (2011) Self-Propelled Walk-Behind Mower View Diagrams & Manuals
TB260 (12AVB29Q766) (2011) Self-Propelled Walk-Behind Mower View Diagrams & Manuals
TB280ES (12AGA26E011) (2011) Self-Propelled Walk-Behind Mower View Diagrams & Manuals
TB280ES (12AGA26E066) (2011) Self-Propelled Walk-Behind Mower View Diagrams & Manuals
TB280ES (12AGA26G211) (2011) Self-Propelled Walk-Behind Mower View Diagrams & Manuals
TB330XP (12AKC39B011) (2011) Self-Propelled Walk-Behind Mower View Diagrams & Manuals
TB330XP (12AKC39B066) (2011) Self-Propelled Walk-Behind Mower View Diagrams & Manuals
TB330XP (12AKC39C211) (2011) Self-Propelled Walk-Behind Mower View Diagrams & Manuals
TB350XP (12AKD39B011) (2011) Self-Propelled Walk-Behind Mower View Diagrams & Manuals
TB350XP (12AKD39B066) (2011) Self-Propelled Walk-Behind Mower View Diagrams & Manuals
TB350XP (12AKD39C211) (2011) Self-Propelled Walk-Behind Mower View Diagrams & Manuals
TB210 (12A-A25S011) (2012) Self-Propelled Walk-Behind Mower View Diagrams & Manuals
TB210 (12A-A25S066) (2012) Self-Propelled Walk-Behind Mower View Diagrams & Manuals
TB210 (12A-A25U211) (2012) Self-Propelled Walk-Behind Mower View Diagrams & Manuals
TB230 (12AVB25S011) (2012) Self-Propelled Walk-Behind Mower View Diagrams & Manuals
TB230 (12AVB25S066) (2012) Self-Propelled Walk-Behind Mower View Diagrams & Manuals
TB230 (12AVB25U211) (2012) Self-Propelled Walk-Behind Mower View Diagrams & Manuals
TB280ES (12AGA26E011) (2012) Self-Propelled Walk-Behind Mower View Diagrams & Manuals
TB280ES (12AGA26G211) (2012) Self-Propelled Walk-Behind Mower View Diagrams & Manuals
12A-B22Q563 Self Propelled Mower View Diagrams & Manuals
TB280ES (12AGA26G711-2012) Mower View Diagrams & Manuals
TB280ES (12AGA26G711-2013) Mower View Diagrams & Manuals
12A-A25U711 (2012) Lawn Mower View Diagrams & Manuals
12A-A25U711 (2013) Lawn Mower View Diagrams & Manuals
11A-A23O711 (2012) Walk Behind Mower View Diagrams & Manuals
11A-A23O711 (2013) Walk Behind Mower View Diagrams & Manuals
TB320 (2013)(12AVC35U766) Lawn Mower View Diagrams & Manuals
TB320 (2013)(12AVC35U711) Lawn Mower View Diagrams & Manuals
TB1100 (11A-A23O766_2012) Lawn Mower View Diagrams & Manuals
TB1100 (11A-A23O766_2013) Lawn Mower View Diagrams & Manuals
TB110 (11A-A23O711)(2012) Lawn Mower View Diagrams & Manuals
TB110 (11A-A23O766)(2012) Lawn Mower View Diagrams & Manuals
TB110 (11A-A23O766)(2013) Lawn Mower View Diagrams & Manuals
TB110 (11A-A23O711)(2013) Lawn Mower View Diagrams & Manuals
TB130 (11A-B29Q711)(2013) Lawn Mower View Diagrams & Manuals
TB130 (11A-B29Q766)(2013) Lawn Mower View Diagrams & Manuals
TB110 (11A-A23O711)(2014) Lawn Mower View Diagrams & Manuals
TB110 (11A-A23O766)(2014) Lawn Mower View Diagrams & Manuals
TB110 (11A-A2BM711)(2014) Lawn Mower View Diagrams & Manuals
TB110 (11A-A2BM766)(2014) Lawn Mower View Diagrams & Manuals
TB115 (11A-B2BM766)(2014) Lawn Mower View Diagrams & Manuals
TB120 (11A-B22J766)(2014) Lawn Mower View Diagrams & Manuals
TB130 (11A-B2AQ711)(2014) Lawn Mower View Diagrams & Manuals
TB105 (11A-A22J766)(TB115)(2015) Lawn Mower View Diagrams & Manuals
TB110 (11A-A2BM711)(2015) Lawn Mower View Diagrams & Manuals
TB110 (11A-A2BM766)(2015) Lawn Mower View Diagrams & Manuals
TB115 (11A-B2BM766)(2015) Lawn Mower View Diagrams & Manuals
TB120 (11A-B22J766)(2015) Lawn Mower View Diagrams & Manuals
TB130 (11A-B2AQ711)(2015) Lawn Mower View Diagrams & Manuals
11A-A22J766 (TB 105)(2016) Lawn Mower View Diagrams & Manuals
11A-A2BM766 (TB 110)(2016) Lawn Mower View Diagrams & Manuals
11A-A2BM711 (TB 110)(2016) Lawn Mower View Diagrams & Manuals
11A-B22J766 (TB 120)(2016) Lawn Mower View Diagrams & Manuals
11A-B2A9711 (TB 130 XP)(2016) Lawn Mower View Diagrams & Manuals
TB280 (12AGA26G211)(2011) Lawn Mower View Diagrams & Manuals
TB210 (12A-A25U711)(2012) Lawn Mower View Diagrams & Manuals
TB210 (12A-A25U766)(2012) Lawn Mower View Diagrams & Manuals
TB230 (12AVB25U711)(2012) Lawn Mower View Diagrams & Manuals
TB230 (12AVB25U766)(2012) Lawn Mower View Diagrams & Manuals
TB260 (12AVB29Q766)(2012) Lawn Mower View Diagrams & Manuals
TB280ES (12AGA26G766)(2012) Lawn Mower View Diagrams & Manuals
TB330XP (12AKC39B066)(2012) Lawn Mower View Diagrams & Manuals
TB330XP (12AKC39C766)(2012) Lawn Mower View Diagrams & Manuals
TB350XP (12AKD39B066)(2012) Lawn Mower View Diagrams & Manuals
TB350XP (12AKD39C766)(2012) Lawn Mower View Diagrams & Manuals
12AKC35U711 (2013) Lawn Mower View Diagrams & Manuals
12AKC35U766 (2013) Lawn Mower View Diagrams & Manuals
12AKD35U711 (2013) Lawn Mower View Diagrams & Manuals
12AKD35U766 (2013) Lawn Mower View Diagrams & Manuals
12ALC35S066 (2013) Lawn Mower View Diagrams & Manuals
12ALC35S711 (2013) Lawn Mower View Diagrams & Manuals
12ALC35S766 (2013) Lawn Mower View Diagrams & Manuals
TB210 (12A-A25U711)(2013) Lawn Mower View Diagrams & Manuals
TB210 (12A-A25U766)(2013) Lawn Mower View Diagrams & Manuals
TB230 (12AVB25U711)(2013) Lawn Mower View Diagrams & Manuals
TB230 (12AVB25U766)(2013) Lawn Mower View Diagrams & Manuals
TB260 (12AVB29Q766)(2013) Lawn Mower View Diagrams & Manuals
TB280ES (12AGA26G011)(2013) Lawn Mower View Diagrams & Manuals
TB280ES (12AGA26G066)(2013) Lawn Mower View Diagrams & Manuals
TB280ES (12AGA26G211)(2013) Lawn Mower View Diagrams & Manuals
TB280ES (12AGA26G766)(2013) Lawn Mower View Diagrams & Manuals
TB200 (12A-A2BU711)(2014) Lawn Mower View Diagrams & Manuals
TB200 (12A-A2BU766)(2014) Lawn Mower View Diagrams & Manuals
TB220 (12AVB22J766)(2014) Lawn Mower View Diagrams & Manuals
TB230 (12AVB25U711)(2014) Lawn Mower View Diagrams & Manuals
TB230 (12AVB2BV711)(2014) Lawn Mower View Diagrams & Manuals
TB230 (12AVB2BV766)(2014) Lawn Mower View Diagrams & Manuals
TB280ES (12AGA25S011)(2014) Lawn Mower View Diagrams & Manuals
TB280ES (12AGA25S066)(2014) Lawn Mower View Diagrams & Manuals
TB280ES (12AGA25S711)(2014) Lawn Mower View Diagrams & Manuals
TB280ES (12AGA25S766)(2014) Lawn Mower View Diagrams & Manuals
TB280ES (12AGA2BJ011)(2014) Lawn Mower View Diagrams & Manuals
TB280ES (12AGA2BJ066)(2014) Lawn Mower View Diagrams & Manuals
TB280ES (12AGA2BJ711)(2014) Lawn Mower View Diagrams & Manuals
TB330 (12AKC35U766)(2014) Lawn Mower View Diagrams & Manuals
TB330 (12AKC3BV711)(2014) Lawn Mower View Diagrams & Manuals
TB330 (12AKC3BV766)(2014) Lawn Mower View Diagrams & Manuals
TB360 (12ABD3BY711)(2014) Lawn Mower View Diagrams & Manuals
TB360 (12ABD3BZ711)(2014) Lawn Mower View Diagrams & Manuals
TB370 (12ABD35U766)(2014) Lawn Mower View Diagrams & Manuals
TB370 (12ABD3BV711)(2014) Lawn Mower View Diagrams & Manuals
TB370 (12ABD3BV766)(2014) Lawn Mower View Diagrams & Manuals
TB380ES (12ACC35S066)(2014) Lawn Mower View Diagrams & Manuals
TB380ES (12ACC35S766)(2014) Lawn Mower View Diagrams & Manuals
TB380ES (12ACC3BJ011)(2014) Lawn Mower View Diagrams & Manuals
TB380ES (12ACC3BJ066)(2014) Lawn Mower View Diagrams & Manuals
TB200 (12A-A2BU711)(2015) Lawn Mower View Diagrams & Manuals
TB200 (12A-A2BU766)(2015) Lawn Mower View Diagrams & Manuals
TB220 (12AVB22J766)(2015) Lawn Mower View Diagrams & Manuals
TB230 (12AVB2A3711)(2015) Lawn Mower View Diagrams & Manuals
TB230 (12AVB2A3766)(2015) Lawn Mower View Diagrams & Manuals
TB240 (12AVB2AQ711)(2015) Lawn Mower View Diagrams & Manuals
TB270ES (12AGA2S6766)(2015) Lawn Mower View Diagrams & Manuals
TB280ES (12AGA2BJ711)(2015) Lawn Mower View Diagrams & Manuals
TB330 (12AKC2A3766)(2015) Lawn Mower View Diagrams & Manuals
TB330 (12AKC3A3766)(2015) Lawn Mower View Diagrams & Manuals
TB340 (12AKC32N766)(2015) Lawn Mower View Diagrams & Manuals
TB360 (12ABD3BZ711)(2015) Lawn Mower View Diagrams & Manuals
TB370 (12ABD3A3766)(2015) Lawn Mower View Diagrams & Manuals
TB370 (12AKD6BZ711)(2015) Lawn Mower View Diagrams & Manuals
TB380ES (12ACC3BJ766)(2015) Lawn Mower View Diagrams & Manuals
12A-A2BU711 (TB 200)(2016) Lawn Mower View Diagrams & Manuals
12A-A2BU766 (TB 200)(2016) Lawn Mower View Diagrams & Manuals
12ABD3A3766 (TB 370)(2016) Lawn Mower View Diagrams & Manuals
12ABD3BZ711 (TB 360)(2016) Lawn Mower View Diagrams & Manuals
12ABD3BZ711 (TB360)(2016) Lawn Mower View Diagrams & Manuals
12ACC3A6766 (TB 380 ES)(2016) Lawn Mower View Diagrams & Manuals
12AGA2A6711 (TB 280 ES)(2016) Lawn Mower View Diagrams & Manuals
12AGA2S6766 (TB 270 ES)(2016) Lawn Mower View Diagrams & Manuals
12AKC32N766 (TB 340)(2016) Lawn Mower View Diagrams & Manuals
12AKC3A3766 (TB 330)(2016) Lawn Mower View Diagrams & Manuals
12AKD3AQ766 (2016) Lawn Mower View Diagrams & Manuals
12AKD6BZ711 (TB 370 XP)(2016) Lawn Mower View Diagrams & Manuals
12AVB22J766 (TB 220)(2016) Lawn Mower View Diagrams & Manuals
12AVB2A3711 (TB 230)(2016) Lawn Mower View Diagrams & Manuals
12AVB2A3721 (TB 230)(2016) Lawn Mower View Diagrams & Manuals
12AVB2A3766 (TB 230)(2016) Lawn Mower View Diagrams & Manuals
12AVB2AQ711 (TB 240)(2016) Lawn Mower View Diagrams & Manuals
12AVB2AQ715 (TB 240)(2016) Lawn Mower View Diagrams & Manuals
12A-A2BU711 (TB 200)(2017) Lawn Mower View Diagrams & Manuals
12A-A2BU766 (TB 200)(2017) Lawn Mower View Diagrams & Manuals
12A-C2BU711 (TB 320)(2017) Lawn Mower View Diagrams & Manuals
12A-K2B5711 (TB 450 XP)(2017) Lawn Mower View Diagrams & Manuals
12A-K2B5766 (TB 450 XP)(2017) Lawn Mower View Diagrams & Manuals
12A-K2BU711 (TB 410 XP)(2017) Lawn Mower View Diagrams & Manuals
12A-L2DQ766 (TB 490 XP)(2017) Lawn Mower View Diagrams & Manuals
12ABD3A3766 (TB 370)(2017) Lawn Mower View Diagrams & Manuals
12ACC3A6766 (TB 380 ES)(2017) Lawn Mower View Diagrams & Manuals
12AGA2A6711 (TB 280 ES)(2017) Lawn Mower View Diagrams & Manuals
12AGA2M6766 (TB 270 ES)(2017) Lawn Mower View Diagrams & Manuals
12AKC3A3766 (TB 330)(2017) Lawn Mower View Diagrams & Manuals
12AKD3AQ766 (2017) Lawn Mower View Diagrams & Manuals
12AKD6BZ711 (TB 370 XP)(2017) Lawn Mower View Diagrams & Manuals
12AVB2A3711 (TB 230)(2017) Lawn Mower View Diagrams & Manuals
12AVB2A3721 (TB 230)(2017) Lawn Mower View Diagrams & Manuals
12AVB2AQ711 (TB 240)(2017) Lawn Mower View Diagrams & Manuals
12AVB2A3766 (TB 230)(2017) Lawn Mower View Diagrams & Manuals
12AVB2AQ715 (TB 240)(2017) Lawn Mower View Diagrams & Manuals
12AVB2M5766 (TB 220)(2017) Lawn Mower View Diagrams & Manuals
12A-A2BU711 (TB 200)(2018) Lawn Mower View Diagrams & Manuals
12A-A2BU766 (TB 200)(2018) Lawn Mower View Diagrams & Manuals
12A-C2BU711 (TB 320)(2018) Lawn Mower View Diagrams & Manuals
12A-K2M7766 (TB 430 XP)(2018) Lawn Mower View Diagrams & Manuals
12A-M2R1711 (TB 450 XP)(2018) Lawn Mower View Diagrams & Manuals
12A-M2R1766 (TB 450 XP)(2018) Lawn Mower View Diagrams & Manuals
12A-N2DQ711 (TB 490 XP)(2018) Lawn Mower View Diagrams & Manuals
12A-N2DQ766 (TB 490 XP)(2018) Lawn Mower View Diagrams & Manuals
12ABP3A3766 (TB 370)(2018) Lawn Mower View Diagrams & Manuals
12ACO3A6766 (TB 380 ES)(2018) Lawn Mower View Diagrams & Manuals
12AGA2A6711 (TB 280 ES)(2018) Lawn Mower View Diagrams & Manuals
12AGA2M6766 (TB 270 ES)(2018) Lawn Mower View Diagrams & Manuals
12AKC3A3766 (TB 330)(2018) Lawn Mower View Diagrams & Manuals
12AKP3RQ766 (TB 380 XP)(2018) Lawn Mower View Diagrams & Manuals
12AKP6BC711 (TB 370 XP)(2018) Lawn Mower View Diagrams & Manuals
12AKP6BC766 (TB 370 XP)(2018) Lawn Mower View Diagrams & Manuals
12AVA2M5766 (TB 220)(2018) Lawn Mower View Diagrams & Manuals
12AVB2A3711 (TB 230)(2018) Lawn Mower View Diagrams & Manuals
12AVB2AQ711 (TB 240)(2018) Lawn Mower View Diagrams & Manuals
12AVB2A3766 (TB 230)(2018) Lawn Mower View Diagrams & Manuals
12AVB2M5766 (TB 220)(2018) Lawn Mower View Diagrams & Manuals
12A-M2MR766 (TB 400 XP)(2019) Lawn Mower View Diagrams & Manuals
12A-A1BP723 (TB 200)(2019) Lawn Mower View Diagrams & Manuals
12A-M2R1766 (TB 450 XP)(2019) Lawn Mower View Diagrams & Manuals
12A-N2DQ766 (TB 490 XP)(2019) Lawn Mower View Diagrams & Manuals
12ACO3A6766 (TB 390 ES)(2019) Lawn Mower View Diagrams & Manuals
12AGA2MT766 (TB 290 ES)(2019) Lawn Mower View Diagrams & Manuals
12AKO2MR766 (TB 300 XP)(2019) Lawn Mower View Diagrams & Manuals
12AKP3RQ766 (TB 365 XP)(2019) Lawn Mower View Diagrams & Manuals
12AKP6BC766 (TB 360 XP)(2019) Lawn Mower View Diagrams & Manuals
12AVA2MR766 (TB 210)(2019) Lawn Mower View Diagrams & Manuals
12AVB2A3766 (TB 240)(2019) Lawn Mower View Diagrams & Manuals
12AVB2MR766 (TB 230)(2019) Lawn Mower View Diagrams & Manuals
12AVB2RQ766 (TB 270 XP)(2019) Lawn Mower View Diagrams & Manuals
12A-M2MR766 (TB400XP)(2020) Lawn Mower View Diagrams & Manuals
12A-N2DQ766 (TB490XP)(2020) Lawn Mower View Diagrams & Manuals
12AGA2MT766 (TB290ES)(2020) Lawn Mower View Diagrams & Manuals
12AKP3RQ766 (TB365XP)(2020) Lawn Mower View Diagrams & Manuals
12AVA2MR766 (TB210)(2020) Lawn Mower View Diagrams & Manuals
12AVB2A3766 (TB240)(2020) Lawn Mower View Diagrams & Manuals
12AVB2MR766 (TB230)(2020) Lawn Mower View Diagrams & Manuals
12AVB2RQ766 (TB270XP)(2020) Lawn Mower View Diagrams & Manuals
11A-B2A9715 (TB 130 XP)(2016) Lawn Mower View Diagrams & Manuals
11A-B2AQ711 (TB 130)(2016) Lawn Mower View Diagrams & Manuals
11A-B2BM766 (TB 115)(2016) Lawn Mower View Diagrams & Manuals
11A-A2BM711 (TB 110)(2017) Lawn Mower View Diagrams & Manuals
11A-A2BM766 (TB 110)(2017) Lawn Mower View Diagrams & Manuals
11A-B2A9715 (TB 130 XP)(2017) Lawn Mower View Diagrams & Manuals
11A-B2BM766 (TB 115)(2017) Lawn Mower View Diagrams & Manuals
11A-B2M5766 (TB 120)(2017) Lawn Mower View Diagrams & Manuals
11A-B2RQ711 (TB 130 XP)(2017) Lawn Mower View Diagrams & Manuals
11A-B2RQ715 (TB 130 XP)(2017) Lawn Mower View Diagrams & Manuals
11A-B2RQ766 (TB 130 XP)(2017) Lawn Mower View Diagrams & Manuals
11A-A2BM711 (TB 110)(2018) Lawn Mower View Diagrams & Manuals
11A-A2BM766 (TB 110)(2018) Lawn Mower View Diagrams & Manuals
11A-A2M5766 (TB 105)(2018) Lawn Mower View Diagrams & Manuals
11A-B2BM766 (TB 115)(2018) Lawn Mower View Diagrams & Manuals
11A-B2RQ766 (TB 130 XP)(2018) Lawn Mower View Diagrams & Manuals
11A-B2RQ711 (TB 130 XP)(2018) Lawn Mower View Diagrams & Manuals
11A-B2M5766 (TB 120)(2018) Lawn Mower View Diagrams & Manuals
11A-B2SD766 (TB 125)(2018) Lawn Mower View Diagrams & Manuals
11A-A2BM766 (TB 120)(2019) Lawn Mower View Diagrams & Manuals
11A-B0BL723 (TB 100)(2019) Lawn Mower View Diagrams & Manuals
11A-A2SD766 (TB 115)(2019) Lawn Mower View Diagrams & Manuals
11A-B0SD766 (TB 105)(2019) Lawn Mower View Diagrams & Manuals
11A-B1BM723 (TB 110)(2019) Lawn Mower View Diagrams & Manuals
11A-B2AQ723 (TB 160)(2019) Lawn Mower View Diagrams & Manuals
11A-B2BM766 (TB 140)(2019) Lawn Mower View Diagrams & Manuals
11A-A2M5766 (TB 105)(2017) Lawn Mower View Diagrams & Manuals
11A-B2MR766 (TB 130)(2019) Lawn Mower View Diagrams & Manuals
11A-A2SD766 (TB115)(2020) Lawn Mower View Diagrams & Manuals
11A-B0BL723 (TB100)(2020) Lawn Mower View Diagrams & Manuals
11A-B2RQ766 (TB 160 XP)(2019) Lawn Mower View Diagrams & Manuals
11A-B0SD766 (TB105)(2020) Lawn Mower View Diagrams & Manuals
11A-B1BM723 (TB110)(2020) Lawn Mower View Diagrams & Manuals
11A-B2AQ723 (TB160)(2020) Lawn Mower View Diagrams & Manuals
11A-B2MR766 (TB130)(2020) Lawn Mower View Diagrams & Manuals
11A-B2RQ766 (TB160XP)(2020) Lawn Mower View Diagrams & Manuals
17ANDALC011 (2017) Mustang Xp 54 View Diagrams & Manuals
17ANDALD066 (2018) Mustang Xp 60 View Diagrams & Manuals
17ANDALD066 (2019) Mustang Xp 60 View Diagrams & Manuals
18BEB9C7766 (TB 510)(2018) Lawn Mower View Diagrams & Manuals
18CGB2C7766 (TB 610)(2018) Lawn Mower View Diagrams & Manuals
18DGB2C7766 (TB 610)(2018) Lawn Mower View Diagrams & Manuals
11A-A23N011 (TB110)(2012) Push Walk-Behind Mower View Diagrams & Manuals
11A-A23N066 (TB110)(2012) Push Walk-Behind Mower View Diagrams & Manuals
11A-A23O211 (TB110)(2012) Push Walk-Behind Mower View Diagrams & Manuals
11A-A23O766 (TB110)(2012) Push Walk-Behind Mower View Diagrams & Manuals
11A-A26M011 (TB110)(2011) Push Walk-Behind Mower View Diagrams & Manuals
11A-A26M066 (TB110)(2011) Push Walk-Behind Mower View Diagrams & Manuals
11A-A26N211 (TB110)(2011) Push Walk-Behind Mower View Diagrams & Manuals
11A-B29Q711 (TB130)(2011) Push Walk-Behind Mower View Diagrams & Manuals
11A-B29Q711 (TB130)(2012) Push Walk-Behind Mower View Diagrams & Manuals
11A-B29Q766 (TB130)(2011) Push Walk-Behind Mower View Diagrams & Manuals
11A-B29Q766 (TB130)(2012) Push Walk-Behind Mower View Diagrams & Manuals
12A-A25S011 (TB210)(2012) Self-Propelled Walk-Behind Mower View Diagrams & Manuals
12A-A25S066 (TB210)(2012) Self-Propelled Walk-Behind Mower View Diagrams & Manuals
12A-A25U211 (TB210)(2012) Self-Propelled Walk-Behind Mower View Diagrams & Manuals
12A-A25U766 (TB210)(2012) Self-Propelled Walk-Behind Mower View Diagrams & Manuals
12A-A26M011 (TB210)(2011) Self-Propelled Walk-Behind Mower View Diagrams & Manuals
12A-A26M066 (TB210)(2011) Self-Propelled Walk-Behind Mower View Diagrams & Manuals
12A-A26N211 (TB210)(2011) Self-Propelled Walk-Behind Mower View Diagrams & Manuals
12AGA26E011 (TB280ES)(2011) Tb280 Es Self-Propelled Walk-Behind Mower View Diagrams & Manuals
12AGA26E011 (TB280ES)(2012) Self-Propelled Walk-Behind Mower View Diagrams & Manuals
12AGA26E066 (TB280ES)(2011) Tb280 Es Self-Propelled Walk-Behind Mower View Diagrams & Manuals
12AGA26E066 (TB280ES)(2012) Self-Propelled Walk-Behind Mower View Diagrams & Manuals
12AGA26G211 (TB280ES)(2011) Tb280 Es Self-Propelled Walk-Behind Mower View Diagrams & Manuals
12AGA26G211 (TB280ES)(2012) Self-Propelled Walk-Behind Mower View Diagrams & Manuals
12AGA26G711 (TB280ES)(2012) Self-Propelled Walk-Behind Mower View Diagrams & Manuals
12AGA26G766 (TB280ES)(2012) Self-Propelled Walk-Behind Mower View Diagrams & Manuals
12AKC39B011 (TB330XP)(2011) Self-Propelled Walk-Behind Mower View Diagrams & Manuals
12AKC39C211 (TB330XP)(2011) Self-Propelled Walk-Behind Mower View Diagrams & Manuals
12AKD39B011 (TB350XP)(2011) Self-Propelled Walk-Behind Mower View Diagrams & Manuals
12AKD39B066 (TB350XP)(2011) Self-Propelled Walk-Behind Mower View Diagrams & Manuals
12AKD39C211 (TB350XP)(2011) Self-Propelled Walk-Behind Mower View Diagrams & Manuals
12AVB25S011 (TB230)(2012) Self-Propelled Walk-Behind Mower View Diagrams & Manuals
12AVB25S066 (TB230)(2012) Self-Propelled Walk-Behind Mower View Diagrams & Manuals
12AVB25U211 (TB230)(2012) Self-Propelled Walk-Behind Mower View Diagrams & Manuals
12AVB25U711 (TB230)(2012) Self-Propelled Walk-Behind Mower View Diagrams & Manuals
12AVB25U766 (TB230)(2012) Self-Propelled Walk-Behind Mower View Diagrams & Manuals
12AVB26M011 (TB230)(2011) Self-Propelled Walk-Behind Mower View Diagrams & Manuals
12AVB26M066 (TB230)(2011) Self-Propelled Walk-Behind Mower View Diagrams & Manuals
12AVB26N211 (TB230)(2011) Self-Propelled Walk-Behind Mower View Diagrams & Manuals
12AVB29Q711 (TB260)(2011) Self-Propelled Walk-Behind Mower View Diagrams & Manuals
12AVB29Q766 (TB260)(2011) Self-Propelled Walk-Behind Mower View Diagrams & Manuals
12AVB29Q766 (TB260)(2012) Self-Propelled Walk-Behind Mower View Diagrams & Manuals
Cub Cadet
CC500 (11A-18JY710) (2012) 11A-18JY Push Walk Behind Mower View Diagrams & Manuals
CC500 (11A-18M9010) (2012) 11A-18M9 Push Walk Behind Mower View Diagrams & Manuals
SC100 (11A-A92J710, 11A-A92J709, HM2013) (2013) 11A-A92J, Sc 100 View Diagrams & Manuals
SC500E (12ARD2JZ710, 12ARD2JZ010) (2013) 12ARD2ZJ, Sc 500 E View Diagrams & Manuals
SC100 (11A-A92J710) (2014) 11A-A92J Push Walk Behind Mower View Diagrams & Manuals
SC500EZ (12ACC6S6710) (2014) 12ACC6S6,12ACC6S6010 Self Propelled Walk Behind Mower View Diagrams & Manuals
SC100 (11A-A92J709, 11A-A92J710) (2015) 11A-A92J Push Walk Behind Mower View Diagrams & Manuals
SC100HW (11A-B92J710) (2015) 11A-B92J Push Walk Behind Mower View Diagrams & Manuals
SC300HW (12ABB22J709, 12ABB22J710) (2015) 12ABB22J Self Propelled Walk Behind Mower View Diagrams & Manuals
SC500E (12ATD2A8713) (2015) 12ATD2A8 Self Propelled Walk Behind Mower View Diagrams & Manuals
SC500EZ (12ACC6S6710) (2015) 12ACC6S6 Self Propelled Walk Behind Mower View Diagrams & Manuals
SC500EZ (12ATC6A8710, 12ATC6A8709) (2015) 12ATC6A8 Self Propelled Walk Behind Mower View Diagrams & Manuals
SC500HW (12ABD22J710) (2015) 12ABD22J Self Propelled Walk Behind Mower View Diagrams & Manuals
SC500Z (12ABC62J710, 12ABC62J709) (2015) 12ABC62J Self Propelled Walk Behind Mower View Diagrams & Manuals
11A-A92J709 (2016) Sc 100 Push Walk Behind Mower View Diagrams & Manuals
11A-A92J710 (SC100) (2016) SC100 Push Walk Behind Mower View Diagrams & Manuals
11A-A92J756 (2016) Sc 100 Push Walk Behind Mower View Diagrams & Manuals
11A-B92J710 (2016) Sc 100 Hw View Diagrams & Manuals
12ABB22J709 (2016) Sc 300 Hw, Sc 300 Hw View Diagrams & Manuals
12ABB22J710 (2016) Sc 300 Hw View Diagrams & Manuals
12ABC62J709 (2016) Sc 500 Z, Sc 500 Z View Diagrams & Manuals
12ABC62J710 (2016) Sc 500 Z View Diagrams & Manuals
12ABC62J756 (2016) Sc 500 Z View Diagrams & Manuals
12ABD22J710 (2016) Sc 500 Hw, Sc 500 Hw View Diagrams & Manuals
12ABD22J756 (2016) Sc 500 Hw View Diagrams & Manuals
12ACC6S6709 (2016) Sc 500 Ez View Diagrams & Manuals
12ACC6S6710 (2016) Sc 500 Ez View Diagrams & Manuals
12ACC6S6756 (2016) Sc 500 Ez View Diagrams & Manuals
300 (12ABB22J709) (2016) Sc Hw View Diagrams & Manuals
300 (12ABB22J756) (2016) Sc Hw View Diagrams & Manuals
500 (2016) Sc Z 12ABC62J709 View Diagrams & Manuals
11A-A9M5709 (2017) Sc 100 Push Walk Behind Mower View Diagrams & Manuals
11A-A9M5710 (2017) Sc 100 Push Walk Behind Mower View Diagrams & Manuals
11A-A9M5756 (2017) Sc 100 Push Walk Behind Mower View Diagrams & Manuals
11A-B9M5710 (2017) Sc 100 Hw View Diagrams & Manuals
11A-B9M5756 (2017) Sc 100 Hw View Diagrams & Manuals
12A-L2CQ710 (2017) Sc 700 H View Diagrams & Manuals
12A-N2CQ710 (2017) Sc 700 H View Diagrams & Manuals
12ABB2M5709 (2017) Sc 300 Hw View Diagrams & Manuals
12ABB2M5710 (2017) Sc 300 Hw View Diagrams & Manuals
12ABC6M5709 (2017) Sc 500 Z View Diagrams & Manuals
12ABC6M5710 (2017) Sc 500 Z View Diagrams & Manuals
12ABC6M5756 (2017) Sc 500 Z View Diagrams & Manuals
12ABD2M5710 (2017) Sc 500 Hw View Diagrams & Manuals
12ABD2M5756 (2017) Sc 500 Hw View Diagrams & Manuals
12ACC6M6710 (2017) Sc 500 Ez View Diagrams & Manuals
12ACC6M6756 (2017) Sc 500 Ez View Diagrams & Manuals
12ACD2J6710 (2017) Sc 500 Eq View Diagrams & Manuals
12ACD2J6756 (2017) Sc 500 Eq View Diagrams & Manuals
12AEL2S7709 (2017) Sc 700 Self Propelled Walk Behind Mower View Diagrams & Manuals
12AEL2S7710 (2017) Sc 700 Self Propelled Walk Behind Mower View Diagrams & Manuals
SC 700 (12A-M2M5710)(2018) Walk-Behind Mower View Diagrams & Manuals
SC 700 (12A-M2M5756)(2018) Walk-Behind Mower View Diagrams & Manuals
Husky
11A-A0JT731 (2013) Lawn Mower View Diagrams & Manuals
11A-B22J731 (2013) Lawn Mower View Diagrams & Manuals
11A-B29Q731 (2013) Lawn Mower View Diagrams & Manuals
11A-B2J1731 (2013) Lawn Mower View Diagrams & Manuals
11A-B2M7031 (2013) Lawn Mower View Diagrams & Manuals
11A-A0S5731 (2014) Lawn Mower View Diagrams & Manuals
11A-B22J731 (2014) Lawn Mower View Diagrams & Manuals
11A-B2J1731 (2014) Lawn Mower View Diagrams & Manuals
11A-A0S5731 (2015) Lawn Mower View Diagrams & Manuals
11A-B0SD731 (2015) Lawn Mower View Diagrams & Manuals
11A-B22J731 (2015) Lawn Mower View Diagrams & Manuals
11A-A0S5731 (2016) Lawn Mower View Diagrams & Manuals
11A-B22J731 (2016) Lawn Mower View Diagrams & Manuals
12A-A2K7231 (2011) Lawn Mower View Diagrams & Manuals
12A-A2M7031 (2011) Lawn Mower View Diagrams & Manuals
12A-B29Q731 (2013) Lawn Mower View Diagrams & Manuals
Show More Compatible Models
This item works with the following types of products:
- Lawn Mower Parts
- Lawn Tractor Parts
This part replaces obsolete part #: 710-04995
Customer Part Reviews ?
Average Rating (out of 5):
Click to filter by ratings:
5 stars
3
4 stars
0
3 stars
0
2 stars
0
1 stars
0
< PREV
- 1
Works perfectly
Fast delivery and detailed descriptions made fixing our mower a breeze!
Guest -
October 25, 2022
Verified Purchase
Screwed
Received this item along with the major part needed for our Troy mower.
Larry -
March 9, 2022
Verified Purchase
Great part
Was in great condition. New actually. Fast shipping.
Guest -
February 5, 2020
Verified Purchase
t
t
t -
t days ago
Verified Purchase
eReplacementParts Team
t
Questions & Answers ?
Our customer Service team is at the ready daily to answer your part and product questions.

Ask our Team
We have a dedicated staff with decades of collective experience in helping customers just like you purchase parts to repair their products.
Does this fit my product?Questions & Answers for Screw, 5/16-14 X .750
No questions have been asked yet
Customer Repair Instructions ?
All our customer repair instructions are solicited directly from other customers just like you who have purchased and replaced this exact part.
The front cover is plastic and holds the axle in place. One of the angled pieces on the end that hold the shaft broke causing the mower deck to drop.
James - June 5, 2018
Tool Type
Lawn Mower
Difficulty
Easy
Time
15-30 minutes
Tools Used
Screwdriver, Socket set, Metric sockets, flathead screwdriver
1. Pulled the spark plug for safety.
2. Propped the mower up using a 5 gallon bucket.
3. Cleaned all the old grass from under the deck.
4. Use socket set to remove 5 total front screws from the front bracket / mower housing.
5. Once the front bracket was removed I also pulled off both front wheels using a flathead screw driver to pop off the wheel covers. Again the socket set was necessary to remove the nuts holding the wheels in place.
6. Removed the adjustment bracket from the old housing.
7. Pulled off the plastic adjustment lever cap using a flathead screwdriver.
8. Installed the old adjustment bracket into the new front end cover
9. The new axle pops right into place, just pushing into the slots.
10. Installed the adjustment handle cover.
11. Installed the new front end cover, bolted right up with no fit issues.
12. Reinstalled the spark plug.
Did you find this story helpful?
Thanks for voting and helping fellow customers!
Front end is plastic. It cannot take the hits and will eventually come loose and breaks or the screw is lost.
Mat - September 27, 2017
Tool Type
Lawn Mower
Difficulty
Medium
Time
15-30 minutes
Tools Used
Socket set
Remove 2 bolts ( I was suppose to have 8)
Remove front cover. Reattached with 8 bolts
Started tested and verified.
Remove front cover. Reattached with 8 bolts
Started tested and verified.
Did you find this story helpful?
Thanks for voting and helping fellow customers!
OEM stands for Original Equipment Manufacturer and means the part you’re buying is sourced directly from the manufacturer who made your product. At eReplacementParts, we sell only genuine OEM parts, guaranteeing the part you’re purchasing is of better design and of higher quality than aftermarket parts.
Our product descriptions are a combination of data sourced directly from the manufacturers who made your product as well as content researched and curated by our content & customer service teams. This content is edited and reviewed internally before being made public to customers.
Our customer service team are at the ready daily to answer your part and product questions. We have a dedicated staff with decades of collective experience in helping customers just like you purchase parts to repair their products.
All our part reviews are solicited directly from other customers who have purchased this exact part. While we moderate these reviews for profanity, offensive language or personally identifiable information, these reviews are posted exactly as submitted and no alterations are made by our team.
All our customer repair instructions are solicited directly from other customers just like you who have purchased and replaced this exact part. While we moderate these reviews for profanity, offensive language or personally identifiable information, these reviews are posted exactly as submitted and no alterations are made by our team.
Based on data from past customer purchasing behaviors, these parts are most commonly purchased together along with the part you are viewing. These parts may be necessary or helpful to replace to complete your current repair.
All our installation videos are created and produced in collaboration with our in-house repair technician, Mark Sodja, who has helped millions of eReplacementParts customers over the last 13 years repair their products. Mark has years of experience in selling and repairing both commercial and residential products with a specialty in gas-powered equipment.
This data is collected from customers who submitted a repair instruction after replacing this exact part. Customers can rate how easy the repair was to complete and how long it took. We aggregate this data to provide a repair rating that allows customers to quickly determine the difficulty and time needed to perform their own repair.