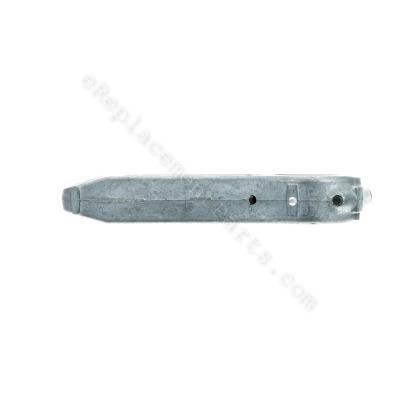


This is a genuine OEM supplied replacement part that is specially designed for Briggs and Stratton engines that are commonly installed on Toro lawn and garden equipment. It is the part that the piston is attached to. The piston is a central component of a two-cycle engine. It provides both the compression within the engine and it transfers the energy from combustion to the crankshaft which creates rotation. Please note one durable metal connecting rod is included, please note over-sized rods are sold separately.
Rod-connecting 794122
OEM part for: Briggs and Stratton, Toro
Part Number: 794122
$65.67
In Stock
Jump To:
Frequently Purchased Together ?


Compatibility
This part will fit the following 1157 machines
Toro
71286 (250000001-250999999)(2005) Lawn Tractor View Diagrams & Manuals
71286 (260000001-260999999)(2006) Lawn Tractor View Diagrams & Manuals
71286 (270000001-270999999)(2007) Lawn Tractor View Diagrams & Manuals
71427 (250000001-250999999)(2005) Lawn Tractor View Diagrams & Manuals
71428 (250000001-250999999)(2005) Lawn Tractor View Diagrams & Manuals
71429 (250000001-250999999)(2005) Lawn Tractor View Diagrams & Manuals
74301 (230000001-230999999)(2003) Lawn Tractor View Diagrams & Manuals
74301 (240000001-240000893)(2004) Lawn Tractor View Diagrams & Manuals
74301 (240000894-240999999)(2004) Lawn Tractor View Diagrams & Manuals
74301 (250000001-250999999)(2005) Lawn Tractor View Diagrams & Manuals
74325 (230000001-230999999)(2003) Lawn Tractor View Diagrams & Manuals
74325 (240000001-240999999)(2004) Lawn Tractor View Diagrams & Manuals
74325 (250000001-250999999)(2005) Lawn Tractor View Diagrams & Manuals
74327 (260000001-260019999)(2006) Lawn Tractor View Diagrams & Manuals
74327 (260020000-260999999)(2006) Lawn Tractor View Diagrams & Manuals
74330 (230000001-230999999)(2003) Lawn Tractor View Diagrams & Manuals
74330 (240000001-240001179)(2004) Lawn Tractor View Diagrams & Manuals
74330 (240001180-240999999)(2004) Lawn Tractor View Diagrams & Manuals
74330 (250000001-250999999)(2005) Lawn Tractor View Diagrams & Manuals
74350 (230000001-230999999)(2003) Lawn Tractor View Diagrams & Manuals
74350 (240000001-240000178)(2004) Lawn Tractor View Diagrams & Manuals
74350 (240000179-240999999)(2004) Lawn Tractor View Diagrams & Manuals
74351 (240000001-240999999)(2004) Lawn Tractor View Diagrams & Manuals
74353 (260000001-260999999)(2006) Lawn Tractor View Diagrams & Manuals
74402 (230000001-230999999)(2003) Lawn Tractor View Diagrams & Manuals
74402 (240000001-240999999)(2004) Lawn Tractor View Diagrams & Manuals
74402 (250000001-250999999)(2005) Lawn Tractor View Diagrams & Manuals
74402 (260000001-260999999)(2006) Lawn Tractor View Diagrams & Manuals
74403 (230000001-230999999)(2003) Lawn Tractor View Diagrams & Manuals
74403 (240000001-240999999)(2004) Lawn Tractor View Diagrams & Manuals
74403 (250000001-250999999)(2005) Lawn Tractor View Diagrams & Manuals
74403 (260000001-260999999)(2006) Lawn Tractor View Diagrams & Manuals
74419 (270000001-270999999)(2007) Lawn Tractor View Diagrams & Manuals
74420 (270000001-270999999)(2007) Lawn Tractor View Diagrams & Manuals
74432 (260000001-260999999)(2006) Lawn Tractor View Diagrams & Manuals
74432 (270000001-270999999)(2007) Lawn Tractor View Diagrams & Manuals
74433 (260000001-260999999)(2006) Lawn Tractor View Diagrams & Manuals
74433 (270000001-270999999)(2007) Lawn Tractor View Diagrams & Manuals
74433 (280000001-280999999)(2008) Lawn Tractor View Diagrams & Manuals
74433 (290000001-290999999)(2009) Lawn Tractor View Diagrams & Manuals
74502 (230000001-230999999)(2003) Lawn Tractor View Diagrams & Manuals
74502 (220000001-220999999)(2002) Lawn Tractor View Diagrams & Manuals
74570 (230000001-230999999)(2003) Lawn Tractor View Diagrams & Manuals
74571 (240000001-240999999)(2004) Lawn Tractor View Diagrams & Manuals
74571 (250000001-250999999)(2005) Lawn Tractor View Diagrams & Manuals
74571 (260000001-260999999)(2006) Lawn Tractor View Diagrams & Manuals
74573 (270000001-270999999)(2007) Lawn Tractor View Diagrams & Manuals
74573 (280000001-280999999)(2008) Lawn Tractor View Diagrams & Manuals
74573 (290000001-290000480)(2009) Lawn Tractor View Diagrams & Manuals
74573 (290000481-290999999)(2009) Lawn Tractor View Diagrams & Manuals
74582 (270000001-270999999)(2007) Lawn Tractor View Diagrams & Manuals
74582 (280000001-280999999)(2008) Lawn Tractor View Diagrams & Manuals
74582 (290000001-290999999)(2009) Lawn Tractor View Diagrams & Manuals
70185 (280899565-290999999)(2009) Lawn Tractor View Diagrams & Manuals
70186 (240000001-240999999)(2004) Lawn Tractor View Diagrams & Manuals
70186 (250000001-250999999)(2005) Lawn Tractor View Diagrams & Manuals
70186 (260000001-260999999)(2006) Lawn Tractor View Diagrams & Manuals
70186 (260732867-270805635)(2007) Lawn Tractor View Diagrams & Manuals
70186 (270805636-280899434)(2008) Lawn Tractor View Diagrams & Manuals
70186 (280899435-290999999)(2009) Lawn Tractor View Diagrams & Manuals
70185 (240000001-240999999)(2004) Lawn Tractor View Diagrams & Manuals
70185 (250000001-250999999)(2005) Lawn Tractor View Diagrams & Manuals
70185 (260000001-260999999)(2006) Lawn Tractor View Diagrams & Manuals
70185 (270000001-270805705)(2007) Lawn Tractor View Diagrams & Manuals
70185 (270805706-280899564)(2008) Lawn Tractor View Diagrams & Manuals
71223 (220010001-220999999)(2002) Lawn Tractor View Diagrams & Manuals
71223 (230000001-230999999)(2003) Lawn Tractor View Diagrams & Manuals
71223 (240000001-240999999)(2004) Lawn Tractor View Diagrams & Manuals
71226 (220010001-220999999)(2002) Lawn Tractor View Diagrams & Manuals
71227 (220010001-220999999)(2002) Lawn Tractor View Diagrams & Manuals
71227 (230000001-230999999)(2003) Lawn Tractor View Diagrams & Manuals
71227 (240000001-240999999)(2004) Lawn Tractor View Diagrams & Manuals
71228 (220010001-220999999)(2002) Lawn Tractor View Diagrams & Manuals
71228 (230000001-230999999)(2003) Lawn Tractor View Diagrams & Manuals
71228 (240000001-240999999)(2004) Lawn Tractor View Diagrams & Manuals
71233 (220000001-220999999)(2002) Lawn Tractor View Diagrams & Manuals
71233 (230000001-230999999)(2003) Lawn Tractor View Diagrams & Manuals
71242 (220010001-220999999)(2002) Lawn Tractor View Diagrams & Manuals
71242 (230000001-230999999)(2003) Lawn Tractor View Diagrams & Manuals
71242 (240000001-240999999)(2004) Lawn Tractor View Diagrams & Manuals
71243 (240000001-240999999)(2004) Lawn Tractor View Diagrams & Manuals
71245 (230000001-230999999)(2003) Lawn Tractor View Diagrams & Manuals
71245 (240000001-240999999)(2004) Lawn Tractor View Diagrams & Manuals
71246 (250000001-250999999)(2005) Lawn Tractor View Diagrams & Manuals
71246 (260000001-260999999)(2006) Lawn Tractor View Diagrams & Manuals
71246 (270000001-270999999)(2007) Lawn Tractor View Diagrams & Manuals
71252 (280000001-280999999)(2008) Lawn Tractor View Diagrams & Manuals
71252 (290000001-290999999)(2009) Lawn Tractor View Diagrams & Manuals
71253 (280000001-280999999)(2008) Lawn Tractor View Diagrams & Manuals
71253 (290000001-290999999)(2009) Lawn Tractor View Diagrams & Manuals
71253 (310000001-310999999)(2010) Lawn Tractor View Diagrams & Manuals
71283 (220010001-220999999)(2002) Lawn Tractor View Diagrams & Manuals
71283 (230000001-230999999)(2003) Lawn Tractor View Diagrams & Manuals
71283 (240000001-240999999)(2004) Lawn Tractor View Diagrams & Manuals
71285 (240000001-240999999)(2004) Lawn Tractor View Diagrams & Manuals
13AL60RG048 (1L107H10100-) Lx426 Lawn Tractor, 2008 View Diagrams & Manuals
13AL60RG544 (1L107H10100-) Lx426 Lawn Tractor, 2008 View Diagrams & Manuals
CODE135E (135E280000001-135E280999999) Rt380h Recycling Mower, 2008 View Diagrams & Manuals
CODE135E (135E290000001-135E290999999) Rt380h Recycling Mower, 2009 View Diagrams & Manuals
Briggs and Stratton
31A507-0111-B1 Engine View Diagrams & Manuals
31A507-0111-E1 Engine View Diagrams & Manuals
31A507-0113-B1 Engine View Diagrams & Manuals
31A507-0113-E1 Engine View Diagrams & Manuals
31A507-0114-B1 Engine View Diagrams & Manuals
31A507-0114-E1 Engine View Diagrams & Manuals
31A507-0116-B1 Engine View Diagrams & Manuals
31A507-0116-E1 Engine View Diagrams & Manuals
31A507-0117-B1 Engine View Diagrams & Manuals
31A507-0117-E1 Engine View Diagrams & Manuals
31A507-0118-B1 Engine View Diagrams & Manuals
31A507-0119-B1 Engine View Diagrams & Manuals
31A507-0120-B1 Engine View Diagrams & Manuals
31A507-0121-G1 Engine View Diagrams & Manuals
31A507-0122-B1 Engine View Diagrams & Manuals
31A507-0123-B1 Engine View Diagrams & Manuals
31A507-0124-B1 Engine View Diagrams & Manuals
31A507-0126-B1 Engine View Diagrams & Manuals
31A507-0130-B1 Engine View Diagrams & Manuals
31A507-0131-B1 Engine View Diagrams & Manuals
31A507-0132-G5 Engine View Diagrams & Manuals
31A507-0133-G1 Engine View Diagrams & Manuals
31A507-0133-G5 Engine View Diagrams & Manuals
31A507-0134-B1 Engine View Diagrams & Manuals
31A507-0135-G1 Engine View Diagrams & Manuals
31A507-0135-G5 Engine View Diagrams & Manuals
31A507-0136-B1 Engine View Diagrams & Manuals
31A507-0137-G5 Engine View Diagrams & Manuals
31A507-0138-B1 Engine View Diagrams & Manuals
31A507-0140-B1 Engine View Diagrams & Manuals
31A507-0141-B1 Engine View Diagrams & Manuals
31A507-0143-B1 Engine View Diagrams & Manuals
31A507-0471-B1 Engine View Diagrams & Manuals
31A507-0742-B1 Engine View Diagrams & Manuals
31A507-0743-B1 Engine View Diagrams & Manuals
31A507-0839-B1 Engine View Diagrams & Manuals
31A507-0871-G1 Engine View Diagrams & Manuals
31A507-0871-G5 Engine View Diagrams & Manuals
31A507-1391-B1 Engine View Diagrams & Manuals
31A507-1405-B1 Engine View Diagrams & Manuals
31A507-1498-G1 Engine View Diagrams & Manuals
31A507-1498-G5 Engine View Diagrams & Manuals
31A507-1516-B1 Engine View Diagrams & Manuals
31A507-1516-G5 Engine View Diagrams & Manuals
31A507-2391-B1 Engine View Diagrams & Manuals
31A507-2471-B1 Engine View Diagrams & Manuals
31A507-3405-G1 Engine View Diagrams & Manuals
31A507-3405-G5 Engine View Diagrams & Manuals
31A507-4111-B1 Engine View Diagrams & Manuals
31A507-4117-B1 Engine View Diagrams & Manuals
31A507-4405-G1 Engine View Diagrams & Manuals
31A507-4405-G5 Engine View Diagrams & Manuals
31A607-3026-G5 Engine View Diagrams & Manuals
31A607-3472-G5 Engine View Diagrams & Manuals
31A607-3496-G1 Engine View Diagrams & Manuals
31A607-3496-G5 Engine View Diagrams & Manuals
31A607-4116-B1 Engine View Diagrams & Manuals
31A607-4118-B1 Engine View Diagrams & Manuals
31A607-4139-B1 Engine View Diagrams & Manuals
31A677-0036-E1 Engine View Diagrams & Manuals
31A677-0036-G1 Engine View Diagrams & Manuals
31A677-0119-B1 Engine View Diagrams & Manuals
31A677-0119-E1 Engine View Diagrams & Manuals
31A677-0128-B1 Engine View Diagrams & Manuals
31A677-0136-B1 Engine View Diagrams & Manuals
31A677-0143-B1 Engine View Diagrams & Manuals
31A677-0146-B1 Engine View Diagrams & Manuals
31A677-0150-B1 Engine View Diagrams & Manuals
31A677-0163-B1 Engine View Diagrams & Manuals
31A607-0026-G1 Engine View Diagrams & Manuals
31A607-0111-B1 Engine View Diagrams & Manuals
31A607-0111-E1 Engine View Diagrams & Manuals
31A607-0113-B1 Engine View Diagrams & Manuals
31A607-0113-E1 Engine View Diagrams & Manuals
31A607-0114-B1 Engine View Diagrams & Manuals
31A607-0114-E1 Engine View Diagrams & Manuals
31A607-0115-B1 Engine View Diagrams & Manuals
31A607-0115-E1 Engine View Diagrams & Manuals
31A607-0116-B1 Engine View Diagrams & Manuals
31A607-0116-E1 Engine View Diagrams & Manuals
31A607-0117-B1 Engine View Diagrams & Manuals
31A607-0117-E1 Engine View Diagrams & Manuals
31A607-0118-B1 Engine View Diagrams & Manuals
31A607-0118-E1 Engine View Diagrams & Manuals
31A607-0120-B1 Engine View Diagrams & Manuals
31A607-0123-B1 Engine View Diagrams & Manuals
31A607-0123-E1 Engine View Diagrams & Manuals
31A607-0124-B1 Engine View Diagrams & Manuals
31A607-0125-B1 Engine View Diagrams & Manuals
31A607-0126-B1 Engine View Diagrams & Manuals
31A607-0127-B1 Engine View Diagrams & Manuals
31A607-0130-B1 Engine View Diagrams & Manuals
31A607-0132-B1 Engine View Diagrams & Manuals
31A607-0137-B1 Engine View Diagrams & Manuals
31A607-0138-B1 Engine View Diagrams & Manuals
31A607-0139-B1 Engine View Diagrams & Manuals
31A607-0140-B1 Engine View Diagrams & Manuals
31A607-0141-B1 Engine View Diagrams & Manuals
31A607-0142-G1 Engine View Diagrams & Manuals
31A607-0144-B1 Engine View Diagrams & Manuals
31A607-0145-B1 Engine View Diagrams & Manuals
31A607-0149-B1 Engine View Diagrams & Manuals
31A607-0151-B1 Engine View Diagrams & Manuals
31A607-0152-B1 Engine View Diagrams & Manuals
31A607-0154-B1 Engine View Diagrams & Manuals
31A607-0155-B1 Engine View Diagrams & Manuals
31A607-0156-B1 Engine View Diagrams & Manuals
31A607-0157-B1 Engine View Diagrams & Manuals
31A607-0158-B1 Engine View Diagrams & Manuals
31A607-0160-B1 Engine View Diagrams & Manuals
31A607-0161-B1 Engine View Diagrams & Manuals
31A607-0162-B1 Engine View Diagrams & Manuals
31A607-0164-B1 Engine View Diagrams & Manuals
31A607-0458-B1 Engine View Diagrams & Manuals
31A607-0458-E1 Engine View Diagrams & Manuals
31A607-0470-B1 Engine View Diagrams & Manuals
31A607-0508-B1 Engine View Diagrams & Manuals
31A607-0740-B1 Engine View Diagrams & Manuals
31A607-0741-B1 Engine View Diagrams & Manuals
31A607-0741-B2 Engine View Diagrams & Manuals
31A607-0741-B3 Engine View Diagrams & Manuals
31A607-0741-E1 Engine View Diagrams & Manuals
31A607-0741-G1 Engine View Diagrams & Manuals
31A607-0741-G2 Engine View Diagrams & Manuals
31A607-0756-B1 Engine View Diagrams & Manuals
31A607-0786-B1 Engine View Diagrams & Manuals
31A607-0787-B1 Engine View Diagrams & Manuals
31A607-0827-B1 Engine View Diagrams & Manuals
31A607-0950-G5 Engine View Diagrams & Manuals
31A607-0968-B1 Engine View Diagrams & Manuals
31A607-1190-B1 Engine View Diagrams & Manuals
31A607-1392-B1 Engine View Diagrams & Manuals
31A607-1432-B1 Engine View Diagrams & Manuals
31A607-1472-B1 Engine View Diagrams & Manuals
31A607-2149-B1 Engine View Diagrams & Manuals
31A607-2151-B1 Engine View Diagrams & Manuals
31A607-2392-B1 Engine View Diagrams & Manuals
31A607-2432-B1 Engine View Diagrams & Manuals
31A607-2470-B1 Engine View Diagrams & Manuals
31A707-0116-B1 Engine View Diagrams & Manuals
31A707-0116-E1 Engine View Diagrams & Manuals
31A707-0117-B1 Engine View Diagrams & Manuals
31A707-0121-B1 Engine View Diagrams & Manuals
31A707-0335-B1 Engine View Diagrams & Manuals
31A707-0335-E1 Engine View Diagrams & Manuals
31A707-0335-E2 Engine View Diagrams & Manuals
31A707-0504-B1 Engine View Diagrams & Manuals
31A707-0504-E1 Engine View Diagrams & Manuals
31A707-0525-B1 Engine View Diagrams & Manuals
31A707-0525-B2 Engine View Diagrams & Manuals
31A707-0525-E1 Engine View Diagrams & Manuals
31A707-0525-G1 Engine View Diagrams & Manuals
31A707-0696-B1 Engine View Diagrams & Manuals
31A707-0787-B1 Engine View Diagrams & Manuals
31A707-0796-B1 Engine View Diagrams & Manuals
31A707-0874-G1 Engine View Diagrams & Manuals
31A707-0874-G5 Engine View Diagrams & Manuals
31A707-1375-B1 Engine View Diagrams & Manuals
31A707-1454-B1 Engine View Diagrams & Manuals
31A707-2121-B1 Engine View Diagrams & Manuals
31A707-2454-B1 Engine View Diagrams & Manuals
31A777-0112-B1 Engine View Diagrams & Manuals
31A777-0112-E1 Engine View Diagrams & Manuals
31A777-0115-B1 Engine View Diagrams & Manuals
31A807-0905-G5 Engine View Diagrams & Manuals
31B707-0005-E1 Engine View Diagrams & Manuals
31B707-0026-E1 Engine View Diagrams & Manuals
31B707-0101-E1 Engine View Diagrams & Manuals
31B707-0420-B1 Engine View Diagrams & Manuals
31B707-0420-E1 Engine View Diagrams & Manuals
31B775-0120-E1 Engine View Diagrams & Manuals
31B775-0120-E2 Engine View Diagrams & Manuals
31C707-0005-G1 Engine View Diagrams & Manuals
31C707-0026-G1 Engine View Diagrams & Manuals
31C707-0101-B1 Engine View Diagrams & Manuals
31C707-0110-B1 Engine View Diagrams & Manuals
31C707-0154-B1 Engine View Diagrams & Manuals
31C707-0154-E1 Engine View Diagrams & Manuals
31C707-0160-B1 Engine View Diagrams & Manuals
31C707-0175-E1 Engine View Diagrams & Manuals
31C707-0230-B1 Engine View Diagrams & Manuals
31C707-0230-B2 Engine View Diagrams & Manuals
31C707-0230-E1 Engine View Diagrams & Manuals
31C707-0230-E2 Engine View Diagrams & Manuals
31C707-0240-B1 Engine View Diagrams & Manuals
31C707-0240-E1 Engine View Diagrams & Manuals
31C707-0240-E2 Engine View Diagrams & Manuals
31C707-0431-B1 Engine View Diagrams & Manuals
31C707-0431-E1 Engine View Diagrams & Manuals
31C707-0506-B2 Engine View Diagrams & Manuals
31C707-0571-B1 Engine View Diagrams & Manuals
31C707-0603-B1 Engine View Diagrams & Manuals
31C707-0603-B2 Engine View Diagrams & Manuals
31C707-0603-E1 Engine View Diagrams & Manuals
31C707-0603-E2 Engine View Diagrams & Manuals
31C707-0603-G1 Engine View Diagrams & Manuals
31C707-0603-G2 Engine View Diagrams & Manuals
31C707-0817-B1 Engine View Diagrams & Manuals
31C707-0826-B1 Engine View Diagrams & Manuals
31C707-0897-B1 Engine View Diagrams & Manuals
31C707-1329-B1 Engine View Diagrams & Manuals
31C707-1346-B1 Engine View Diagrams & Manuals
31C707-1346-B2 Engine View Diagrams & Manuals
31C707-1346-G2 Engine View Diagrams & Manuals
31C707-1429-B1 Engine View Diagrams & Manuals
31C707-1431-B1 Engine View Diagrams & Manuals
31C707-2429-B1 Engine View Diagrams & Manuals
31C707-2506-B2 Engine View Diagrams & Manuals
31C707-2826-B1 Engine View Diagrams & Manuals
31C707-3005-G5 Engine View Diagrams & Manuals
31C707-3026-G5 Engine View Diagrams & Manuals
31C707-3346-G1 Engine View Diagrams & Manuals
31C707-3346-G2 Engine View Diagrams & Manuals
31C707-3346-G5 Engine View Diagrams & Manuals
31C707-3346-G6 Engine View Diagrams & Manuals
31C707-3487-G1 Engine View Diagrams & Manuals
31C707-3487-G5 Engine View Diagrams & Manuals
31C707-4346-G1 Engine View Diagrams & Manuals
31C707-4346-G5 Engine View Diagrams & Manuals
31C777-0153-B1 Engine View Diagrams & Manuals
31C777-0155-B1 Engine View Diagrams & Manuals
31C777-0155-E1 Engine View Diagrams & Manuals
31C777-0156-B1 Engine View Diagrams & Manuals
31C777-0159-B1 Engine View Diagrams & Manuals
31C777-0173-E1 Engine View Diagrams & Manuals
31C777-0226-E1 Engine View Diagrams & Manuals
31D707-0193-E1 Engine View Diagrams & Manuals
31D707-0232-E1 Engine View Diagrams & Manuals
31D707-0419-E1 Engine View Diagrams & Manuals
31D707-0458-E1 Engine View Diagrams & Manuals
31D707-0567-B1 Engine View Diagrams & Manuals
31D707-0601-E2 Engine View Diagrams & Manuals
31D777-0035-E1 Engine View Diagrams & Manuals
31D777-0233-E1 Engine View Diagrams & Manuals
31D777-0235-E1 Engine View Diagrams & Manuals
31D777-0236-E1 Engine View Diagrams & Manuals
31D777-0339-E1 Engine View Diagrams & Manuals
31E507-0137-B1 Engine View Diagrams & Manuals
31E577-0110-B1 Engine View Diagrams & Manuals
31E577-0110-E1 Engine View Diagrams & Manuals
31E577-0114-G1 Engine View Diagrams & Manuals
31E577-0114-G5 Engine View Diagrams & Manuals
31E577-0115-G5 Engine View Diagrams & Manuals
31E577-0116-G5 Engine View Diagrams & Manuals
31E577-0117-G5 Engine View Diagrams & Manuals
31E577-0135-B1 Engine View Diagrams & Manuals
31E577-0135-E1 Engine View Diagrams & Manuals
31E577-0472-B1 Engine View Diagrams & Manuals
31E577-1596-G5 Engine View Diagrams & Manuals
31E607-0116-B1 Engine View Diagrams & Manuals
31E607-0124-B1 Engine View Diagrams & Manuals
31E607-0124-E1 Engine View Diagrams & Manuals
31E607-0140-B1 Engine View Diagrams & Manuals
31E607-0141-B1 Engine View Diagrams & Manuals
31E607-2116-B1 Engine View Diagrams & Manuals
31E607-4140-B1 Engine View Diagrams & Manuals
31E677-0110-B1 Engine View Diagrams & Manuals
31E677-0110-E1 Engine View Diagrams & Manuals
31E677-0111-B1 Engine View Diagrams & Manuals
31E677-0111-E1 Engine View Diagrams & Manuals
31E677-0112-B1 Engine View Diagrams & Manuals
31E677-0112-E1 Engine View Diagrams & Manuals
31E677-0114-B1 Engine View Diagrams & Manuals
31E677-0117-B1 Engine View Diagrams & Manuals
31E677-0118-B1 Engine View Diagrams & Manuals
31E677-0120-B1 Engine View Diagrams & Manuals
31E677-0120-E1 Engine View Diagrams & Manuals
31E677-0123-B1 Engine View Diagrams & Manuals
31E677-0125-B1 Engine View Diagrams & Manuals
31E677-0133-B1 Engine View Diagrams & Manuals
31E677-0133-E1 Engine View Diagrams & Manuals
31E677-0134-B1 Engine View Diagrams & Manuals
31E677-0134-E1 Engine View Diagrams & Manuals
31E677-0143-B1 Engine View Diagrams & Manuals
31E677-0144-B1 Engine View Diagrams & Manuals
31E677-0145-B1 Engine View Diagrams & Manuals
31E677-0147-B1 Engine View Diagrams & Manuals
31E677-0148-B1 Engine View Diagrams & Manuals
31E677-0746-B1 Engine View Diagrams & Manuals
31E677-0746-E1 Engine View Diagrams & Manuals
31E677-0772-B1 Engine View Diagrams & Manuals
31E677-2117-B1 Engine View Diagrams & Manuals
31E677-2772-B1 Engine View Diagrams & Manuals
31E677-4143-B1 Engine View Diagrams & Manuals
31E777-1628-G5 Engine View Diagrams & Manuals
31E777-3136-G1 Engine View Diagrams & Manuals
31E777-3136-G5 Engine View Diagrams & Manuals
31E777-4500-G5 Engine View Diagrams & Manuals
31E707-0111-E1 Engine View Diagrams & Manuals
31E707-0129-B1 Engine View Diagrams & Manuals
31E707-0129-E1 Engine View Diagrams & Manuals
31E777-0114-E1 Engine View Diagrams & Manuals
31E777-0115-B1 Engine View Diagrams & Manuals
31E777-0115-E1 Engine View Diagrams & Manuals
31E777-0115-G1 Engine View Diagrams & Manuals
31E777-0117-B1 Engine View Diagrams & Manuals
31E777-0118-B1 Engine View Diagrams & Manuals
31E777-0120-B1 Engine View Diagrams & Manuals
31E777-0126-E1 Engine View Diagrams & Manuals
31E777-0130-B1 Engine View Diagrams & Manuals
31E777-0130-E1 Engine View Diagrams & Manuals
31E777-0131-B1 Engine View Diagrams & Manuals
31E777-0132-B1 Engine View Diagrams & Manuals
31E777-0134-B1 Engine View Diagrams & Manuals
31E777-0136-B1 Engine View Diagrams & Manuals
31E777-0136-G1 Engine View Diagrams & Manuals
31E777-0137-B1 Engine View Diagrams & Manuals
31E777-0137-G1 Engine View Diagrams & Manuals
31E777-0140-B1 Engine View Diagrams & Manuals
31E777-0141-B1 Engine View Diagrams & Manuals
31E777-0142-B1 Engine View Diagrams & Manuals
31E777-0143-G5 Engine View Diagrams & Manuals
31E777-0144-B1 Engine View Diagrams & Manuals
31E777-0378-E1 Engine View Diagrams & Manuals
31E777-0443-E1 Engine View Diagrams & Manuals
31E777-1500-G1 Engine View Diagrams & Manuals
31E777-1500-G5 Engine View Diagrams & Manuals
31E777-1501-B1 Engine View Diagrams & Manuals
31F707-0112-E1 Engine View Diagrams & Manuals
31F707-0112-E2 Engine View Diagrams & Manuals
31F707-0112-E3 Engine View Diagrams & Manuals
31F707-0114-E1 Engine View Diagrams & Manuals
31F707-0129-E1 Engine View Diagrams & Manuals
31F707-0129-E2 Engine View Diagrams & Manuals
31F707-0130-E1 Engine View Diagrams & Manuals
31F707-0132-E1 Engine View Diagrams & Manuals
31F707-0132-E2 Engine View Diagrams & Manuals
31F775-0116-E1 Engine View Diagrams & Manuals
31F777-0113-E1 Engine View Diagrams & Manuals
31F777-0123-E1 Engine View Diagrams & Manuals
31F777-0126-E1 Engine View Diagrams & Manuals
31F777-0131-E1 Engine View Diagrams & Manuals
31F777-0136-B1 Engine View Diagrams & Manuals
31F777-0161-E1 Engine View Diagrams & Manuals
31F777-0162-E1 Engine View Diagrams & Manuals
31F777-0284-E1 Engine View Diagrams & Manuals
31F777-0317-E1 Engine View Diagrams & Manuals
31F777-0318-E1 Engine View Diagrams & Manuals
31F777-0403-E1 Engine View Diagrams & Manuals
31G707-0026-B1 Engine View Diagrams & Manuals
31G707-0026-E1 Engine View Diagrams & Manuals
31G707-0026-G1 Engine View Diagrams & Manuals
31G707-0140-B1 Engine View Diagrams & Manuals
31G707-0175-B1 Engine View Diagrams & Manuals
31G707-3026-G5 Engine View Diagrams & Manuals
31G777-0036-B1 Engine View Diagrams & Manuals
31G777-0036-E1 Engine View Diagrams & Manuals
31G777-0036-G1 Engine View Diagrams & Manuals
31G777-0112-B1 Engine View Diagrams & Manuals
31G777-0112-E1 Engine View Diagrams & Manuals
31G777-0113-E1 Engine View Diagrams & Manuals
31G777-0114-E1 Engine View Diagrams & Manuals
31G777-0115-E1 Engine View Diagrams & Manuals
31G777-0116-E1 Engine View Diagrams & Manuals
31G777-0119-E1 Engine View Diagrams & Manuals
31G777-0120-B1 Engine View Diagrams & Manuals
31G777-0120-E1 Engine View Diagrams & Manuals
31G777-0121-B1 Engine View Diagrams & Manuals
31G777-0121-E1 Engine View Diagrams & Manuals
31G777-0123-E1 Engine View Diagrams & Manuals
31G777-0125-B1 Engine View Diagrams & Manuals
31G777-0125-E1 Engine View Diagrams & Manuals
31G777-0126-B1 Engine View Diagrams & Manuals
31G777-0126-E1 Engine View Diagrams & Manuals
31G777-0127-B1 Engine View Diagrams & Manuals
31G777-0127-E1 Engine View Diagrams & Manuals
31G777-0128-B1 Engine View Diagrams & Manuals
31G777-0128-E1 Engine View Diagrams & Manuals
31G777-0130-B1 Engine View Diagrams & Manuals
31G777-0130-E1 Engine View Diagrams & Manuals
31G777-0131-B1 Engine View Diagrams & Manuals
31G777-0131-E1 Engine View Diagrams & Manuals
31G777-0132-B1 Engine View Diagrams & Manuals
31G777-0132-E1 Engine View Diagrams & Manuals
31G777-0133-B1 Engine View Diagrams & Manuals
31G777-0133-E1 Engine View Diagrams & Manuals
31G777-0134-B1 Engine View Diagrams & Manuals
31G777-0135-B1 Engine View Diagrams & Manuals
31G777-0136-B1 Engine View Diagrams & Manuals
31G777-0139-B1 Engine View Diagrams & Manuals
31G777-0142-B1 Engine View Diagrams & Manuals
31G777-0146-B1 Engine View Diagrams & Manuals
31G777-0148-B1 Engine View Diagrams & Manuals
31G777-0149-B1 Engine View Diagrams & Manuals
31G777-0150-B1 Engine View Diagrams & Manuals
31G777-0151-E1 Engine View Diagrams & Manuals
31G777-0155-B1 Engine View Diagrams & Manuals
31G777-0158-B1 Engine View Diagrams & Manuals
31G777-0159-B1 Engine View Diagrams & Manuals
31G777-0162-B1 Engine View Diagrams & Manuals
31G777-0165-E1 Engine View Diagrams & Manuals
31G777-0166-E1 Engine View Diagrams & Manuals
31G777-0167-B1 Engine View Diagrams & Manuals
31G777-0167-E1 Engine View Diagrams & Manuals
31G777-0168-B1 Engine View Diagrams & Manuals
31G777-0169-B1 Engine View Diagrams & Manuals
31G777-0172-E1 Engine View Diagrams & Manuals
31G777-0174-G5 Engine View Diagrams & Manuals
31G777-0181-E1 Engine View Diagrams & Manuals
31G777-0191-E1 Engine View Diagrams & Manuals
31G777-0192-E1 Engine View Diagrams & Manuals
31G777-0193-E1 Engine View Diagrams & Manuals
31G777-0194-B1 Engine View Diagrams & Manuals
31G777-0196-E1 Engine View Diagrams & Manuals
31G777-0199-E1 Engine View Diagrams & Manuals
31G777-0201-B1 Engine View Diagrams & Manuals
31G777-0201-E1 Engine View Diagrams & Manuals
31G777-0203-B1 Engine View Diagrams & Manuals
31G777-0204-B1 Engine View Diagrams & Manuals
31G777-0253-E1 Engine View Diagrams & Manuals
31G777-0258-E1 Engine View Diagrams & Manuals
31G777-0263-E1 Engine View Diagrams & Manuals
31G777-0290-E1 Engine View Diagrams & Manuals
31G777-0290-E2 Engine View Diagrams & Manuals
31G777-0292-B1 Engine View Diagrams & Manuals
31G777-0292-E1 Engine View Diagrams & Manuals
31G777-0293-B1 Engine View Diagrams & Manuals
31G777-0293-E1 Engine View Diagrams & Manuals
31G777-0294-B1 Engine View Diagrams & Manuals
31G777-0294-E1 Engine View Diagrams & Manuals
31G777-0299-B1 Engine View Diagrams & Manuals
31G777-0299-E1 Engine View Diagrams & Manuals
31G777-0300-B1 Engine View Diagrams & Manuals
31G777-0302-B1 Engine View Diagrams & Manuals
31G777-0303-G1 Engine View Diagrams & Manuals
31G777-0304-G1 Engine View Diagrams & Manuals
31G777-0424-B1 Engine View Diagrams & Manuals
31G777-0559-B1 Engine View Diagrams & Manuals
31G777-0806-B1 Engine View Diagrams & Manuals
31G777-0806-E1 Engine View Diagrams & Manuals
31G777-1191-B1 Engine View Diagrams & Manuals
31G777-1413-B1 Engine View Diagrams & Manuals
31G777-1583-B1 Engine View Diagrams & Manuals
31G777-1597-G5 Engine View Diagrams & Manuals
31G777-2146-B1 Engine View Diagrams & Manuals
31G777-2424-B1 Engine View Diagrams & Manuals
31G777-3036-G5 Engine View Diagrams & Manuals
31G777-3304-G1 Engine View Diagrams & Manuals
31G777-3304-G5 Engine View Diagrams & Manuals
31G777-4127-B1 Engine View Diagrams & Manuals
31G777-4130-B1 Engine View Diagrams & Manuals
31G777-4133-B1 Engine View Diagrams & Manuals
31H707-0212-E1 Engine View Diagrams & Manuals
31H777-0110-E1 Engine View Diagrams & Manuals
31H777-0112-E1 Engine View Diagrams & Manuals
31H777-0114-E1 Engine View Diagrams & Manuals
31H777-0168-E1 Engine View Diagrams & Manuals
31H777-0177-E1 Engine View Diagrams & Manuals
31H777-0202-E1 Engine View Diagrams & Manuals
31H777-0202-E2 Engine View Diagrams & Manuals
31H777-0210-E1 Engine View Diagrams & Manuals
31H777-0228-E1 Engine View Diagrams & Manuals
31H777-0235-E1 Engine View Diagrams & Manuals
31H777-0297-E1 Engine View Diagrams & Manuals
31H777-0605-E2 Engine View Diagrams & Manuals
31H777-0830-E1 Engine View Diagrams & Manuals
31H777-0831-E1 Engine View Diagrams & Manuals
31N807-0440-E1 Engine View Diagrams & Manuals
31N607-0726-B1 Engine View Diagrams & Manuals
31N607-0765-B1 Engine View Diagrams & Manuals
31N607-0868-G1 Engine View Diagrams & Manuals
31N607-0868-G5 Engine View Diagrams & Manuals
31N607-1403-B1 Engine View Diagrams & Manuals
31N607-3403-G5 Engine View Diagrams & Manuals
31N677-0554-B2 Engine View Diagrams & Manuals
31N707-0026-E1 Engine View Diagrams & Manuals
31N707-0026-G1 Engine View Diagrams & Manuals
31N707-0101-B1 Engine View Diagrams & Manuals
31N707-0130-B1 Engine View Diagrams & Manuals
31N707-0132-B1 Engine View Diagrams & Manuals
31N707-0233-E1 Engine View Diagrams & Manuals
31N707-0301-B1 Engine View Diagrams & Manuals
31N707-0301-B2 Engine View Diagrams & Manuals
31N707-0301-B3 Engine View Diagrams & Manuals
31N707-0301-E1 Engine View Diagrams & Manuals
31N707-0301-E2 Engine View Diagrams & Manuals
31N707-0301-G1 Engine View Diagrams & Manuals
31N707-0302-G1 Engine View Diagrams & Manuals
31N707-0429-B1 Engine View Diagrams & Manuals
31N707-0430-B1 Engine View Diagrams & Manuals
31N707-0430-E1 Engine View Diagrams & Manuals
31N707-0539-B1 Engine View Diagrams & Manuals
31N707-0840-B1 Engine View Diagrams & Manuals
31N707-0872-G1 Engine View Diagrams & Manuals
31N707-0872-G5 Engine View Diagrams & Manuals
31N707-1374-B1 Engine View Diagrams & Manuals
31N707-1374-G1 Engine View Diagrams & Manuals
31N707-1437-B1 Engine View Diagrams & Manuals
31N707-1441-B1 Engine View Diagrams & Manuals
31N707-2132-B1 Engine View Diagrams & Manuals
31N707-2437-B1 Engine View Diagrams & Manuals
31N707-2441-B1 Engine View Diagrams & Manuals
31N707-2539-B1 Engine View Diagrams & Manuals
31N707-3026-G5 Engine View Diagrams & Manuals
31N707-3374-G1 Engine View Diagrams & Manuals
31N707-3374-G5 Engine View Diagrams & Manuals
31N707-4374-G1 Engine View Diagrams & Manuals
31N777-0131-B1 Engine View Diagrams & Manuals
31P607-0114-B1 Engine View Diagrams & Manuals
31P607-0151-B1 Engine View Diagrams & Manuals
31P677-0113-B1 Engine View Diagrams & Manuals
31P677-0113-E1 Engine View Diagrams & Manuals
31P677-0113-G1 Engine View Diagrams & Manuals
31P677-0116-B1 Engine View Diagrams & Manuals
31P677-0117-B1 Engine View Diagrams & Manuals
31P677-0117-G1 Engine View Diagrams & Manuals
31P677-0123-B1 Engine View Diagrams & Manuals
31P677-0124-B1 Engine View Diagrams & Manuals
31P677-0126-G5 Engine View Diagrams & Manuals
31P677-0138-B1 Engine View Diagrams & Manuals
31P677-0147-G1 Engine View Diagrams & Manuals
31P677-0148-B1 Engine View Diagrams & Manuals
31P677-0149-B1 Engine View Diagrams & Manuals
31P677-0150-B1 Engine View Diagrams & Manuals
31P677-0494-B1 Engine View Diagrams & Manuals
31P677-0494-E1 Engine View Diagrams & Manuals
31P677-0758-B1 Engine View Diagrams & Manuals
31P677-0804-B1 Engine View Diagrams & Manuals
31P677-0804-B2 Engine View Diagrams & Manuals
31P677-0804-E1 Engine View Diagrams & Manuals
31P677-0804-G1 Engine View Diagrams & Manuals
31P677-0824-B1 Engine View Diagrams & Manuals
31P677-0825-B1 Engine View Diagrams & Manuals
31P677-0899-B1 Engine View Diagrams & Manuals
31P677-0900-B1 Engine View Diagrams & Manuals
31P677-0912-G5 Engine View Diagrams & Manuals
31P677-1373-B1 Engine View Diagrams & Manuals
31P677-1373-B2 Engine View Diagrams & Manuals
31P677-1373-G1 Engine View Diagrams & Manuals
31P677-1517-B1 Engine View Diagrams & Manuals
31P677-1517-G5 Engine View Diagrams & Manuals
31P677-3147-G1 Engine View Diagrams & Manuals
31P677-3147-G5 Engine View Diagrams & Manuals
31P677-3373-G1 Engine View Diagrams & Manuals
31P677-3373-G2 Engine View Diagrams & Manuals
31P677-3373-G5 Engine View Diagrams & Manuals
31P677-3373-G6 Engine View Diagrams & Manuals
31P677-4116-B1 Engine View Diagrams & Manuals
31P677-4117-B1 Engine View Diagrams & Manuals
31P677-4373-G1 Engine View Diagrams & Manuals
31P677-4373-G5 Engine View Diagrams & Manuals
31P707-0123-B1 Engine View Diagrams & Manuals
31P707-0123-E1 Engine View Diagrams & Manuals
31P707-0123-E2 Engine View Diagrams & Manuals
31P707-0124-B1 Engine View Diagrams & Manuals
31P707-0124-E1 Engine View Diagrams & Manuals
31P707-0124-E2 Engine View Diagrams & Manuals
31P707-0126-B1 Engine View Diagrams & Manuals
31P707-0126-B2 Engine View Diagrams & Manuals
31P707-0130-B1 Engine View Diagrams & Manuals
31P707-0131-G1 Engine View Diagrams & Manuals
31P707-0132-B1 Engine View Diagrams & Manuals
31P707-0136-B1 Engine View Diagrams & Manuals
31P707-0140-B1 Engine View Diagrams & Manuals
31P707-0140-B2 Engine View Diagrams & Manuals
31P707-0149-B1 Engine View Diagrams & Manuals
31P707-0149-B2 Engine View Diagrams & Manuals
31P707-0241-B1 Engine View Diagrams & Manuals
31P707-0241-B2 Engine View Diagrams & Manuals
31P707-0241-B5 Engine View Diagrams & Manuals
31P707-0241-B6 Engine View Diagrams & Manuals
31P707-0242-B1 Engine View Diagrams & Manuals
31P707-0242-B2 Engine View Diagrams & Manuals
31P707-0244-B1 Engine View Diagrams & Manuals
31P707-0244-B2 Engine View Diagrams & Manuals
31P707-0372-B1 Engine View Diagrams & Manuals
31P707-0372-B2 Engine View Diagrams & Manuals
31P707-0832-B1 Engine View Diagrams & Manuals
31P777-0110-B1 Engine View Diagrams & Manuals
31P777-0115-E1 Engine View Diagrams & Manuals
31P777-0116-B1 Engine View Diagrams & Manuals
31P777-0116-E1 Engine View Diagrams & Manuals
31P777-0120-B1 Engine View Diagrams & Manuals
31P777-0120-E1 Engine View Diagrams & Manuals
31P777-0121-B1 Engine View Diagrams & Manuals
31P777-0122-B1 Engine View Diagrams & Manuals
31P777-0125-B1 Engine View Diagrams & Manuals
31P777-0125-E1 Engine View Diagrams & Manuals
31P777-0133-B1 Engine View Diagrams & Manuals
31P777-0133-E1 Engine View Diagrams & Manuals
31P777-0134-B1 Engine View Diagrams & Manuals
31P777-0135-G1 Engine View Diagrams & Manuals
31P777-0142-B1 Engine View Diagrams & Manuals
31P777-0143-B1 Engine View Diagrams & Manuals
31P777-0148-B1 Engine View Diagrams & Manuals
31P777-0150-B1 Engine View Diagrams & Manuals
31P777-0153-B1 Engine View Diagrams & Manuals
31P777-0155-B1 Engine View Diagrams & Manuals
31P777-0156-G1 Engine View Diagrams & Manuals
31P777-0156-G5 Engine View Diagrams & Manuals
31P777-0202-G1 Engine View Diagrams & Manuals
31P777-0203-B1 Engine View Diagrams & Manuals
31P777-0293-E1 Engine View Diagrams & Manuals
31P777-0293-E2 Engine View Diagrams & Manuals
31P777-0296-B1 Engine View Diagrams & Manuals
31P777-0296-E1 Engine View Diagrams & Manuals
31P777-0299-B1 Engine View Diagrams & Manuals
31P777-0299-E1 Engine View Diagrams & Manuals
31P777-0337-E1 Engine View Diagrams & Manuals
31P777-0348-B1 Engine View Diagrams & Manuals
31P777-0348-E1 Engine View Diagrams & Manuals
31P777-0349-B1 Engine View Diagrams & Manuals
31P777-0349-E1 Engine View Diagrams & Manuals
31P777-0366-B1 Engine View Diagrams & Manuals
31P777-0366-E1 Engine View Diagrams & Manuals
31P777-0371-B1 Engine View Diagrams & Manuals
31P777-0371-E1 Engine View Diagrams & Manuals
31P777-0378-B1 Engine View Diagrams & Manuals
31P777-0378-E1 Engine View Diagrams & Manuals
31P777-0492-B1 Engine View Diagrams & Manuals
31P777-0492-E1 Engine View Diagrams & Manuals
31P777-0565-B1 Engine View Diagrams & Manuals
31P777-0581-B1 Engine View Diagrams & Manuals
31P777-0581-E1 Engine View Diagrams & Manuals
31P777-0602-B1 Engine View Diagrams & Manuals
31P777-0602-B2 Engine View Diagrams & Manuals
31P777-0602-E1 Engine View Diagrams & Manuals
31P777-0602-E2 Engine View Diagrams & Manuals
31P777-0602-G2 Engine View Diagrams & Manuals
31P777-0770-B1 Engine View Diagrams & Manuals
31P777-0899-B1 Engine View Diagrams & Manuals
31P777-0899-E1 Engine View Diagrams & Manuals
31P777-1076-B1 Engine View Diagrams & Manuals
31P777-1462-B1 Engine View Diagrams & Manuals
31P777-2143-B1 Engine View Diagrams & Manuals
31P777-2148-B1 Engine View Diagrams & Manuals
31P777-2770-B1 Engine View Diagrams & Manuals
31P777-3202-G5 Engine View Diagrams & Manuals
31P777-3462-G5 Engine View Diagrams & Manuals
31P777-3602-G6 Engine View Diagrams & Manuals
31P977-0449-E1 Engine View Diagrams & Manuals
31P977-0575-E1 Engine View Diagrams & Manuals
31P977-0575-E2 Engine View Diagrams & Manuals
31P977-0635-E1 Engine View Diagrams & Manuals
31P977-0652-B1 Engine View Diagrams & Manuals
31P977-0671-E1 Engine View Diagrams & Manuals
31P977-0881-B1 Engine View Diagrams & Manuals
31P977-1046-B1 Engine View Diagrams & Manuals
31X707-0777-E2 Engine View Diagrams & Manuals
33M677-0110-G5 Engine View Diagrams & Manuals
33M677-0117-G1 Engine View Diagrams & Manuals
33M677-0121-B1 Engine View Diagrams & Manuals
33M677-0122-B1 Engine View Diagrams & Manuals
33M677-0123-G1 Engine View Diagrams & Manuals
33M677-0124-B1 Engine View Diagrams & Manuals
33M677-0149-B1 Engine View Diagrams & Manuals
33M677-0151-B1 Engine View Diagrams & Manuals
33M677-1398-B1 Engine View Diagrams & Manuals
33M677-1494-B1 Engine View Diagrams & Manuals
33M677-1594-G5 Engine View Diagrams & Manuals
33M677-2124-G5 Engine View Diagrams & Manuals
33M677-2494-G5 Engine View Diagrams & Manuals
280H06-0118-E1 Engine View Diagrams & Manuals
280H07-0005-E1 Engine View Diagrams & Manuals
280H07-0036-E1 Engine View Diagrams & Manuals
280H07-0111-E1 Engine View Diagrams & Manuals
280H07-0112-E1 Engine View Diagrams & Manuals
280H07-0116-E1 Engine View Diagrams & Manuals
280H07-0117-E1 Engine View Diagrams & Manuals
280H07-0119-E1 Engine View Diagrams & Manuals
280H07-0120-E1 Engine View Diagrams & Manuals
280H07-0120-E2 Engine View Diagrams & Manuals
280H07-0121-E1 Engine View Diagrams & Manuals
280H07-0123-E1 Engine View Diagrams & Manuals
280H07-0124-E1 Engine View Diagrams & Manuals
280H07-0130-E1 Engine View Diagrams & Manuals
280H07-0131-E1 Engine View Diagrams & Manuals
280H07-0133-E1 Engine View Diagrams & Manuals
280H07-0160-E1 Engine View Diagrams & Manuals
280H07-0166-E1 Engine View Diagrams & Manuals
280H07-0185-E1 Engine View Diagrams & Manuals
280H07-0282-E1 Engine View Diagrams & Manuals
280H07-0311-E1 Engine View Diagrams & Manuals
280H07-0373-E1 Engine View Diagrams & Manuals
280H07-0385-B1 Engine View Diagrams & Manuals
280H07-0385-E1 Engine View Diagrams & Manuals
280H07-0386-E1 Engine View Diagrams & Manuals
280H07-0402-E1 Engine View Diagrams & Manuals
280H07-0429-B1 Engine View Diagrams & Manuals
280J07-0110-E1 Engine View Diagrams & Manuals
280J07-0115-E1 Engine View Diagrams & Manuals
280J07-0115-E2 Engine View Diagrams & Manuals
280J07-0120-E1 Engine View Diagrams & Manuals
280J07-0120-E2 Engine View Diagrams & Manuals
280J77-0111-E1 Engine View Diagrams & Manuals
280J77-0122-B1 Engine View Diagrams & Manuals
280J77-0394-E1 Engine View Diagrams & Manuals
280J77-0434-B1 Engine View Diagrams & Manuals
281H07-0111-E1 Engine View Diagrams & Manuals
281H07-0112-E1 Engine View Diagrams & Manuals
281H07-0113-E1 Engine View Diagrams & Manuals
281H07-0372-E1 Engine View Diagrams & Manuals
281H07-0384-B1 Engine View Diagrams & Manuals
281H07-0384-E1 Engine View Diagrams & Manuals
282H07-0105-E1 Engine View Diagrams & Manuals
282H07-0110-E1 Engine View Diagrams & Manuals
282H07-0110-E2 Engine View Diagrams & Manuals
282H07-0111-E1 Engine View Diagrams & Manuals
282H07-0113-E1 Engine View Diagrams & Manuals
282H07-0115-E1 Engine View Diagrams & Manuals
282H07-0116-E1 Engine View Diagrams & Manuals
282H07-0117-E1 Engine View Diagrams & Manuals
282H07-0119-E1 Engine View Diagrams & Manuals
282H07-0120-E1 Engine View Diagrams & Manuals
282H07-0121-E1 Engine View Diagrams & Manuals
282H07-0122-E1 Engine View Diagrams & Manuals
282H07-0123-E1 Engine View Diagrams & Manuals
282H07-0124-E1 Engine View Diagrams & Manuals
282H07-0125-B1 Engine View Diagrams & Manuals
282H07-0188-E1 Engine View Diagrams & Manuals
282H07-0196-E1 Engine View Diagrams & Manuals
282H07-0198-E1 Engine View Diagrams & Manuals
282H07-0199-E1 Engine View Diagrams & Manuals
282H07-0200-E1 Engine View Diagrams & Manuals
282H07-0231-E1 Engine View Diagrams & Manuals
282H07-0239-B1 Engine View Diagrams & Manuals
282H07-0239-E1 Engine View Diagrams & Manuals
282H07-0262-E1 Engine View Diagrams & Manuals
282H07-0334-E1 Engine View Diagrams & Manuals
282H07-0382-E1 Engine View Diagrams & Manuals
282H07-0423-B1 Engine View Diagrams & Manuals
282H07-0600-E1 Engine View Diagrams & Manuals
282H07-0600-E2 Engine View Diagrams & Manuals
282H77-0242-E1 Engine View Diagrams & Manuals
282H77-0257-E1 Engine View Diagrams & Manuals
283H07-0105-E1 Engine View Diagrams & Manuals
283H07-0197-E1 Engine View Diagrams & Manuals
283H07-0399-E1 Engine View Diagrams & Manuals
283H07-0400-B1 Engine View Diagrams & Manuals
283H07-0400-E1 Engine View Diagrams & Manuals
284H07-0110-E1 Engine View Diagrams & Manuals
284H07-0111-E1 Engine View Diagrams & Manuals
284H07-0115-E1 Engine View Diagrams & Manuals
284H07-0131-E1 Engine View Diagrams & Manuals
284H07-0132-E1 Engine View Diagrams & Manuals
284H77-0101-E1 Engine View Diagrams & Manuals
284H77-0105-E1 Engine View Diagrams & Manuals
284H77-0113-E1 Engine View Diagrams & Manuals
284H77-0114-E1 Engine View Diagrams & Manuals
284H77-0116-E1 Engine View Diagrams & Manuals
284H77-0117-E1 Engine View Diagrams & Manuals
284H77-0118-E1 Engine View Diagrams & Manuals
284H77-0119-E1 Engine View Diagrams & Manuals
284H77-0121-E1 Engine View Diagrams & Manuals
284H77-0123-B1 Engine View Diagrams & Manuals
284H77-0125-E1 Engine View Diagrams & Manuals
284H77-0125-E2 Engine View Diagrams & Manuals
284H77-0126-E1 Engine View Diagrams & Manuals
284H77-0129-E1 Engine View Diagrams & Manuals
284H77-0130-E1 Engine View Diagrams & Manuals
284H77-0133-E1 Engine View Diagrams & Manuals
284H77-0135-B1 Engine View Diagrams & Manuals
285H07-0026-B1 Engine View Diagrams & Manuals
285H07-0026-E1 Engine View Diagrams & Manuals
285H07-0028-E1 Engine View Diagrams & Manuals
285H07-0126-E1 Engine View Diagrams & Manuals
285H77-0036-E1 Engine View Diagrams & Manuals
285H77-0110-E1 Engine View Diagrams & Manuals
285H77-0116-E1 Engine View Diagrams & Manuals
285H77-0117-E1 Engine View Diagrams & Manuals
285H77-0120-E1 Engine View Diagrams & Manuals
285H77-0121-E1 Engine View Diagrams & Manuals
285H77-0122-E1 Engine View Diagrams & Manuals
285H77-0122-E2 Engine View Diagrams & Manuals
285H77-0124-E1 Engine View Diagrams & Manuals
285H77-0125-E1 Engine View Diagrams & Manuals
285H77-0173-E1 Engine View Diagrams & Manuals
285H77-0178-E1 Engine View Diagrams & Manuals
285H77-0180-E1 Engine View Diagrams & Manuals
285H77-0252-E1 Engine View Diagrams & Manuals
285H77-0252-E2 Engine View Diagrams & Manuals
285H77-0374-E1 Engine View Diagrams & Manuals
285H77-0395-E1 Engine View Diagrams & Manuals
285H77-0397-E1 Engine View Diagrams & Manuals
285H77-0436-B1 Engine View Diagrams & Manuals
285H77-0566-B1 Engine View Diagrams & Manuals
286H07-0026-E1 Engine View Diagrams & Manuals
286H77-0101-E1 Engine View Diagrams & Manuals
286H77-0121-E1 Engine View Diagrams & Manuals
286H77-0122-B1 Engine View Diagrams & Manuals
286H77-0122-E1 Engine View Diagrams & Manuals
286H77-0165-E1 Engine View Diagrams & Manuals
286H77-0186-E1 Engine View Diagrams & Manuals
286H77-0402-B1 Engine View Diagrams & Manuals
286H77-0402-E1 Engine View Diagrams & Manuals
286H77-0556-E1 Engine View Diagrams & Manuals
319775-0110-E1 Engine View Diagrams & Manuals
319775-0110-E2 Engine View Diagrams & Manuals
331707-0115-B1 Engine View Diagrams & Manuals
331707-0115-G1 Engine View Diagrams & Manuals
331777-0546-B1 Engine View Diagrams & Manuals
331777-0546-E1 Engine View Diagrams & Manuals
331777-0815-B1 Engine View Diagrams & Manuals
331777-0819-B1 Engine View Diagrams & Manuals
331777-0896-B1 Engine View Diagrams & Manuals
331777-0901-B1 Engine View Diagrams & Manuals
331777-0946-B1 Engine View Diagrams & Manuals
331777-0946-B2 Engine View Diagrams & Manuals
331777-0946-B4 Engine View Diagrams & Manuals
331777-0946-G1 Engine View Diagrams & Manuals
331777-1372-B1 Engine View Diagrams & Manuals
331777-1372-B2 Engine View Diagrams & Manuals
331777-1372-G1 Engine View Diagrams & Manuals
331777-1372-G2 Engine View Diagrams & Manuals
331777-1457-G1 Engine View Diagrams & Manuals
331777-1523-B1 Engine View Diagrams & Manuals
331777-1523-G5 Engine View Diagrams & Manuals
331777-1557-G1 Engine View Diagrams & Manuals
331777-1557-G5 Engine View Diagrams & Manuals
331777-1558-G1 Engine View Diagrams & Manuals
331777-1558-G5 Engine View Diagrams & Manuals
331777-2372-G1 Engine View Diagrams & Manuals
331777-2372-G5 Engine View Diagrams & Manuals
331777-2457-G5 Engine View Diagrams & Manuals
331777-4372-G5 Engine View Diagrams & Manuals
331977-0100-B1 Engine View Diagrams & Manuals
331977-0101-B1 Engine View Diagrams & Manuals
331807-0026-G1 Engine View Diagrams & Manuals
331807-0116-B1 Engine View Diagrams & Manuals
331807-3026-G5 Engine View Diagrams & Manuals
331877-0110-G5 Engine View Diagrams & Manuals
331877-0115-B1 Engine View Diagrams & Manuals
331877-0117-G1 Engine View Diagrams & Manuals
331877-0118-G1 Engine View Diagrams & Manuals
331877-0119-B1 Engine View Diagrams & Manuals
331877-0120-B1 Engine View Diagrams & Manuals
331877-0151-G5 Engine View Diagrams & Manuals
331877-0505-B1 Engine View Diagrams & Manuals
331877-0730-B1 Engine View Diagrams & Manuals
331877-0794-B1 Engine View Diagrams & Manuals
331877-0805-B1 Engine View Diagrams & Manuals
331877-0805-E1 Engine View Diagrams & Manuals
331877-0845-G1 Engine View Diagrams & Manuals
331877-0845-G5 Engine View Diagrams & Manuals
331877-0869-G1 Engine View Diagrams & Manuals
331877-0869-G5 Engine View Diagrams & Manuals
331877-1497-B1 Engine View Diagrams & Manuals
331877-2118-G1 Engine View Diagrams & Manuals
331877-2118-G5 Engine View Diagrams & Manuals
331877-2794-G1 Engine View Diagrams & Manuals
331877-2794-G5 Engine View Diagrams & Manuals
31A507-0144-G5 Engine View Diagrams & Manuals
31A607-0037-B1 Engine View Diagrams & Manuals
31C707-0985-G5 Engine View Diagrams & Manuals
31E577-0018-B1 Engine View Diagrams & Manuals
31E677-0149-B1 Engine View Diagrams & Manuals
31E677-0150-G5 Engine View Diagrams & Manuals
31G777-0176-B1 Engine View Diagrams & Manuals
31N707-4374-G5 Engine View Diagrams & Manuals
31P677-0979-B1 Engine View Diagrams & Manuals
31P707-0157-B1 Engine View Diagrams & Manuals
31P707-0157-B2 Engine View Diagrams & Manuals
31P707-0373-B1 Engine View Diagrams & Manuals
31P707-0373-B2 Engine View Diagrams & Manuals
31P777-0001-B1 Engine View Diagrams & Manuals
31Q507-0001-H1 Engine View Diagrams & Manuals
31Q507-0002-H1 Engine View Diagrams & Manuals
31Q507-0003-H1 Engine View Diagrams & Manuals
31Q507-0004-H1 Engine View Diagrams & Manuals
31Q507-0005-H1 Engine View Diagrams & Manuals
31Q507-0006-H1 Engine View Diagrams & Manuals
31Q507-0007-H1 Engine View Diagrams & Manuals
31Q507-0008-H1 Engine View Diagrams & Manuals
31Q507-0010-H1 Engine View Diagrams & Manuals
31Q507-0011-H1 Engine View Diagrams & Manuals
31Q507-0012-H1 Engine View Diagrams & Manuals
31R507-0001-B1 Engine View Diagrams & Manuals
31R507-0002-G1 Engine View Diagrams & Manuals
31R507-0003-B1 Engine View Diagrams & Manuals
31R507-0004-B1 Engine View Diagrams & Manuals
31R507-0005-B1 Engine View Diagrams & Manuals
31R507-0006-B1 Engine View Diagrams & Manuals
31R507-0007-B1 Engine View Diagrams & Manuals
31R507-0008-B1 Engine View Diagrams & Manuals
31R507-0011-B1 Engine View Diagrams & Manuals
31R507-0012-B1 Engine View Diagrams & Manuals
31R507-0013-B1 Engine View Diagrams & Manuals
31R507-0015-B1 Engine View Diagrams & Manuals
31R507-0016-B1 Engine View Diagrams & Manuals
31R507-0018-B1 Engine View Diagrams & Manuals
31R507-0021-B1 Engine View Diagrams & Manuals
31R507-0022-B1 Engine View Diagrams & Manuals
31R507-0023-B1 Engine View Diagrams & Manuals
31R507-0024-B1 Engine View Diagrams & Manuals
31R507-0025-B1 Engine View Diagrams & Manuals
31R507-0029-B1 Engine View Diagrams & Manuals
31R507-0030-B1 Engine View Diagrams & Manuals
31R507-0036-B1 Engine View Diagrams & Manuals
31R577-0009-B1 Engine View Diagrams & Manuals
31R577-0014-B1 Engine View Diagrams & Manuals
31R577-0017-B1 Engine View Diagrams & Manuals
31R577-0019-B1 Engine View Diagrams & Manuals
31R577-0020-B1 Engine View Diagrams & Manuals
31R577-0026-B1 Engine View Diagrams & Manuals
31R577-0027-B1 Engine View Diagrams & Manuals
31R577-0028-B1 Engine View Diagrams & Manuals
31R577-0031-B1 Engine View Diagrams & Manuals
31R577-0033-B1 Engine View Diagrams & Manuals
31R577-0034-B1 Engine View Diagrams & Manuals
31R577-0035-G1 Engine View Diagrams & Manuals
31R607-0001-B1 Engine View Diagrams & Manuals
31R607-0003-B1 Engine View Diagrams & Manuals
31R607-0005-G1 Engine View Diagrams & Manuals
31R607-0006-G1 Engine View Diagrams & Manuals
31R607-0007-G1 Engine View Diagrams & Manuals
31R607-0009-G1 Engine View Diagrams & Manuals
31R607-0011-G1 Engine View Diagrams & Manuals
31R607-0012-B1 Engine View Diagrams & Manuals
31R607-0013-B1 Engine View Diagrams & Manuals
31R607-0014-B1 Engine View Diagrams & Manuals
31R607-0015-B1 Engine View Diagrams & Manuals
31R607-0016-B1 Engine View Diagrams & Manuals
31R607-0018-B1 Engine View Diagrams & Manuals
31R677-0004-B1 Engine View Diagrams & Manuals
31R677-0008-G1 Engine View Diagrams & Manuals
31R677-0010-G1 Engine View Diagrams & Manuals
31R677-0017-G1 Engine View Diagrams & Manuals
31R707-0001-G1 Engine View Diagrams & Manuals
31R707-0004-B1 Engine View Diagrams & Manuals
31R707-0008-B1 Engine View Diagrams & Manuals
31R707-0012-B1 Engine View Diagrams & Manuals
31R707-0013-G1 Engine View Diagrams & Manuals
31R707-0017-B1 Engine View Diagrams & Manuals
31R707-0020-G1 Engine View Diagrams & Manuals
31R707-0021-G1 Engine View Diagrams & Manuals
31R707-0023-G1 Engine View Diagrams & Manuals
31R707-0024-B1 Engine View Diagrams & Manuals
31R707-0025-B1 Engine View Diagrams & Manuals
31R707-0028-B1 Engine View Diagrams & Manuals
31R707-0033-G1 Engine View Diagrams & Manuals
31R707-0034-G1 Engine View Diagrams & Manuals
31R707-0035-B1 Engine View Diagrams & Manuals
31R707-0037-B1 Engine View Diagrams & Manuals
31R707-0038-B1 Engine View Diagrams & Manuals
31R707-0040-B1 Engine View Diagrams & Manuals
31R707-0041-B1 Engine View Diagrams & Manuals
31R777-0002-B1 Engine View Diagrams & Manuals
31R777-0003-B1 Engine View Diagrams & Manuals
31R777-0005-B1 Engine View Diagrams & Manuals
31R777-0006-B1 Engine View Diagrams & Manuals
31R777-0007-B1 Engine View Diagrams & Manuals
31R777-0009-B1 Engine View Diagrams & Manuals
31R777-0010-B1 Engine View Diagrams & Manuals
31R777-0011-B1 Engine View Diagrams & Manuals
31R777-0014-B1 Engine View Diagrams & Manuals
31R777-0015-B1 Engine View Diagrams & Manuals
31R777-0016-B1 Engine View Diagrams & Manuals
31R777-0018-B1 Engine View Diagrams & Manuals
31R777-0019-B1 Engine View Diagrams & Manuals
31R777-0022-B1 Engine View Diagrams & Manuals
31R777-0026-G1 Engine View Diagrams & Manuals
31R777-0027-B1 Engine View Diagrams & Manuals
31R777-0029-B1 Engine View Diagrams & Manuals
31R777-0030-B1 Engine View Diagrams & Manuals
31R777-0031-B1 Engine View Diagrams & Manuals
31R777-0032-B1 Engine View Diagrams & Manuals
31R777-0036-B1 Engine View Diagrams & Manuals
31R777-0039-B1 Engine View Diagrams & Manuals
31R777-0042-B1 Engine View Diagrams & Manuals
31R777-0043-B1 Engine View Diagrams & Manuals
31R777-0044-G1 Engine View Diagrams & Manuals
31R807-0003-B1 Engine View Diagrams & Manuals
31R807-0004-B1 Engine View Diagrams & Manuals
31R807-0005-B1 Engine View Diagrams & Manuals
31R807-0007-B1 Engine View Diagrams & Manuals
31R807-0008-B1 Engine View Diagrams & Manuals
31R807-0011-B1 Engine View Diagrams & Manuals
31R807-0014-G1 Engine View Diagrams & Manuals
31R807-0017-B1 Engine View Diagrams & Manuals
31R807-0024-G1 Engine View Diagrams & Manuals
31R807-0025-B1 Engine View Diagrams & Manuals
31R807-0026-B1 Engine View Diagrams & Manuals
31R807-0028-G1 Engine View Diagrams & Manuals
31R807-0029-G1 Engine View Diagrams & Manuals
31R877-0001-B1 Engine View Diagrams & Manuals
31R877-0002-B1 Engine View Diagrams & Manuals
31R877-0006-B1 Engine View Diagrams & Manuals
31R877-0009-G1 Engine View Diagrams & Manuals
31R877-0010-G1 Engine View Diagrams & Manuals
31R877-0012-B1 Engine View Diagrams & Manuals
31R877-0013-B1 Engine View Diagrams & Manuals
31R877-0015-G1 Engine View Diagrams & Manuals
31R877-0016-G1 Engine View Diagrams & Manuals
31R877-0018-B1 Engine View Diagrams & Manuals
31R877-0019-B1 Engine View Diagrams & Manuals
31R877-0020-B1 Engine View Diagrams & Manuals
31R877-0022-B1 Engine View Diagrams & Manuals
31R877-0023-B1 Engine View Diagrams & Manuals
31R877-0027-B1 Engine View Diagrams & Manuals
31R877-0031-B1 Engine View Diagrams & Manuals
31R907-0006-G1 Engine View Diagrams & Manuals
31R907-0007-G1 Engine View Diagrams & Manuals
31R907-0012-B1 Engine View Diagrams & Manuals
31R907-0018-G1 Engine View Diagrams & Manuals
31R907-0019-G1 Engine View Diagrams & Manuals
31R907-0020-G1 Engine View Diagrams & Manuals
31R907-0022-G1 Engine View Diagrams & Manuals
31R907-0025-G1 Engine View Diagrams & Manuals
31R907-0031-G1 Engine View Diagrams & Manuals
31R907-0038-G1 Engine View Diagrams & Manuals
31R907-0042-G1 Engine View Diagrams & Manuals
31R907-0044-G1 Engine View Diagrams & Manuals
31R907-0049-G1 Engine View Diagrams & Manuals
31R907-0050-G1 Engine View Diagrams & Manuals
31R907-0053-G1 Engine View Diagrams & Manuals
31R907-0055-G1 Engine View Diagrams & Manuals
31R907-0059-G1 Engine View Diagrams & Manuals
31R975-0023-B1 Engine View Diagrams & Manuals
31R975-0036-B1 Engine View Diagrams & Manuals
31R976-0045-G1 Engine View Diagrams & Manuals
31R977-0002-G1 Engine View Diagrams & Manuals
31R977-0009-B1 Engine View Diagrams & Manuals
31R977-0010-B1 Engine View Diagrams & Manuals
31R977-0011-B1 Engine View Diagrams & Manuals
31R977-0014-G1 Engine View Diagrams & Manuals
31R977-0015-G1 Engine View Diagrams & Manuals
31R977-0017-G1 Engine View Diagrams & Manuals
31R977-0021-G1 Engine View Diagrams & Manuals
31R977-0023-B1 Engine View Diagrams & Manuals
31R977-0024-G1 Engine View Diagrams & Manuals
31R977-0026-B1 Engine View Diagrams & Manuals
31R977-0027-G1 Engine View Diagrams & Manuals
31R977-0028-G1 Engine View Diagrams & Manuals
31R977-0029-G1 Engine View Diagrams & Manuals
31R977-0030-B1 Engine View Diagrams & Manuals
31R977-0032-G1 Engine View Diagrams & Manuals
31R977-0033-G1 Engine View Diagrams & Manuals
31R977-0034-G1 Engine View Diagrams & Manuals
31R977-0035-B1 Engine View Diagrams & Manuals
31R977-0037-B1 Engine View Diagrams & Manuals
31R977-0039-B1 Engine View Diagrams & Manuals
31R977-0040-B1 Engine View Diagrams & Manuals
31R977-0041-G1 Engine View Diagrams & Manuals
31R977-0043-G1 Engine View Diagrams & Manuals
31R977-0046-G1 Engine View Diagrams & Manuals
31R977-0048-G1 Engine View Diagrams & Manuals
31R977-0051-B1 Engine View Diagrams & Manuals
31R977-0054-G1 Engine View Diagrams & Manuals
31R977-0056-G1 Engine View Diagrams & Manuals
31R977-0057-G1 Engine View Diagrams & Manuals
331777-0001-G5 Engine View Diagrams & Manuals
331977-0004-G1 Engine View Diagrams & Manuals
331977-0005-G1 Engine View Diagrams & Manuals
331977-0006-G1 Engine View Diagrams & Manuals
331977-0007-G1 Engine View Diagrams & Manuals
331977-0008-G1 Engine View Diagrams & Manuals
33R777-0001-G1 Engine View Diagrams & Manuals
33R777-0002-B1 Engine View Diagrams & Manuals
33R777-0007-B1 Engine View Diagrams & Manuals
33R877-0007-G1 Engine View Diagrams & Manuals
33R877-0008-G1 Engine View Diagrams & Manuals
33R877-0009-G1 Engine View Diagrams & Manuals
33R877-0010-G1 Engine View Diagrams & Manuals
33R877-0011-G1 Engine View Diagrams & Manuals
33R877-0014-B1 Engine View Diagrams & Manuals
33R877-0016-G1 Engine View Diagrams & Manuals
33R877-0022-B1 Engine View Diagrams & Manuals
33S877-0001-G1 Engine View Diagrams & Manuals
Show More Compatible Models
This item works with the following types of products:
- Lawn Tractor Parts
- Engine Parts
This part replaces obsolete part #: 697126, 791631
Customer Part Reviews ?
Average Rating (out of 5):
Click to filter by ratings:
5 stars
2
4 stars
0
3 stars
0
2 stars
0
1 stars
0
< PREV
- 1
Works great, love this company
It arrived in a very secure box came when it was supposed to
Guest -
August 22, 2023
Verified Purchase
although i give you a 5 star rating i am reluctant to place another order with you due to length of time to recieve my parts. when i place an order on liner it is because i found what i want but i need it now not 3 to 4 weeks later.
parts and gaskets were great quality
Guest -
September 10, 2020
Verified Purchase
t
t
t -
t days ago
Verified Purchase
eReplacementParts Team
t
Questions & Answers ?
Our customer Service team is at the ready daily to answer your part and product questions.

Ask our Team
We have a dedicated staff with decades of collective experience in helping customers just like you purchase parts to repair their products.
Does this fit my product?Questions & Answers for Rod-connecting
No questions have been asked yet
Customer Repair Instructions ?
All our customer repair instructions are solicited directly from other customers just like you who have purchased and replaced this exact part.
Lawnmower connecting rod broke due to low oil.
Paul - March 11, 2017
👍 11 of 12 people found this instruction helpful
Tool Type
Lawn Mower
Difficulty
Medium
Time
More than 2 hours
Tools Used
Screwdriver, Pliers, Socket set, Wrench Set, Nutdriver, Adjustable Wrench
Remove and disassemble engine.
Remove broken rod and pieces and check for any other damage.
Refinish Crank journal with emery cloth.
Attach new rod to piston and install in engine.
Reassemble all components and use new gaskets where needed.
Remove broken rod and pieces and check for any other damage.
Refinish Crank journal with emery cloth.
Attach new rod to piston and install in engine.
Reassemble all components and use new gaskets where needed.
Did you find this story helpful?
Thanks for voting and helping fellow customers!
Broken Connection Road in Briggs & Stratton 20hp Intek Craftsman Lawn Tractor Mower engine
Michael - October 19, 2017
👍 6 of 7 people found this instruction helpful
Tool Type
Lawn Tractor
Difficulty
Medium
Time
30-60 minutes
Tools Used
Power Drill, Socket set, Wrench Set, Nutdriver
Disconnect Battery
Disconnect Starter and Electrical Wire.
Remove Engine shroud.
Remove Intake manifold w/carb. Remove muffler.
Lower mower deck and unbolt mower transmission and blade pulley from crankshaft.
Unbolt and remove Engine from lawn tractor chassis.
Drain Oil.
Unbolt and remove cylinder head & remove push rods.
Unbolt and remove bottom crankcase cover.
Remove cam shaft.
Remove broken Connection Rod (note connection rod orientation on crankshaft, it will only work one way).
Push Piston up and out the cylinder.
Inspect engine case, crankshaft, piston and cylinder for any damage or scoring.
Remove retainer clip from connection rod piston pin and press out pin far enough to remove old connection rod and attach new one. Push connection rod pin back into place and replace retainer pin clip.
Check piston rings for any damage and replace if necessary.
Hone piston cylinder.
Using a piston ring compressor tool, compress piston rings on piston.
Lubricate piston cylinder. (I use Lucas Assembly Lube but regular oil will work) and slide piston back into the cylinder making sure the connection rod is orientate correctly.
Lubricate crankshaft with oil and attached connection rod. Torque to required specs.
Reinstall camshaft making sure to align timing mark on camshaft and crankshaft.
Remove and clean engine block and cover of ALL old gasket material.
Remove oil pump cover on the crankcase cover and remove oil pump gear and drive pin.
Place new crankcase gasket on engine block and replace crankcase cover. Torque to specs.
Align oil pump drive shaft with camshaft slot, replace gear and replace oil pump cover.
Remove and clean cylinder and cylinder head of ALL old head gasket material.
Place new cylinder head gasket on engine block, replace cylinder head and Torque to specs.
Remove OHV cover.
Loosen rocker arms until you are able to replace push rods.
Rotate engine until engine timing is at TDC. Adjust rocker arms to correct gap setting between rocker arm and valve.
Replace engine to lawn tractor (reverse of removal procedure).
ADD NEW OIL.
When you start using tractor again, do NOT run under full load for the first 5 to 10 hours. Change oil and filter (if equipped) after 10 hours.
Did you find this story helpful?
Thanks for voting and helping fellow customers!
OEM stands for Original Equipment Manufacturer and means the part you’re buying is sourced directly from the manufacturer who made your product. At eReplacementParts, we sell only genuine OEM parts, guaranteeing the part you’re purchasing is of better design and of higher quality than aftermarket parts.
Our product descriptions are a combination of data sourced directly from the manufacturers who made your product as well as content researched and curated by our content & customer service teams. This content is edited and reviewed internally before being made public to customers.
Our customer service team are at the ready daily to answer your part and product questions. We have a dedicated staff with decades of collective experience in helping customers just like you purchase parts to repair their products.
All our part reviews are solicited directly from other customers who have purchased this exact part. While we moderate these reviews for profanity, offensive language or personally identifiable information, these reviews are posted exactly as submitted and no alterations are made by our team.
All our customer repair instructions are solicited directly from other customers just like you who have purchased and replaced this exact part. While we moderate these reviews for profanity, offensive language or personally identifiable information, these reviews are posted exactly as submitted and no alterations are made by our team.
Based on data from past customer purchasing behaviors, these parts are most commonly purchased together along with the part you are viewing. These parts may be necessary or helpful to replace to complete your current repair.
All our installation videos are created and produced in collaboration with our in-house repair technician, Mark Sodja, who has helped millions of eReplacementParts customers over the last 13 years repair their products. Mark has years of experience in selling and repairing both commercial and residential products with a specialty in gas-powered equipment.
This data is collected from customers who submitted a repair instruction after replacing this exact part. Customers can rate how easy the repair was to complete and how long it took. We aggregate this data to provide a repair rating that allows customers to quickly determine the difficulty and time needed to perform their own repair.