
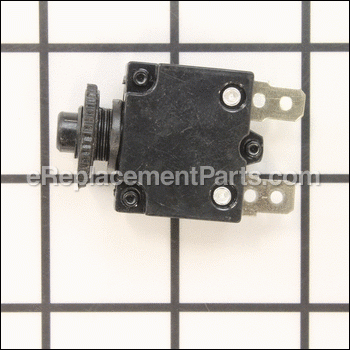
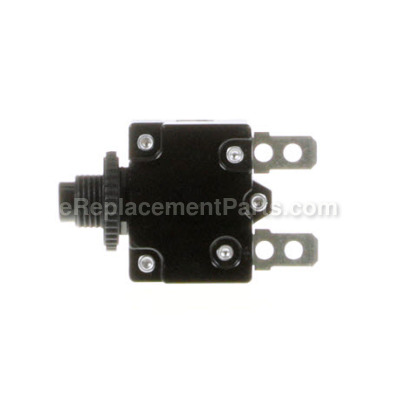


This is a genuine OEM sourced component which is specially designed for use with Razor electric scooters. This circuit breaker is an automatically operated electrical switch designed to protect an electrical circuit from damage caused by overload or short circuit. Its basic function is to detect a fault condition and interrupt current flow. Unfortunately, over time it will wear out and it may begin to fail eventually requiring a replacement. Keep in mind this high-quality reset button is sold individually. Please make sure to refer to the appropriate diagrams of your model for the correct location and application of this component.
Reset Button W13111260112
OEM part for: Razor
Part Number: W13111260112
$8.71
In Stock
Compatibility
This part will fit the following 5 machines
Razor
E100 24V Electric Scooter View Diagrams & Manuals
E125 24V Electric Scooter View Diagrams & Manuals
E150 24V Electric Scooter View Diagrams & Manuals
E175 24V Electric Scooter View Diagrams & Manuals
eSpark 24V Electric Scooter View Diagrams & Manuals
This item works with the following types of products:
- Scooter Parts
This part replaces obsolete part #: W13111612112
Customer Part Reviews ?
Average Rating (out of 5):
Click to filter by ratings:
5 stars
1
4 stars
0
3 stars
0
2 stars
0
1 stars
0
< PREV
- 1
Worked as it should
The parts were easy to find and came fairly quickly. Overall good experience
Guest -
September 13, 2022
Verified Purchase
t
t
t -
t days ago
Verified Purchase
eReplacementParts Team
t
Questions & Answers ?
Our customer Service team is at the ready daily to answer your part and product questions.

Ask our Team
We have a dedicated staff with decades of collective experience in helping customers just like you purchase parts to repair their products.
Does this fit my product?Questions & Answers for Reset Button
No questions have been asked yet
Customer Repair Instructions ?
All our customer repair instructions are solicited directly from other customers just like you who have purchased and replaced this exact part.
Scooter motor would not run. A clicking noise was heard when throttle was activated.
Tom - May 14, 2019
Tool Type
Scooter
Difficulty
Easy
Time
15-30 minutes
Tools Used
Screwdriver
Repair was not successful..
Replaced module control, power switch and reset switch.
Will test motor next.
Replaced module control, power switch and reset switch.
Will test motor next.
Did you find this story helpful?
Thanks for voting and helping fellow customers!
Switch broken.
juan - June 15, 2017
👍 0 of 1 people found this instruction helpful
Tool Type
Scooter
Difficulty
Easy
Time
15-30 minutes
Tools Used
Screwdriver, Pliers
Removed and replaced.
Did you find this story helpful?
Thanks for voting and helping fellow customers!
Albert - September 22, 2016
👍 0 of 2 people found this instruction helpful
Tool Type
Scooter
Difficulty
Easy
Time
15-30 minutes
Tools Used
Screwdriver, Adjustable Wrench
Parts Used
Remove the platform of the scooter. Below that you will see all of the wiring. Look for the wires going to the overload switch. Remove the nut from the front of the switch and pull it out of the hole in the panel. Now exchange the wires on the old overload to the new one, put the wires on the same terminals as they were on the old one. Push the new overload into the hole in the panel and tighten the nut down on the new overload. Then put the platform back on.
Did you find this story helpful?
Thanks for voting and helping fellow customers!
OEM stands for Original Equipment Manufacturer and means the part you’re buying is sourced directly from the manufacturer who made your product. At eReplacementParts, we sell only genuine OEM parts, guaranteeing the part you’re purchasing is of better design and of higher quality than aftermarket parts.
Our product descriptions are a combination of data sourced directly from the manufacturers who made your product as well as content researched and curated by our content & customer service teams. This content is edited and reviewed internally before being made public to customers.
Our customer service team are at the ready daily to answer your part and product questions. We have a dedicated staff with decades of collective experience in helping customers just like you purchase parts to repair their products.
All our part reviews are solicited directly from other customers who have purchased this exact part. While we moderate these reviews for profanity, offensive language or personally identifiable information, these reviews are posted exactly as submitted and no alterations are made by our team.
All our customer repair instructions are solicited directly from other customers just like you who have purchased and replaced this exact part. While we moderate these reviews for profanity, offensive language or personally identifiable information, these reviews are posted exactly as submitted and no alterations are made by our team.
Based on data from past customer purchasing behaviors, these parts are most commonly purchased together along with the part you are viewing. These parts may be necessary or helpful to replace to complete your current repair.
All our installation videos are created and produced in collaboration with our in-house repair technician, Mark Sodja, who has helped millions of eReplacementParts customers over the last 13 years repair their products. Mark has years of experience in selling and repairing both commercial and residential products with a specialty in gas-powered equipment.
This data is collected from customers who submitted a repair instruction after replacing this exact part. Customers can rate how easy the repair was to complete and how long it took. We aggregate this data to provide a repair rating that allows customers to quickly determine the difficulty and time needed to perform their own repair.