
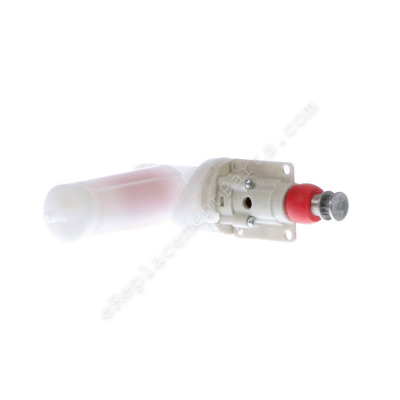


This is an authentic Bissell replacement part that is OEM sourced to ensure a high-level of quality. The pump is intended to be used with carpet cleaners. If your carpet cleaner is not pumping out cleaner solution the pump may need to be replaced. The pump is priced as a single item.
Pump B-010-7185
OEM part for: Bissell
Part Number: B-010-7185
$41.25
In Stock
Jump To:
Frequently Purchased Together ?


Compatibility
This part will fit the following 38 machines
Bissell
1699 Proheat Clearview Powersteamer Carpet Cleaner View Diagrams & Manuals
1699-1 Proheat Clearview Powersteamer Carpet Cleaner View Diagrams & Manuals
1699-5 Proheat Clearview Powersteamer Carpet Cleaner View Diagrams & Manuals
1699-8 Proheat Clearview Powersteamer Carpet Cleaner View Diagrams & Manuals
1699-A Proheat Clearview Powersteamer Carpet Cleaner View Diagrams & Manuals
1699-B Proheat Clearview Powersteamer Carpet Cleaner View Diagrams & Manuals
1699-F Proheat Clearview Powersteamer Carpet Cleaner View Diagrams & Manuals
1699-P Proheat Clearview Powersteamer Carpet Cleaner View Diagrams & Manuals
7901 Proheat Clearview Powersteamer Carpet Cleaner View Diagrams & Manuals
7920 Proheat Clearview Powersteamer Carpet Cleaner View Diagrams & Manuals
8905 Proheat Clearview Powersteamer Carpet Cleaner View Diagrams & Manuals
8910 Proheat Clearview Powersteamer Carpet Cleaner View Diagrams & Manuals
1370 Powersteamer Upright Carpet Cleaner View Diagrams & Manuals
1622 Powersteamer Upright Carpet Cleaner View Diagrams & Manuals
1623 Powersteamer Upright Carpet Cleaner View Diagrams & Manuals
1623-1 Powersteamer Upright Carpet Cleaner View Diagrams & Manuals
1685 Upright Deep Cleaner View Diagrams & Manuals
1692 Upright Deep Cleaner View Diagrams & Manuals
1697 Upright Proheat Powersteamer Deep Cleaner View Diagrams & Manuals
1698 Upright Proheat Powersteamer Deep Cleaner View Diagrams & Manuals
1698-1 Upright Proheat Powersteamer Deep Cleaner View Diagrams & Manuals
25A3 Proheat Upright Deep Cleaner View Diagrams & Manuals
7950 ProHeat Self Propelled Upright Deep Cleaner View Diagrams & Manuals
9E00 Xtra-Lift Upright Deep Cleaner View Diagrams & Manuals
1694 Upright Deep Cleaner View Diagrams & Manuals
7901-1 Proheat Clearview Powersteamer View Diagrams & Manuals
1693 Upright Deep Cleaner View Diagrams & Manuals
1694V Upright Deep Cleaner View Diagrams & Manuals
1694W Upright Deep Cleaner View Diagrams & Manuals
1699-N Proheat Upright Extractor View Diagrams & Manuals
7950-Y Deep Cleaner ProHeat Self Propelled View Diagrams & Manuals
8804 Power Steamer Pro Deluxe View Diagrams & Manuals
8804M Power Steamer Pro Deluxe View Diagrams & Manuals
8804T Power Steamer Turbo View Diagrams & Manuals
8805 Upright Deep Cleaner View Diagrams & Manuals
8806 Upright Deep Cleaner View Diagrams & Manuals
8806-1 Upright Deep Cleaner View Diagrams & Manuals
8904 Power Steamer Pro Deluxe View Diagrams & Manuals
Show More Compatible Models
This item works with the following types of products:
- Vacuum Parts
This part replaces obsolete part #: B-210-7181, 210-7181
Customer Part Reviews ?
Average Rating (out of 5):
Click to filter by ratings:
5 stars
3
4 stars
0
3 stars
0
2 stars
0
1 stars
0
< PREV
- 1
Perfect fit!
This is a pump for my Bissell Pro Heat Pet carrier cleaner. I installed it and everything fit as it should. I haven't used it but expect good things.
Michael -
September 16, 2023
Verified Purchase
Easy repair
Pump fit perfectly and corrected the problem of no water or soap spraying
Jeffery -
January 12, 2021
Verified Purchase
Great experience
Perfect condition exactly what I needed
Guest -
May 18, 2019
Verified Purchase
t
t
t -
t days ago
Verified Purchase
eReplacementParts Team
t
Questions & Answers ?
Our customer Service team is at the ready daily to answer your part and product questions.

Ask our Team
We have a dedicated staff with decades of collective experience in helping customers just like you purchase parts to repair their products.
Does this fit my product?Questions & Answers for Pump
No questions have been asked yet
Customer Repair Instructions ?
All our customer repair instructions are solicited directly from other customers just like you who have purchased and replaced this exact part.
Carpet cleaner not pumping out cleaner solution
ronald - August 16, 2016
👍 5 of 6 people found this instruction helpful
Tool Type
Vacuum
Difficulty
Medium
Time
30-60 minutes
Tools Used
Screwdriver, Pliers, Power Drill, Nutdriver
Open unit up and replaced pumps on two units no problems.
Did you find this story helpful?
Thanks for voting and helping fellow customers!
Pump sprayer on a Bissell pro heat shampooer
michael - October 5, 2017
👍 1 of 1 people found this instruction helpful
Tool Type
Vacuum
Difficulty
Easy
Time
15-30 minutes
Tools Used
Screwdriver
Parts Used
Removed the three supply lines off of pump. Use a phillips screwdriver to remove the 4 screws. Took out the broken pump and replaced it with the new one.It was a simple and easy fix.
Did you find this story helpful?
Thanks for voting and helping fellow customers!
Self destructed gear pulley on motor
Stuart - May 10, 2017
👍 1 of 1 people found this instruction helpful
Tool Type
Vacuum
Difficulty
Medium
Time
30-60 minutes
Tools Used
Screwdriver, Pliers
Parts Used
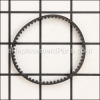
Removed and replaced pump motor/drive and new drive belt
Did you find this story helpful?
Thanks for voting and helping fellow customers!
Pump assembly end broke off that run the brush.
kirk - June 20, 2016
👍 2 of 3 people found this instruction helpful
Tool Type
Vacuum
Difficulty
Medium
Time
30-60 minutes
Tools Used
Screwdriver, Pliers
This burned up the brush holder, and i had one elevator arm from a while back broken.
1. Remove 6 screws for top half
2. Remove brush retainer screws
3. Remove screws and hoses from pump
1. Remove 6 screws for top half
2. Remove brush retainer screws
3. Remove screws and hoses from pump
Did you find this story helpful?
Thanks for voting and helping fellow customers!
Water pump failed on carpet extractor.
David - June 29, 2022
Tool Type
Vacuum
Difficulty
Easy
Time
30-60 minutes
Tools Used
Screwdriver, Pliers, Cordless impact screw driver
Parts Used
Access cover off. Top motor cover off. Remove water and vacuum feeder hoses. Remove attachment screws. Remove 2 drive belts. Install pump. Install belts.install all hoses. Install major top cover(s). Test.
Did you find this story helpful?
Thanks for voting and helping fellow customers!
Bissell carpet machine stored in freezing conditions. pump was broken
John - November 27, 2021
Tool Type
Vacuum
Difficulty
Easy
Time
15-30 minutes
Tools Used
Screwdriver, Pliers
Parts Used
disassembled machine, replaced pump. checked You-Tube videos for correct sequence and/or repair tips. machine works perfectly.
Did you find this story helpful?
Thanks for voting and helping fellow customers!
No Water was flowing out when trigger was being squeezed
George - May 8, 2020
Tool Type
Vacuum
Difficulty
Easy
Time
15-30 minutes
Tools Used
Screwdriver, Pliers
1. Removed the 6 screws holding the base together
2. Marked (color code) all the hose lines leading to the pump
3. Disconnected all hose lines on Pump
4. Removed 4 screws holding pump in place, and smooth belt.
5. Removed pump by tilting inward side up, this allowed toothed belt to become loose and came off gear.
6. Disconnected all plastic lines and cleaned. Checked all joints to insure flow through them then reassembled all lines.
7. Snapped out Autoload Receiver and replaced with new part
8. Reassembled entire base and screwed on new Flow Indicator.
Easy to do with Phillips Screwdriver, Pliers (Standard and Needle Nose).
Did you find this story helpful?
Thanks for voting and helping fellow customers!
Wasn't pumping water out to shampoo
Dolores - March 17, 2019
Tool Type
Vacuum
Difficulty
Easy
Time
Less than 15 minutes
Tools Used
Screwdriver, Pliers
Parts Used
Took apart and put back together
Did you find this story helpful?
Thanks for voting and helping fellow customers!
Carpet Cleaner vacuum no longer would distribute cleaner/water
greg - January 19, 2018
Tool Type
Vacuum
Difficulty
Medium
Time
1-2 hours
Tools Used
Screwdriver, Pliers
Parts Used
Removed out housing;
Checked vacuum hoses for leaks/breaks;
Removed belts from roller/brush assembly
Unscrewed vacuum pump
Removed vacuum hoses
Installation was reverse of disassembly
Difficulty in reattaching the outer cover - realignment / access issues
Checked vacuum hoses for leaks/breaks;
Removed belts from roller/brush assembly
Unscrewed vacuum pump
Removed vacuum hoses
Installation was reverse of disassembly
Difficulty in reattaching the outer cover - realignment / access issues
Did you find this story helpful?
Thanks for voting and helping fellow customers!
OEM stands for Original Equipment Manufacturer and means the part you’re buying is sourced directly from the manufacturer who made your product. At eReplacementParts, we sell only genuine OEM parts, guaranteeing the part you’re purchasing is of better design and of higher quality than aftermarket parts.
Our product descriptions are a combination of data sourced directly from the manufacturers who made your product as well as content researched and curated by our content & customer service teams. This content is edited and reviewed internally before being made public to customers.
Our customer service team are at the ready daily to answer your part and product questions. We have a dedicated staff with decades of collective experience in helping customers just like you purchase parts to repair their products.
All our part reviews are solicited directly from other customers who have purchased this exact part. While we moderate these reviews for profanity, offensive language or personally identifiable information, these reviews are posted exactly as submitted and no alterations are made by our team.
All our customer repair instructions are solicited directly from other customers just like you who have purchased and replaced this exact part. While we moderate these reviews for profanity, offensive language or personally identifiable information, these reviews are posted exactly as submitted and no alterations are made by our team.
Based on data from past customer purchasing behaviors, these parts are most commonly purchased together along with the part you are viewing. These parts may be necessary or helpful to replace to complete your current repair.
All our installation videos are created and produced in collaboration with our in-house repair technician, Mark Sodja, who has helped millions of eReplacementParts customers over the last 13 years repair their products. Mark has years of experience in selling and repairing both commercial and residential products with a specialty in gas-powered equipment.
This data is collected from customers who submitted a repair instruction after replacing this exact part. Customers can rate how easy the repair was to complete and how long it took. We aggregate this data to provide a repair rating that allows customers to quickly determine the difficulty and time needed to perform their own repair.