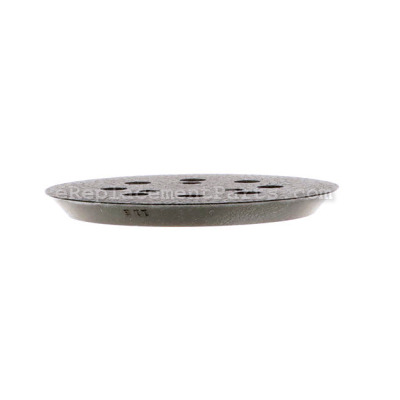


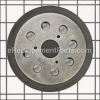
Sanding Pad For Adhesive Back 151281-09
Part Number: 151281-09
Leaves our warehouse within
7 - 12 business days
7 - 12 business days
*This part replaces obsolete part #: 151281-00 and 151281-07.
Product Information
Specifications
|
Description:
| Genuine OEM replacement part, this part is sold individually. The 151281-09 Pad is used to hold 5 inch PSA (Pressure Sensitive Adhesive) sandpaper with 8 vacuum holes. Applying too much pressure on the sander may cause premature wear on the pad. |
Frequently Purchased With

Compatibility
the 12 compatible machines
This part is compatible with the following machines:
DeWALT
DW421 Type 1 Random Orbit Sander
DW421 Type 2 Random Orbit Sander
DW422 Type 1 EVS Random Orbit Palm Sander
DW423 Type 1 5 inch EVS Random Orbit Sander
DW421 Type 2 Random Orbit Sander
DW422 Type 1 EVS Random Orbit Palm Sander
DW423 Type 1 5 inch EVS Random Orbit Sander
DW423 Type 2 5 inch EVS Random Orbit Sander
D26453 Type 1 Random Orbit Sander
D26450 Type 1 Random Orbit Sander
D26451 Type 1 Random Orbit Sander
D26453 Type 1 Random Orbit Sander
D26450 Type 1 Random Orbit Sander
D26451 Type 1 Random Orbit Sander
Porter Cable
Black and Decker
Products Compatibility
This item works with the following types of products:
- • Sander
Repair Guides
![]()

Watch the Repair Video for
Sanding Pad For Adhesive Back

Articles:
|
Step-by-step instructions for removing and installing the sanding pad (with vacuum holes) on your Porter Cable sander....
January 11, 2018
|

Questions & Answers for Sanding Pad For Adhesive Back
No questions have been asked yet
Repair Instructions: Submitted by Customers Like You
4 of 4 people found this instruction helpful
Tool Type:
Sander
Parts Used:
Repair Difficulty:
Easy
Time Spent Repairing:
Less than 15 minutes
Tools Used:
Screwdriver, needed star drive head had which I had to remove the screws
Backing pad wore out so I ordered a new adhesive backing pad for my Dewalt orbital sander
Remove three screws from the old pad, replace with new pad and insert same three screws!
Did you find this story helpful?
Thanks for voting and helping fellow customers!
2 of 2 people found this instruction helpful
Tool Type:
Sander
Repair Difficulty:
Easy
Time Spent Repairing:
Less than 15 minutes
Tools Used:
Screwdriver
The orbit belt was worn also the pad
Remove the 3 screws attaching the old worn pad on and remove the pad. Blow out the inside of the sander to get rid of the sawdust. Remove the old belt, then replace it just as the other was. Install the new pad with the same screws.
Did you find this story helpful?
Thanks for voting and helping fellow customers!
Tool Type:
Sander
Parts Used:
Repair Difficulty:
Easy
Time Spent Repairing:
Less than 15 minutes
Tools Used:
Screwdriver
Old pad had curled around perimeter
Unscrew mounting screws and replace pad
Did you find this story helpful?
Thanks for voting and helping fellow customers!
Tool Type:
Sander
Parts Used:
Repair Difficulty:
Easy
Time Spent Repairing:
Less than 15 minutes
Tools Used:
, no tools needed
hook and loop sanding pad worn out
followed simple instructions on repair parts package
Did you find this story helpful?
Thanks for voting and helping fellow customers!
Tool Type:
Sander
Parts Used:
Repair Difficulty:
Easy
Time Spent Repairing:
Less than 15 minutes
Tools Used:
, allen wrench
pad came apart
replaced pad
Did you find this story helpful?
Thanks for voting and helping fellow customers!
Tool Type:
Sander
Parts Used:
Repair Difficulty:
Easy
Time Spent Repairing:
Less than 15 minutes
Tools Used:
Screwdriver
pad wore out
took old pad off and put the mew one on
Did you find this story helpful?
Thanks for voting and helping fellow customers!
Tool Type:
Sander
Parts Used:
Repair Difficulty:
Easy
Time Spent Repairing:
Less than 15 minutes
Tools Used:
Power Drill, None
Pad worn out.
Power drill to remove screws. Discard old pad, attached new pad.
Did you find this story helpful?
Thanks for voting and helping fellow customers!
Tool Type:
Sander
Parts Used:
Repair Difficulty:
Easy
Time Spent Repairing:
15-30 minutes
Tools Used:
, metric t handle wrenches
Self stick pads removed the protective layer on the pad when I took the abrasive pads off. It eventuAlly started to take part of the sander pad.
1. Removed 3 screws securing the pad.
2. Removed existing pad.
3. Replaced pad.
4. Tightened 3 screws.
2. Removed existing pad.
3. Replaced pad.
4. Tightened 3 screws.
Did you find this story helpful?
Thanks for voting and helping fellow customers!
Tool Type:
Sander
Repair Difficulty:
Easy
Time Spent Repairing:
15-30 minutes
Tools Used:
Screwdriver, Allen wrench
Adheasive pad was rotten. Brake was torn. Replaced bearing while I was in there.
Removed three screws holding pad.
Removed Brake.
Lifted off bearing.
Put everything back in reverse order.
Removed Brake.
Lifted off bearing.
Put everything back in reverse order.
Did you find this story helpful?
Thanks for voting and helping fellow customers!
Tool Type:
Sander
Parts Used:
Repair Difficulty:
Easy
Time Spent Repairing:
Less than 15 minutes
Tools Used:
Screwdriver
Foam pad separated from its base.
Removed the old part, fastened down the new pad.
Did you find this story helpful?
Thanks for voting and helping fellow customers!
show more
Reviews
4 Reviews
Average Rating (out of 5):
Click to filter by ratings:
5 stars
3
4 stars
1
3 stars
0
2 stars
0
1 stars
0
< PREV
- 1
New parts
Pad arrived very fast fit perfectly and is a great replacement
Guest -
June 23, 2023
Verified Purchase
Easy
Just what I was looking for. Worked great
Guest -
September 4, 2020
Verified Purchase
Easy repair
Arrived quickly and in good condition. Easy to install.
Guest -
August 19, 2019
Verified Purchase
Easy swap
As above
Guest -
May 28, 2023
Verified Purchase
Verified Purchase
eReplacementParts Team
< PREV
- 1
Product Information
Repair Guides
![]()
Watch the Repair Video for
Sanding Pad For Adhesive Back
Articles:
|
Step-by-step instructions for removing and installing the sanding pad (with vacuum holes) on your Porter Cable sander....
January 11, 2018
|