Product Information
Description:
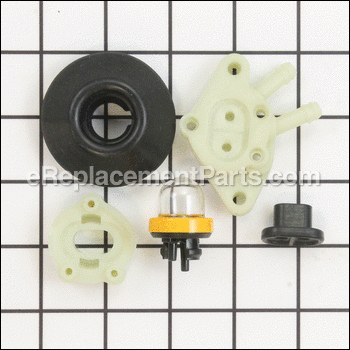
| This is an authentic Generac replacement part that has been OEM sourced to ensure quality. The primer bulb assembly is intended to be used with portable generators. This item is used to cycle fuel within the carburetor and fuel system before cold starting the engine. This kit includes all items that are pictured. |
Compatibility
This part is compatible with the following machines:
Products Compatibility
This item works with the following types of products:
- • Generator
Questions & Answers for Kit, Primer Bulb Assy.
No questions have been asked yet
Repair Instructions: Submitted by Customers Like You
4 of 4 people found this instruction helpful
Tool Type:
Generator
Parts Used:
Repair Difficulty:
Medium
Time Spent Repairing:
30-60 minutes
Tools Used:
Screwdriver
Fuel primer bulb failed (has a hole about the size of pencil eraser)
Removed the exhaust pipe cover Removed two screws on the cover where the starter rope is, then loosened the other two, then removed a clip under the fuel spill catch assy. Pulled the cover away far enough to gain access to the screws that hold the bulb assembly to the engine. Installed the new bulb and other parts that were with it in the package. Reassembled in reverse order. The new part seems to have a flaw (weakness) exactly where the old one failed) Hope this is not an on going problem...
Did you find this story helpful?
Thanks for voting and helping fellow customers!
Tool Type:
Generator
Parts Used:
Repair Difficulty:
Medium
Time Spent Repairing:
30-60 minutes
Tools Used:
Screwdriver, Pliers
Primer bulb was broken and leaking fuel.
Took out 4 phillips screws holding rear cover (exhaust) and removed cover. Then loosened screws (2) near the bottom front and rear, loosening rear till nut on other side was just about to come off, the one in front only a few turns. Next, took out three screws across the top of the generator. Proceeded to remove 4 screws holding front cover and electrical outlets and let it fold forward and down. I was then able to gently pry the outer cases apart at the back end and put a small piece of wood as a spacer to hold outer covers apart and expose the primer bulb assembly. From there it was just a matter of removing the attached fuel lines and then removing the screws holding the primer bulb in place. Re-assembly is pretty straight forward once you take out the old unit and take it apart to see how it was assembled. The fuel lines are positioned in such a way that they will only go back on the way they came off, even if you were trying to switch them around :). The rest is just putting front and rear covers on and tightening up top and bottom side cover screws. It probably took me an hour to finish, and the primer bulb works great!
Did you find this story helpful?
Thanks for voting and helping fellow customers!
Product Information

