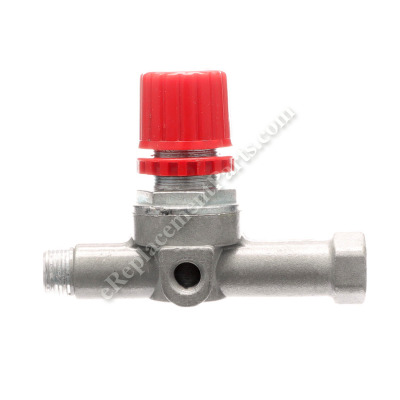
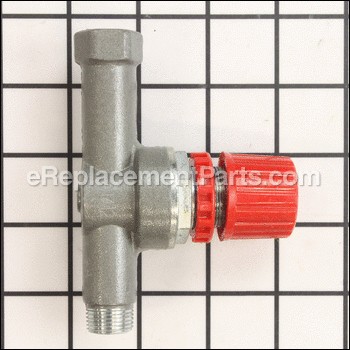
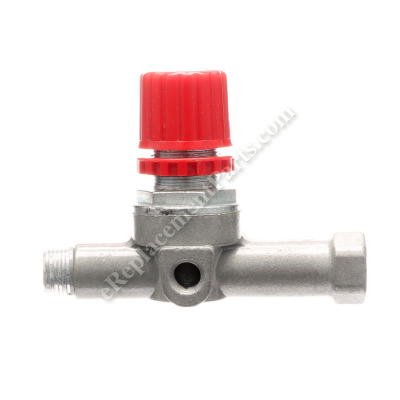
This is a genuine Bostitch replacement part, it is sold individually.
The purpose of the AB-9051116 Pressure Reducer is to control the amount of air pressure coming out of the compressor tank.
This is helpful when inflating items to specified pressure.
Also some pneumatic tools use different air pressure specifications to make them operate properly.
Pressure Reducer AB-9415883
OEM part for: Bostitch
Part Number: AB-9415883
Jump To:
Product Description ?
- Classification: Part
- Weight: 0.60 lbs.
- Also Known As: Pressure Regulator, Control Valve, Pressure Relief Valve, Regulator Manifold
- Shipping: Ships Worldwide
Frequently Purchased Together ?
Compatibility
This part will fit the following 1 machine
Bostitch
This item works with the following types of products:
- Compressor Parts
Customer Part Reviews ?
- 1
- 2
Questions & Answers ?
Our customer Service team is at the ready daily to answer your part and product questions.

Ask our Team
We have a dedicated staff with decades of collective experience in helping customers just like you purchase parts to repair their products.
Does this fit my product?Questions & Answers for Pressure Reducer
Customer Repair Instructions ?
All our customer repair instructions are solicited directly from other customers just like you who have purchased and replaced this exact part.
Pressure reducer threads were stripped
Tool Type
Compressor
Difficulty
Medium
Time
30-60 minutes
Tools Used
Screwdriver, Socket set, Adjustable Wrench
Parts Used
Regulator failed
Tool Type
Compressor
Difficulty
Medium
Time
30-60 minutes
Tools Used
Screwdriver, Socket set, Wrench Set, Teflon tape
Parts Used
Can now adjust air pressure
Tool Type
Compressor
Difficulty
Easy
Time
15-30 minutes
Tools Used
Screwdriver, Socket set, Adjustable Wrench
Parts Used
The threads stripped out of the pressure reducer
Tool Type
Compressor
Difficulty
Medium
Time
15-30 minutes
Tools Used
Screwdriver, Pliers, Wrench Set, Adjustable Wrench
Replace pressure regulator valve.
Tool Type
Compressor
Difficulty
Medium
Time
15-30 minutes
Tools Used
Screwdriver, Socket set, Wrench Set, Nutdriver, Propane torch
Parts Used
Pressure Reducer or Regulator Defective could not adjust or regulate pressure to tools....
Tool Type
Compressor
Difficulty
Medium
Time
30-60 minutes
Tools Used
Screwdriver, Adjustable Wrench, small pipe wrench & 7/16 open end wrench
Parts Used
2.Removed all Phillips head screws that support plastic cover above tank area & gauge face cover screws. (one side of the plastic is all that is required to remove on this type compressor)..
3. Gently pry apart & remove plastic cover not to damage gauges or plastic... Recommend starting at the handle area.
4.Removed quick connect for air supply while using a back up pipe wrench.
5.Remove pressure regulator gauge with a 7/16' open end wrench. Proceed cautiously not to damage gauge.
6. Remove defective pressure regulator & nipple with a adjustable wrench while using a back up pipe wrench on the positive compressor side of the pump. This is very soft metal so be smart and don't force anything to move.
7. Clean area around compressor side of nipple and make sure that no debris falls inside of open fittings.
8.Use threaded pipe tape to on new replacement fitting per normal pipe fitting specs.
9. Gently reapply the pipe nipple into the compressor positive side were the old part was removed from.
10.Possition fitting to make sure that it is not over tightened and is inline with how the replace part was positioned prior to removing it... This has to be correctly installed to make sure that all of the plastic and gauges are in place to allow the plastic covers to fit correctly.
11.Reapply quick connection fitting and make sure to use the threaded pipe tape on this fitting too.
12. Leak test the fittings that replace by plugging in the cord to electric and allowing the compressor to pressure up to 20 psi and turning it off .. Unplug electric supply cord from the compressor and use test solution or some dish washing liquid... Ten to 15 minutes should be along enough dwell time
13. After the leak test is successful release the air pressure stored in the tank and start the reassembly of the plastic cover...
14. Plug the compressor into the electric source, turn it on and monitor the pressure as it build up in ten PSI increments to make sure that everything is operating correctly before leaving it unattended...
Good luck with your replacement project! This replacement may not be 100% per the book but it worked for me.... The right tools for the job do make the difference...
The pressure reducer got stripped and could not control the air
Tool Type
Compressor
Difficulty
Easy
Time
15-30 minutes
Tools Used
Socket set, Adjustable Wrench
Parts Used
Air pressure reducer threads were stripped,
Tool Type
Compressor
Difficulty
Medium
Time
30-60 minutes
Tools Used
Screwdriver, Wrench Set, Adjustable Wrench
Parts Used
Bought used and needed parts to protect piston
Tool Type
Compressor
Difficulty
Easy
Time
15-30 minutes
Tools Used
Screwdriver, Pliers, Adjustable Wrench
Broken pressure adjuster and broken gauges.
Tool Type
Compressor
Difficulty
Easy
Time
15-30 minutes
Tools Used
Screwdriver, Wrench Set, Adjustable Wrench
2. Removed the quick coupler, both pressure gauges, and the pressure adjuster body.
3. Installed the new pressure adjuster.
4. Installed the new gauges.
5. Installed the quick coupler and the cover.
OEM stands for Original Equipment Manufacturer and means the part you’re buying is sourced directly from the manufacturer who made your product. At eReplacementParts, we sell only genuine OEM parts, guaranteeing the part you’re purchasing is of better design and of higher quality than aftermarket parts.
Our product descriptions are a combination of data sourced directly from the manufacturers who made your product as well as content researched and curated by our content & customer service teams. This content is edited and reviewed internally before being made public to customers.
Our customer service team are at the ready daily to answer your part and product questions. We have a dedicated staff with decades of collective experience in helping customers just like you purchase parts to repair their products.
All our part reviews are solicited directly from other customers who have purchased this exact part. While we moderate these reviews for profanity, offensive language or personally identifiable information, these reviews are posted exactly as submitted and no alterations are made by our team.
All our customer repair instructions are solicited directly from other customers just like you who have purchased and replaced this exact part. While we moderate these reviews for profanity, offensive language or personally identifiable information, these reviews are posted exactly as submitted and no alterations are made by our team.
Based on data from past customer purchasing behaviors, these parts are most commonly purchased together along with the part you are viewing. These parts may be necessary or helpful to replace to complete your current repair.
All our installation videos are created and produced in collaboration with our in-house repair technician, Mark Sodja, who has helped millions of eReplacementParts customers over the last 13 years repair their products. Mark has years of experience in selling and repairing both commercial and residential products with a specialty in gas-powered equipment.
This data is collected from customers who submitted a repair instruction after replacing this exact part. Customers can rate how easy the repair was to complete and how long it took. We aggregate this data to provide a repair rating that allows customers to quickly determine the difficulty and time needed to perform their own repair.


